
DIY Mother's Day Brooch
Surprise mom with a sweet DIY Mother's Day brooch with a photo of her sweet grandchild(ren).

I managed to eek out my mom's Mother's Day present over the last couple of days.
I knew that a picture of her favorite (okay, only) grandson was a must, and I know she loves the fabric flowers that are all over the web almost as much as I do.
She doesn't wear many necklaces, and I couldn't figure out a good way to incorporate my idea into a bracelet.
So I was left with making a fun brooch!
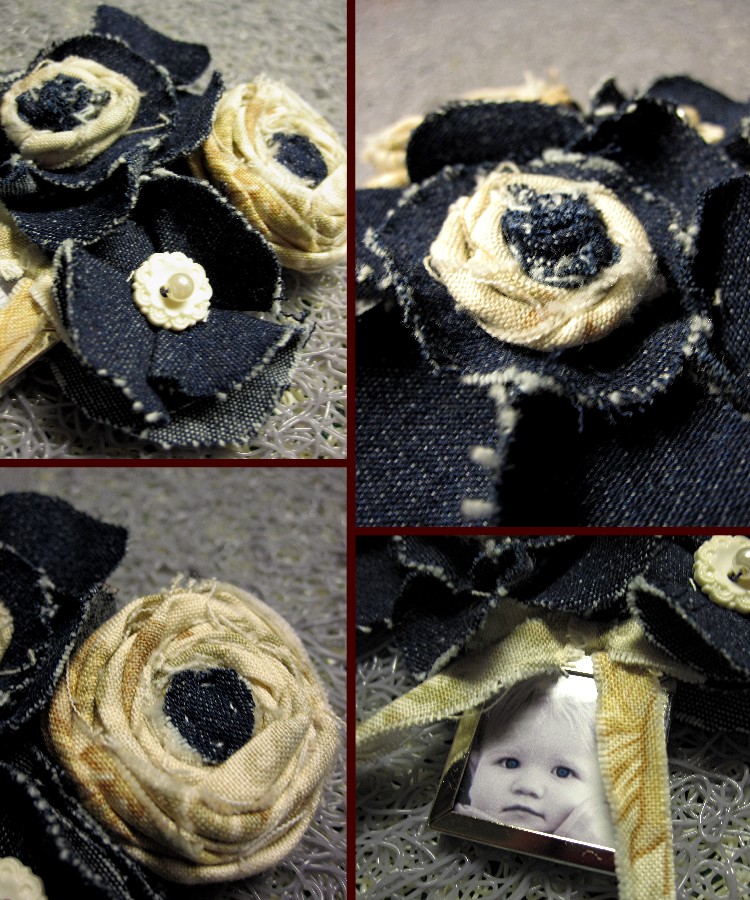
This Mother's Day brooch involves 3 fabric flowers made from remnant denim and remnant patterned cotton and a photo charm.
I have a tutorial for making each flower and how to put it all together as a brooch.
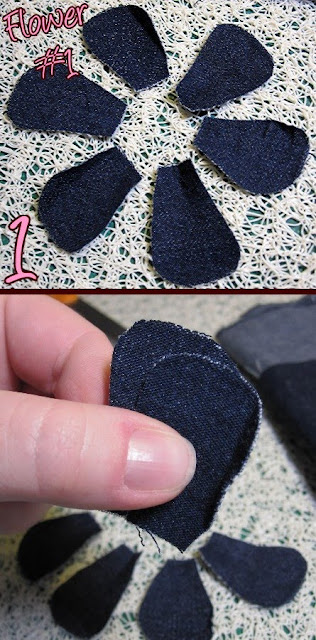
Mother's Day Brooch Flower #1
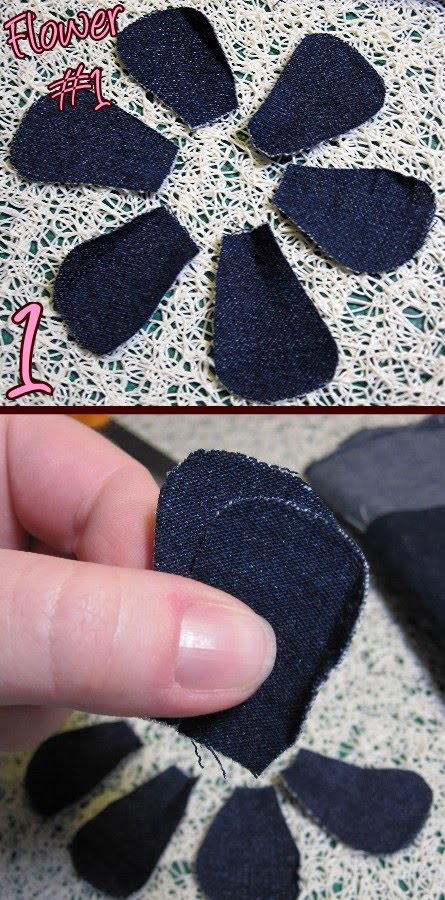
1. Cut out 6 petals.
I cut two slightly different sizes.
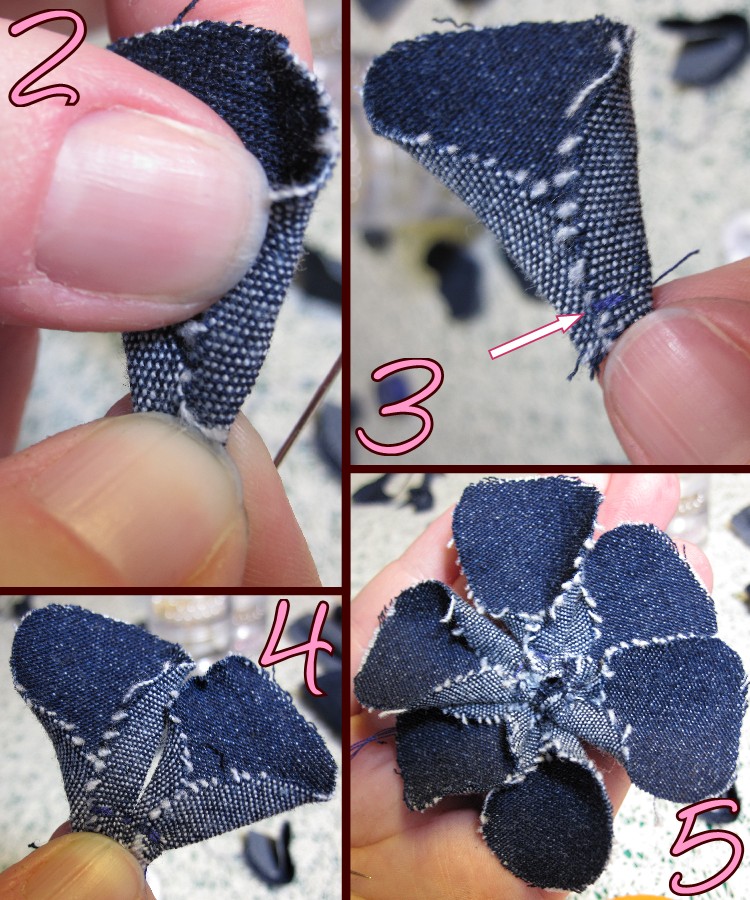
2. Fold each side of the bottom the petal towards the center.
3. Stitch your fold secure. (The arrow is pointing at the stitch.)
4. Continue with each petal, alternating between the 2 different size petals, and attach each new petal to the previous petal as you go.
5. After you have added the 6th petal, attach it back to the 1st petal to make a flower.
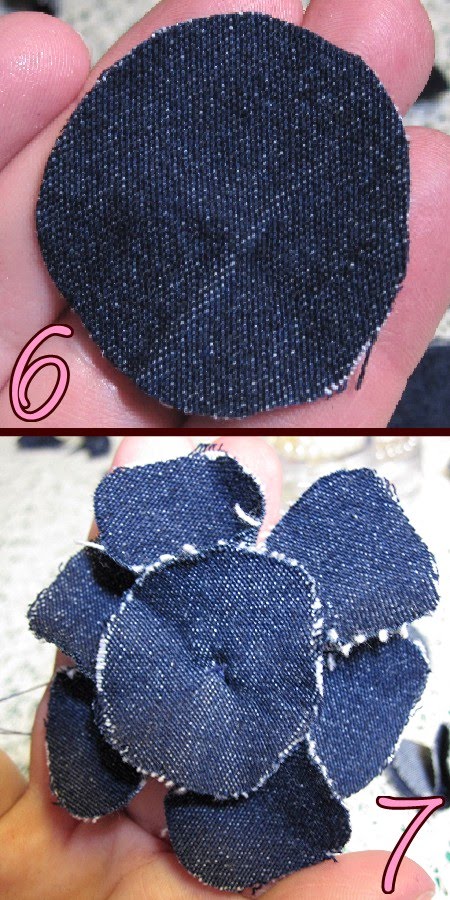
6. Cut out a circle that will fit the center of your flower.
7. Stitch the circle to the center of the petals with a tight "x" stitch.
That will pinch the circle a little to give it some volume.
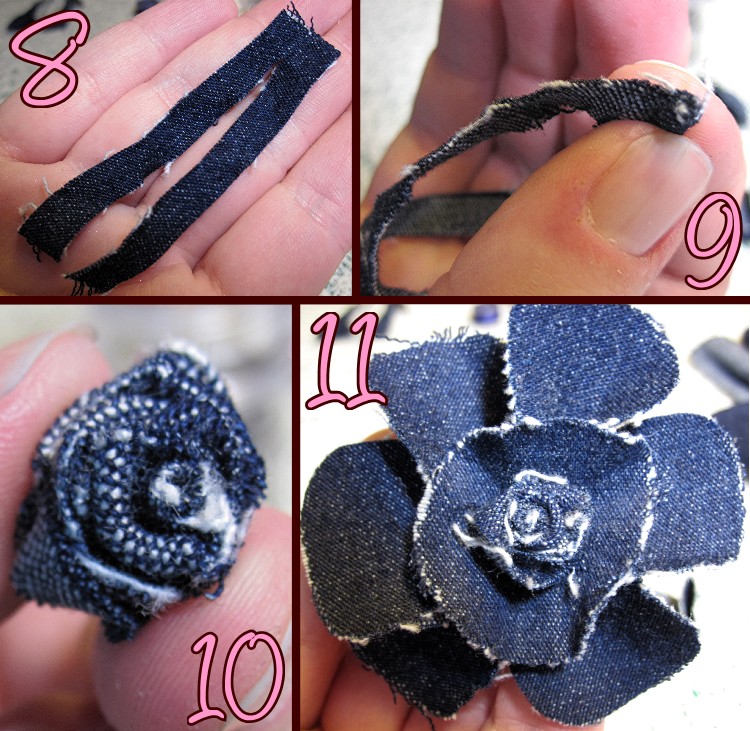
8. I cut a strip of scrap fabric to make a rosette.
The strip wasn't long enough for a good rosette so I cut it twice as wide as I needed and cut it down the middle to about ¼" from the end.
9. I started rolling one of the ends for the rosette.
10. The completed rosette.
11. Stitch the rosette to the center of the flower.
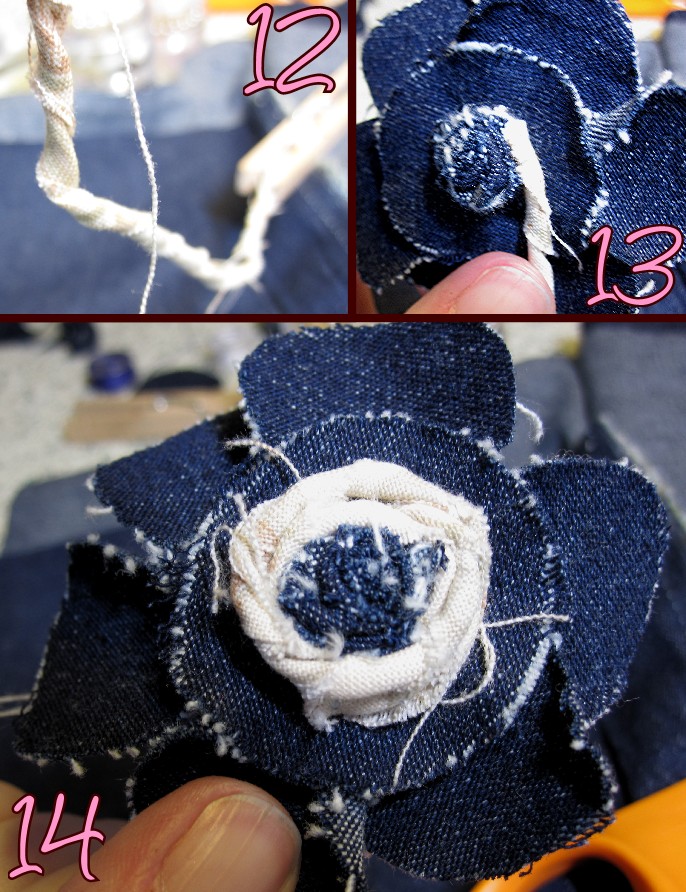
12. I cut a long thin strip of the cotton material and twisted it very tight.
13. Stitch one end of the twisted material to the outside of the rosette.
14. Wrapped the twisted end about 3 times around the rosette and stitch the end to the flower.
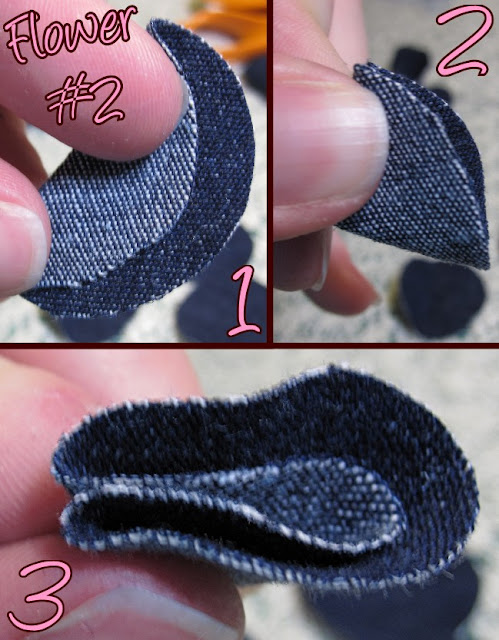
Mother's Day Brooch Flower #2

1. For the next flower, cut 4 circles all the same size.
Fold each circle so that the colored side of the material is facing the outside (mine is reversed in the picture above... don't ask!).
Don't fold the circle completely in half.
2. Fold the circle again.
3. This is just an alternate view of #2.
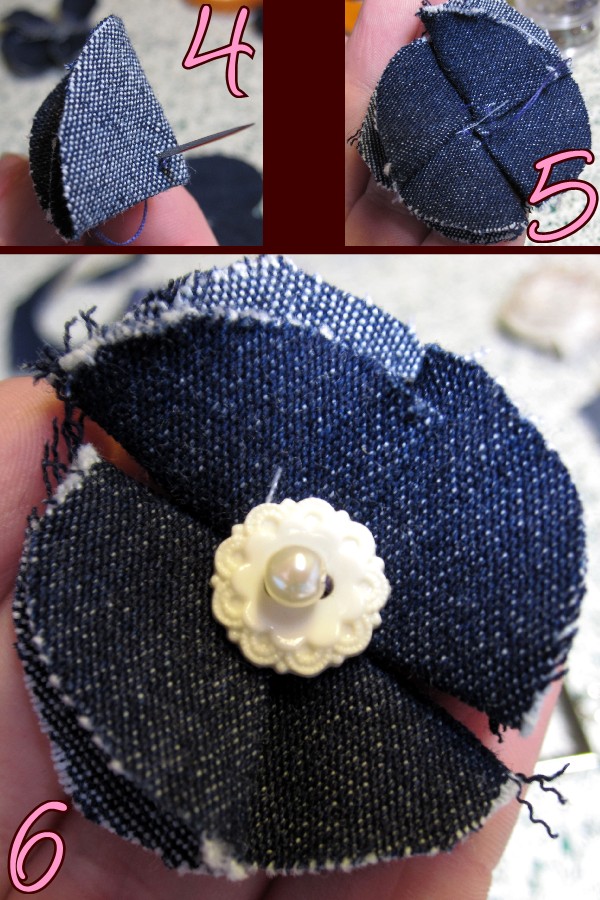
4. Stitch the bottom corner of the circle so that it will stay folded.
5. Continue to do this with all 4 of the circles then stitch them together to make the flower.
6. Attach whatever decoration you like to the center.
I've added a decorative button and a pearl.

Mother's Day Brooch Flower #3
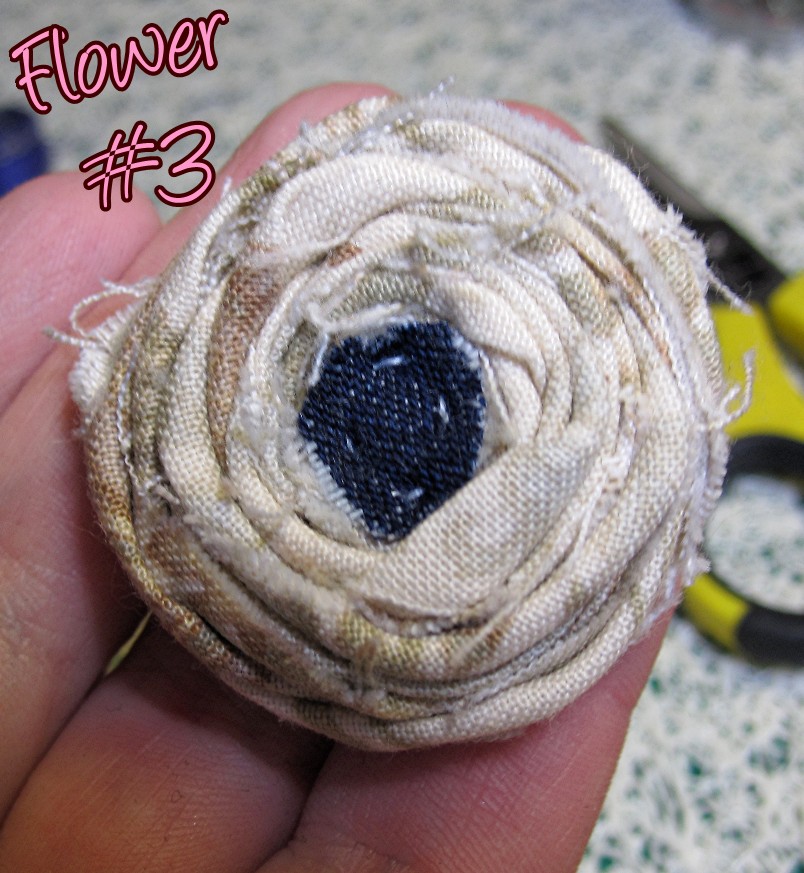
This flower is just a rolled fabric rose of the contrasting cotton remnant.
I stitched a small scrap piece of the denim material to the center so that it more easily blends with the other two flowers.
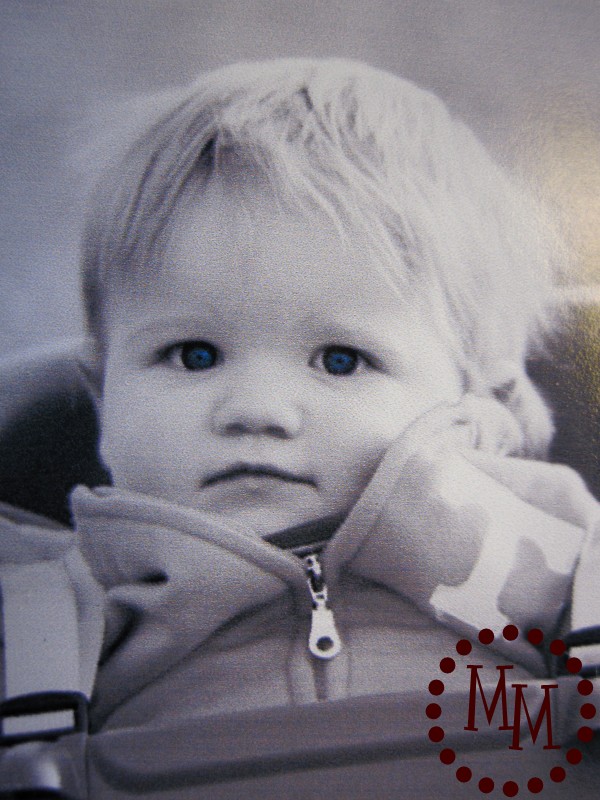
For the photo charm, I selected a recent photo from my ginormous stash of pictures of my son.
I made it black and white so as not to be too bright in contrast to my flowers.
I did leave his eyes blue since he has such amazing eyes!

Mother's Day Brooch Photo Charm
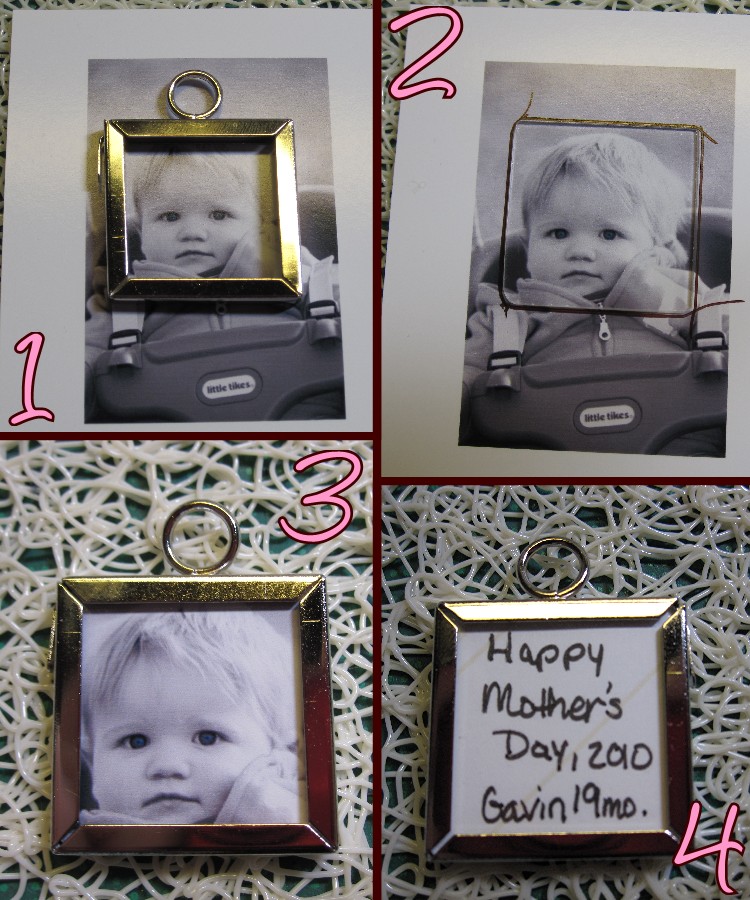
1. Measure how big you need to make your photo and edit the size in your drawing program (you can probably also do this in Word).
2. Print your photo and trace along the edges of the glass insert so you know where to cut the photo.
3. Trim the photo and insert into the charm as per the instructions.
(I snagged this one in a 2-pack from Hobby Lobby for just over $1! Gotta love the 50% off!)
4. I made a note of the back of the photo to date when the charm was put together.
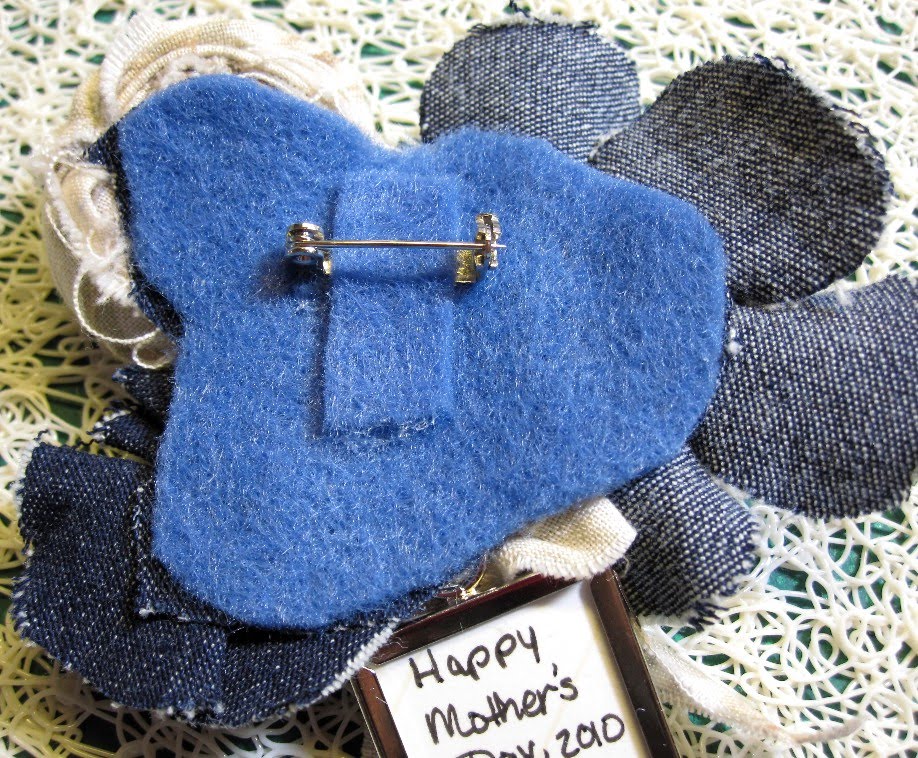
I arranged the flowers and charm and flipped them over to add a backing.
I actually backed them with a piece of the denim first (no photo, sorry!) to be sure that when I added the felt it would not show through.
I also stitched the charm to the denim, which you can't really tell in any of my photo.
For sturdiness, I attached a piece of felt then added the pin back.

The completed Mother's Day brooch.
It came together so well!
I made a bow out of the cotton material and glued it to the top of the charm just to spread a little color of the cotton material to the rest of the brooch.
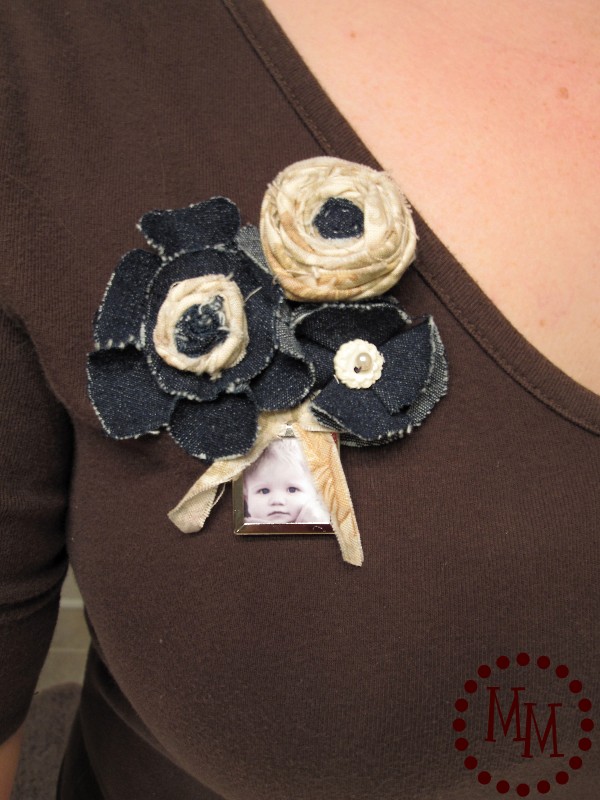
My mom can wear this with almost any outfit with these subdued colors.
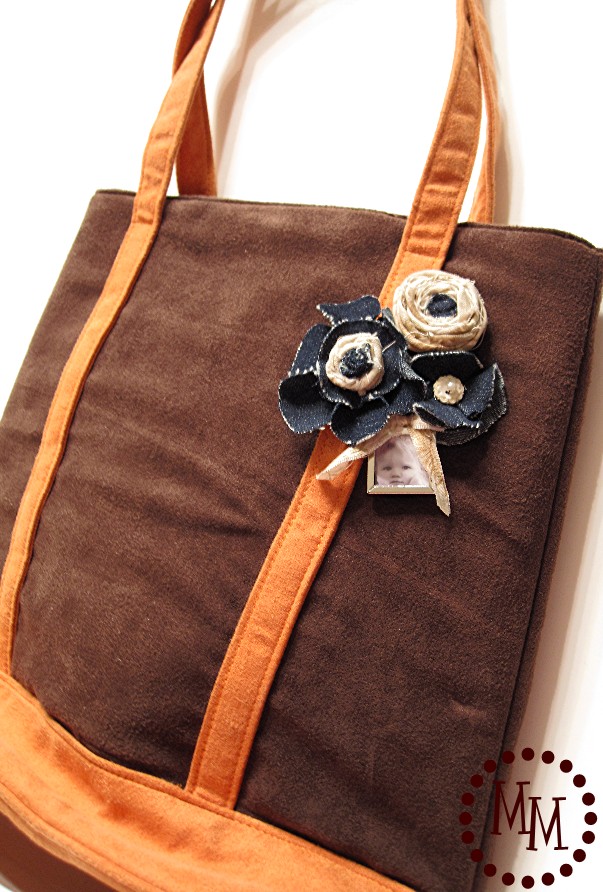
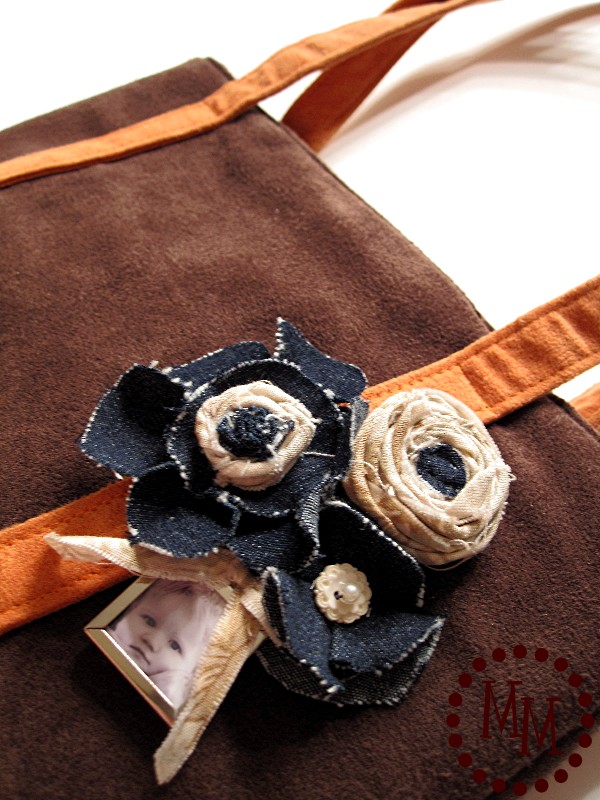
And also attach it to her purse and handbags!
I've already warned her to stay away from the blog until Mother's Day.
I hope she listened to me!
Sorry for the washed out photos.
We're having major flood weather here and there's not a chance of seeing any sunshine soon!

>> See where I party! <<
This is so beautiful. Congrats, you are being featured at Thursday Favorite Things.
https://eclecticredbarn.blogspot.com/2019/05/thursday-favorite-things.html
Hugs,
Bev
This is so pretty!! Great instructions, I'm saving it!
Really cute...and clever adding the photo 🙂 Laurel@chippingwithcharm
Very cute!
Simply Adorable! visiting from CSI Project!
So cute! I'm sure she was THRILLED with such a lovely gift 🙂
Alright, my dear. I did another flower round-up and featured your gorgeous brooch, which I *adore*!! You know you are the bestest!!
Ok, so this is like the cutest ever! But the best part is how insanely adorable your little guy is--WOW what a cutie!
Did I tell you I love my necklace? Thanks for linking your fabulous tutorial and projects!
Lovely brooch! Thank you for visiting me!
This is such a cute idea! I love the denim. Thanks for linking up to Saturday is Crafty Day!
Very cute! : )
This is so cute! I'm going to feature this tomorrow! Feel free to grab a button!
Great idea and wonderful tutorial!!
Thanks for sharing and linking up to I'm Lovin' It! Have a FABULOUS Weekend!
So cute! Great tutorial. Love the picture idea. Perfect for mother's day!
Love your Mother's Day design. I copied the tutorial so I can try this. My boys are a bit older, but it would make a lovely gift. Even for a new Mom when visiting the new baby. I have a tutorial running on how to make a graduation memory board. You may want to check it out. It would also work for when your son goes to school for "Star of the Week".
Have a blessed Mother's Day....
sherry
I love the three types of flowers on this brooch! I am featuring it at somedaycrafts.blogspot.com
What a great tutorial. It turned out really pretty!
I'm hosting a blog party on Saturday and I'd love it if you linked up! http://www.iamalongfortheride.blogspot.com
Thank you for sharing I love the 3rd flower best. Clear instructions thanks again.
Ahhh these flowers are adorable...these are the "in" thing right now and I dig it! Thanks for a great tutorial! and thanks for linking up your creative juices 🙂
You are so cute and talented!! I love the denim. Great idea.
Thanks for linking to my party this week!
What a fun idea!
Kendra "Domestic Princess in Training"
Love those on the bag like that. Too bad the first winner lost out! Congratulations to Julie!
Adorable and the photo charm is precious! What a great gift! Fabulous job! Thanks so much for stopping by and joining the Sunday Showcase Party! I greatly appreciate it. Hope you have a wonderful week. Hope to see you again next Sunday! ~ Stephanie Lynn
Cute! I especially love the photo charm - nice touch! Have a blessed week!
VERY WONDERFUL! ANY MOM WOULD LOVE IT!
LOVE, KELEE @ http://www.katillacshack.com
I LOVE this project! Such a sweet baby and I like that it's so versatile. 🙂 Visiting from Kimba's DIY Day party. 🙂
The brooch is absolutely gorgeous! I love how it turned out. If you don't find winner #2 just put me down for winner #3 LOL
Terrific tutorial. What a meaningful, fun gift!!
love the tutorial!!! and congrats to julie! i was way close with the vote of 37 flowers!!!
I love it! Your instructions are great, too. I am a huge fan of your blog and craftiness!
Beautiful flowers...I never thought of using denim, I like it!
~Lauri
http://knitsandreads.blogspot.com
l_meinhardt@yahoo.com
Ah! This is so gorgeous! Another kind of flower I need to add to my flower tutorial list. Love it!
PS I made your felt flowers last night. So pretty!
What a great gift. Love how you included a picture with it!
I think this is the CUTEST gift ever!!! Beautiful work!
I LOVE the photo charm.
I think I'm going to try and make it!
Melanie
http://www.jonathanandmelanie.blogspot.com