
If you’ll remember back to Thursday’s post, I went on and on about rosette t-shirts and how they are everywhere.
I found a lot of inspiration in the shirts I saw, and it led me to my next project!
Let me present you with:
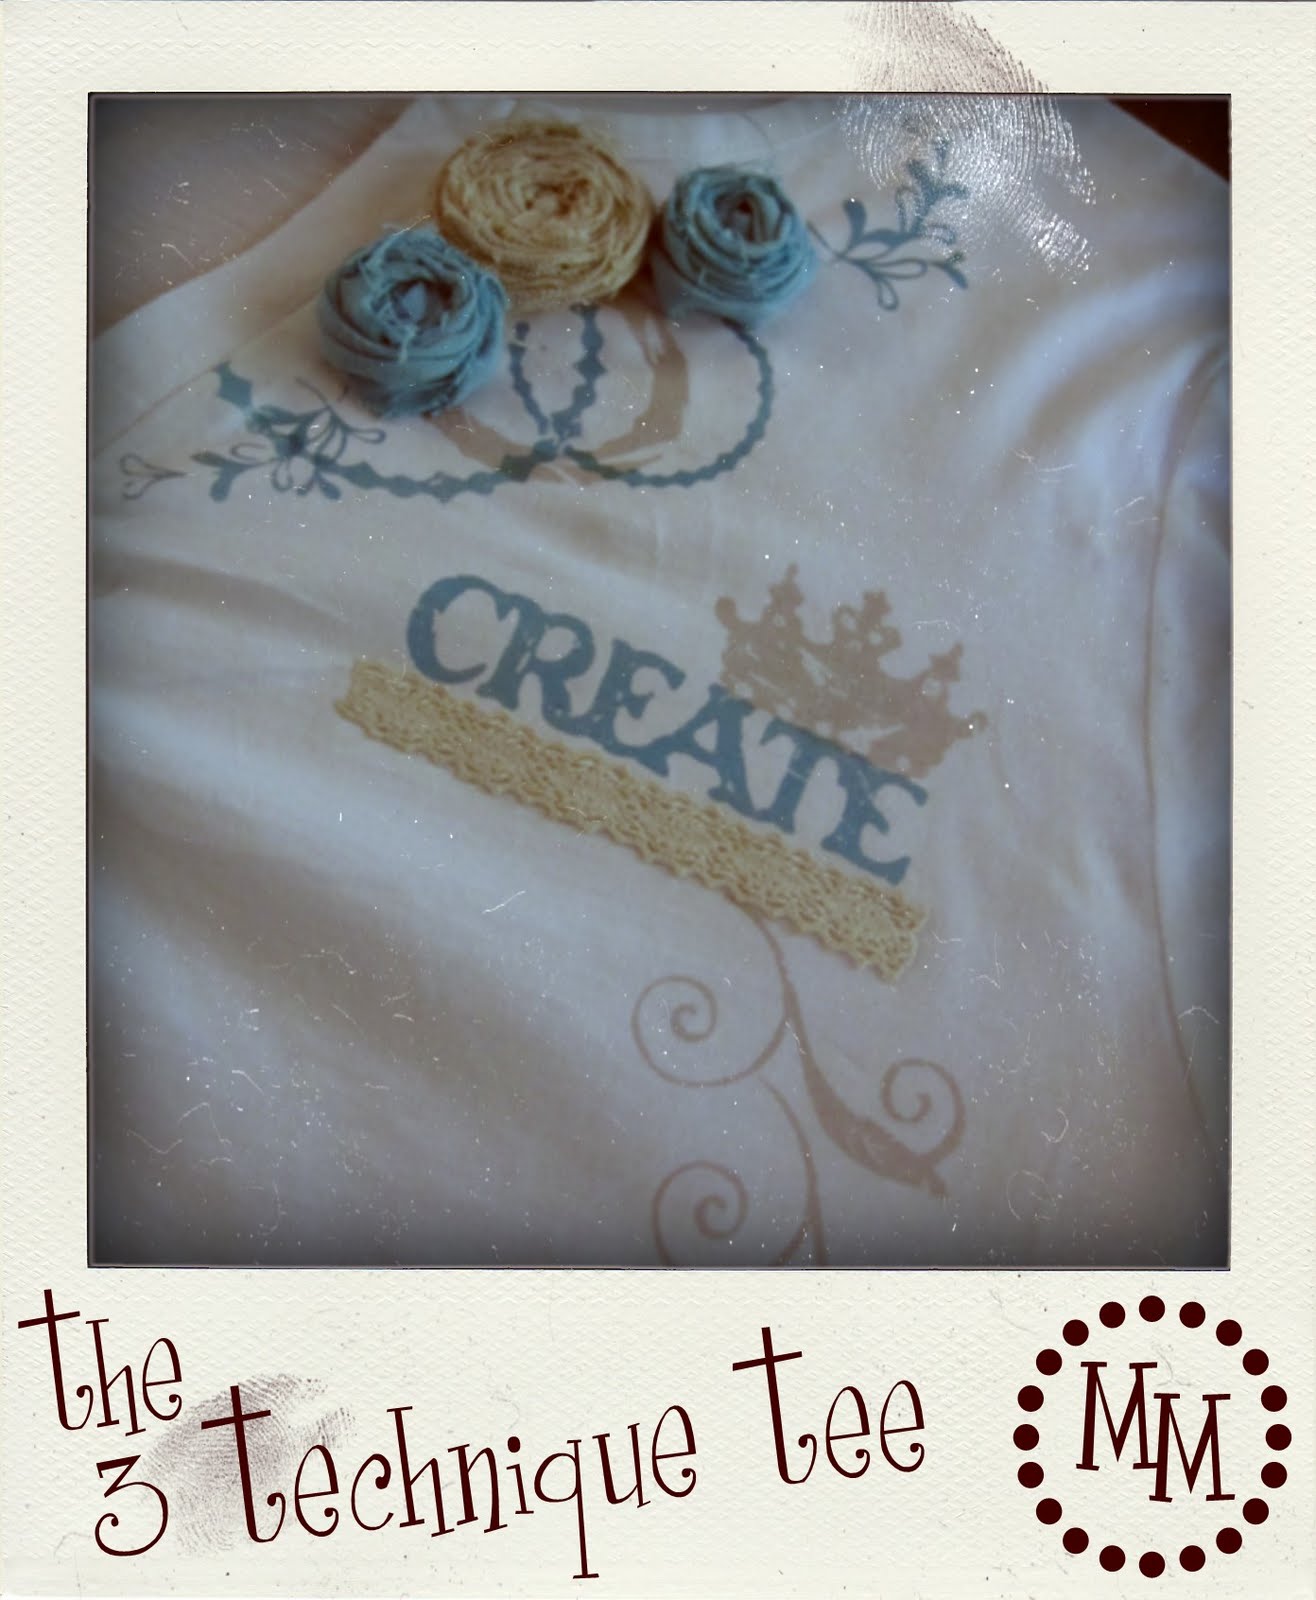
The 3 Technique Tee!
It started off with my putting together this really cute outfit while I was shopping at Stein Mart.
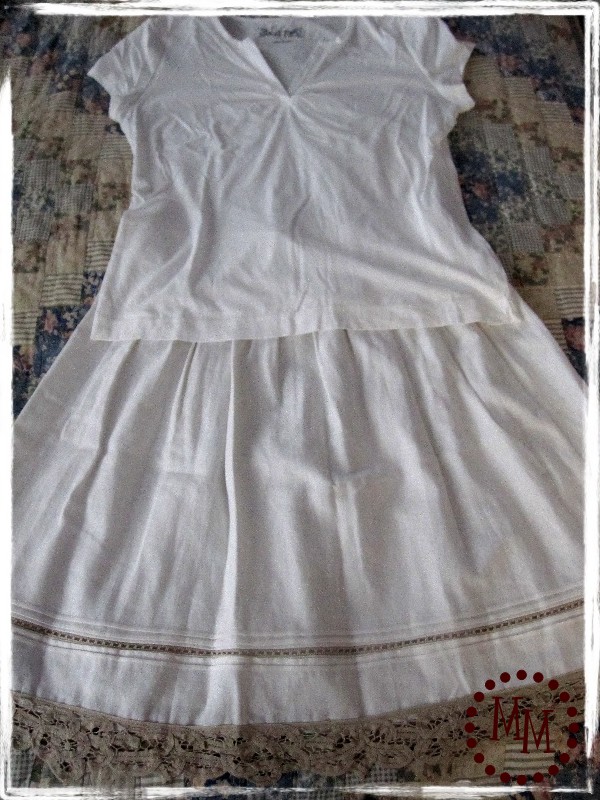
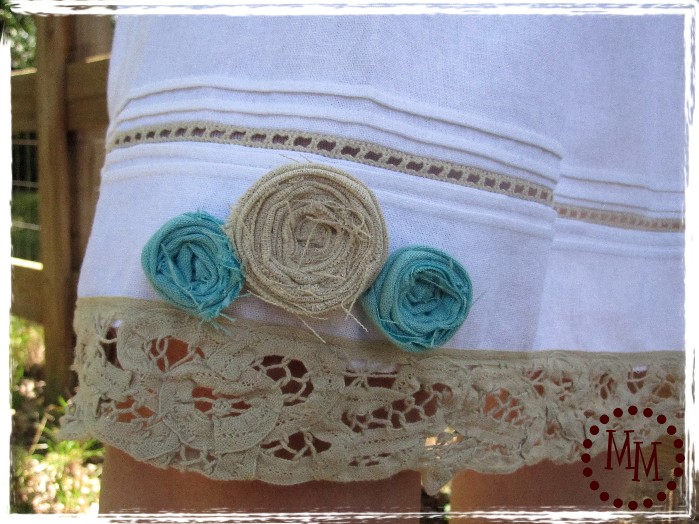
Don’t you just love that skirt?? Here’s a close up of the lace trim…

Love it! Okay, back to the shirt…
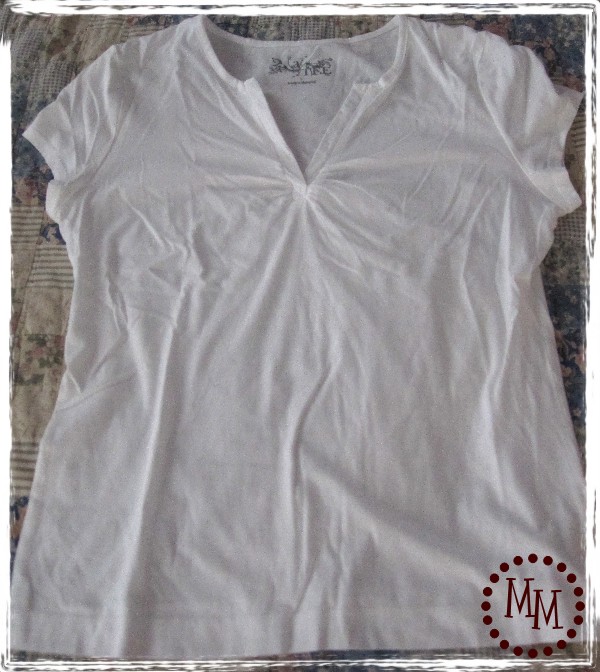
Just a plain old v-neck t-shirt.
And here is what I am going to use to transform it.
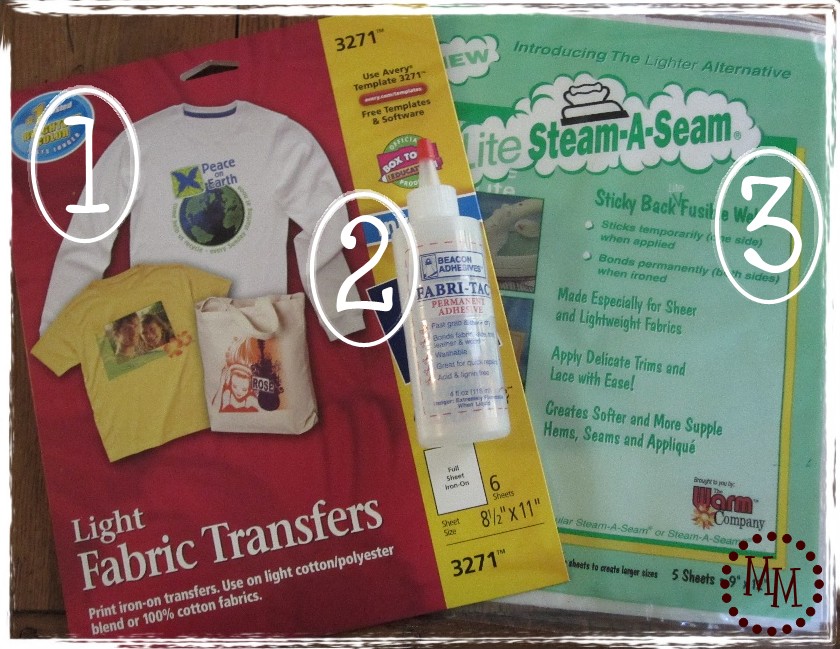
1. Printable heat transfer paper (from Walmart)
2. Fabri-Tac fabric adhesive from Beacon Adhesives
3. Steam-A-Seam fusible web
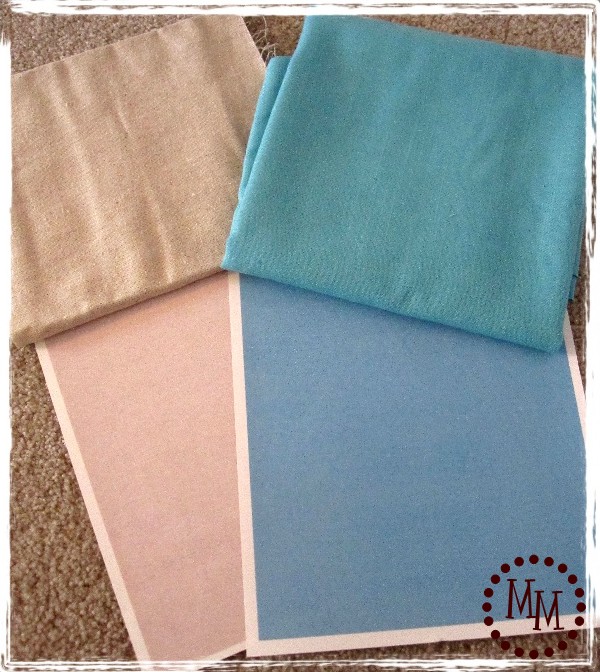
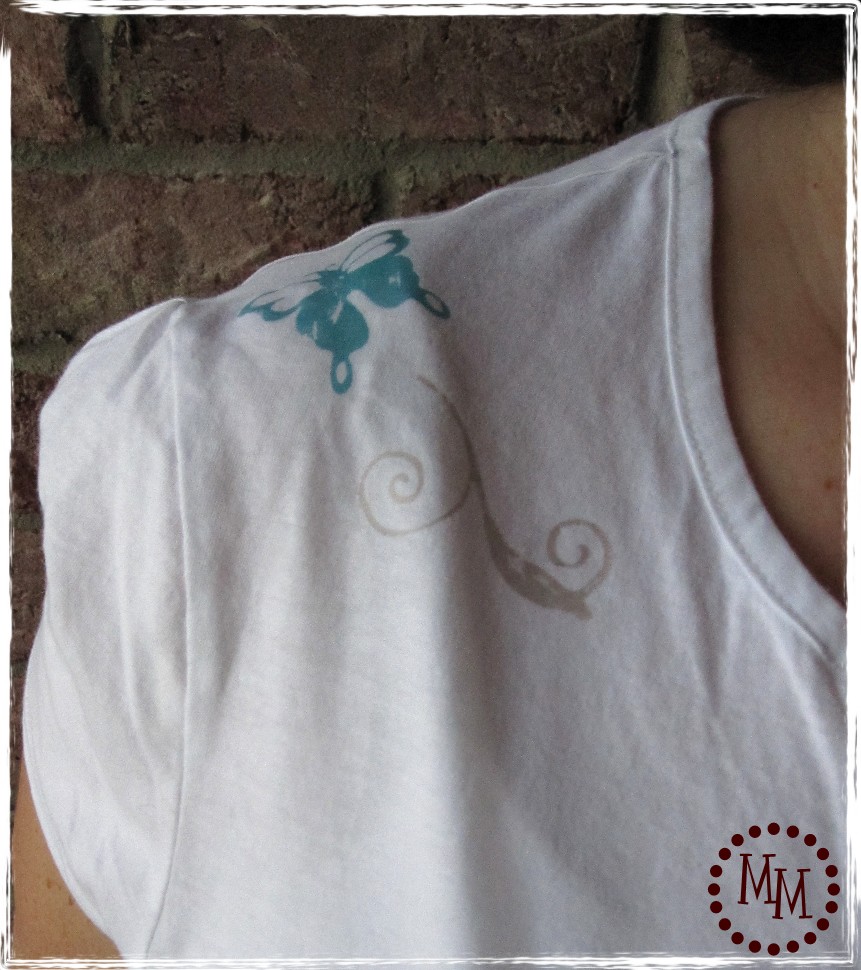
First things first, I, of course, was going to put rosettes on the shirts so I picked out two different solid colors from my fabric stash. It turns out I had this fantastic natural cotton linen that was almost the exact color of the lace trim on the skirt! I chose a mellow aqua linen to accompany it.
Then, so that my iron on tranfers would match the rosettes, I scanned the fabrics and printed them out on the heat transfer paper (see photo above).
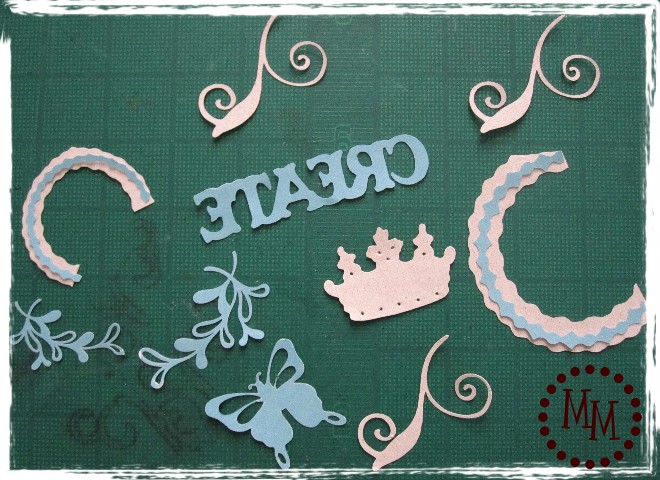
Then I attacked the heat transfer paper with my die cut machines. The two little leafy things on the left are an image that comes with the Silhouette and the rest of the die cuts are from the Vintage Findings cards for the Slice.
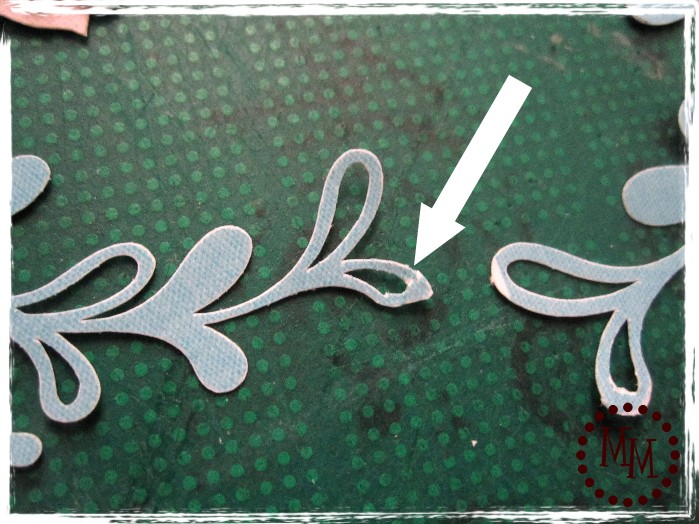
I noticed that if I wasn’t careful with the thin edges of some of the die cuts they would start to rub off…. which gave me an idea!
Since my linen rosettes have a laid back feel to them, I wanted the iron ons to have that same feeling. So I decided to distress them! I very lightly (it did not take much pressure at all) sanded all of the die cuts with a small craft sander.

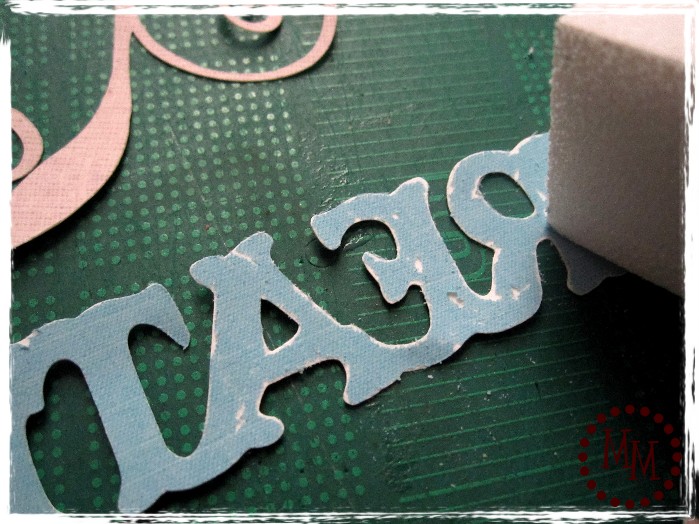
I followed the directions on the heat transfer paper and this is how I was rewarded with my distressing. I love it!!! It’s exactly how I envisioned it!
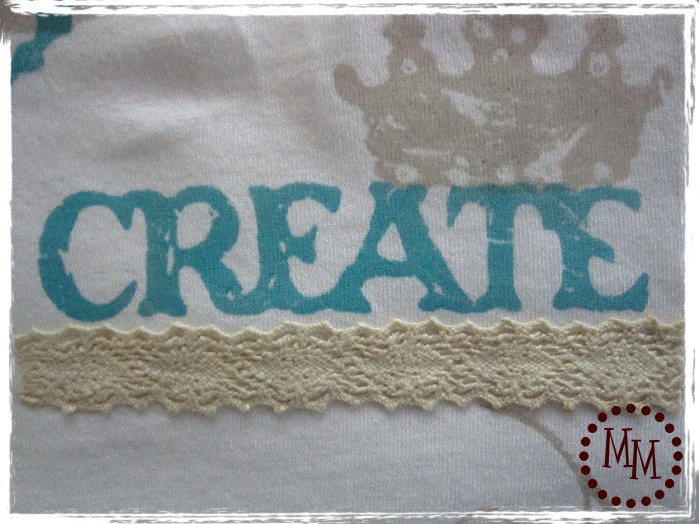
I finished the rest of the iron ons then moved on to my plan of using the fusible webbing.
I wanted to incorporate some lace onto the shirt since it was on the skirt. I cut a length of lace I had on hand that was a similar color to the lace on the skirt. I used Fray Check on the ends so they wouldn’t fall apart. Then I attached the webbing to the back and ironed it onto the shirt.
Basically the fusible webbing will make anything into an applique. Great stuff!
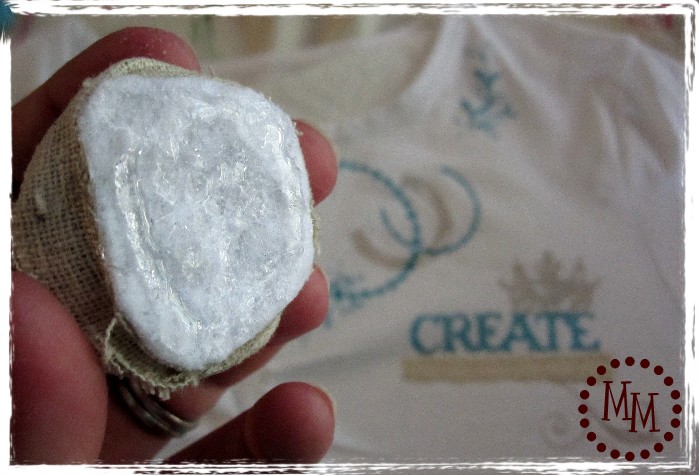
Next up was the rosettes. I added a fair amount of the Fabri-Tac to the backs and placed them on the shirt. I actually layered a paper towel directly under where the flowers were going so no adhesive would bleed through to the back of the shirt.

I also put some of the Fabric-Tac between the rosettes to ensure they would stay together when the shirt moved around.
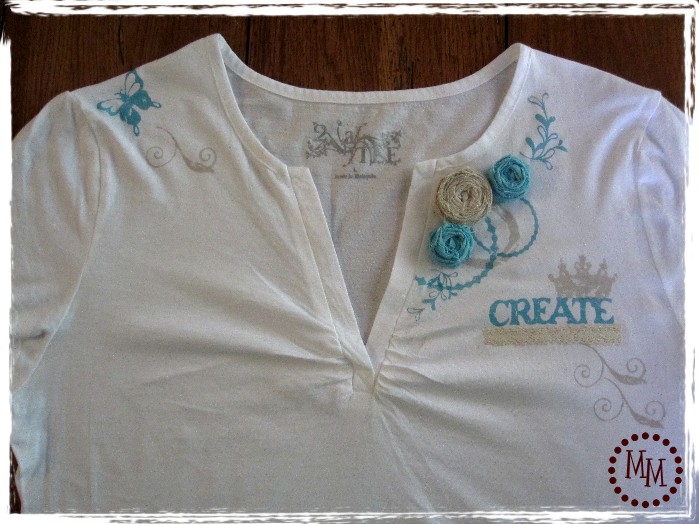
And here is my completed shirt!! Don’t you just love the colors!
I am soooo taking this to the beach with me in a few weeks!
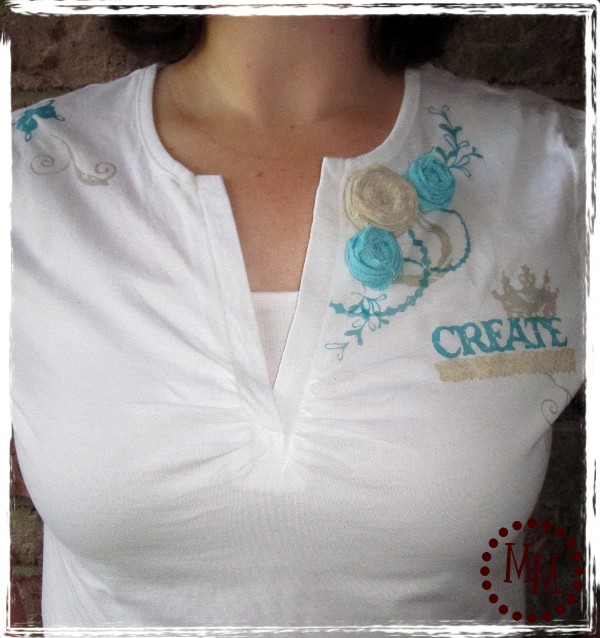
Of course we have to have an action shot… or two…

It even looks good with jeans!

Notice anything in this picture?
No? How about this one?
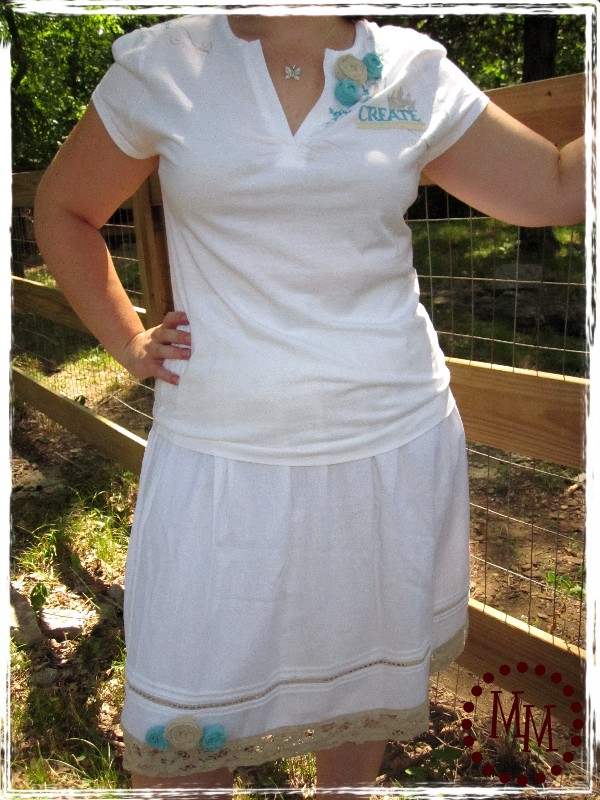
Yep! Totally added rosettes to the skirt, too!!
Awesome!
Okay, now seriously, this was a super inexpensive outfit and project.
Shirt and skirt from Stein Mart were $5 and $20 respectively.
Fabric, lace, Fabri-Tac, and Steam-A-Seam were on hand.
Heat transfer paper was ~ $7 at Walmart (but its for about 8 sheets!).
So a $32 outfit, when all is said and done. I can live with that!
I am soooo proud of this outfit and can’t wait to wear it out and about. And I am loving my first experience playing with the printable heat transfer paper. I see more projects in my future!!
And did I mention this is my first t-shirt makeover? 🙂

linking up to
I have started truncating my posts to avoid having my content stolen. I hope you’ll click over to finish reading the post. Thank you for understanding!
Kara @ Mine for the Making
Friday 9th of September 2011
LOVE this outfit Michele!!!! OH my goodness...where to begin!? LOVE the how to on the printable transfer paper. That skirt is so pretty. love the colors and images you chose. and of course...the rosettes...perfect that you added them to the skirt too.
SO CUTE!!!
Thanks for linking up this week Michele! You are such a sweet and supportive bloggy friend :)
Cyndy
Friday 1st of October 2010
What an awesome turorial!!! I love the idea you used for the iron-ons. When I get caught up on projects I'll have to try it. Thank you :-)
Holly
Wednesday 11th of August 2010
So, so, so cute. I love that you added those other details to the rosettes. Great colors too! Thanks for linking to Tickled pink a couple of weeks ago. I took a week off...but I'm back this week!
Donene
Wednesday 4th of August 2010
This project is awesome and turned out so cute! I love it! Stopping by from the CSI Project!
AUDRA
Tuesday 3rd of August 2010
still love it! Thanks for linking up last week!
I'm planning on making some of these as christmas gifts! :)
Thanks for sharing!