

I finally have the vinyl knob tutorial for you, and since I made you wait so long, I’ve made it worth your while with 3 different techniques to try!
Let’s get started!

First, I purchased 3 wooden knobs at Lowe’s for less than $1 each.

I spray painted each knob a different color so I could try some different looks.
These are all spray paints we had in our “stash” of paint. I have to tell you, I’m loving the Rustoleum Aluminum! Its so bright and shiny that the knob really looks like it started out as metal!

To figure out sizing for my vinyl I measured the diameter of my knobs.

I chose my images for the knobs by perusing my Silhouette library. I ended up with
bloom_C00021_23851
Damask_0852
round_spanish_lace_C00182_20387
I sized them down in the software…
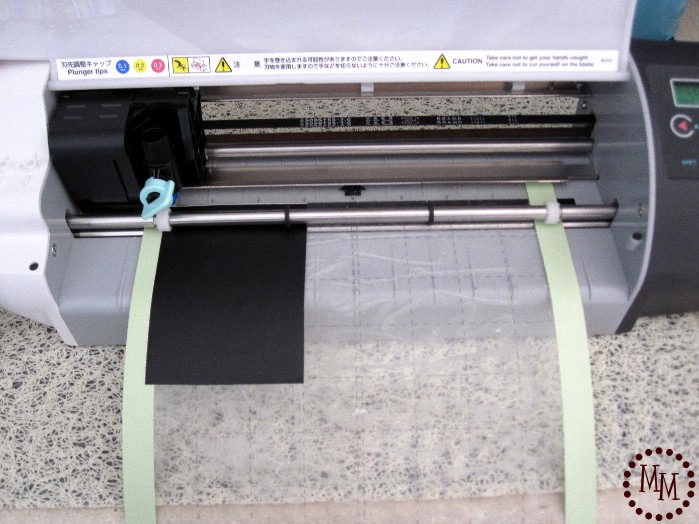
And used some scrap vinyl to cut them out.

The bloom and spanish lace designs needed the removal of a lot of small pieces of vinyl. I’ve found the easiest way to do this is to (1) use something pointed to (2) push the the small piece of vinyl out of the way and (3) remove it from the image. It can actually go quite quickly once you get the hang of it!
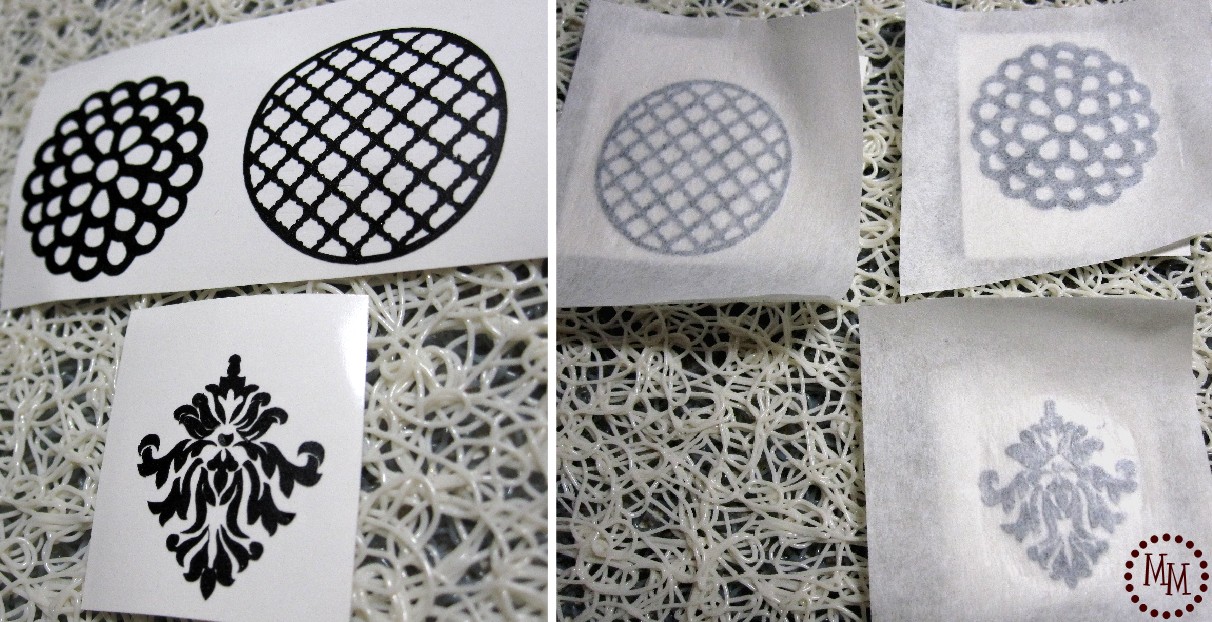
Once the images have all extra vinyl removed, cover them with transfer paper and rub it on thoroughly.
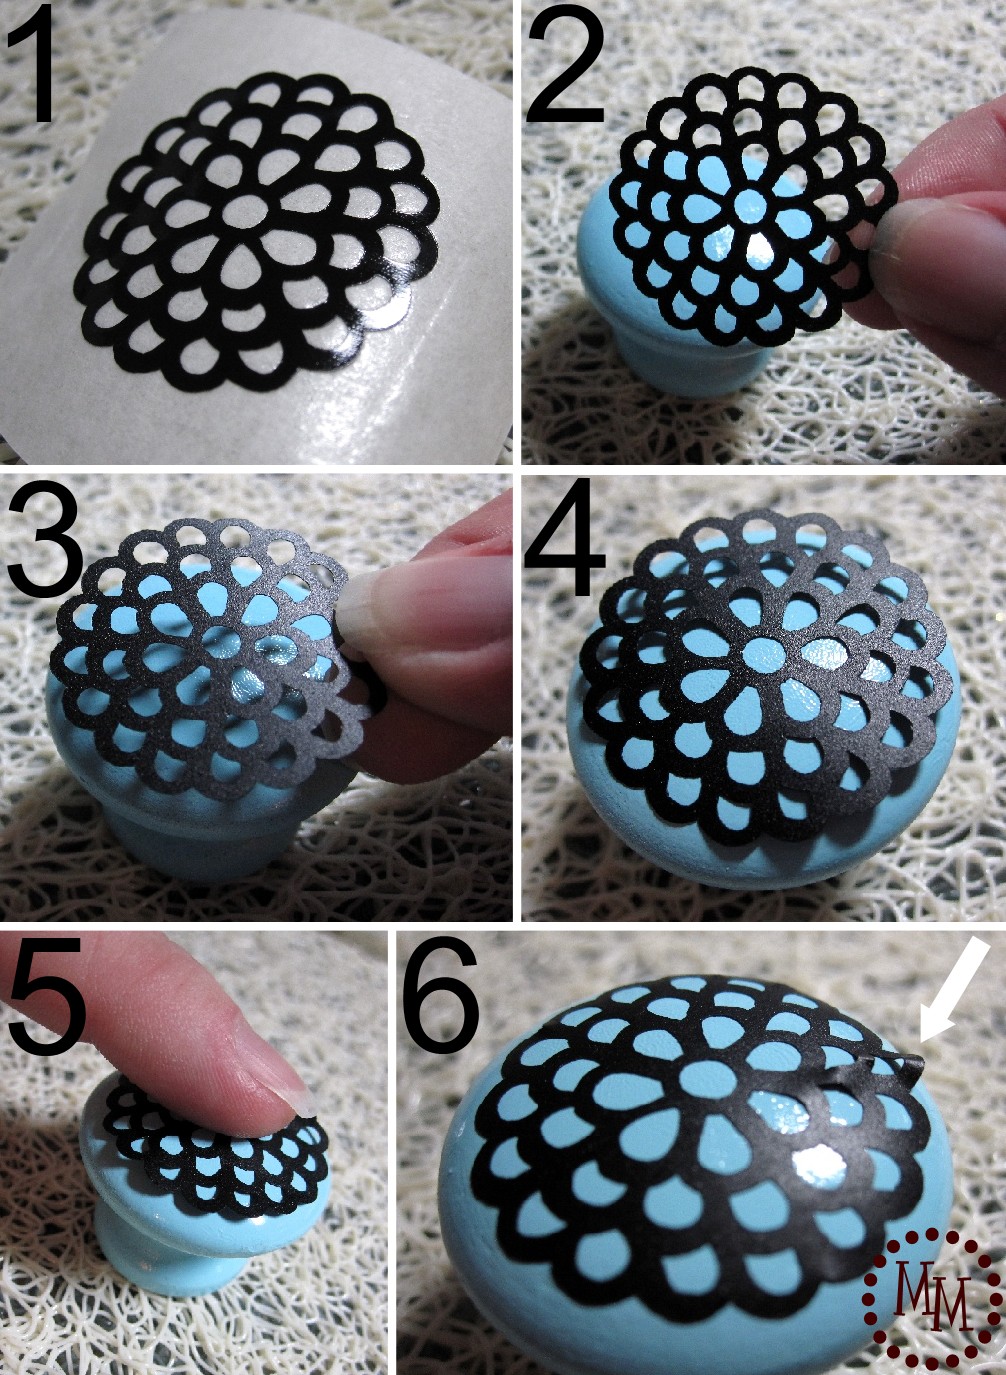
Let’s start with the bloom design. I wanted to put it on the Blue Ocean Breeze knob.
1. This is simply showing you the vinyl on the transfer paper.
2. I find that using a design that is round and the same size as my knob, it is easier to remove the image from the transfer paper and place it on by hand (alternatively you could trim around the image as close as possible to line it up on the knob).
3. I eyeballed the bloom image on the knob.
4. Once I thought I had it centered, I lightly placed it on the knob.
5. When I was sure it was centered, I proceeded to stick the vinyl down with my finger working from the center of the knob out.
6. Because the knob itself is not perfectly flat, the design will not lay flat. I was able to smooth it down in all but one place.
Here’s how to remedy the bump in the image:

7. Get a pair of sharp small tip scissors.
8. Carefully cut across middle of the bloom of the flower.
9. Smooth down one side of the vinyl you just cut, then smooth down the other side. There will be a slight overlap.
10. Looking down at the knob you can’t see where the cut was made!
11. Recover the knob with the transfer paper and rub well to be sure the vinyl is well attached to the knob.
12-13. Now admire your work!
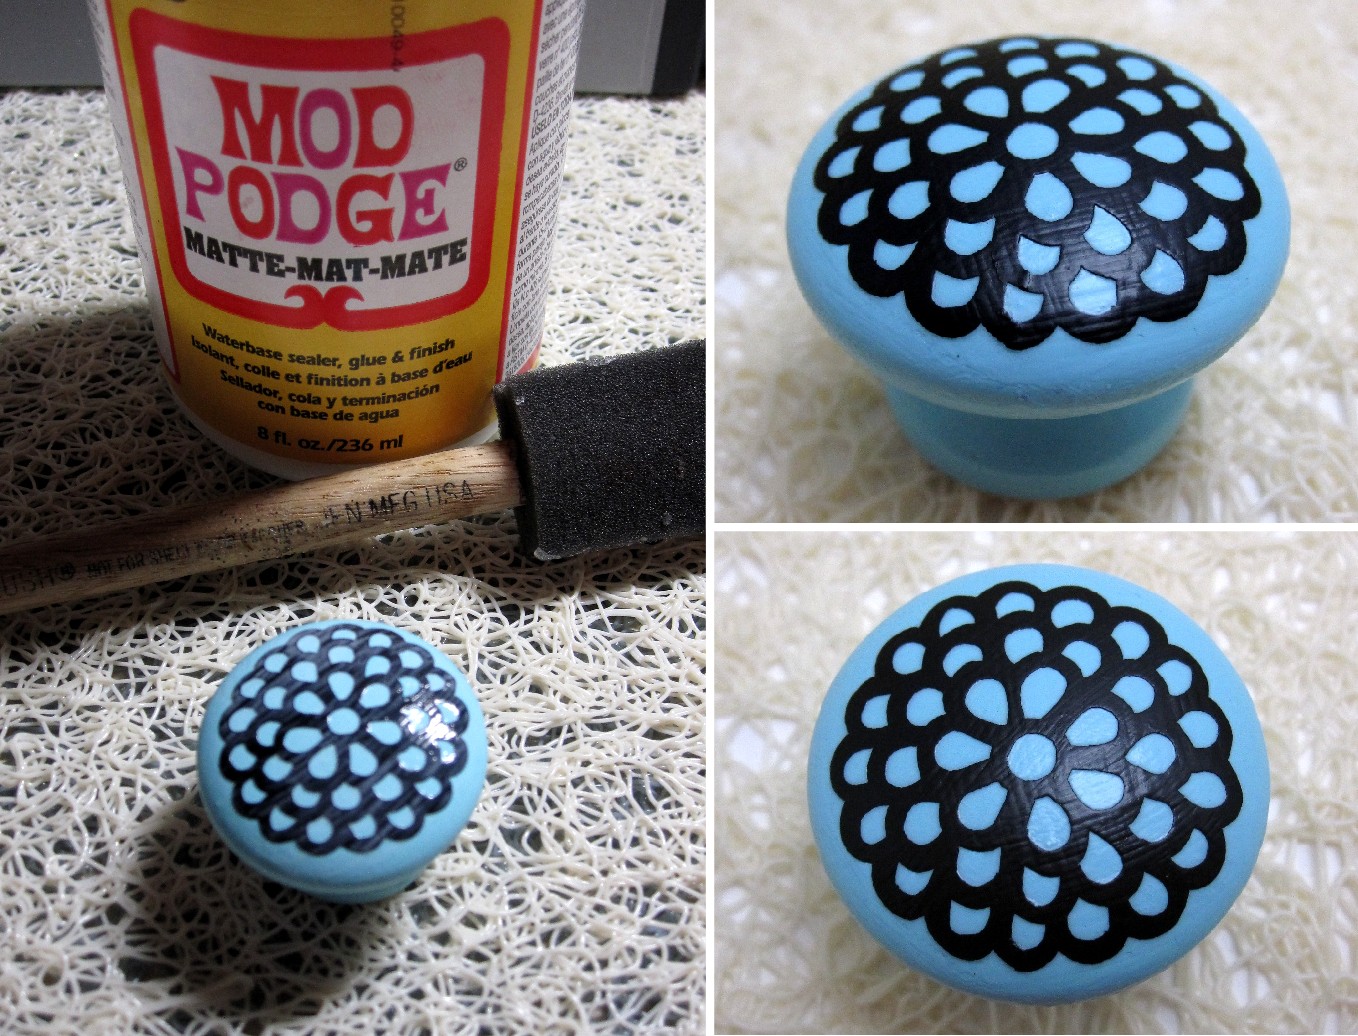
I really like the shine that the knob has and the vinyl had too much of a matte look. So I added a couple of coats of Mod Podge across the top of the knob giving the vinyl a more shiny look and blending in better with the blue paint.

On to the next knob!
I know what you’re thinking with this black knob….
Why put black vinyl on a black knob?
Answer: To use it as a stencil template!
1. Smooth the vinyl on just as we did with the blue knob. There are many more puckers in this design when I smooth it down.
2-3. Trim the puckers as advised above and smooth down the vinyl.
4. I decided to use some scrapbook ink and dabbed a couple of coats all over the top of the stencil.
5. Remove the stencil once the ink is dry. I love the shabby chic look of the vinyl stencil. I think sanding the edges of the knob will finish off the look.
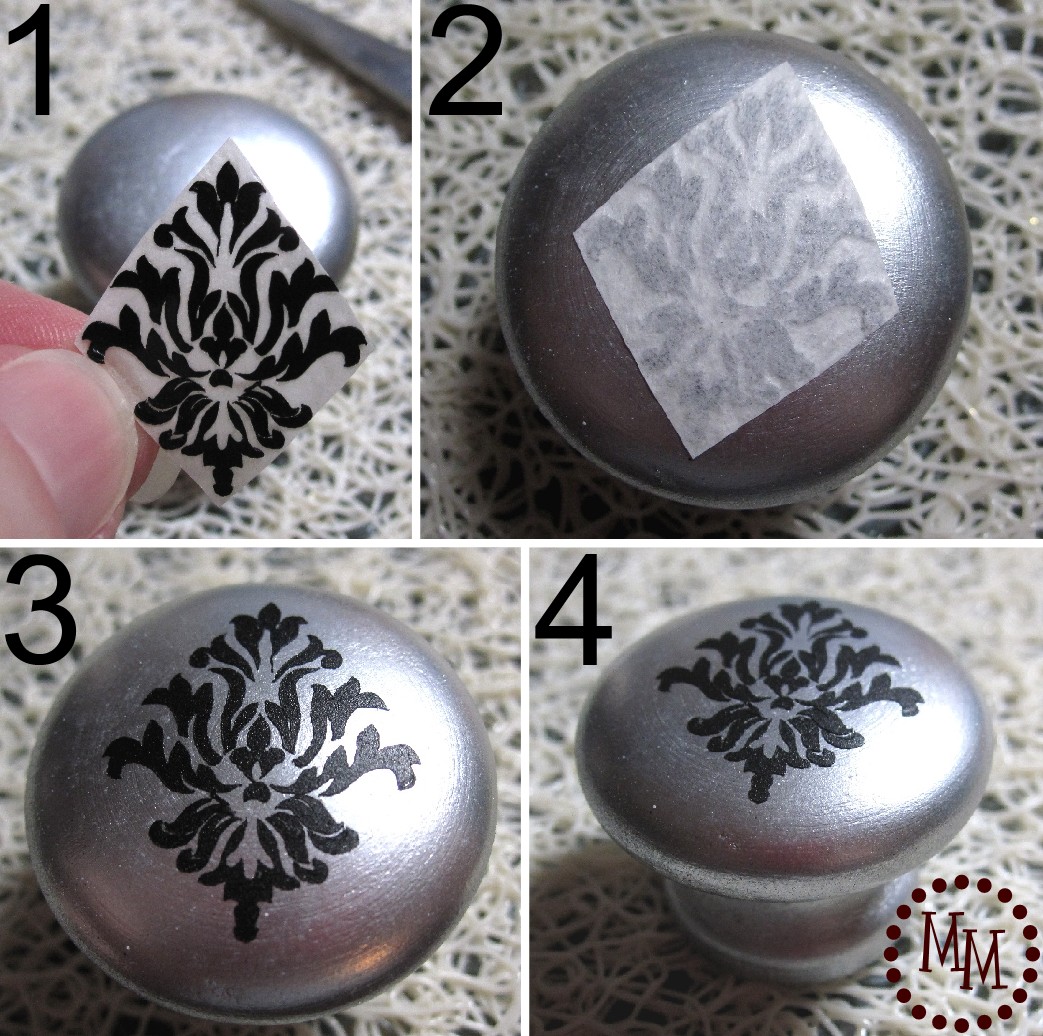
For the silver knob I chose to use the damask pattern.
1. Trim the image as much as possible.
2. Center the image on the knob and rub it on thoroughly.
3-4. Remove the transfer paper and admire your work!

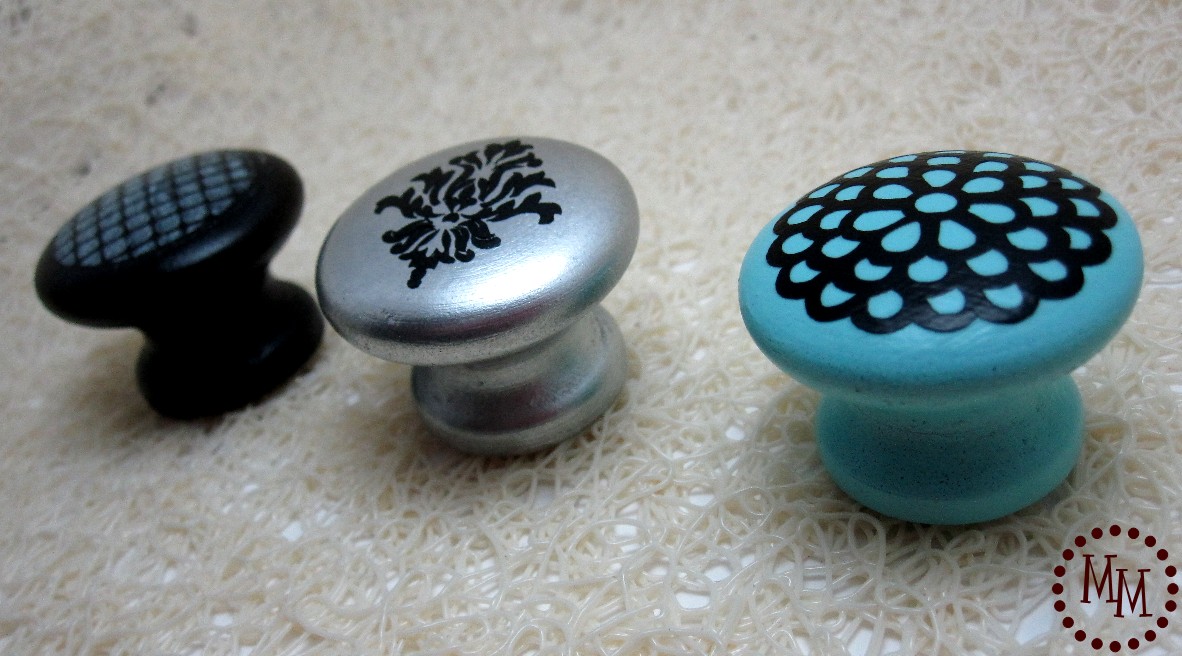
And there you have it!
3 different looks for 1 wooden knob. And, really, the possibilities are endless!
For less than a dollar, you can customize a knob to suit your fancy.
I hope the next time you go on the hunt for the perfect knob for your big project you think about trying out a little vinyl!
I think I’ll use these to make a jewelry holder… How eclectic and cute would that be? 🙂

claire
Sunday 27th of December 2015
Hi, this looks amazing, and I so want to try it. But how do I get the silhouette image onto the vinyl?
Beverly Ritch
Friday 26th of July 2013
Best idea ever! Makes replacing knobs on my projects so much more affordable and more personable too! Thanks for sharing :)
Reinventing Mimi B
Monday 7th of May 2012
Thanks so much for the tutorial. I just got my Silhouette and want to try to create my own knobs like you did. I'm not sure that my fingers are quite nimble enough, but we'll see.
Best, ~Mimi B~
Michele {The Scrap Shoppe}
Monday 7th of May 2012
You can do it, Mimi! It will take a bit of practice but you will pick it up. I would love to see anything you make! :)
Sue from Oregon
Sunday 1st of January 2012
oh my...I just got a new cameo for Christmas...can't wait to try this!!!
Jen @ My Own Road
Friday 24th of June 2011
This is exactly the kind of thing I was looking for!! I've been looking for some inspiration for my craft room, and knobs were one of my biggies. Thank you so much for posting this great tutorial! Definitely pinning this for later.