
DIY Mother's Day Photo Cube
This sweet personalized Mother's Day photo cube is the perfect DIY gift for mom!
This post contains affiliate links.
~~~~~~~~~~
Today we have Erin Sutch from Crafts & Sutch as our guest poster!

First, I would like to say a giant CONGRATULATIONS to Michele on the new little man in her life and thank her for letting me hang out here today!
I am super excited to spend some time with you and show you a simple Mother's Day craft that was a big hit with the grandmas last year!

Moms love a personalized gift for Mother's Day, and they will love the time you put into making this Mother's Day photo cube yourself!
You do not need many supplies, and it is as cute as can be when complete.
Just grab the free printable below and print pictures you know mom will love.
AND you can make new versions every few years with new photos!
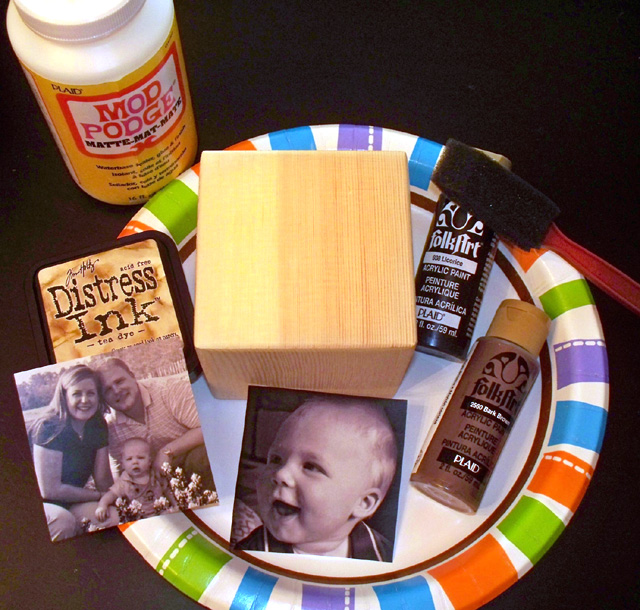
Mother's Day Photo Cube Supplies

3" wooden cube (I got mine at Michael's)
5 images that have been sized to 2.5" square and printed using a laser printer or photo copied
Mom/Mimi/Mema/Nana printable (see further down the post)
Distress ink (optional)
Mother's Day Photo Cube Directions

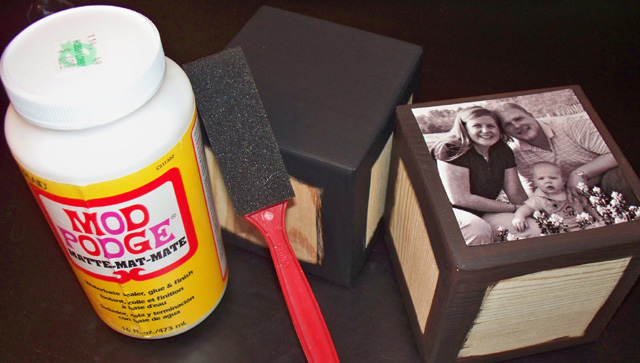
Using the foam brush, paint the edges of the wooden cubes.
When the paint is dry, slather on a layer of Mod Podge, put the image on top, then another layer of Mod Podge.
Be sure to smooth out any bubbles.
It's best if your images have been printed with a laser printer or have been photo copied so the image does not bleed when you cover it with the Mod Podge.

These were made for the monkey's grandmothers, and I was sure to include all of their children and grandchildren on the cubes.
We have a small family, so it wasn't too hard to manage.
However, if your family is big, you might only do pics of the grandkids.
(The original printable file from Erin at Crafts & Sutch is no longer available.
I have made a similar version that can be downloaded.)

Cut out the the Mom/Mimi/Mema printable and Mod Podge it to the last side of the cube.
If your kiddo calls his/her grandmother something else, you can create your own printable using a word processing program (I created mine using PowerPoint).

While I used black and white images, this would be equally great with bright, spring colored paint and color photos!

All that is left to do is wrap this baby up and you have one fantastically affordable and super personal Mother's Day gift!
Michele, thank you so much for letting me hang out here for the day!
I've had a wonderful time and I'll hope you'll pop over to Crafts & Sutch sometime to say hi!

>> See where I party! <<
This post was originally May, 2011.
Thanks for sharing this great idea.
I love this cute and inventive this is and not only shows off pictures but makes them a memorable part of home Decor. Thanks for sharing this with us at #omhgww
I love photo cube crafts. They are fun, and you can add to them every year. Great idea for mother's day gifts. Thanks for linking up with us at the #HomeMattersParty this week!
Such a lovely gift to create for anyone. Will be including this in a Mother's Day Round-up. Thanks for sharing on Merry Monday.
Love this idea. My mother just got a new desk and this would look great on it.
This is a great idea and I bet the grandmothers did love it! Thanks for sharing at Over the Moon.
This is a gift that mom would really treasure!!
Great idea for a Mother's Day Gift! Thanks for sharing at Merry Monday this week. 🙂
This is such a heartfelt and thoughtful gift! Loved it! Thanks a lot for joining us at the Family Joy Blog link up. I would also love to share this post with my readers in my MOther's Day gift idea post that I'm planning to write. Will that be okay? Please let me know. Thanks a lot. Pinned!
Absolutely! One photo with a link back to the post would be perfect. 🙂 Thank you!
that's great! thanks a lot!
This is just lovely!! Thanks for sharing with us on Throwback Thursday!
Mollie
This is absolutely adorable!
Where is the image with mimi and nana??
I cannot seem to find the download arrow for the printable
I am making these for Christmas with a different occasion on them and used wordle.com to make a text collage and just resized to square in photoshop wordle is a fun site to use!
I'm making these for Christmas, but not with the mom words - I used wordle.com to create a word collage and then square it up in photoshop - turned out pretty cute!
I absolutely love this idea! It can be used for so many occasions. I was curious what you used the distress ink on and how? I am new to the crafting DIY world. Thanks for sharing this!
I cannot seem to find the download arrow for the printable.
Hi Tammy, This was a guest post and it does not look like the file is available any longer. 🙁
these look great! good to know I can get the blocks at micheals! would regular pictures work? is that what you mean by laser printed?
Mary, regular photos or photos printed on a inkjet printer might start to run when you add the Mod Podge. You could try putting a light coat of Mod Podge on the back and putting a regular photo on top, but do no add the extra coat of Mod Podge on top.
will regular pictures work? have you worked with them? im super excited to do this! yours look great!
What a sweet tutorial! How precious!
Ooh I love this Erin!! You could also do something similar for a Vacation - pictures of your spot and then a fun side with text of all the things you saw. Hmmmm. 🙂
Thanks for the great idea!!
These are SUPER cute, Erin! Fabulous for Mother's Day!
Love this! Wishing two of my favorite bloggers a VERY Happy Mother's Day!
Michele, thank you so much for having me over today! 🙂 I'm so happy I was able to help out so you can spend a little more time with Caleb! 🙂 I hope you have the BEST Mother's Day tomorrow!
These are just great! I might do these for Father's Day for my dad's desk!
Wow Erin - I love these blocks!! thank you for the printable!