
Whip up this DIY Father’s Day shirt for the guy in your life!

I don’t know about you, but I have a terrible time coming up with guy gifts. But I have a fun gift idea for the guys this year for Father’s Day! The Daddy EST T-Shirt!
It also works for grandfathers! And you could definitely incorporate other ideas into this shirt (or hat, or toolbelt, or gym bag… you get the idea!) such as mechanic, dentist, whatever and the year they began as a great guy gift for birthdays or Christmas.
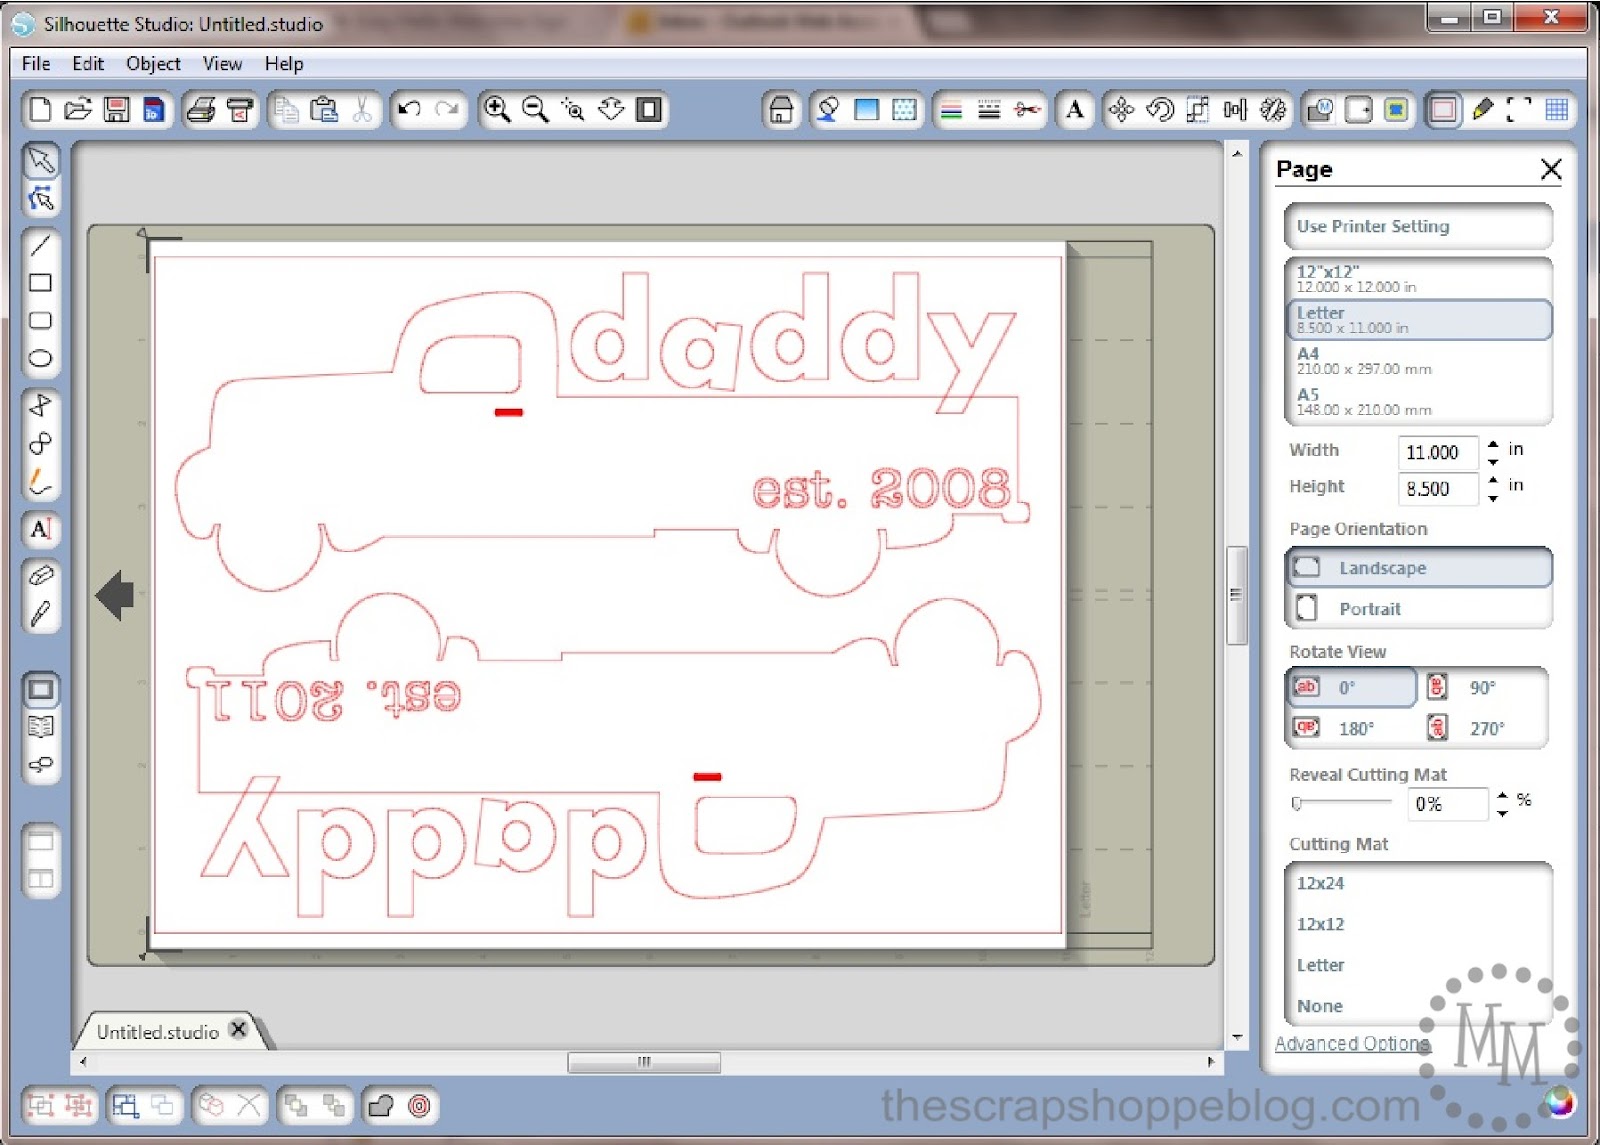
I put together the design in the Silhouette Studio software. I used the Echo Park Truck (design id #18841) from the Silhouette Image Library and added the lettering.
I’m making one for the hubs and one for my brother-in-law.

Let’s talk t-shirt prep for just a moment.
I’m going to use the image as a stencil so I need a nice flat surface to work on.
I cut a piece of scrap cardboard larger than the size of my stencil, wrapped it with freezer paper (shiny side up) then place it under the shirt where the stencil will go. I folded the shirt up to making for a tidy work surface and used rubber bands to help keep everything in place.
For my stencil, I decided to try my hand at using adhesive vinyl (affiliate link) rather than freezer paper, but you can also use stencil film (affiliate link).
I cut my image with the Silhouette on white vinyl then carefully placed it on the shirt. I used a roller to make sure there was no bubbles between the vinyl and the t-shirt. Don’t forget to add any extra pieces of the vinyl you might need such as the truck window or parts of your letters!
Finally, run your fingers around all of the edges of your stencil to be sure there is a good bond with the fabric.
Note: You could also cut this image on heat transfer vinyl (affiliate link) and iron on to a t-shirt, just remember to flip the image horizontally prior to cutting.
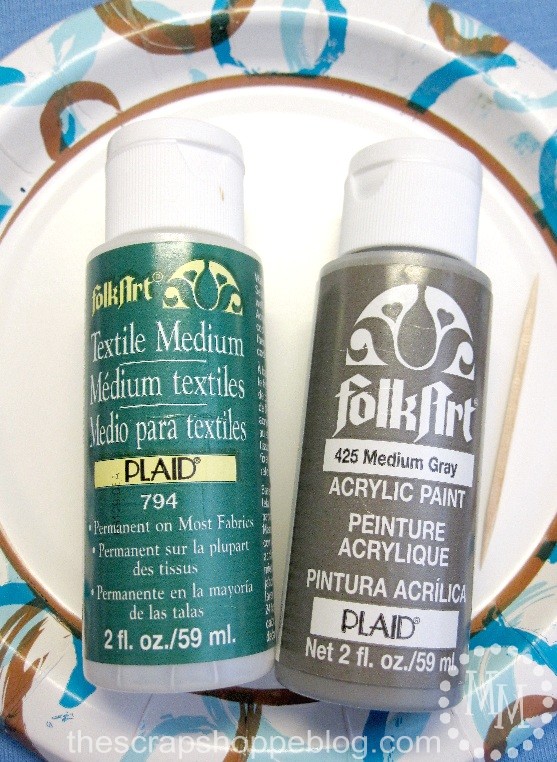
I like to make my own fabric paint rather than purchase it. I typically have quite the variety of acrylic paints on hand, and I love to be able to use them for any and all applications!
To use acrylic paints on clothing you simply need a textile medium. The textile medium will make the paint softer and more flexible after it dries on the fabric.
Follow the directions on the bottle for mixing the two then stir, stir, stir. I use a toothpick to mix them together. And just when you think you’ve stirred enough, stir a little bit longer and you’re all set to start painting!
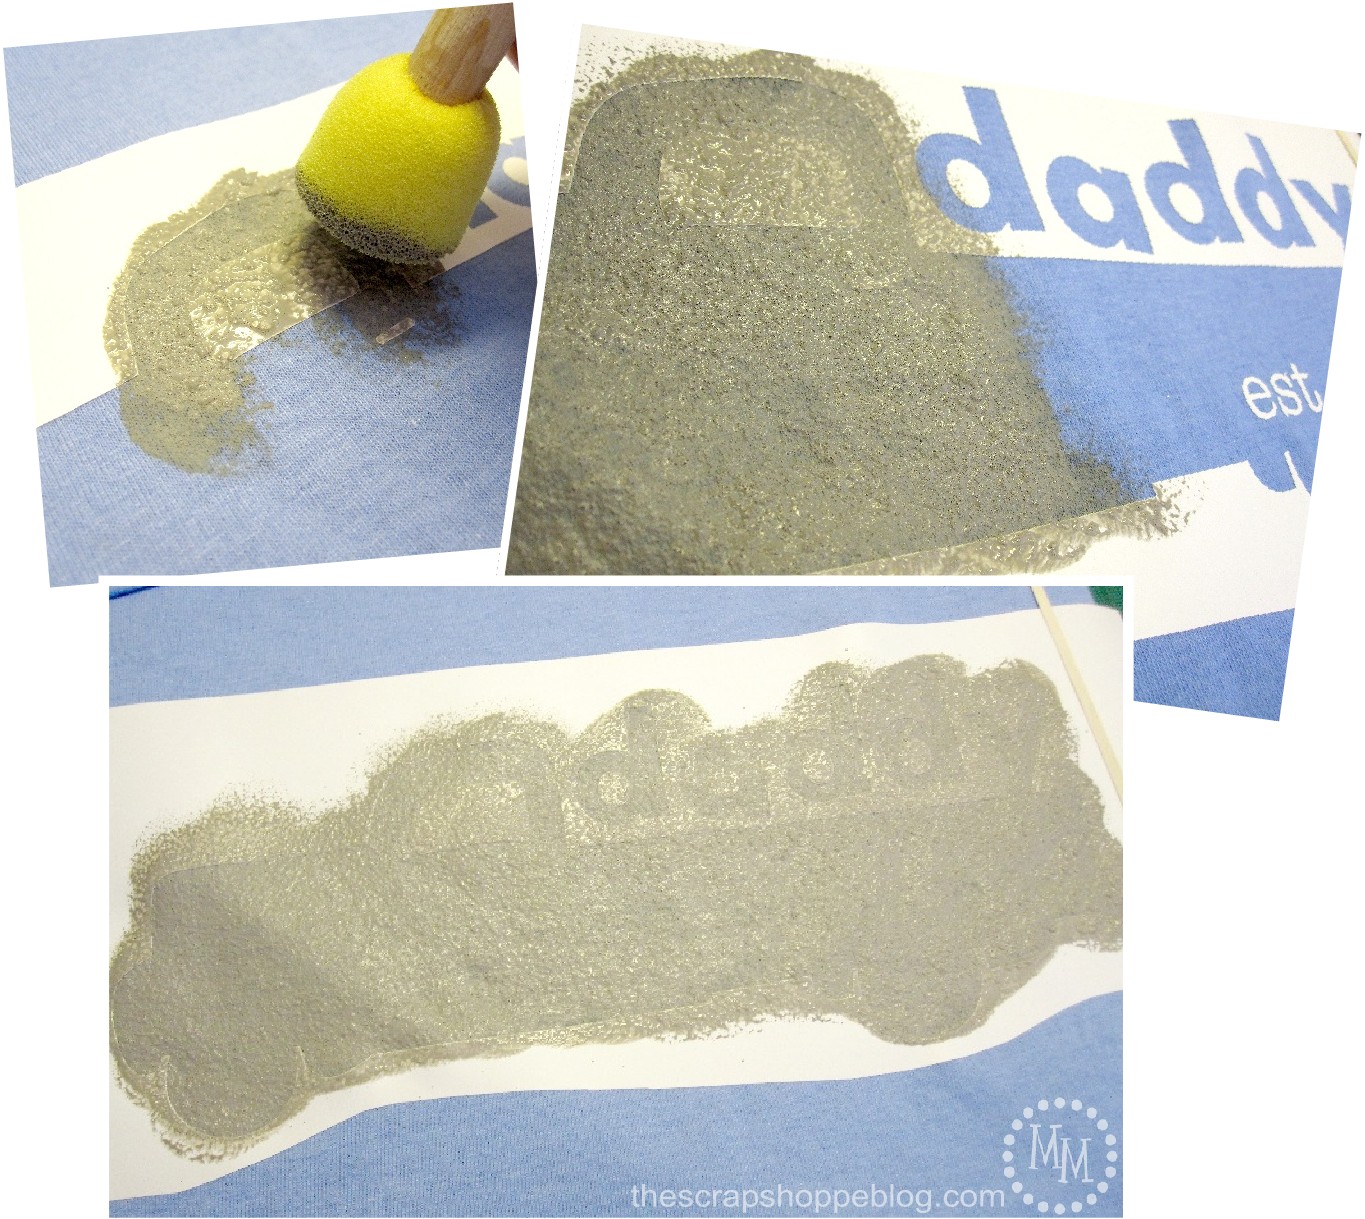
Use a sponge dauber or stipple brush to apply the paint to the fabric. You want to use a pouncing method not a brushstroke method to apply the paint. This will help ensure the paint won’t end up under the edge of your stencil creating messing lines.
I applied two coats of paint, not quite waiting for the first coat to completely dry before adding the second. I’m just impatient like that!
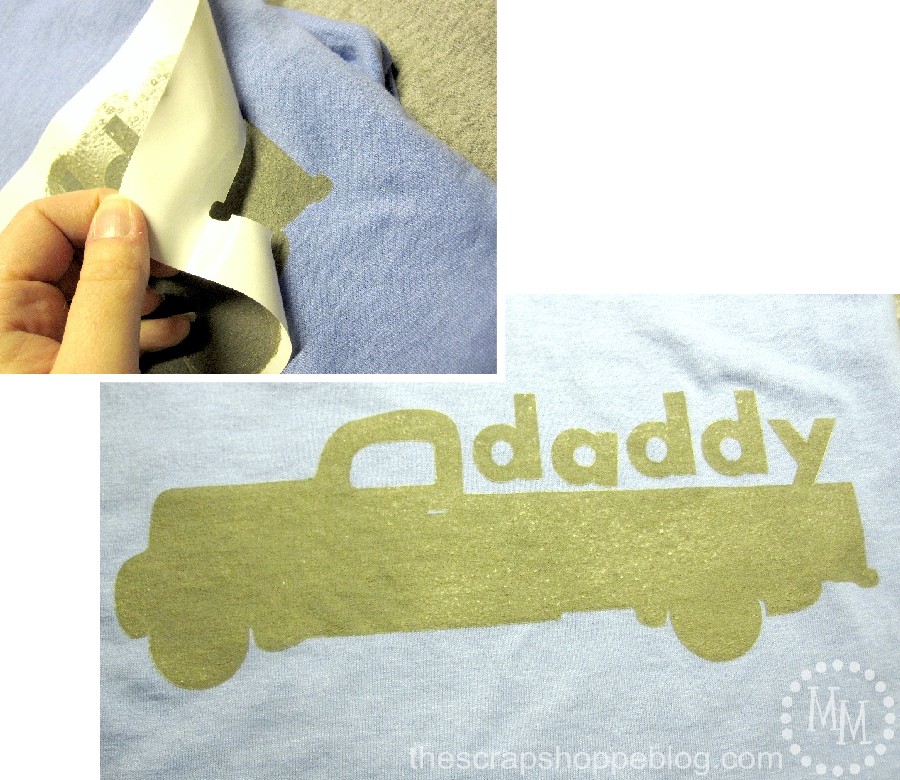
The vinyl stencil is basically like a large sticker, so peel up the edge and slowly remove it from the t-shirt. The paint does not have to be 100% dry yet, but allow it to be mostly dry.
So… you may or may not have noticed a slight difference in my starting stencil and the final outcome after painting. Since I was making my hub’s and BIL’s shirts at the same time I had a slight goof. I put the wrong stencil on the wrong shirt!
You see they each became a daddy at a different year, and I couldn’t simply swap who was getting what shirt because of sizing. Blech! I didn’t notice I had done it wrong until I had nearly finished painting the stencil so there was no going back.
My only option was to paint over the mistake which I did.
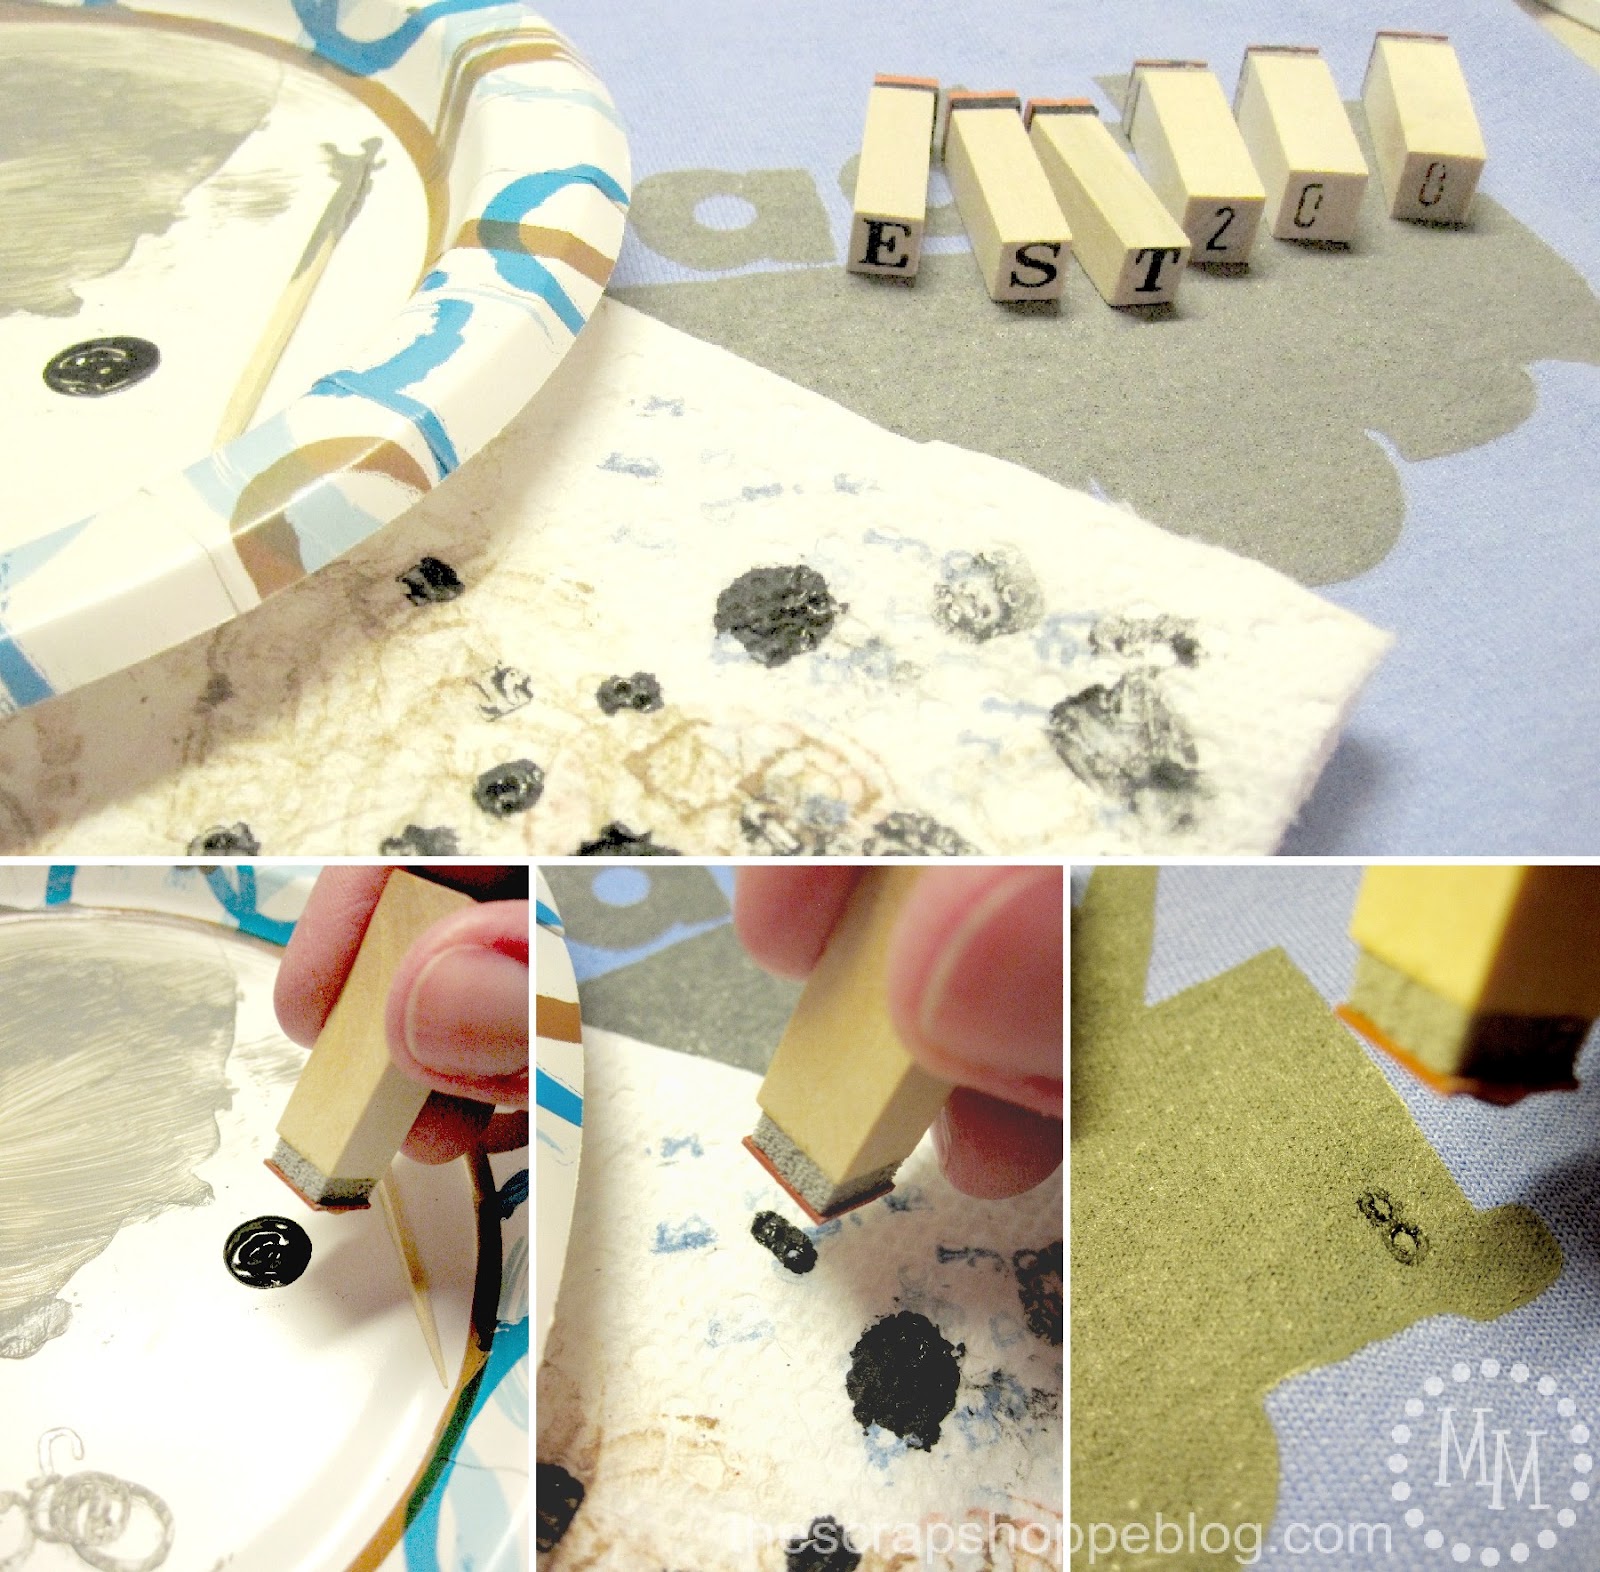
Then I decided I could stamp the year they became daddies on the shirt! I used some small rubber stamps and black acrylic paint. I decided not to use the textile medium with the paint since I wasn’t using much paint.
Acrylic paint stamping technique: Dip the stamp in a small amount of paint. Lightly stamp a paper towel to remove excess paint from the stamp. Then stamp directly onto the shirt applying slight pressure. Repeat! You can clean the stamps with a baby wipe or a little warm water.
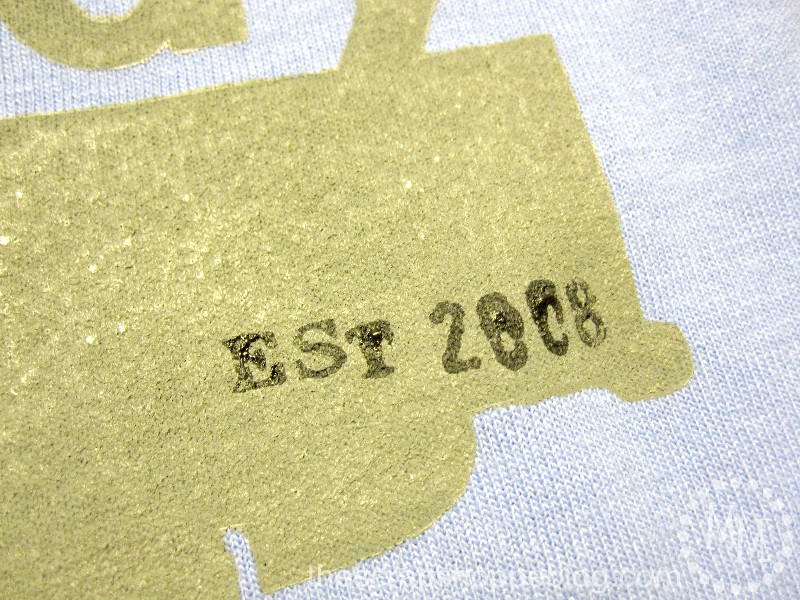
Shew! Craft fail adverted!
And I think I like this look a little better.

The paint may feel a little stiff, but one run through the wash and it will be nice and soft. You may want to wash it before you give it as a gift.
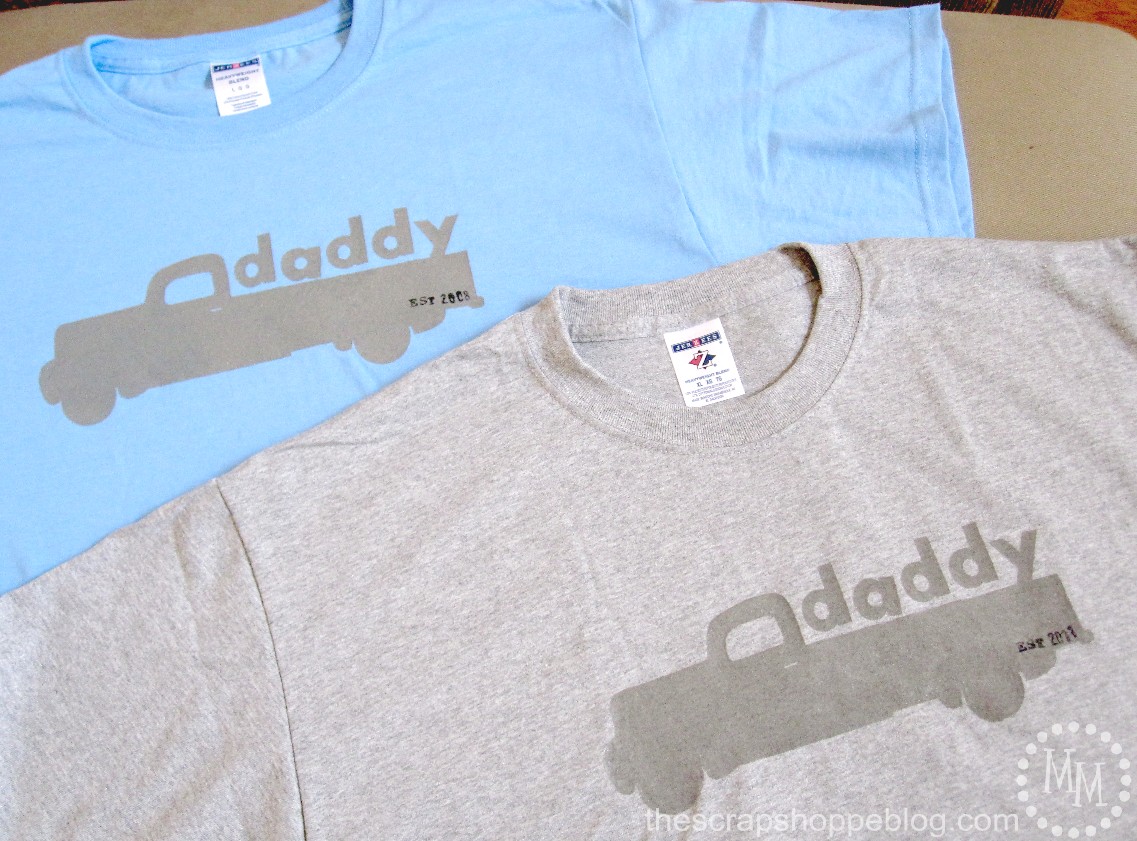
Isn’t this a fun idea for dads? This post is orginally from 2012 and my hubby still wears his! The paint is so soft and feels like part of the shirt.
This post was originally part of the Workshop Wednesday series from 2012.


>> See where I party! <<
Tauni
Wednesday 25th of July 2012
What a fun gift idea M! I love it!!! In fact, I am definitely going to bookmark for next year.
xoxo, Tauni
Sweet Bella Roos
Thursday 19th of July 2012
Super cute! I neeeed a silhouette!
CSI girl
Wednesday 18th of July 2012
Great t-shirt refashion! I would love for you to link this up to The CSI project this week. The challenge is refashions/upcycles. This would be perfect and you just might WIN! Come on over each week for a new challenge, new tutorials and new judges.www.thecsiproject.com
Jennifer Dawn
Wednesday 18th of July 2012
Such a cute shirt! I would love for you to link this up to my new link party. http://thelifeofjenniferdawn.blogspot.com/2012/07/a-little-bird-told-me-link-party-2.htmlHope to see you there! Thanks!
Katie's Nesting Spot
Tuesday 17th of July 2012
I have gotta get a silhouette!