

Confession: I have a mini collection of plain t-shirts that I have intentions of refashioning.
One of the refashions I have been wanting to try for a while is decorating a shirt using bleach.
I finally gave it a try and, I have to say, it was a lot of fun!

Supplies:
(1) tarp, drop cloth, (2) t-shirt form, t-shirt, water, bleach, paper towels,
3M TEKK Protection ((3) respirator, (4) safety glasses, and (5) rubber gloves), ScotchBlue Painter’s Tape

To bleach a t-shirt you’re going to need to do a little prep work.
You need to protect the surface you work on in case you spill any bleach.
I worked in the garage because a) I’m not afraid of damaging the concrete and b) I can ventilate the area by cracking the garage door.
I laid a tarp on the floor followed by a piece of drop cloth.
You also need to protect the t-shirt by making something to stick inside it to prevent the bleach from soaking straight through to the back.

I dismantled a cardboard box so that I had one long rectangular piece.
I then covered the front with Duck tape.
Now I have something to protect the bleach from going through the front of the shirt to the back.

As far as protective gear goes, the rubber gloves are a definite must have.
You do NOT want any bleach to make contact with your skin.
The safety glasses should be worn when pouring the bleach, but not necessarily during the actual bleach-the-shirt process. There is very little chance of splattering once we start the process.
You will want the face respirator if you’re not able to work outside or in a well ventilated area.
And, last but not least, you want to wear the oldest, most grungiest clothes possible.
I also opted for long sleeves to protect my arms from the bleach.
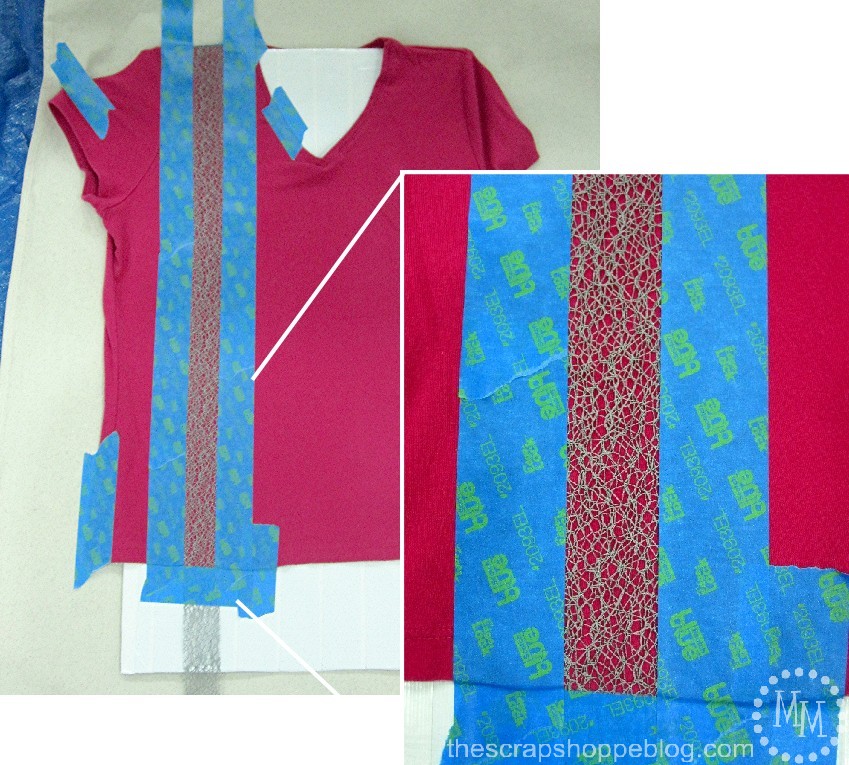
Use the Scotch Blue tape to create a pattern on your shirt.
I used it to tape down a long strip of decorative ribbon.
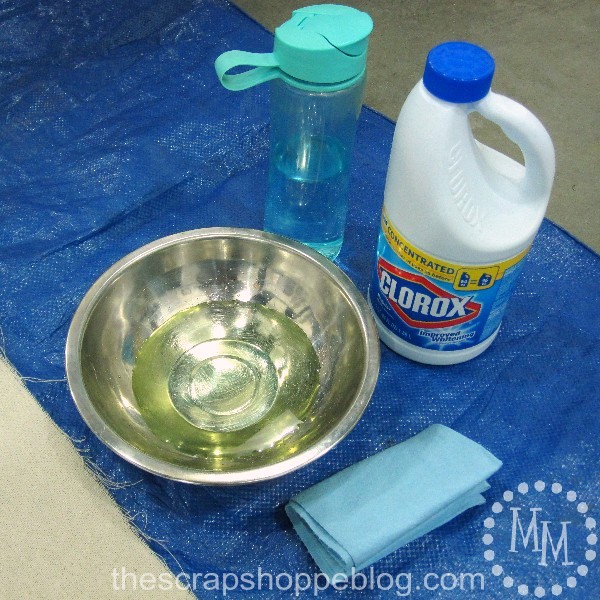
Put on your safety glasses and, in an old bowl, mix equal parts bleach and water.

Take a paper towel (I used the super absorbent ones you can find in automotive stores), and fold it in half several times.
Don the rubber gloves, dip the paper towel in the bleach mixture, blot off any excess liquid,
and gently dab the shirt.
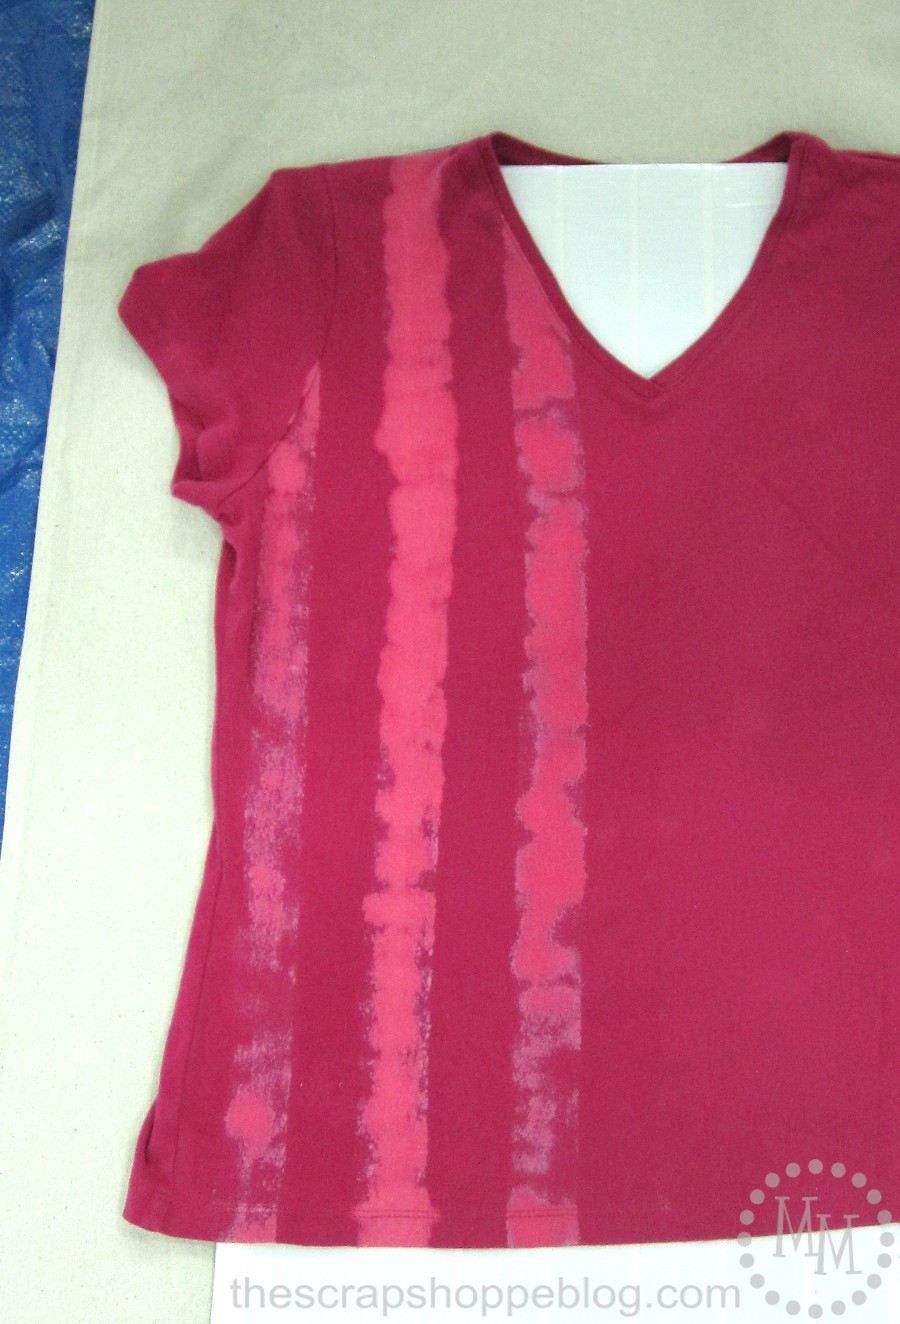
I repeated the process two more times to create three stripes down the t-shirt.
The decorative ribbon plan backfired because I over blotted with the bleach, but I still love the effect of the stripes! I almost looks like tie dye.

Once last thing to do.
Add some paint to the stripes to add a little more to the look!
Use the Scotch Blue tape to tape off all of the stripes.

Mix some acrylic paint with textile medium to make it okay to use on fabric (it makes the paint soft).
Dip a stippling brush into the paint and then blot most of the paint off.
Pounce the brush on the shirt to lightly add the paint.

Remove the tape, allow the paint to dry, then wash the shirt.


I love that I was able to create something completely unique using a little bleach, water, and tape!


Disclosure: This post is a sponsored post paid for by 3M DIY, but the ideas and tutorial are my own.
This post is brought to you in partnership with 3M DIY. Learn how to work smart and be prepared at 3MDIY.com.

Content and/or other value provided by our partner, 3M DIY Starts Here
Follow 3M DIY on Facebook, 3M DIY on Twitter, and 3M DIY on YouTube.


Jenn "Rook No. 17"
Sunday 28th of October 2012
Michele, I love this simple and chic project. Beautifully done!
Crystelle Boutique
Monday 22nd of October 2012
I love it! My favorite? the gear you wore to make it....LOL!
Crystellehttp://www.crystelleboutique.com
Bonny Yokeley
Sunday 21st of October 2012
I've seen this on pinterest and have been wanting to try it but I haven't been brave enough. I'm glad to hear yours turned out so well. I'll have to give it a try one of these days!
WTFab
Sunday 21st of October 2012
Great DIY. Would love if if you linked up on my blog hop www.w-t-fab.com/search/label/bloghop. Also let me know if you'd like to follow each other!
Amy @ Positively Splendid
Saturday 20th of October 2012
Love this - that color is so bright and fun!