
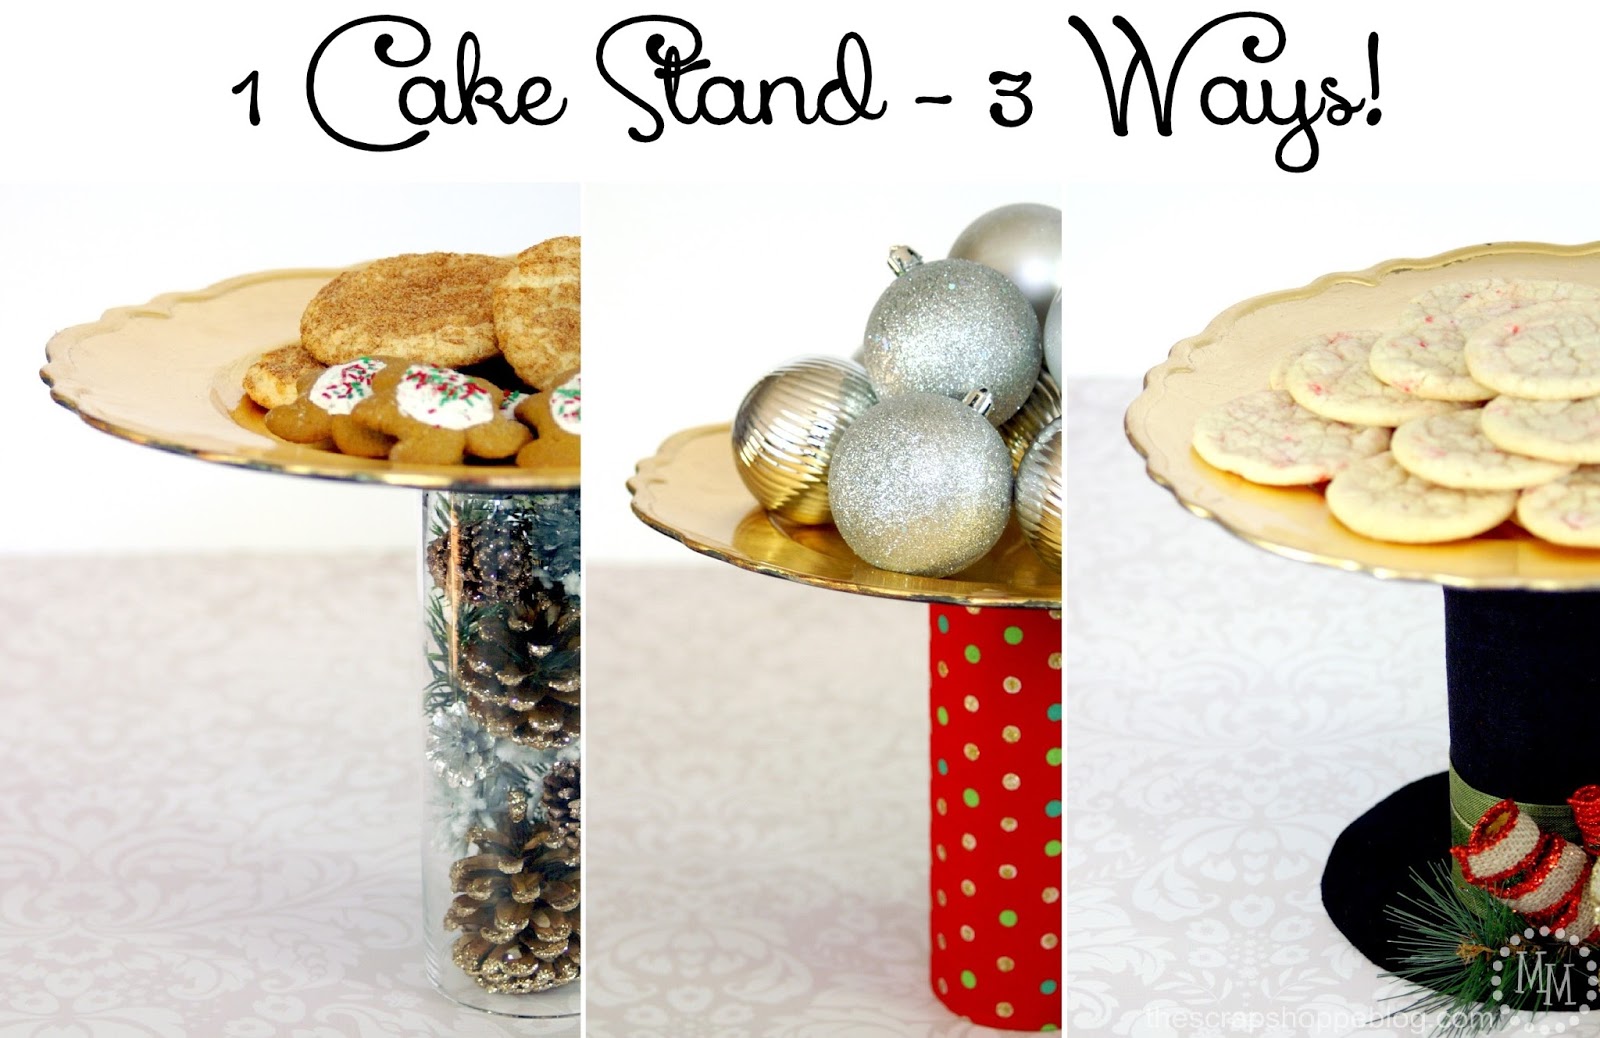
Entertaining for the holidays can be a lot of fun, but if you are on the hunt for the perfect centerpiece for your tablescape, look no further than this DIY Christmas cake stand dressed up 3 ways!
With just a handful of items you can create an inexpensive cake stand and dress it up for different occasions!
Cake stands are so fun to use for the holidays!
They are great for serving you favorite Christmas desserts and also make adorable centerpieces for your holiday table.
A downside of using a cake stand as your centerpiece is that they can be a little pricey.
And you may want different looks for different occasions.
That means purchasing even more cake stands.
Would you believe that the 3 cake stands above are all the same DIY Christmas cake stand dressed up in 3 different ways?
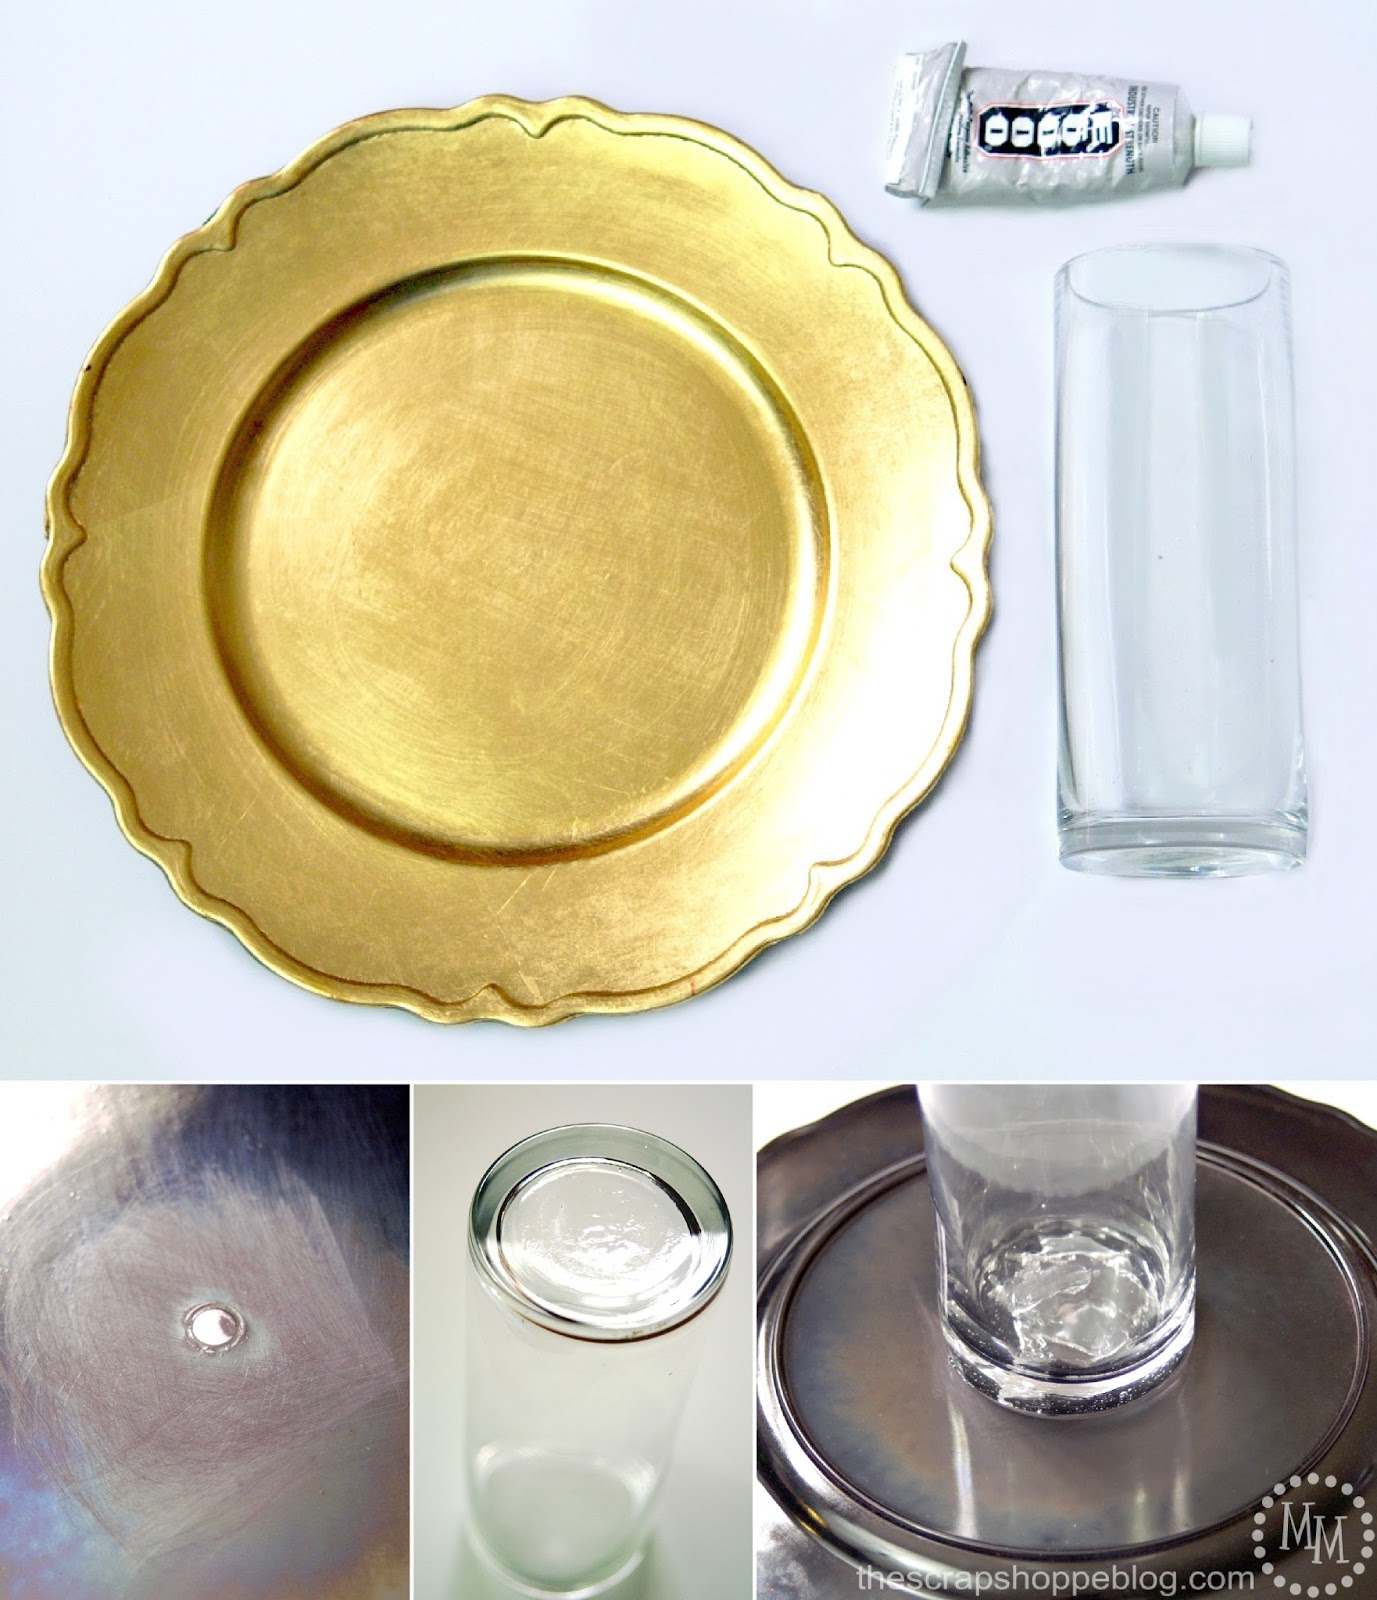
To DIY this cake stand you will need 3 things: a platter, a vase without tapered edges, and E6000 adhesive.
I’m using a charger because it is lightweight and festive, but you could also use glass or ceramic plates.
The vase I am using is ~3 inches in diameter and 8 inches tall.
It’s super thick and sturdy.
Perfect for this project!
Sand the bottom of the charger to give the adhesive something to grip to.
Clean the bottom of the vase with alcohol so that it is thoroughly clean of grime and/or price tag residue.
Apply the E6000 to the base of the vase and center it on the back of the charger.
Allow to dry 24 hours.
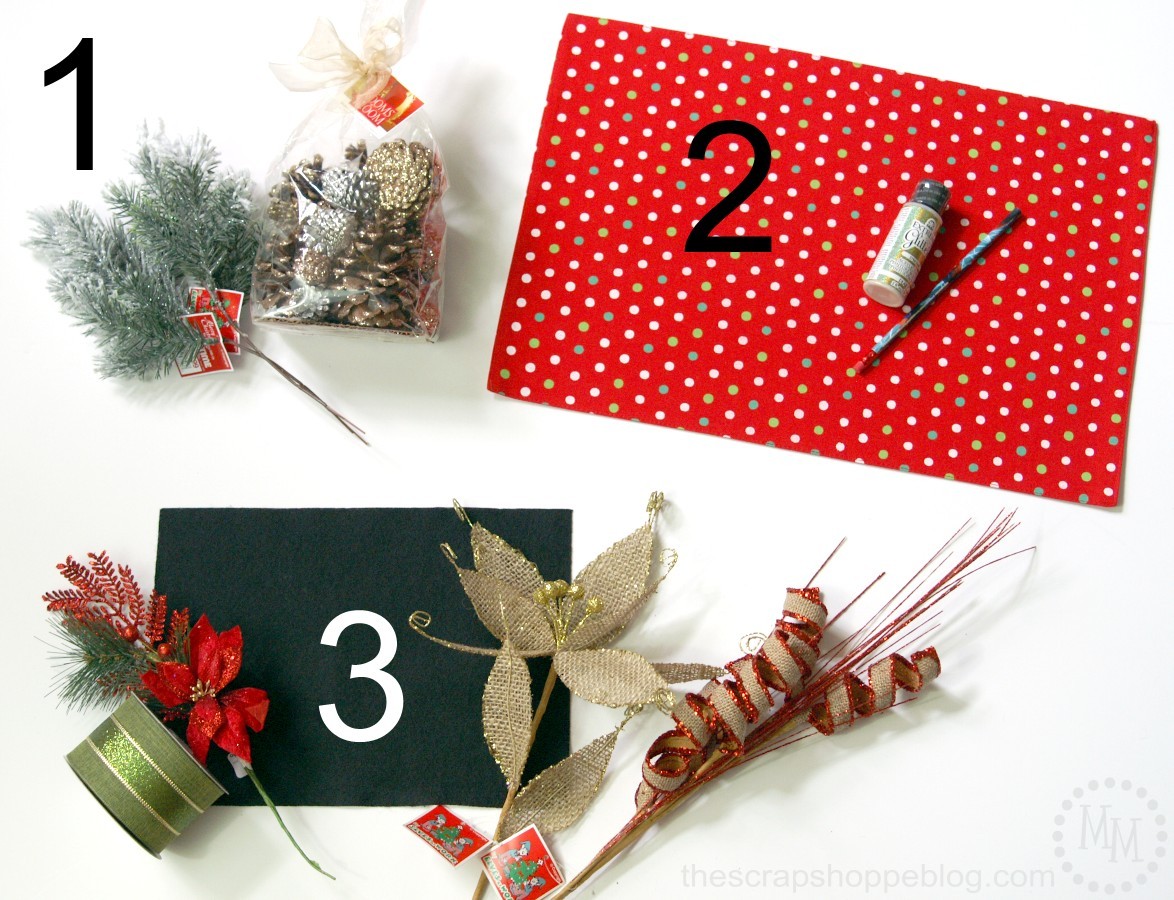
Now that we have a cake stand, we can start to dress it up!
I have 3 different looks to show you.
You could do one or all.
The price for any look ranges from ~$3.50 – $15.
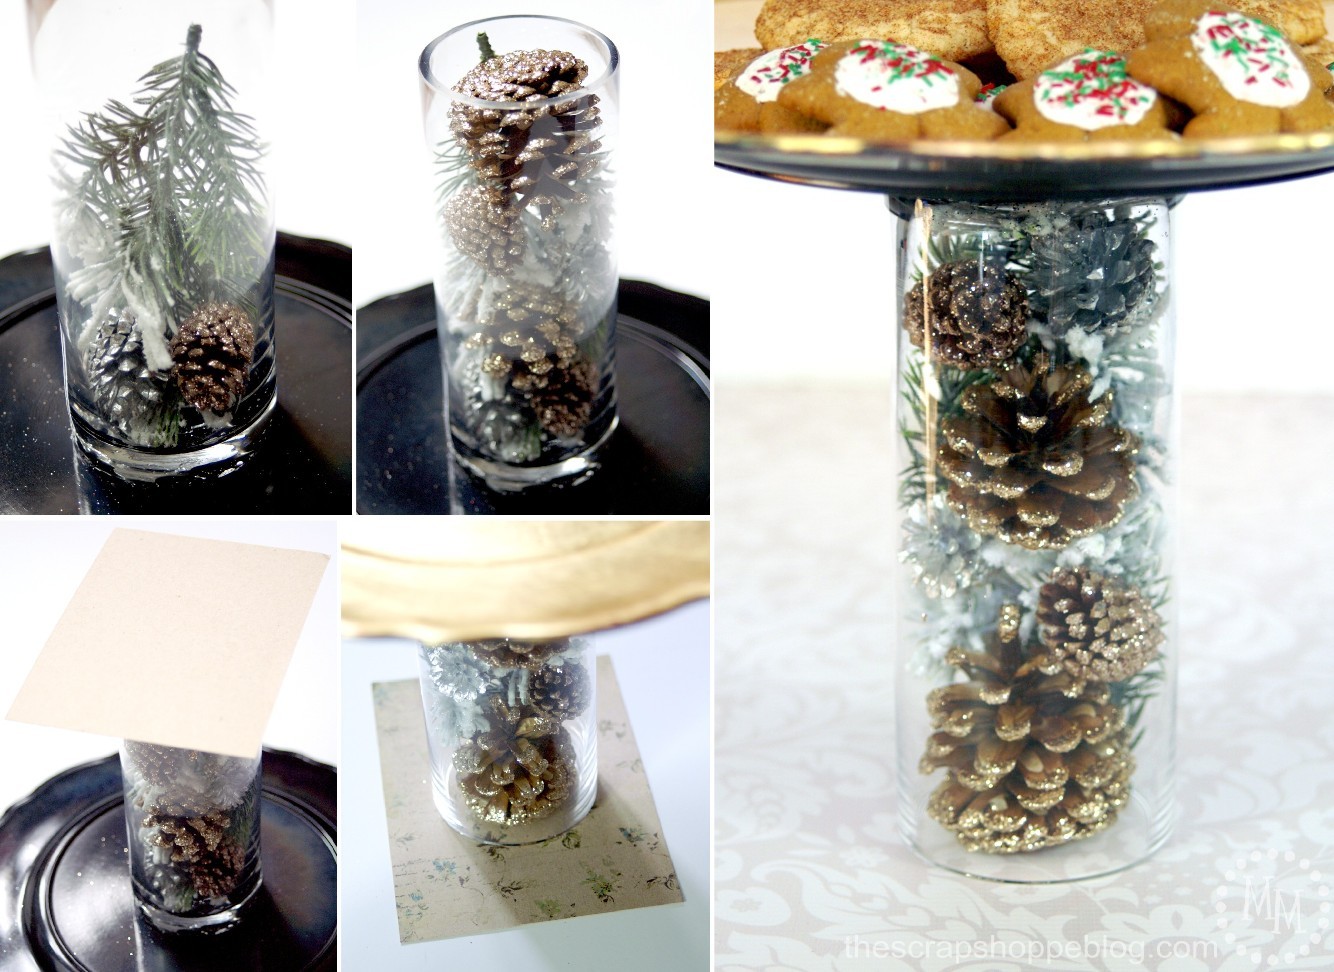
The first look we are going for requires a frosted pine pick and a bag of glittered pine cones.
The frosted pine branches should pop right off of the stems.
Place the cake stand upside down so you can add the items to the vase.
First, insert one of the branches upside down then add a couple of the smaller pine cones.
Add a second branch followed by more medium-sized pine cones.
Then add the third brand followed by a large and small pine cone.
Place a piece of scrap paper over the open end of the vase then invert the cake stand and slip the paper out from underneath it.

I love this look and think it looks great for every day.
Its also elegant enough for a fancy dinner party.
You will have half a bag of pine cones left over which you can use to decorate the rest of your tablescape.
The second look is by far the least expensive.
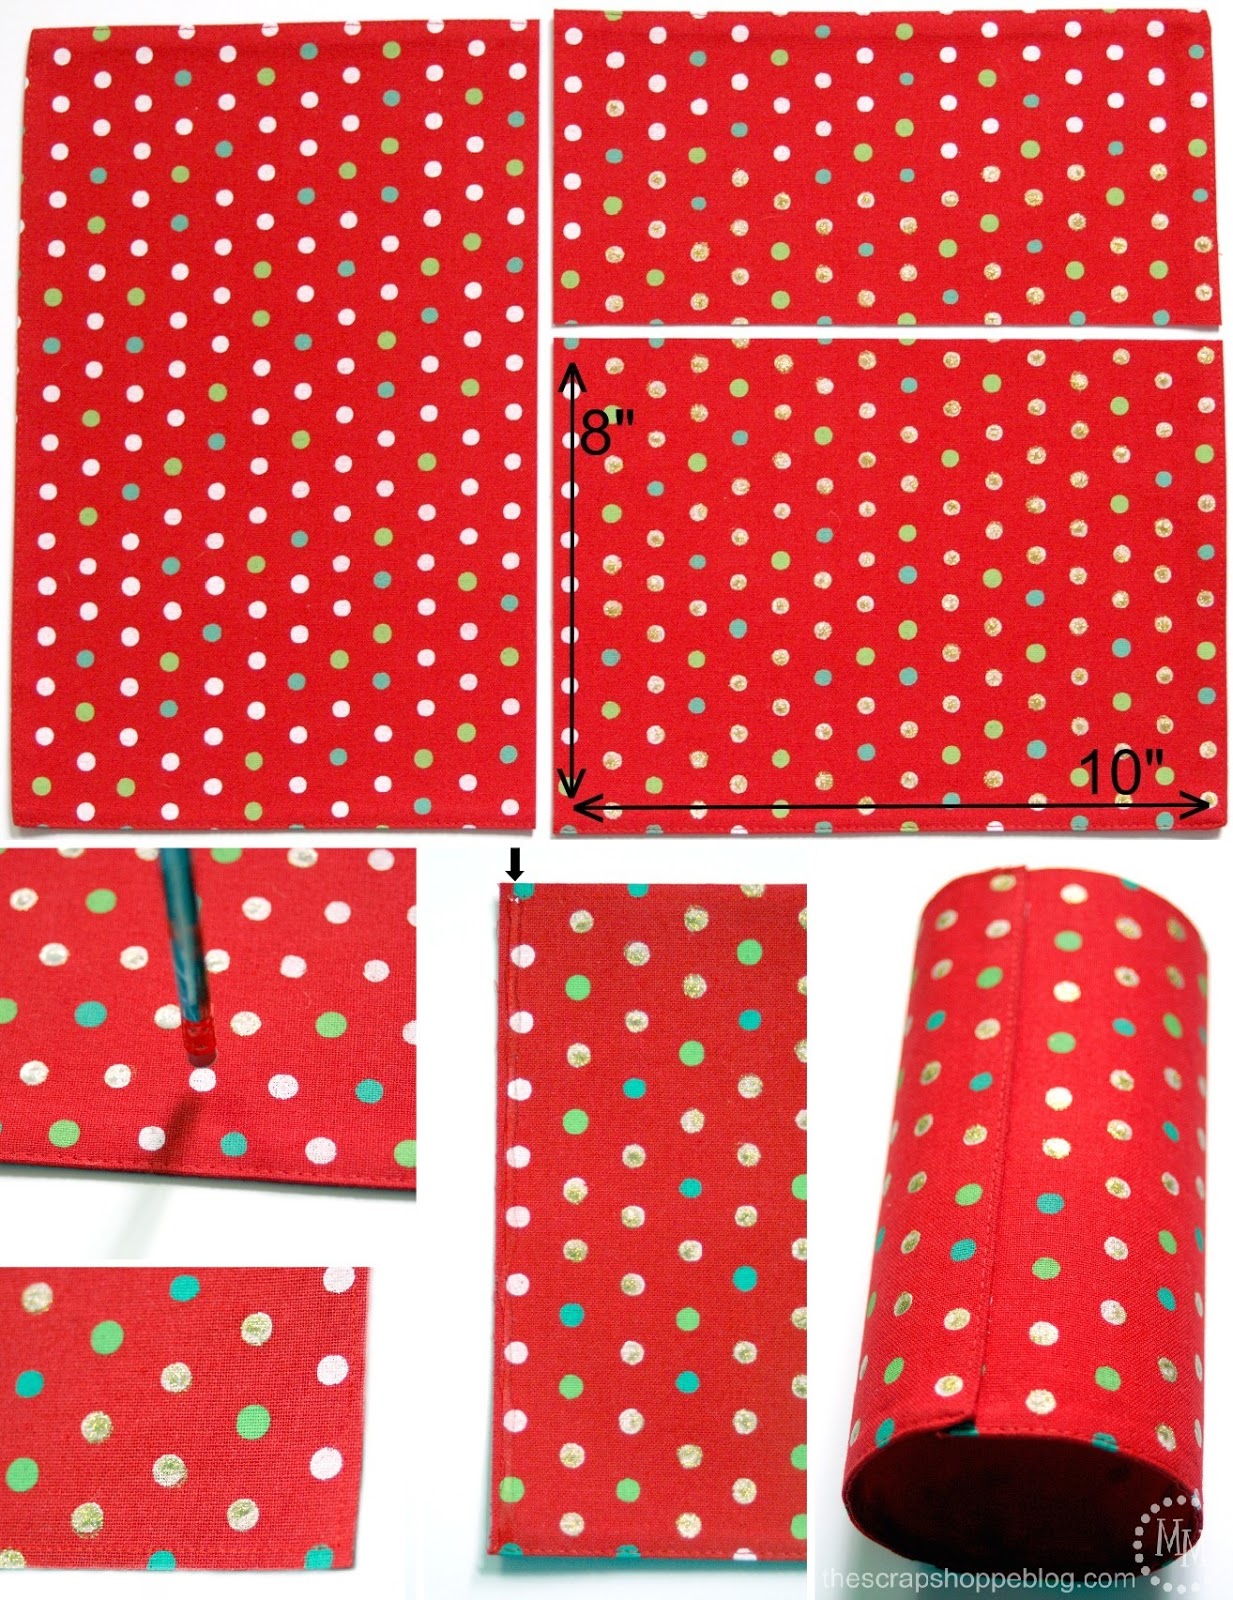
Start with a piece of fabric or, in this case, a festive place mat.
Trim the fabric to 8″ x 10″ or to fit the size of the base of your cake stand.
I just love the polka dots on this place mat, but to make it blend in better with the charger on the cake stand I decided to added a touch of gold to it.
Simply take the eraser of a new pencil and dip it in gold glitter paint and apply it to the white dots.
Once dry, run fabric adhesive along the 8″ edge of the fabric and wrap around to form a cylinder.
Slip the fabric wrap over the vase base.
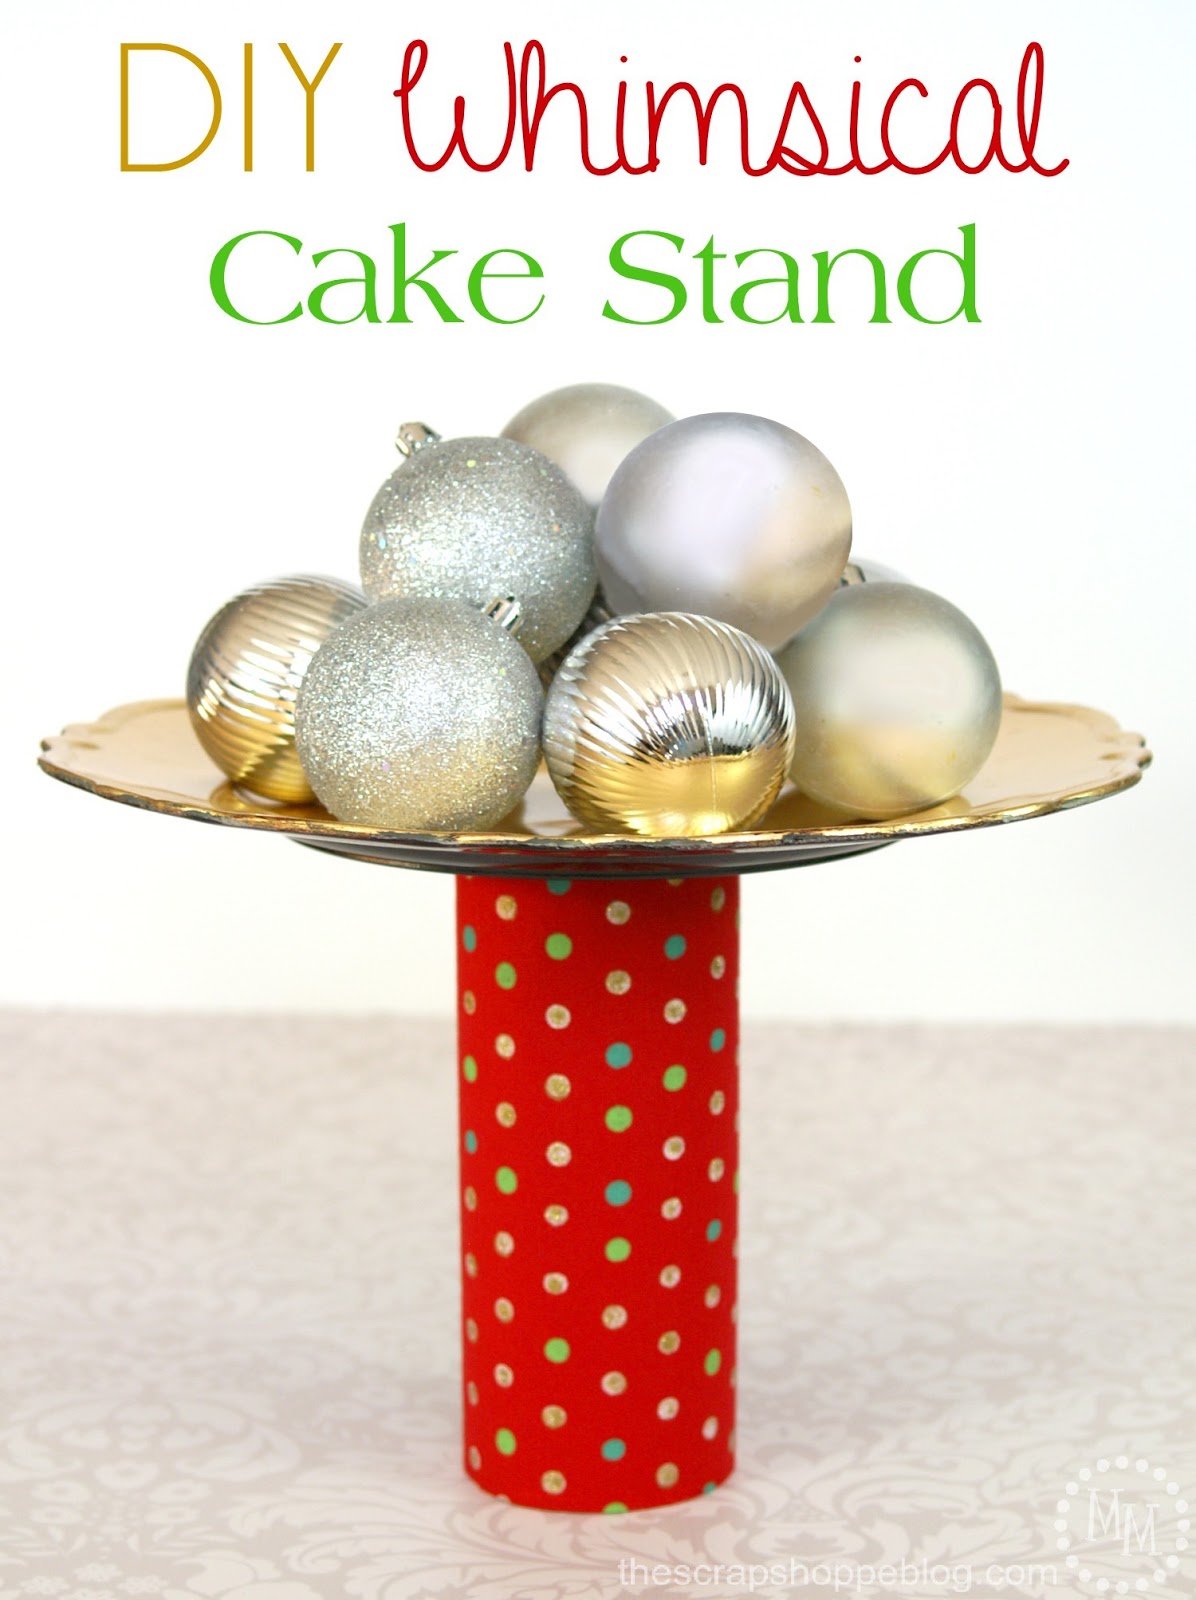
I call this the milk and cookies cake stand.
The whimsy of the wrap is perfect to set out for Santa’s special treats on Christmas eve!
And, of course, you can completely change the look with different fabric.
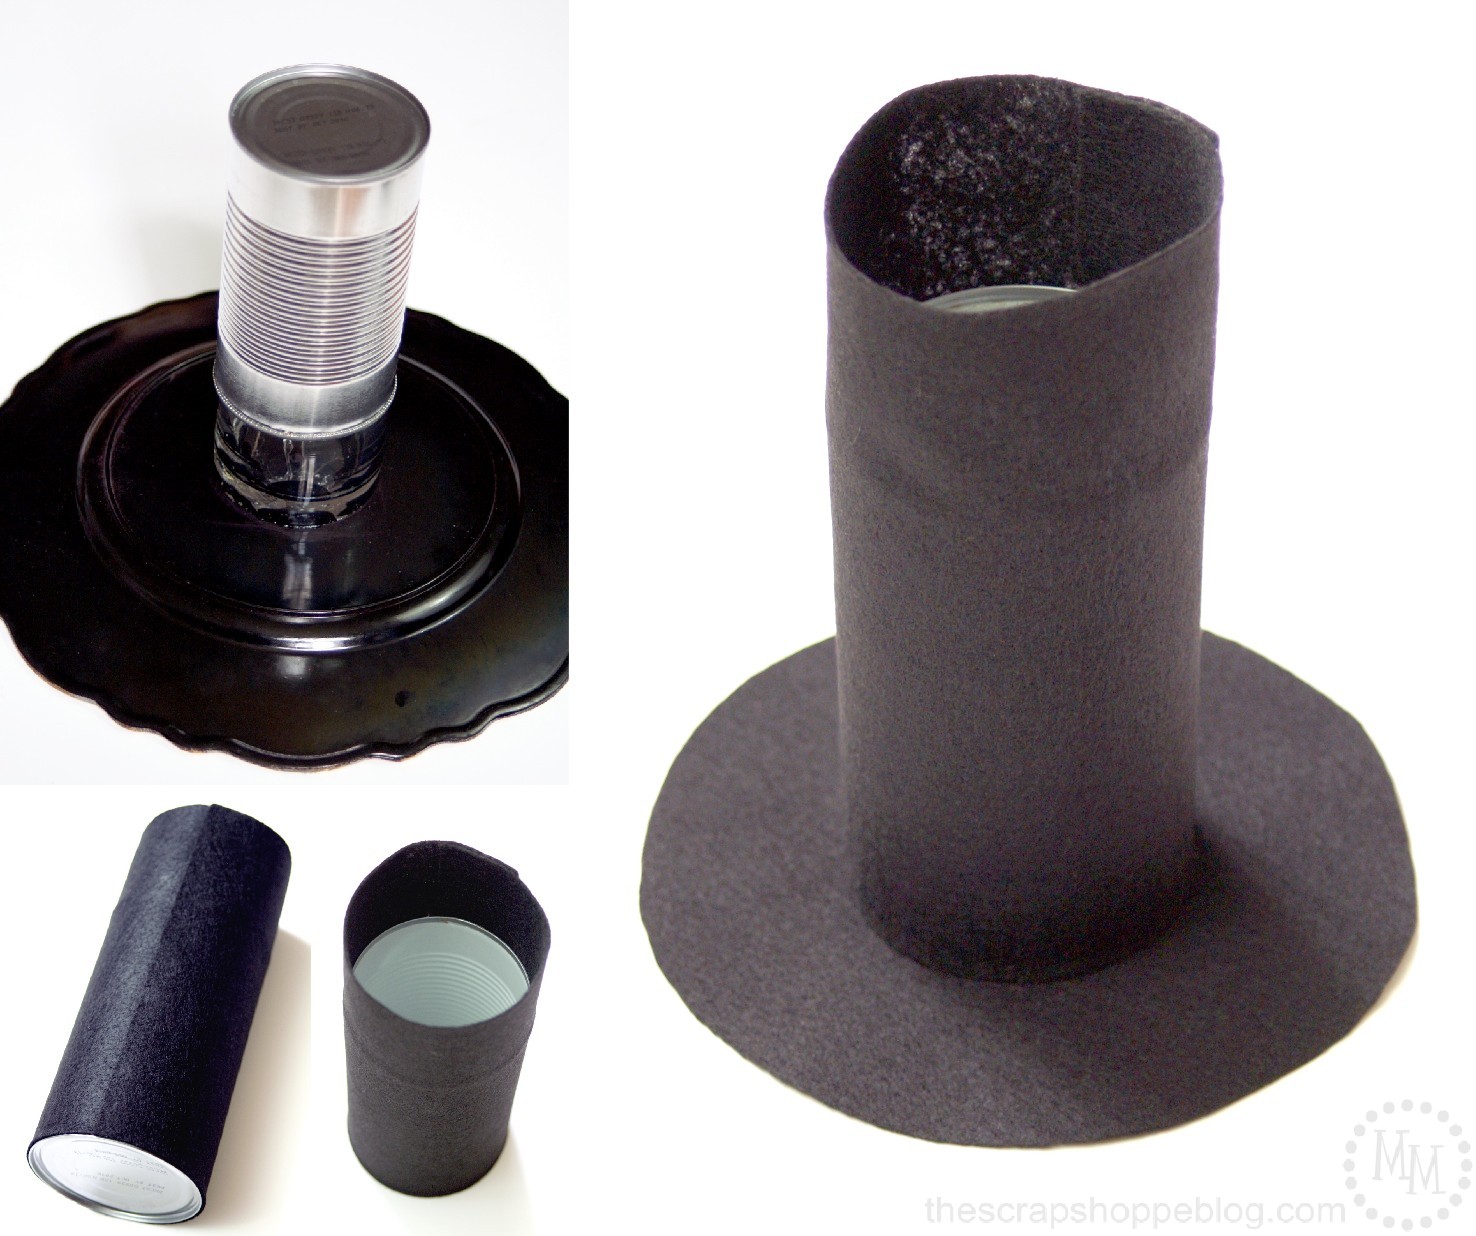
To make the snowman hat base you will need a couple of extra accessories: a tin can and black felt.
A large tin can such as the ones that baked beans come in is perfect for this!
The can fits perfectly over the vase.
Trim a sheet of black felt to 8″ x 10.5″ and wrap it around the can, gluing it in place.
Use a bowl or other round template to create the base of the hat with a second piece of black felt.
Glue the base of the hat to the bottom of the can.
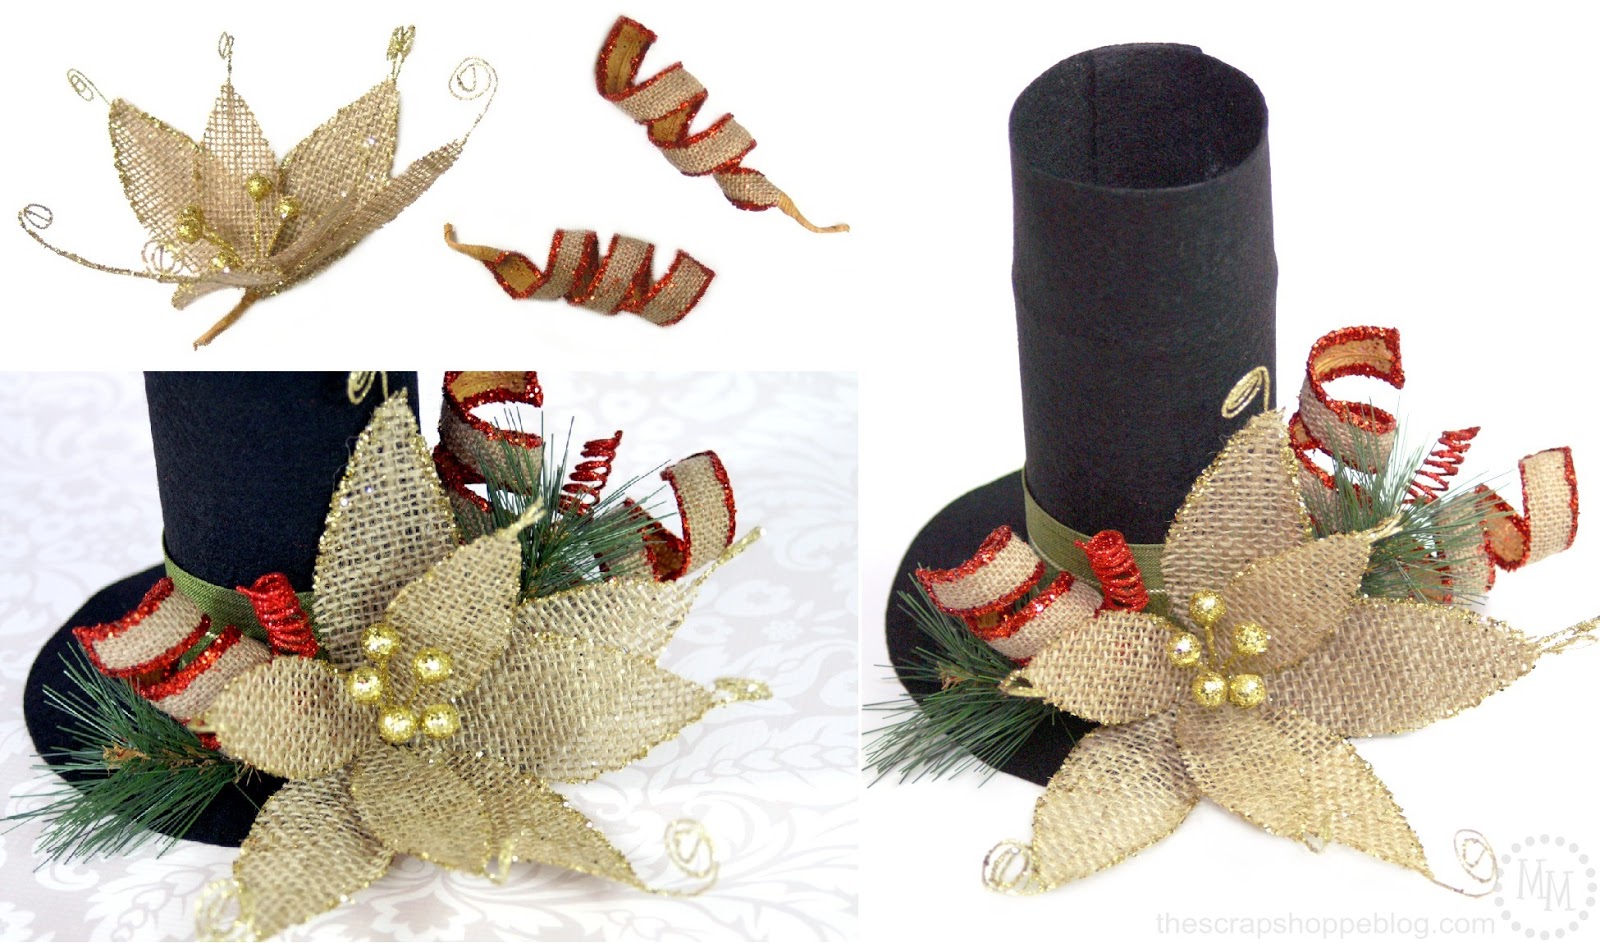
Now comes the fun part: decorating the hat!
I love these rustic burlap picks and knew they would be perfect for this project.
I also used a red poinsettia pick that I dismantled so I could use just the pine stems and red glitter curls.
Wrap the hat with a piece of ribbon and glue in place with a hot glue gun.
Trim the picks down with a wire cutter so that they are shorter.
You will still want them long enough that you can glue them to the hat.
I recommend figuring out how you want to arrange the all of hat accessories before gluing them in place.
Be sure to arrange them so that none of the stem bases show.
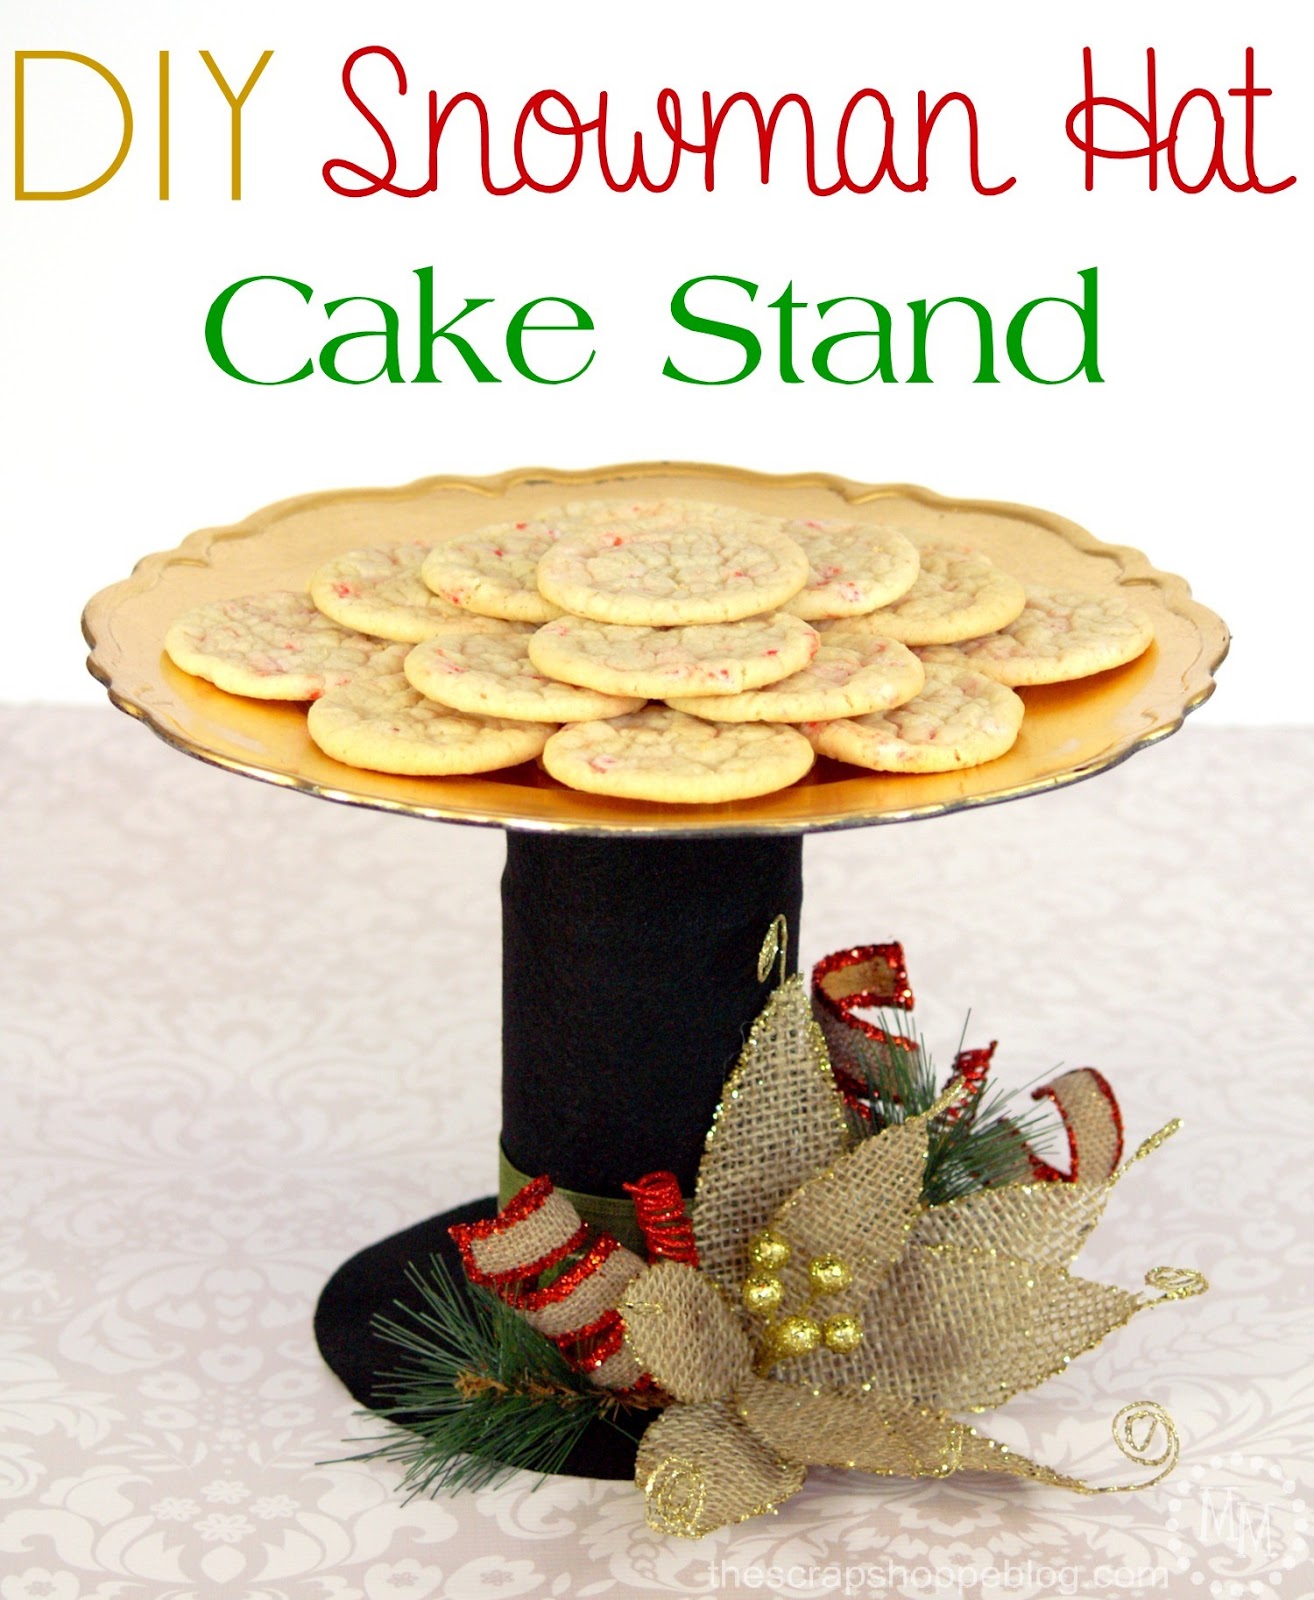
Slip the snowman hat over the vase, and we have accomplished the final look of the cake stand!
This one may be my favorite.
And it would be the perfect centerpiece for a Christmas party.

So depending on the look you are going for, you can create an expensive DIY Christmas cake stand and reuse it again and again with just a little dressing up!

>> See where I party! <<
This post was originally shared December, 2013.
Mary Beth
Saturday 21st of December 2013
I love these ~ I'm always looking for new ways to display cakes and cookies at parties, these would be perfect!
Randi~Dukes and Duchesses
Thursday 19th of December 2013
Those are such fun ideas ... might have to borrow them for a party I'm hosting tomorrow night!
Crystal
Thursday 19th of December 2013
super cute!! i love that you can change it. Love it!!
Beverly {Flamingo Toes}
Thursday 19th of December 2013
I just adore this Michele!! I don't have a ton of storage space so I love that you show three cute ways to use the same items! Genius. And they're all adorable but the hat is my fave!! :)
malia
Thursday 19th of December 2013
Love all of these but the hat is especially adorable!