
Learn how to build a brick patio from start to finish. It’s a great transformation of a space and not as difficult as you think!

Installing your own patio may seem like a daunting task, but it doesn’t have to be!
These days, pavers of all shapes and sizes can be purchased from home improvement stores along with the tools needed help with the install.
Today I’m going to show you how you can build a brick patio to give your outdoor space an instant face lift!

The exterior of my potting shed was just begging to become a sitting area.
The flower garden under the window tended to flood in heavy rain so growing things there just wasn’t ideal.
A DIY patio seemed like a fun idea to try!
(To see the complete before and after of the potting shed makeover be sure to visit the full potting shed makeover reveal.)

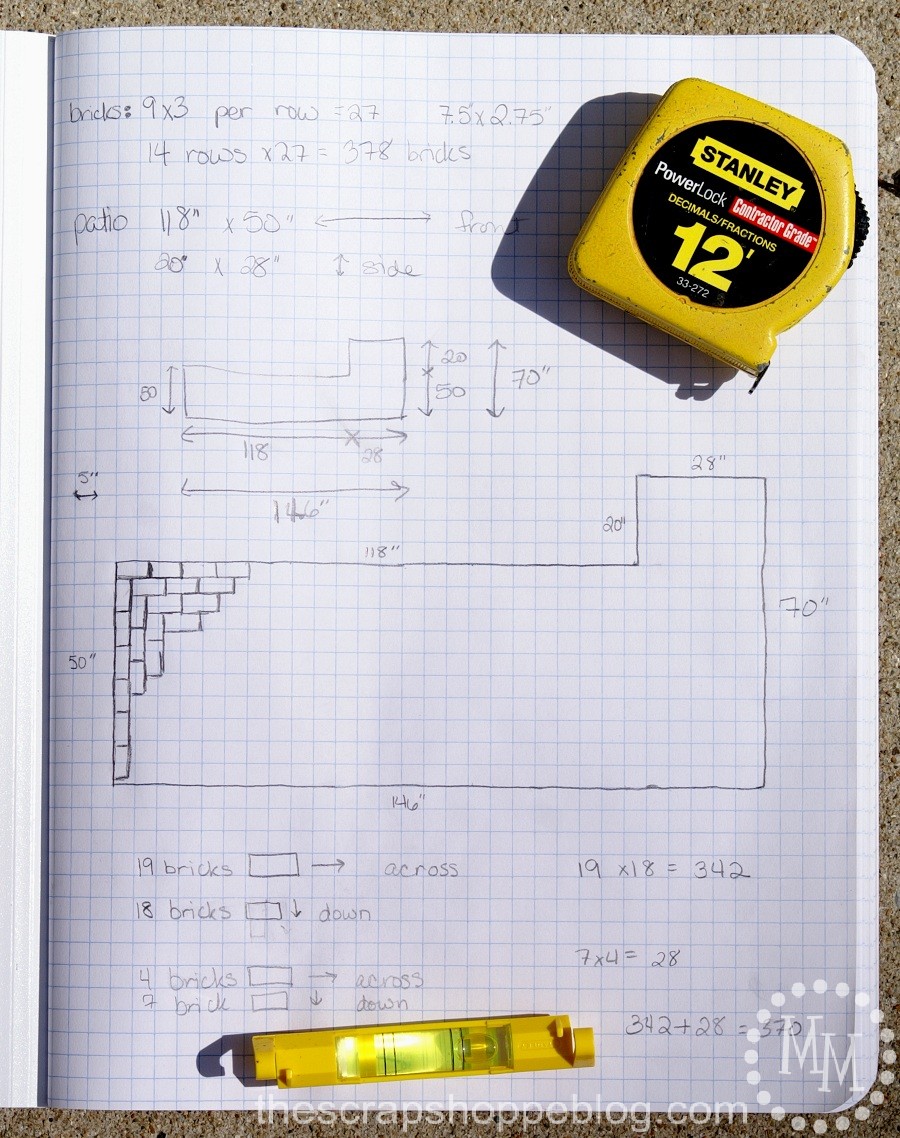
How to Build a Brick Patio: Measure


When we moved into our house 10 years ago the builders left behind a pallet of bricks, extra that ended up not being needed.
They have sat in our backyard all this time just waiting to be used for a special project.
This patio was that project! Not to mention it was going to save us a good amount of money not to purchase pavers.
I did a rough calculation of how many bricks we had and determined how large of a patio I could create.
I wanted to be sure I could take it along the side of the patio a small bit to make a place for a rain barrel.

How to Build a Brick Patio: Digging

After removing the rock border from the former garden and doing some mild clean up of the area, it was time to start digging.
We needed to level the space and figure out how deep we needed to go for the bricks to lay relatively flush with the existing sidewalk.
We used twine and a level made specially to sit on twine to mark and level the area to dig.

How to Build a Brick Patio: Tampering

After digging, its time to put add the paver base.
You can find paver base right next to the paver sand at Home Depot.
For this space we used 12 bags of paver sand and it was ~1-2″ thick after being packed down.
To pack down the base you typically use a tamper.
We didn’t see the point of running back to the store and dishing out $30 for a tool we may not use after this project, so the hubs DIY’ed a quick and dirty, but super efficient, tamper by arranging 1×4’s around a heavy duty mallet.
The bottom was 3 1×4’s side-by-side and, with the weight of the mallet, did a great job of pounding the paver base smooth and level.
Afterwards he was able to easily dismantle the homemade tamper.

How to Build a Brick Patio: Bricks

It’s finally time to lay the bricks!
Now comes the confession of the downfall of the free bricks (and using bricks as opposed to pavers).
We discovered quickly that the bricks were not all uniform in length. So any hopes I had for making a cute pattern with the bricks went right out the window.
Instead, we did a border of bricks then simply staggered the rows across the patio.
We tapped each brick down with a rubber mallet.
We purchased a special masonry blade (~$5) for the circular saw to cut the bricks for the edges of the patio.
I highly recommend wearing safety goggles and a face mask when cutting the bricks! It is very messy and creates a lot of dust.
Also, cut the bricks in an area you don’t mind turning red from the dust. We cut them in the grass, and the spot wasn’t noticeable after a couple of rains.

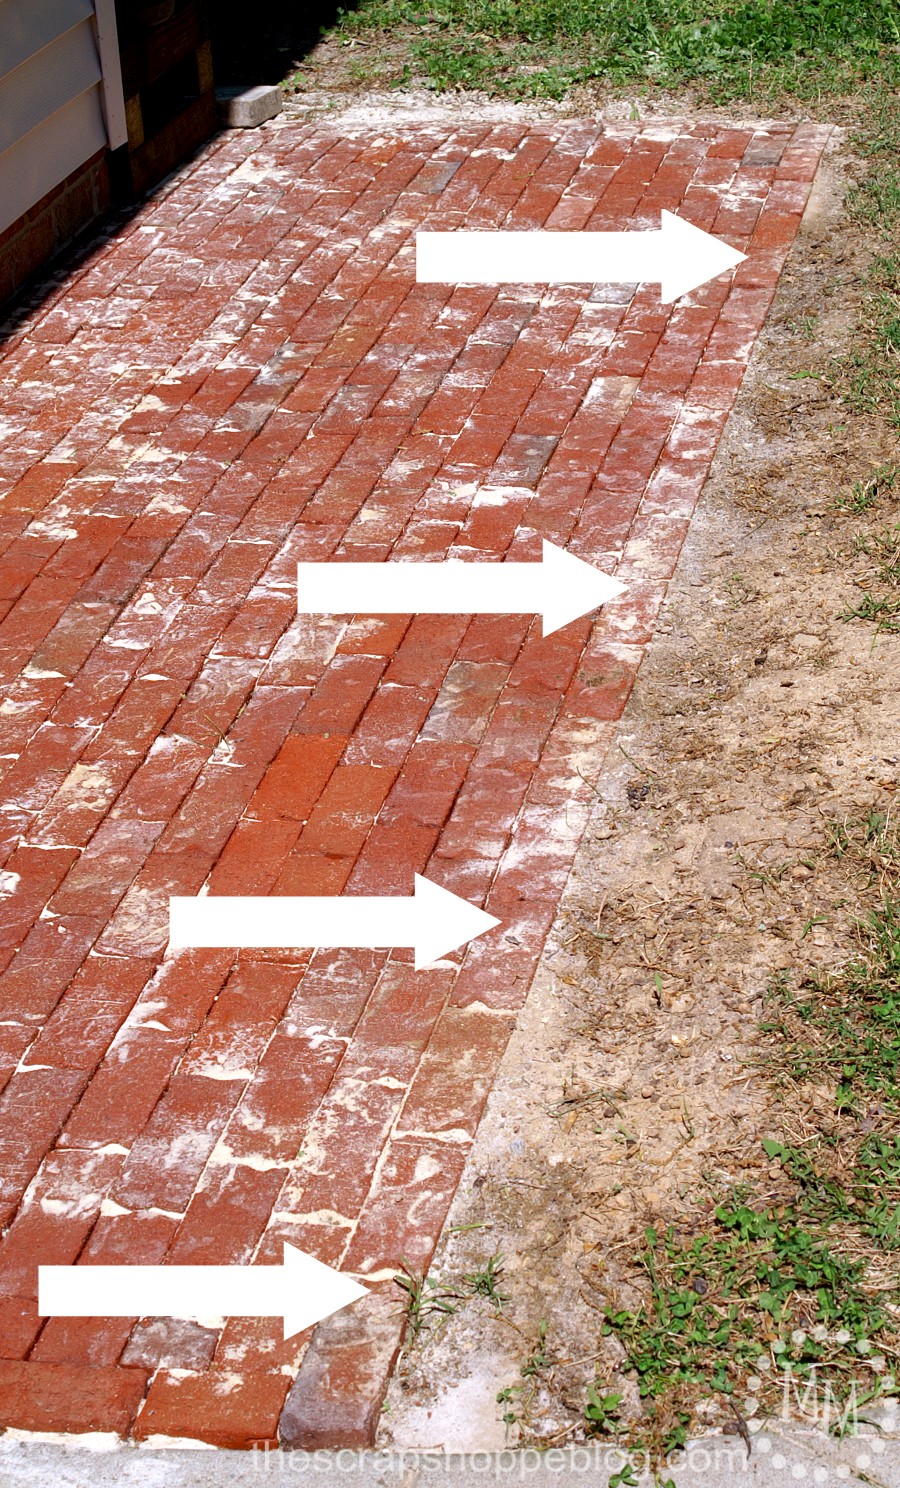
How to Build a Brick Patio: Sand

Now comes the most tedious part of making the patio.
Adding the sand!
Spread a thin layer of paver sand over the entire patio then brush it back and forth over the surface with a push broom.
Once you think you’ve filled all the cracks, sweep the sand to the side.
Spray the bricks with the water hose pushing and packing the sand further into the cracks between the bricks.
Allow to dry then repeat the entire process. Over. And over. And over. And over.
Repeat until no more cracks appear between the bricks after wetting the patio.
In total we used 2 bags of sand.
I mentioned earlier that this area used to flood during heavy rain when it was a garden.
Although the space is higher now with the bricks, I was still afraid that dirt might get washed over the patio.

I used metal edging from Home Depot and installed it around the front and sides of the patio, leaving ~1 inch above ground.
To prevent anyone from tripping over the edging, and to dress it up a bit, I planted 10 mounds of dwarf mondo grass in front of it.
Now I have a super fun little patio perfect for sipping on my morning coffee or watching the kids play in the yard!
Check out the complete before and after of the potting shed makeover!

>> See where I party! <<
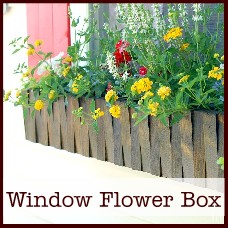
If you enjoyed this post you might also like this DIY Flag Planter.

Don’t miss any of the other potting shed makeover projects!


Sheri
Sunday 1st of July 2018
Great project! Thanks for sharing at To Grandma's House We Go DIY, Crafts, Recipes and more Link Party! Pinned!
Theresa @DearCreatives
Thursday 16th of July 2015
Pinned, shared & featuring at the party. Thanks for joining in & hope to see you again this week!
Bethany @ The Southern Couture
Saturday 11th of July 2015
I always admire people that can do things like this. It seems so complicated but with step-by-step directions and pictures it seems doable. Thanks so much for sharing at Motivational Monday! I can't wait to see what you have to share next week too.
Bethany from The Southern Couture
Paula
Saturday 11th of July 2015
What a gift that they left those pavers because they are super expensive. You did an awesome job. Wonderful post! I would love it if you would share it at our WIW Linky Party! I hope you can join us!
Paula ivyandelephants.blogspot.com
Kristina & Millie
Wednesday 8th of July 2015
wow perfect timing! i was talking to the hubby about making a little sippin' porch and here you went and made one! perfect inspiration to get me moving on the project :) thanks for sharing with Snickerdoodle Sunday!