

Surprise, y’all! It’s another Halloween wreath!
What can I say? I can’t get enough!
But this one is in mini form so I don’t need any extra doors to find for it to hang on.
For this project I am sticking with one of my very favorite crafting media: paper!
There really is SO much you can do with paper! Come along, and I’ll show you how to make this adorable Mini Ruffled Paper Halloween Wreath! I even have a template you can download to make that fabulous bow.
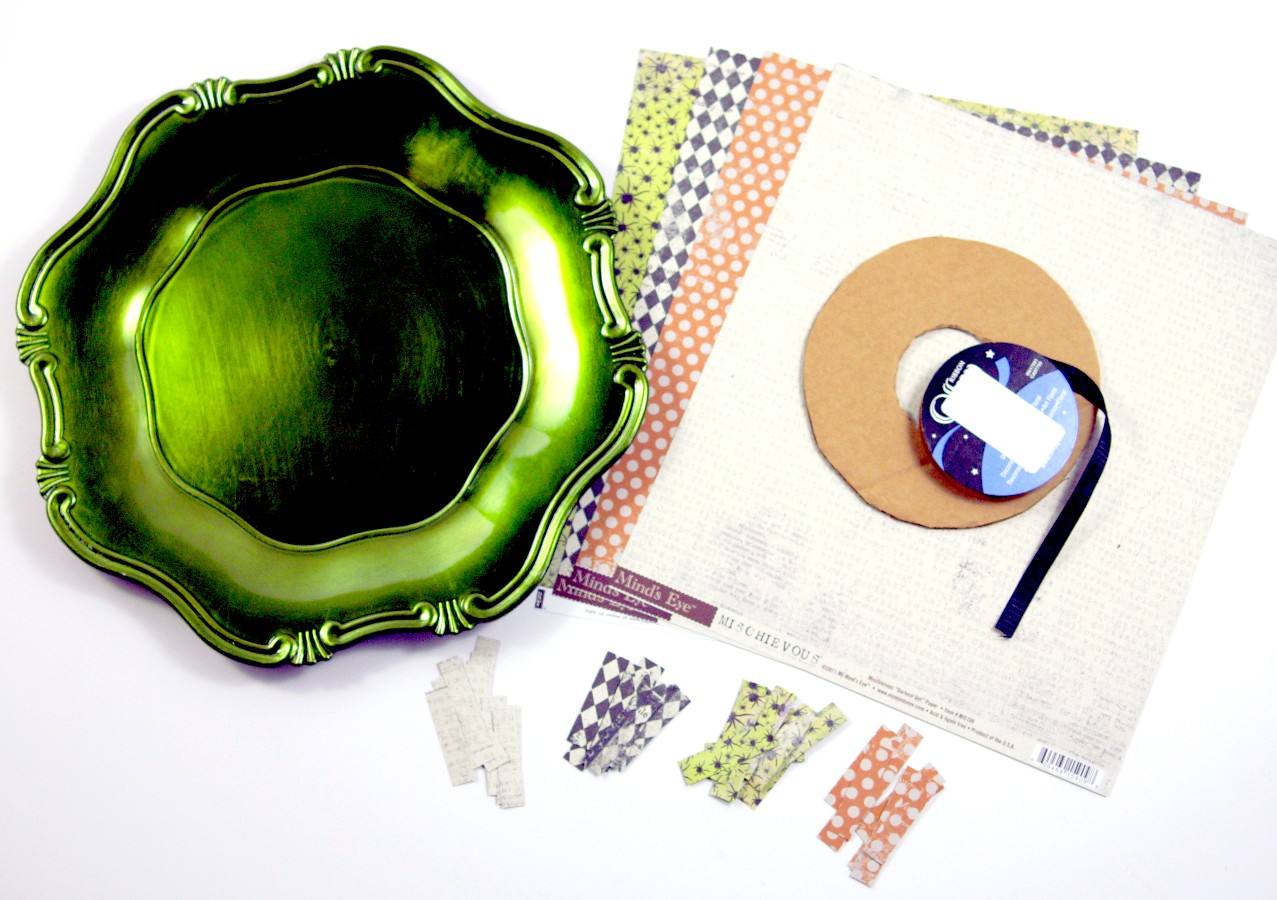
You only need a few basic supplies to make this mini wreath.
A spooky charger: these are so inexpensive and easy to find! This one is from Michael’s.
4 sheets of Halloween scrapbook paper (doublesided is awesome!)
Thin black ribbon
A homemade cardboard wreath frame (6″ across total with frame itself being 2″ wide)
Small doily (~3″), black ink, stapler, & adhesive (all not shown)
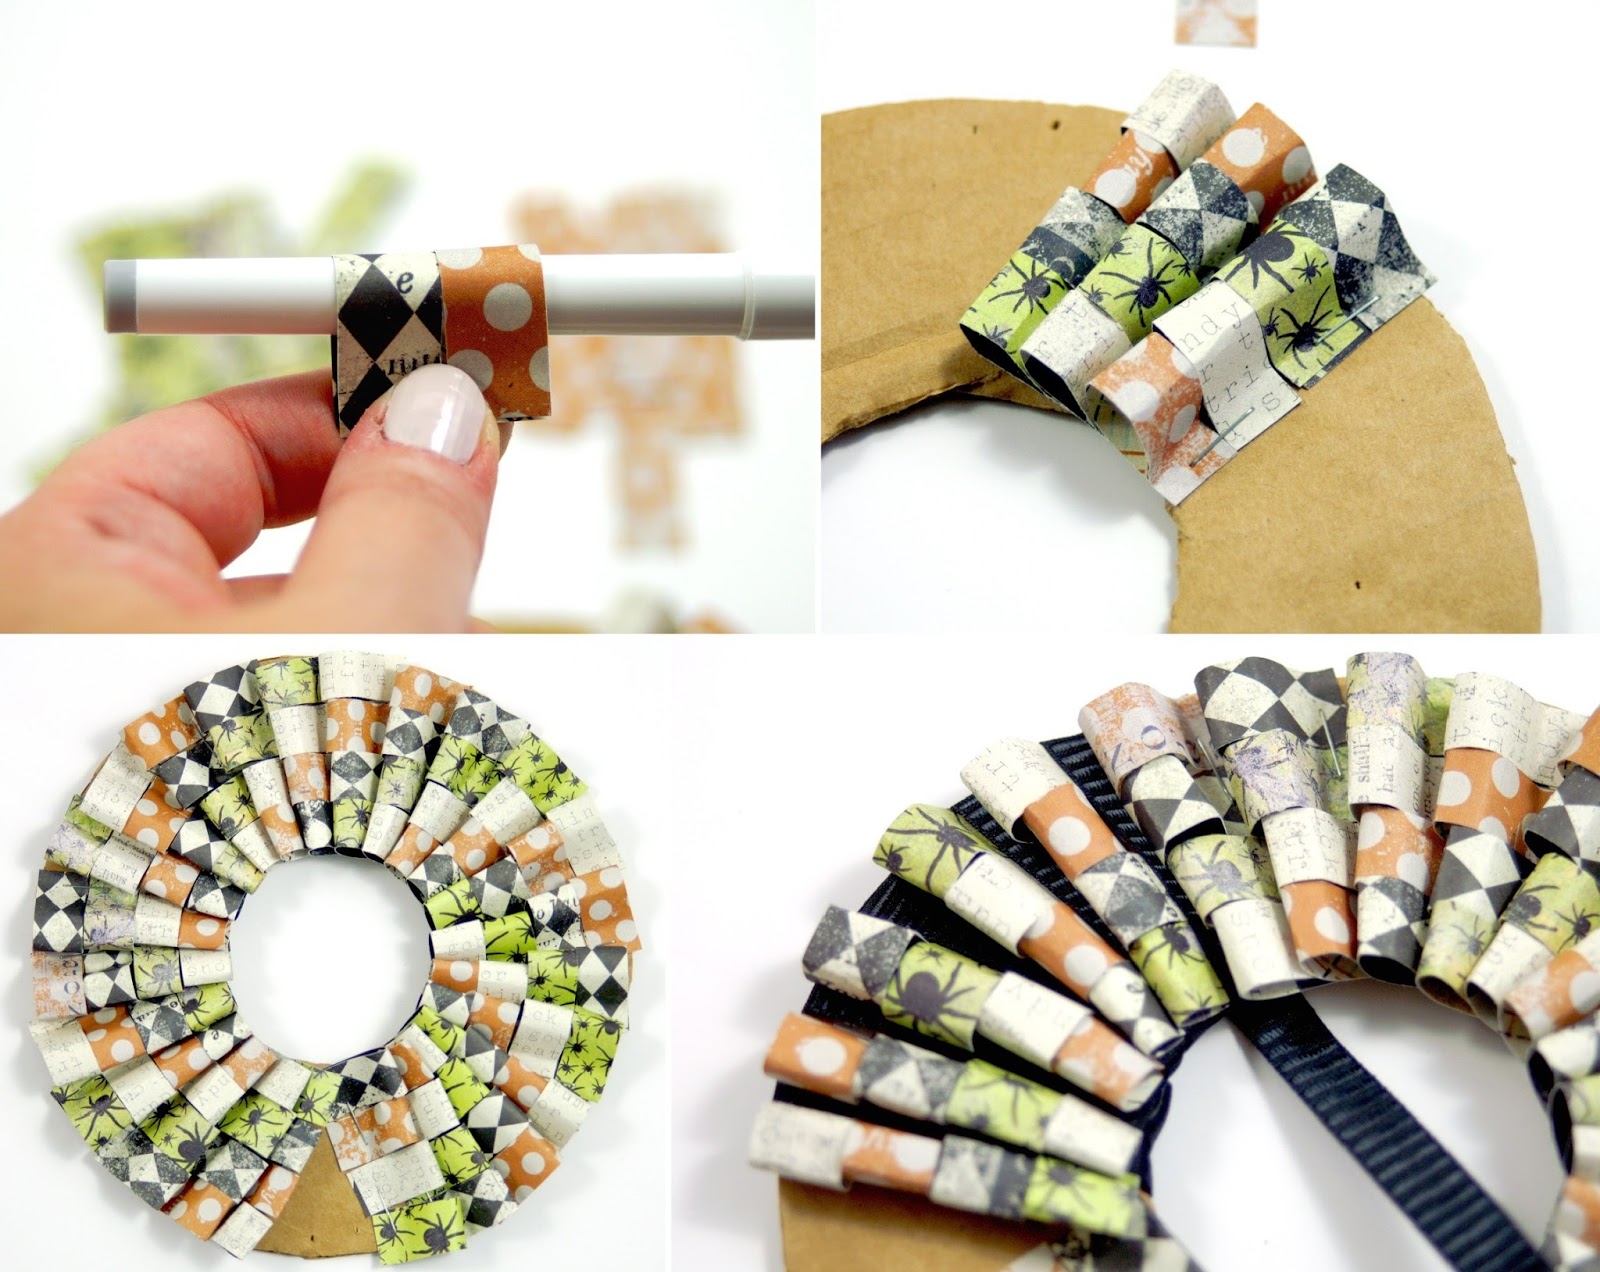
Cut the scrapbook paper into 0.5″ x 2″ strips.
Wrap the pieces around the a pen or marker to give them a rounded shape.
Staple the strips to the cardboard wreath frame in overlapping rows of four. This gives the wreath a ruffled look.
Don’t worry if you can see the staples – we’ll fix that…
Continue adding rows of the rounded paper until the wreath frame is nearly full. At this point you will discover that it’s difficult to staple more paper to the frame without “smooshing” your first row of paper. It’s all good! Just stop adding the paper. We’re going to cover this area up later!
Tape the ribbon to the back of the frame and begin wrapping it between the rows. This will both cover any staples from being shown and give the wreath a fun look. Once you get to the area of exposed cardboard, simply continue wrapping the ribbon around the frame to cover it up.
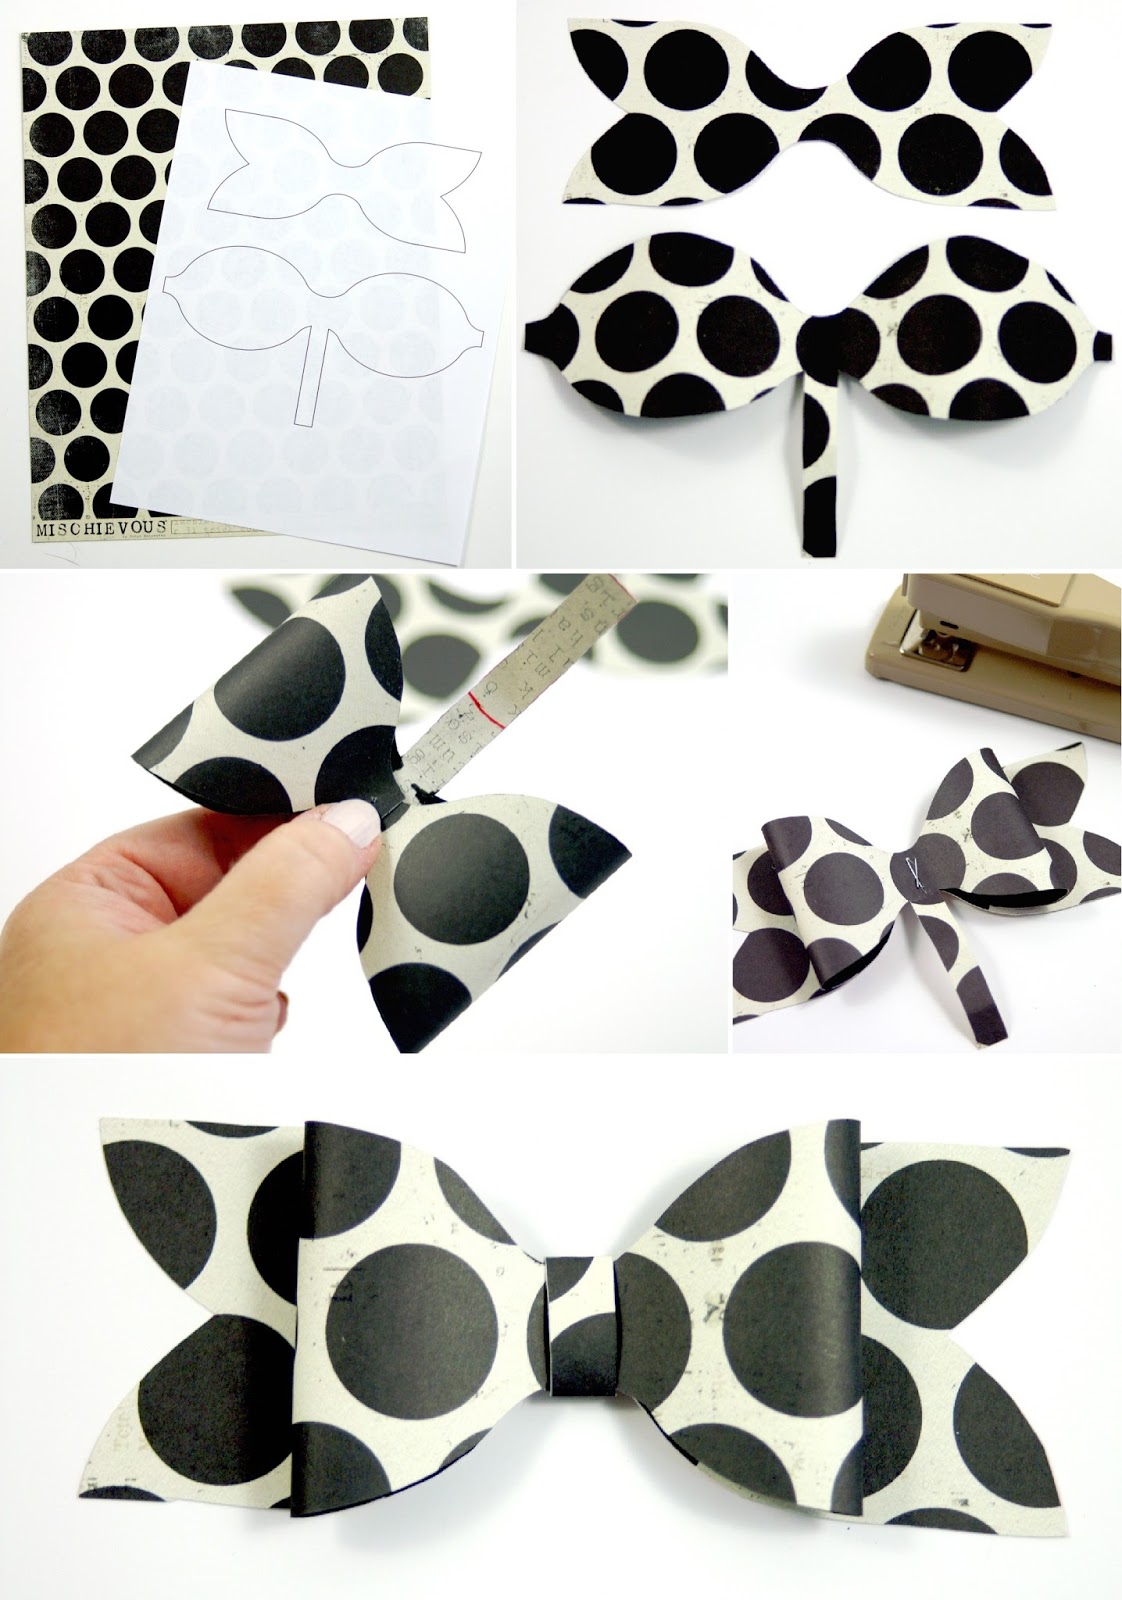
Print out the bow template. Cut it out and use it to trace the bow onto a piece of scrapbook paper and cut it out. This is where the doublesided paper comes in handy! I used the back of one of the sheets used to make the little strips for the wreath.
Take the piece that looks like it has a tail. This is the top of the bow. Fold the ends over to the middle of the paper. Starting to look like a bow? Place the bow face up on top of the other piece you cut out.
Now you have several options of attaching these pieces together. You can glue them, poke a hole in the middle and keep together with a brad… Since we already have the stapler out, I simply stapled the pieces together.
Take the tail and wrap it around the center of the bow, and adhere the end to the back of the bow.
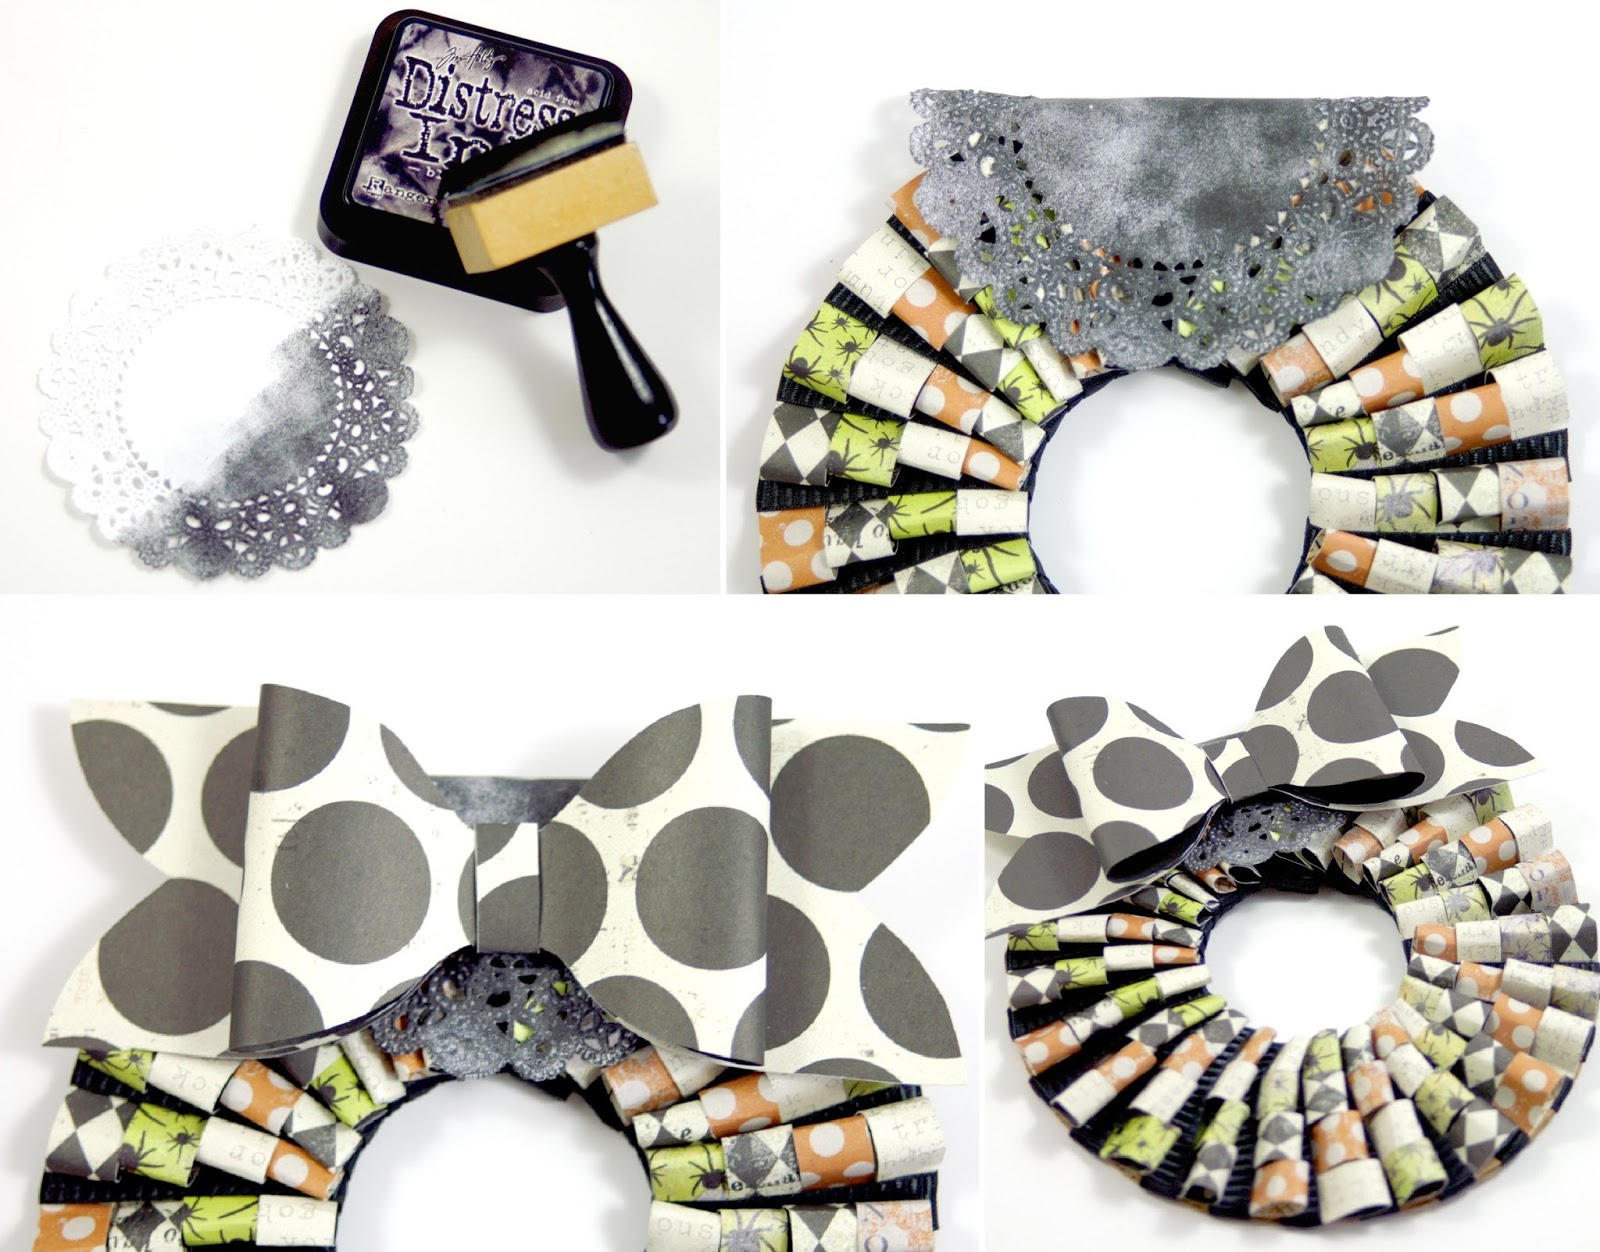
Make the doily black by daubing it with the blank ink.
Fold it over the empty space on the wreath that didn’t have the paper. Adhere it to the front and back of the wreath. Apply adhesive to the back of the bow and center it on the doily.
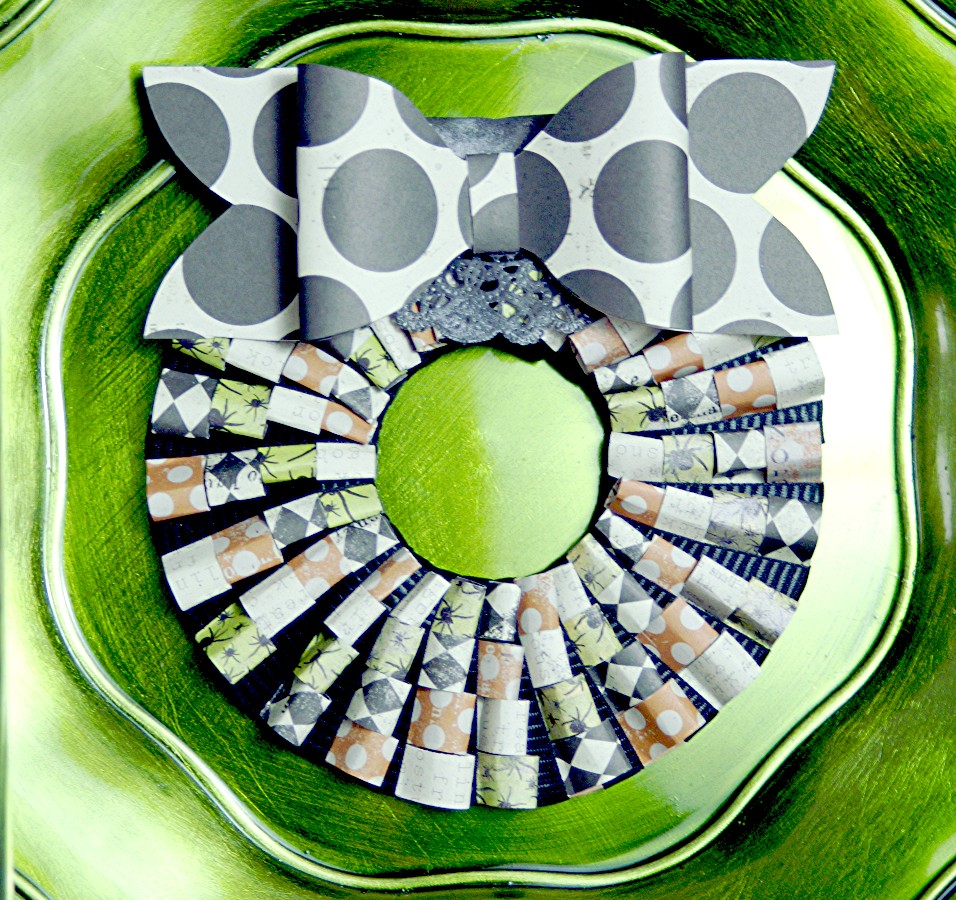
Attach the wreath to the center of the charger.

It’s spooky but cute! I attribute that to the giant bow.
Do I dare call it spooky chic? 😉
Linking up to Flamingo Toes, Today’s Creative Blog, Tidymom, My Repurposed Life,
Tatertots & Jello, Serenity Now, and other great parties found on my party page.

Jann Olson
Wednesday 12th of September 2018
I think they would be so cute hanging on the back of chairs! Thanks for sharing with SYC. hugs, Jann
Kristen
Monday 10th of September 2018
This is so cool...on my first look I thought you used fabric or napkins. Didn't dawn on me that it was scrapbook paper!
Victoria @DazzleWhileFrazzled
Thursday 6th of September 2018
I like chic-y cute too! Would look great on a tablescape, although it would take time to make one for each plate. Visiting from Share Your Style party.
Cathy Sokolowski
Sunday 2nd of September 2018
What a fun idea! I will definitely be making my own. Thanks for sharing your idea!
2dishingdivas
Tuesday 27th of October 2015
Love this! Very cute and looks versatile enough to be able to make one for each season, changing out colors and patterns!