
This painted Thanksgiving pumpkin is the perfect centerpiece for your fall decor.
This is a sponsored post on behalf of DecoArt. As always, all ideas and opinions are my own. This post contains affiliate links.

Fall is my favorite season so it’s no surprise I love decorating for it.
Come November my house is full of bright colorful leaves, pumpkins, and all things harvest.
Today I am combining all these things to create a super festive centerpiece for my Thanksgiving table.
This painted Thanksgiving pumpkin is the perfect centerpiece for my fall table!

Supplies:
Metallic Lustre – Iced Espresso
Metallic Lustre – Brilliant Turquoise
Faux Pumpkin
Not shown: sponge brushes, scissors, sisal twine, cardstock, gold pen, small flower embellishments, brown paper-wrapped wire

The Metallic Lustre paints look kind of like cake frosting in the jars and are applied with sponges or soft cloths.
Follow directions on the container for application.
I found that 2 coats were necessary for perfect coverage.
Paint a circle of the Brilliant Turquoise large enough to hold one of the large gold deer silhouettes from the Decou-page papers.
Paint the rest of the pumpkin with the Iced Espresso and the stem with Gold Rush.
Cut out a large deer silhouette from the Decou-page paper and Decou-page it to the center of the turquoise circle.
And then start embellishing!
I added some small white paper flowers to the deer’s antlers then added some color to them with the metallic paints.
Outline the turquoise circle with some sisal ribbon by hot gluing it on.
Add long strips of the brown Decoupage paper to the pumpkin with Decou-page.
I also accented the Iced Espresso with little bit of the Brilliant Turquoise by sponging on little swipes of the paint.
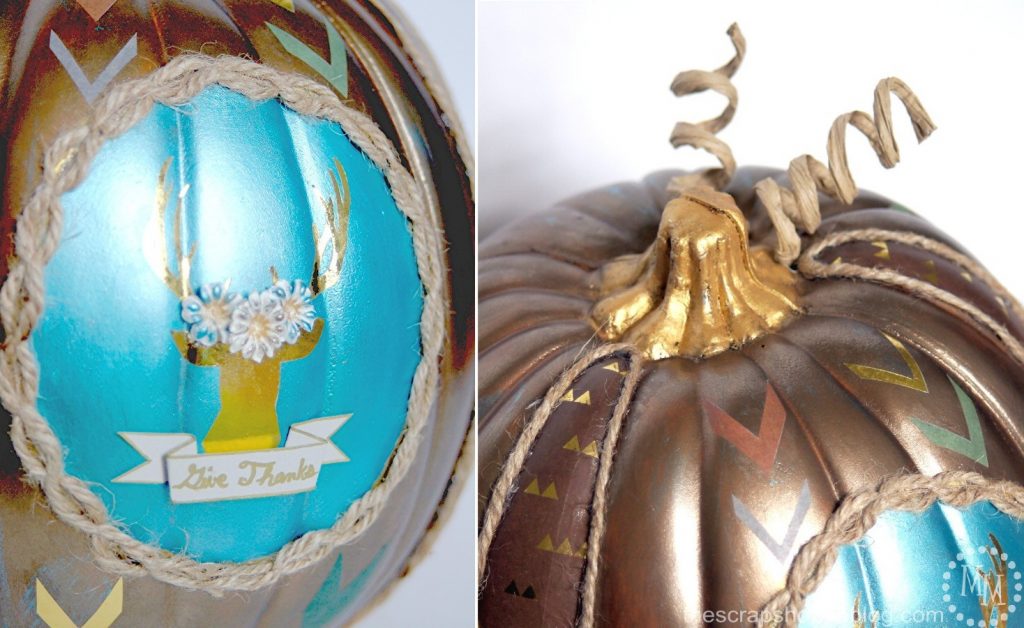
Make a banner out of cardstock for your favorite fall sentiment and hot glue it to the bottom of the deer silhouette.
Cut out the arrows on one of the Decou-page papers and Decou-page to the pumpkin.
Outline the strips of brown Decou-page paper with sisal twine by hot gluing it to the pumpkin.
Add some curly cues to the stem with paper-wrapped wire that’s been wrapped around a fat pen or pencil.
Poke holes in the pumpkin to slip with wire into.

Stand back for a moment and admire the cuteness you’ve just created!
How fun are those metallic paints??
Not to mention all of that gold paper.

To get the Thanksgiving pumpkin centerpiece-ready I placed it in an old metal pie plate and filled in the edges with store-bought moss.
Some colorful leaves, and an old jar full of wheat, and I’m all set!

Now that my painted Thanksgiving pumpkin is finished, bring on Thanksgiving!

>> See where I party! <<
Check out these other fun Thanksgiving centerpiece ideas!
Gold Rimmed Flower Pot | Gobble Gobble Table Runner |
Fall Candle Centerpiece | Paper Mache Succulent | Floral Pumpkin Vases |
Pumpkin Candle Holder | Holiday Tool Box | Free Flowing Fall Centerpiece |
Sharon
Monday 4th of November 2019
This is so gorgeous! I love the deer! Thank you for linking w us at Creative Muster! Pinned this! xoxo Sharon
Zaleina
Tuesday 14th of November 2017
This is the most beautiful pumpkin I've ever seen! I can't seem to stop staring at it!
Indah Nuria Savitri
Wednesday 11th of November 2015
wooow...it looks royal! Love the metallic touch and indeed it's a perfect center piece :)
Mollie
Tuesday 10th of November 2015
This has got to be the fanciest pumpkin I have ever seen - if you don't count Cinderella's! What a great way to extend pumpkin season and thanks for sharing this on Throwback Thursday!
Sahana
Sunday 8th of November 2015
Such a lovely metallic pumpkin. Thank you for sharing with us at #HomeMatterParty. We would love to have you again next week.