
Singed Pom Pom Flower Tutorial
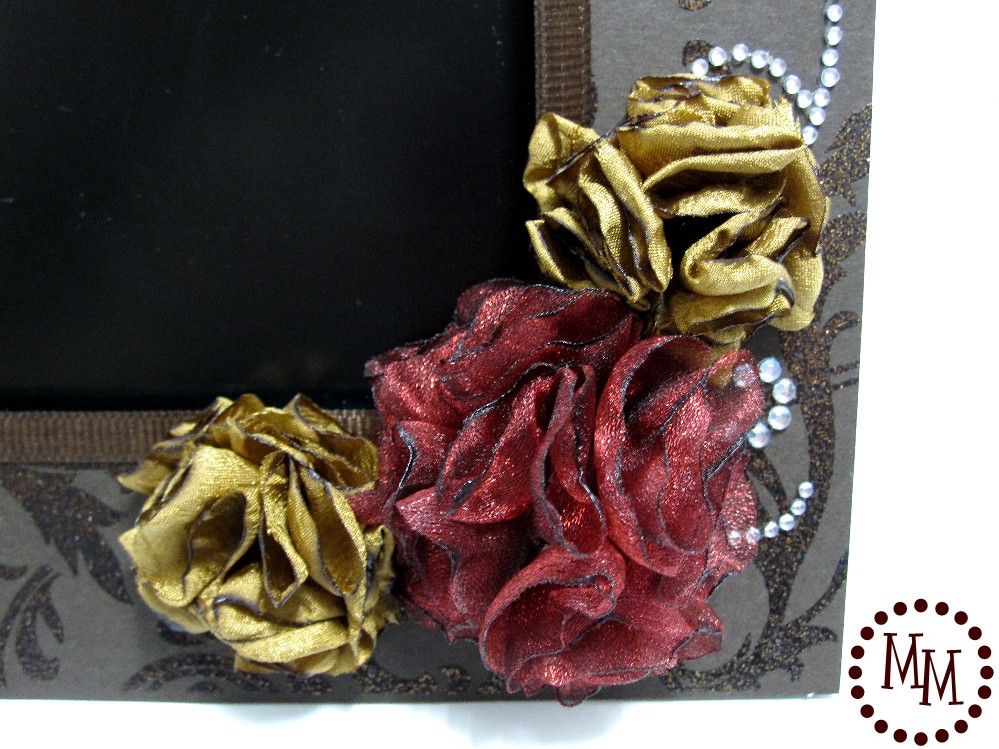
As promised, I'm going to show you how I made the pom pom flowers for my
digital photo frame makeover from last weekend.
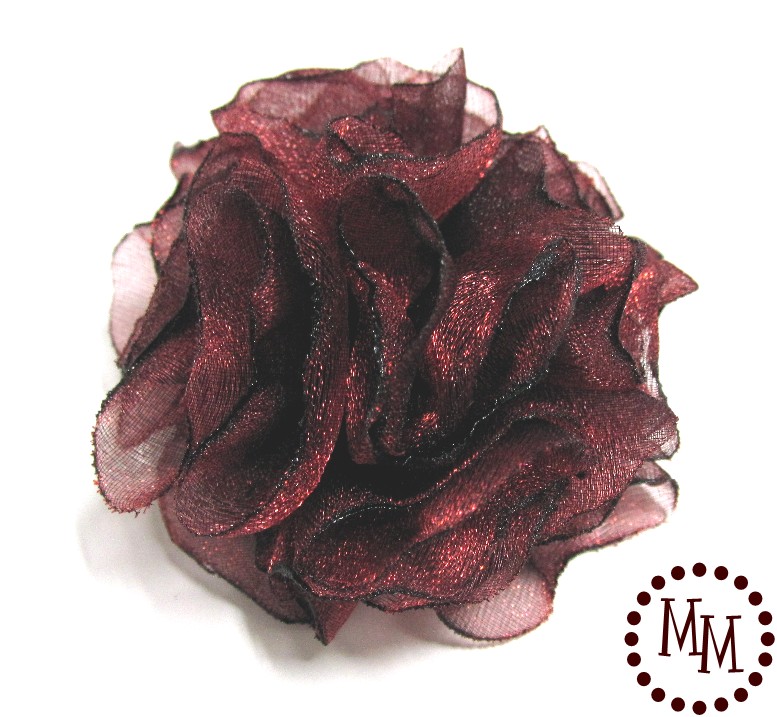
We'll be making the burgundy flower today in 10 easy steps!
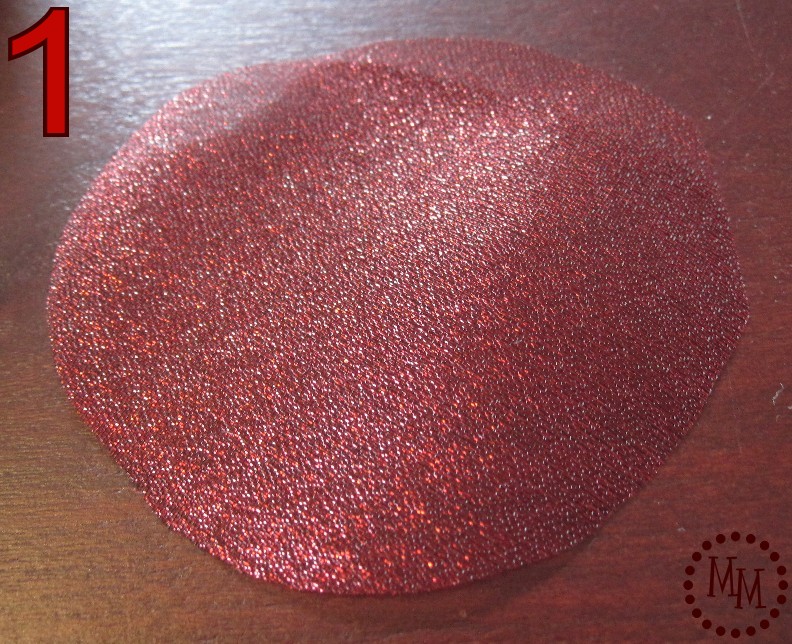
1. Pick your material and cut a dozen circles out of it. I'm using an organza fabric.
(For the record, the above circle is 2 inches in diameter, and the gold flowers were made with 1.5 inch circles.)
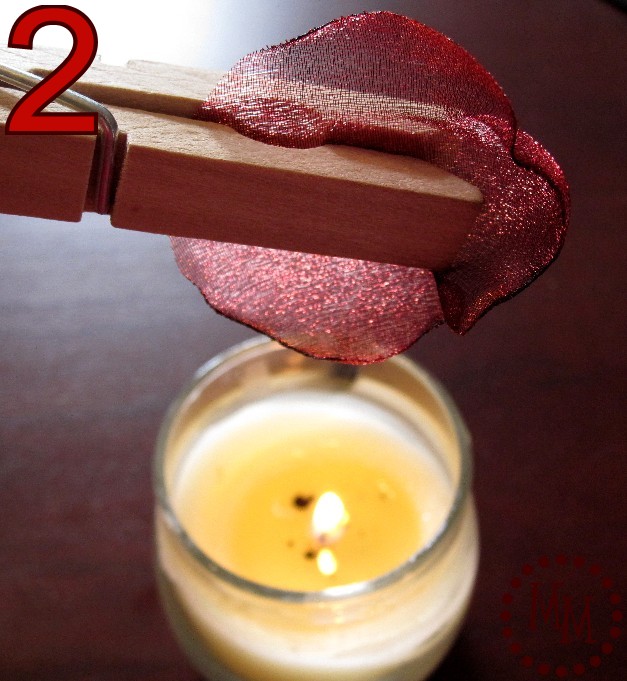
2. Very carefully singe the edges of your material with a flame.
I prefer to use a clothespin to hold my fabric and a candle for my flame.
If you've never use the singed fabric technique before you may want to create some extra circles of fabric. This process will take a little bit of practice! For many fabrics, the edges will singe very quickly so don't hold it directly over the flame for too long!
Also, not all fabrics will work with this technique. Avoid natural fabrics (i.e. cottons). Synthetics work best (i.e. organza, satin, etc.)
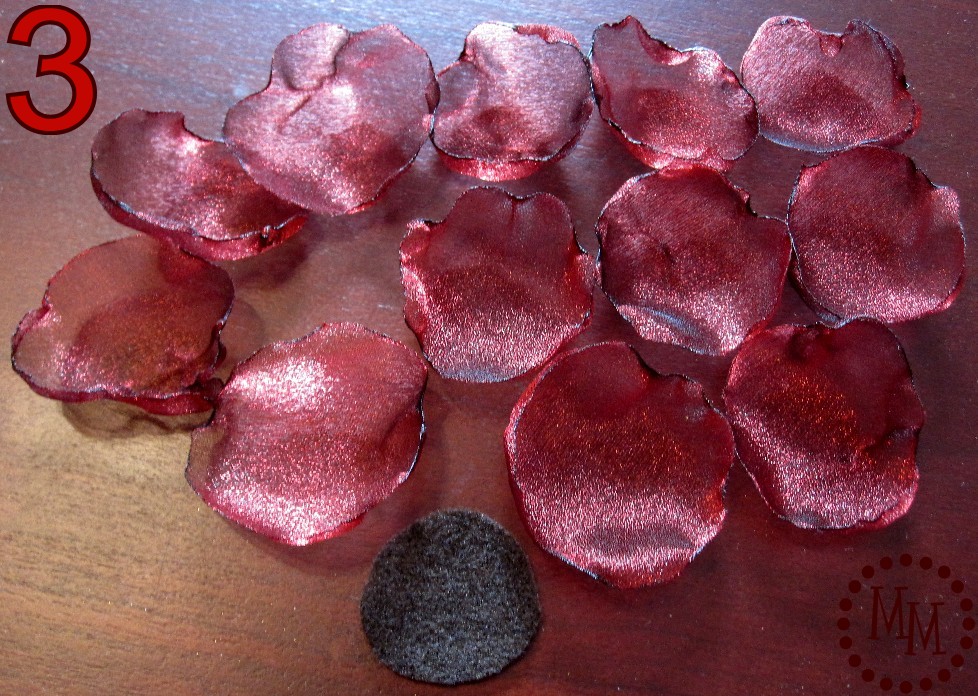
3. Continue step 2 until you have singed the edges of all of your circles.
Also cut a small round piece of felt to use as a base for your flower.
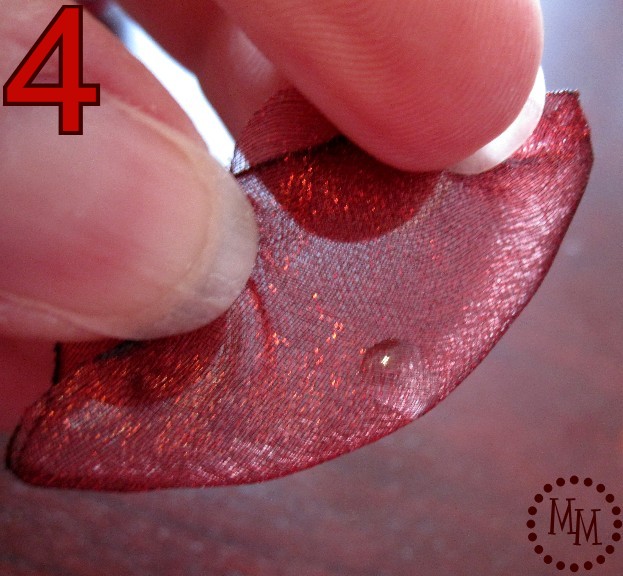
4. Take one circle and fold it in half. Add a small spot of glue (I used Beacon's 3-in-1) to the center edge of the folded over circle.

5. Fold the circle in half again. Pinch the bottom of the fabric so that the adhesive spreads through all layers of the material.
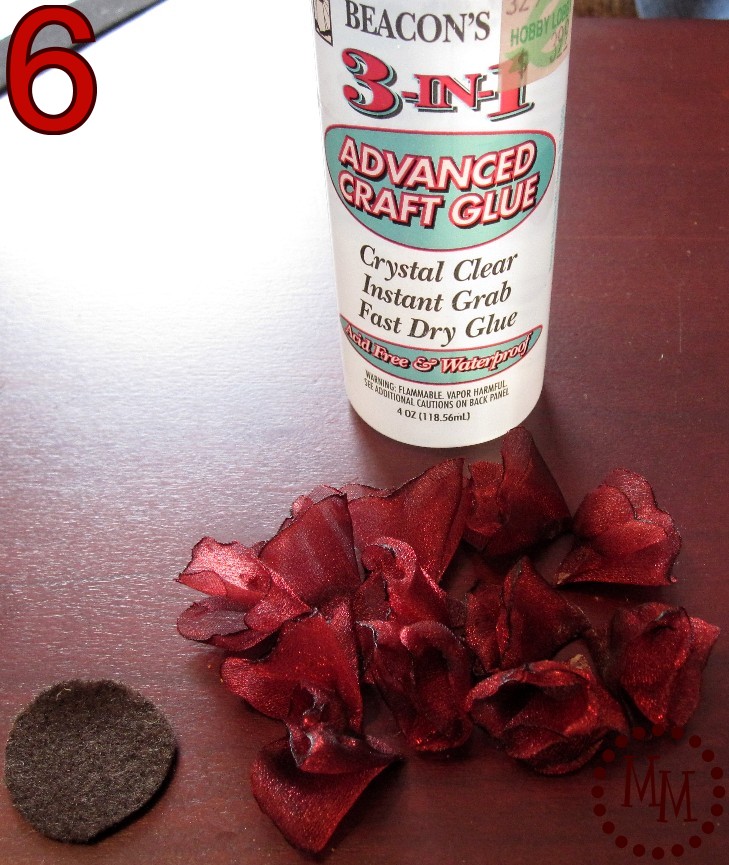
6. Continue step 5 until you have all of the circles folded into fourths.
You should now have a dozen "petals."

7. Add some adhesive to your circle of felt and add one of the petals.
8. Continue adding 3 more petals around the circle. This is you bottom layer of the flower.

9. Carefully add more adhesive to the center of the bottom layer of flowers. Start adding 4 more petals to create the second layer of the flower. Stagger the second layer so they are not sitting directly on top of the petals beneath them.
10. Add more adhesive to the center of the second layer of petals. Add three more petals, staggering them again from the petals in the second layer.
You will have one more petal left over. We made it as an extra in case anything happened to one of the other 11 petals in the creative process!
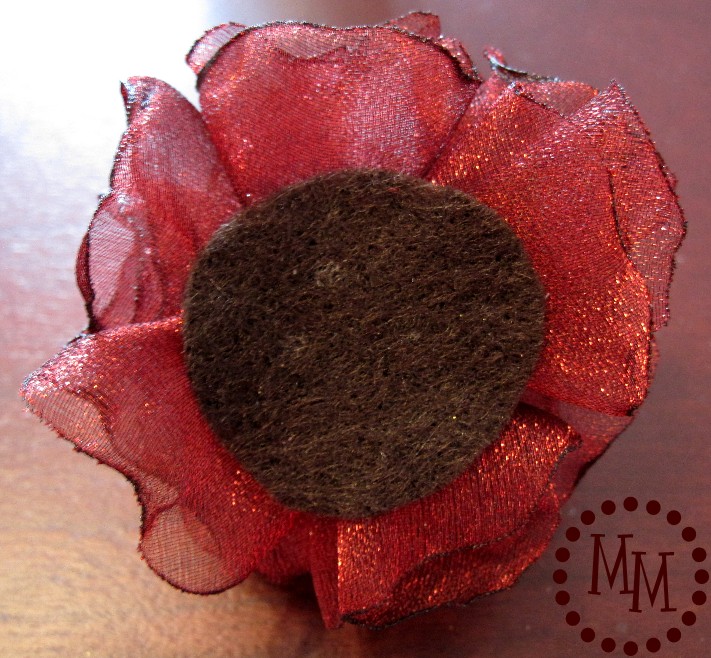
This is what the back of your flower now looks like. You can add a pinback, hair clip, etc. Or add it as an embellishment like I did to my frame by just using some glue!
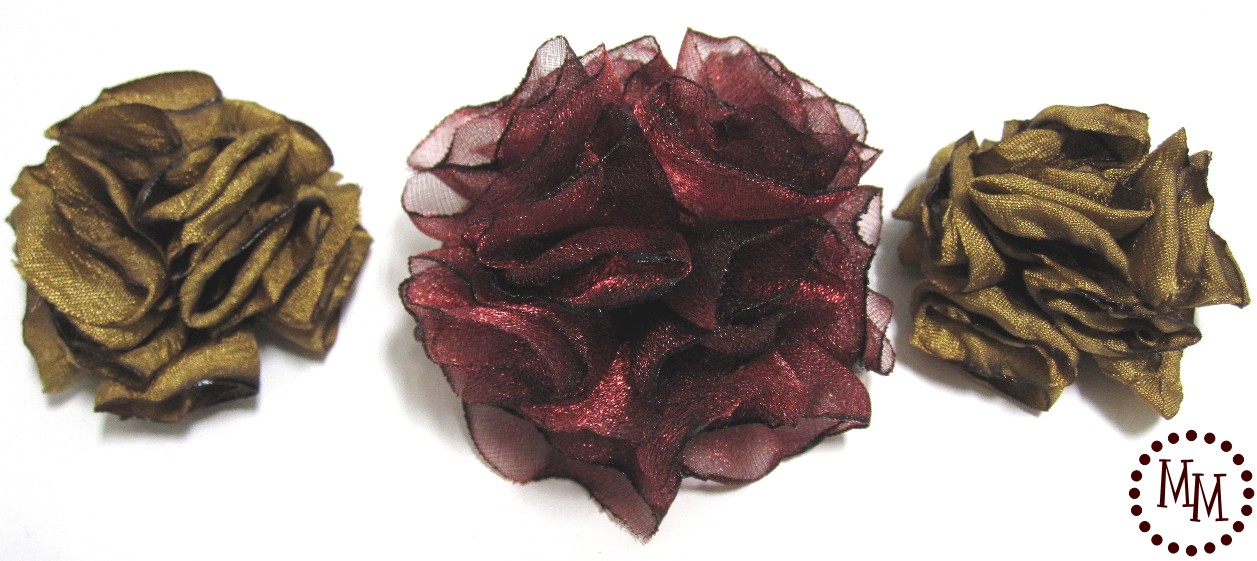
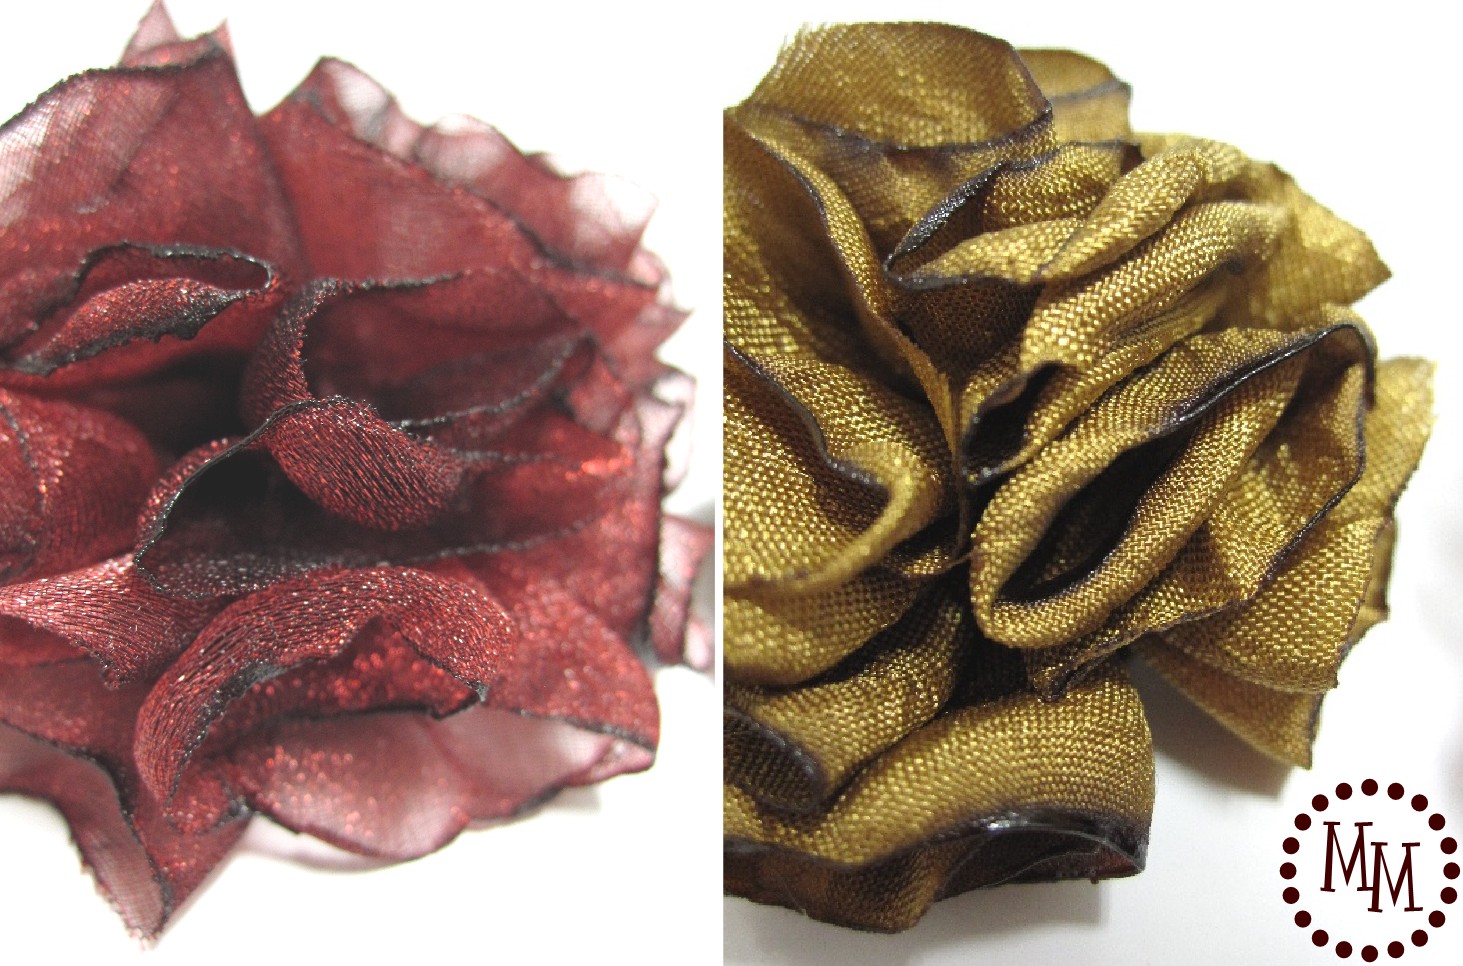
I love the look the singed edges gives to these pom pom flowers! It gives them a little more life and makes the flower fuller.
I hope you enjoyed this tutorial!


That is a great tutorial! If you have not been by yet, I would love for you to come link up! Every month the best link gets prizes!
http://www.thesaturdaymorningsblog.com/2011/02/strut-your-stuff-for-february-round-2.html
SO cute! I just tried making crepe paper flowers for a wreath last week and it was a major FAIL! Can't wait to try these!! I'm your newest follower btw! You can visit me at nebraskabyrd.blogspot.com 🙂
super cute! And it looks so easy to do. Thanks for the tutorial!
These are fantastic! What a great idea . . . thanks so much for sharing!
Oh these are just gorgeous. I am no sure I will do at the singed thing though, but I am definitely thinking about trying it.
I just found your blog from Frugalicious Friday and am now a follower.
This looks so easy but with great results! Love that burgundy color. Stopping by from Tatertots & Jello.
I lvoe singed flowers... I will have to try pom poms!
These flowers are so full and beautiful! Thanks for linking up!
HI! I'm hosting a link up this week -- It's a Keeper Thursdays! I hope you can come over and link up!
Thanks!
It's a Keeper
http://www.everydaytastes.com/
http://twitter.com/itsakeeperblog
http://www.facebook.com/ItsAKeeper
luv luv the flowers and colours.
Don't forget to link it in our linking party this week.
http://www.passionatelyartistic.com/2011/02/fun-ideas-for-valentine-day-2011be.html
Maggie
I make these all the time! So fun.. but your color comination is just stunning! Great job!!
http://www.cherishedbliss.com
These are absolutely gorgeous! I can't wait to try them myself. Thanks for sharing!!!
http://sunscholars.blogspot.com
These are stunning, Michele!
I love making these, great idea with the clothes pin!
Would love for you to come link up:
http://gigglesglitzandglam.blogspot.com/2011/01/tuesday-glam-party-13.html
These are gorgeous!
How pretty, and a great tip on holding the flower!
These are soooo pretty Michele!! I haven't ever done these - I've always wanted to. I love the colors you chose too. Thanks for the great tutorial!! 🙂
Michele, these turned out fabulous!!! I love that fabric you used! So sparkly!
WOW! That is a fabulous tutorial
That's so pretty! Thanks for the tutorial - JenT
I love these flowers. You did a great job on them. I would love to have you come and link up to Fantastic Friday at http://ironvioletdesigns.blogspot.com
thanks
MIchele, I love these! I love the singed flower look! What a great idea to make them into pom pom flowers. They look great!
Super cute, Michele! I've tried making singed flowers like this and mine always look so stiff and uncute! 🙁 Maybe it's the fabric I'm using.
I'm going to have to buy some organza now. 🙂 LOL! Will you please the hubs know it is your fault? Thanks! 🙂
These are so great..Love!!