Add a whimsical and slightly rustic look to your Christmas decor with this DIY moss Christmas tree.

If you’re still looking for just the right decor for your holiday mantel, I have a fun DIY for you. Keep the natural look with this rustic moss tree, but add some glitz and glitter that will sparkle in the glow of the Christmas lights!
This festive tree comes in at ~27 inches and is the perfect end cap to your Christmas mantel. It’s small diameter allows it to easily fit on most any surface you ultimately choose to place it. The moss is a great addition to the greenery already present in your home. And who doesn’t love a little glitter in their Christmas decor?

For this project you will need a large tin wall cone, preserved sheet moss, green burlap ribbon, and an assortment of holiday picks and decorations. These supplies came from Old Time Pottery, but if you don’t have one nearby you can find most items at your local craft store.
You will also need a pair of scissors, wire cutters, needle nose pliers, and a hot glue gun.

The wall cone is perfect for this project! Tall, thin, and inexpensive.
Before we use it we need to get the hanger out of the way. Take the needle nose pliers and fold the hanger back against the cone. It will fold very easily. Then flatten the hanger so that it doesn’t stick out from the cone.

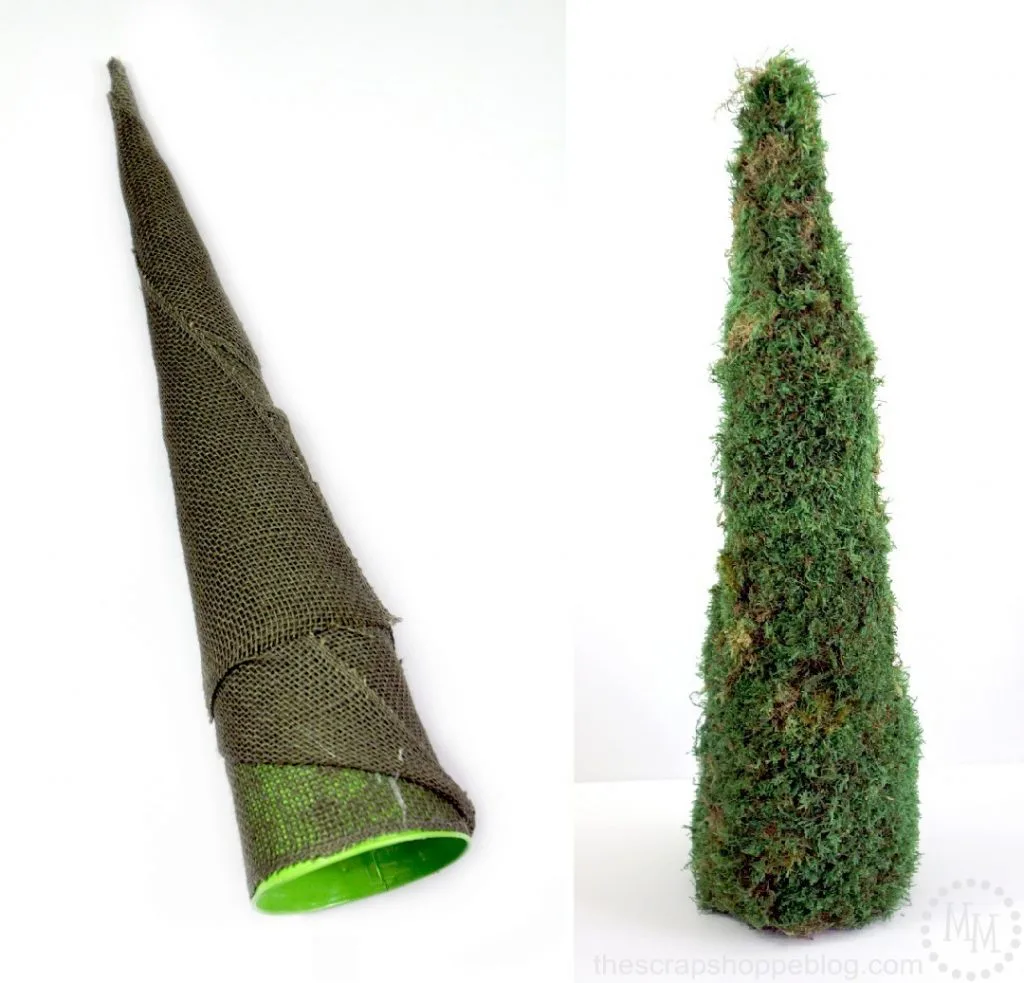
Before we put the moss on the cone we need to wrap it with the burlap. This will give the moss a better surface to adhere to than the slick cone. Use the hot glue gun to adhere the burlap to the cone.
The moss is messy to work with. I highly suggested placing newspaper under your work surface or taking the project outside (near an outlet – you will need the hot glue gun). Remove the sheet moss from the packaging and gently shake it out to remove any loose pieces. The moss will come in 3-4 pieces. Start with the largest piece and work from the bottom of the cone up. Fill in gaps with the smaller sheets of moss. If the moss isn’t the right shape for where you need it to go – good news! You can easily cut the moss with scissors to fit your needs. Be sure all pieces of moss are glued down firmly. If you have brown spots or thin spots simply go back and fill in with extra pieces of moss. I used 2.5 bags of moss to cover the cone. After adding all of the moss, shake the cone to remove any excess loose pieces. When you are done shaking, shake one more time. It will be worthwhile! The little moss tree should hardly shed a bit now.

I used a fun Christmas bow with bells to use as the tree topper. It attaches with a brown wire so it is fairly invisible on the tree. Simply wrap the wire around the top of the tree and twist it tight. The arrow is pointing at the wire – can you see it?

Trees with garland are the most fun, right? This simple gold glitter garland came as a bunch, but you will only need 2 strands for the tree. Cut them off from the bundle then wrap them around the tree. I did not even glue them down since the ends tucked securely into the moss.

These glitter gold poinsettia picks are a great accent for the tree. Use the wire cutters to cut the poinsettias off of the picks, leaving a small 1/2″ tip that can fit into the moss for a better grip. Hot glue the flowers to the tree.

The glitter berries are my favorite addition to the tree. Start by disassembling the berry pick; remove the leaves, separate the berry branches, then cut off the berries into individual pieces.
Group the berries into clusters of 3 and hot glue them to the tree.
I took 2 of the leaves and added them to the back of the tree topper.

Disassemble the grape cluster using the wire cutters. Hot glue the balls randomly around the tree, keeping the larger ones towards the bottom.

Of course any type of embellishments can be added to the tree, including Christmas lights, but the simple red and gold glitter of these “ornaments” against the natural green of the moss really does it for me. You can even keep the tree plain and leave it up year round! Its customization is completely up to your tastes. Be sure to see how I used the rustic moss Christmas tree on our Christmas mantel this year!

>> See where I party! <<

Rhonda
Friday 9th of December 2016
Stopping by from Sunday's Best. I love the moss tree. It looks easy enough to make. Thanks for sharing on the linkup. I'll be Pinning and sharing on Twitter. Looking forward to seeing more of your posts.
Krystal Sadler
Thursday 8th of December 2016
So simple and so pretty! This is my kind of craft. Thanks for linking up with us at the Share the Wealth Sunday link up!!
Debbie Mayfield
Tuesday 6th of December 2016
Such a lovely tree. Thanks for sharing the tutorial with us.
Kim~madeinaday
Monday 5th of December 2016
Such a great idea for a christmas tree. Love the moss! Thanks for linking up to Merry Monday! Pinned! Have a great week! Kim
Mick
Saturday 3rd of October 2015
I've been gearing up for large Christmas show and making a few 'trees'. I took styrofoam cone, wrapped it in plastic (first on)e I left in plastic it came in), then papier mached it and have made a number of trees using the one styro cone
Michele McDonald
Saturday 3rd of October 2015
Clever!!