
Woodland Whimsy Easter Jar

I am super excited to be the guest designer for P K Glitz this month!

How could anyone turn down the opportunity to play with glitter all month long?
I'm sure its not possible, and I know I never would!
Plus, with two little boys, the holidays are about the only time I get the opportunity to add glitter to anything.
So watch out, Easter! You are going to sparkle this year!
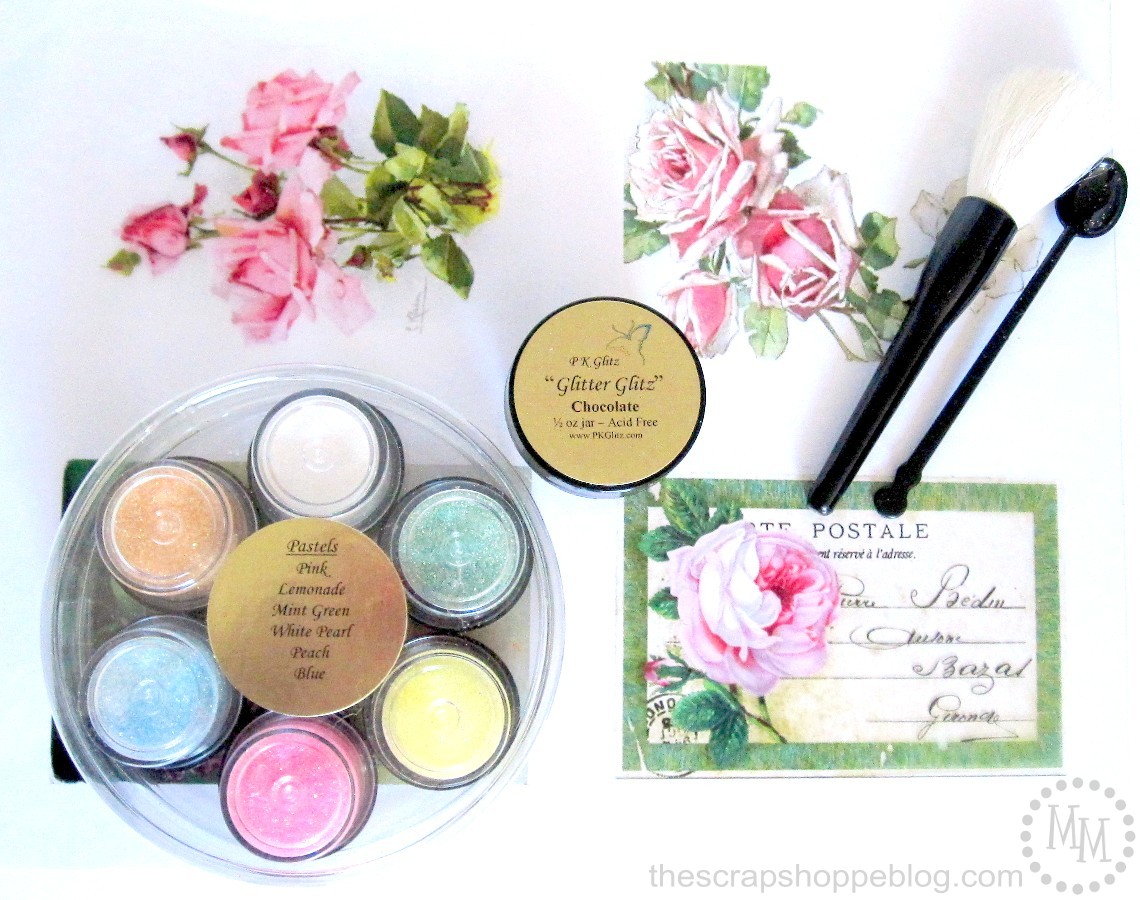
To make this woodland whimsy Easter jar we are going to need some glitter.
And for some of the best glitter around, you're going to want P K Glitz glitter!
They have an amazing assortment, and its super fine so it covers just about anything amazingly well.
I'm going to be using the Pastel color wheel as well as the chocolate glitter.
P K Glitz also has a wide variety of Vintage Hues - color images on transparencies.
I'm going to use the postcard Vintage Hue.
A couple of other handy supplies are the anti static brush and mini spoon.

Other supplies we will need are a glass jar, Easter grass, 3D Crystal Lacquer, decoupage, acrylic paint, small paper mache egg, and a small plastic deer.

First let's glitter the deer! This has become one of my favorite things to do.
Glitter all the little plastic animals I can find! It won't be long before I have quite the menagerie.
To glitter the deer, add an even coat of decoupage to its body then use the spoon to sprinkle it with the chocolate glitter.
Repeat the process as often as necessary to be sure it is completely covered..

Now, moving on to the egg, apply several coats of your acrylic paint until it is well covered.

I wanted a polka dot Easter egg, and I wanted to use an adhesive that is already in the form of a circle...
Glue Dots to the rescue! They are already round and all I had to do was place them on the egg then dip them in the pastel glitters.

Here are our completed deer and Easter egg.
I can barely stand all of the glittery goodness!
But wait, there's more to come!
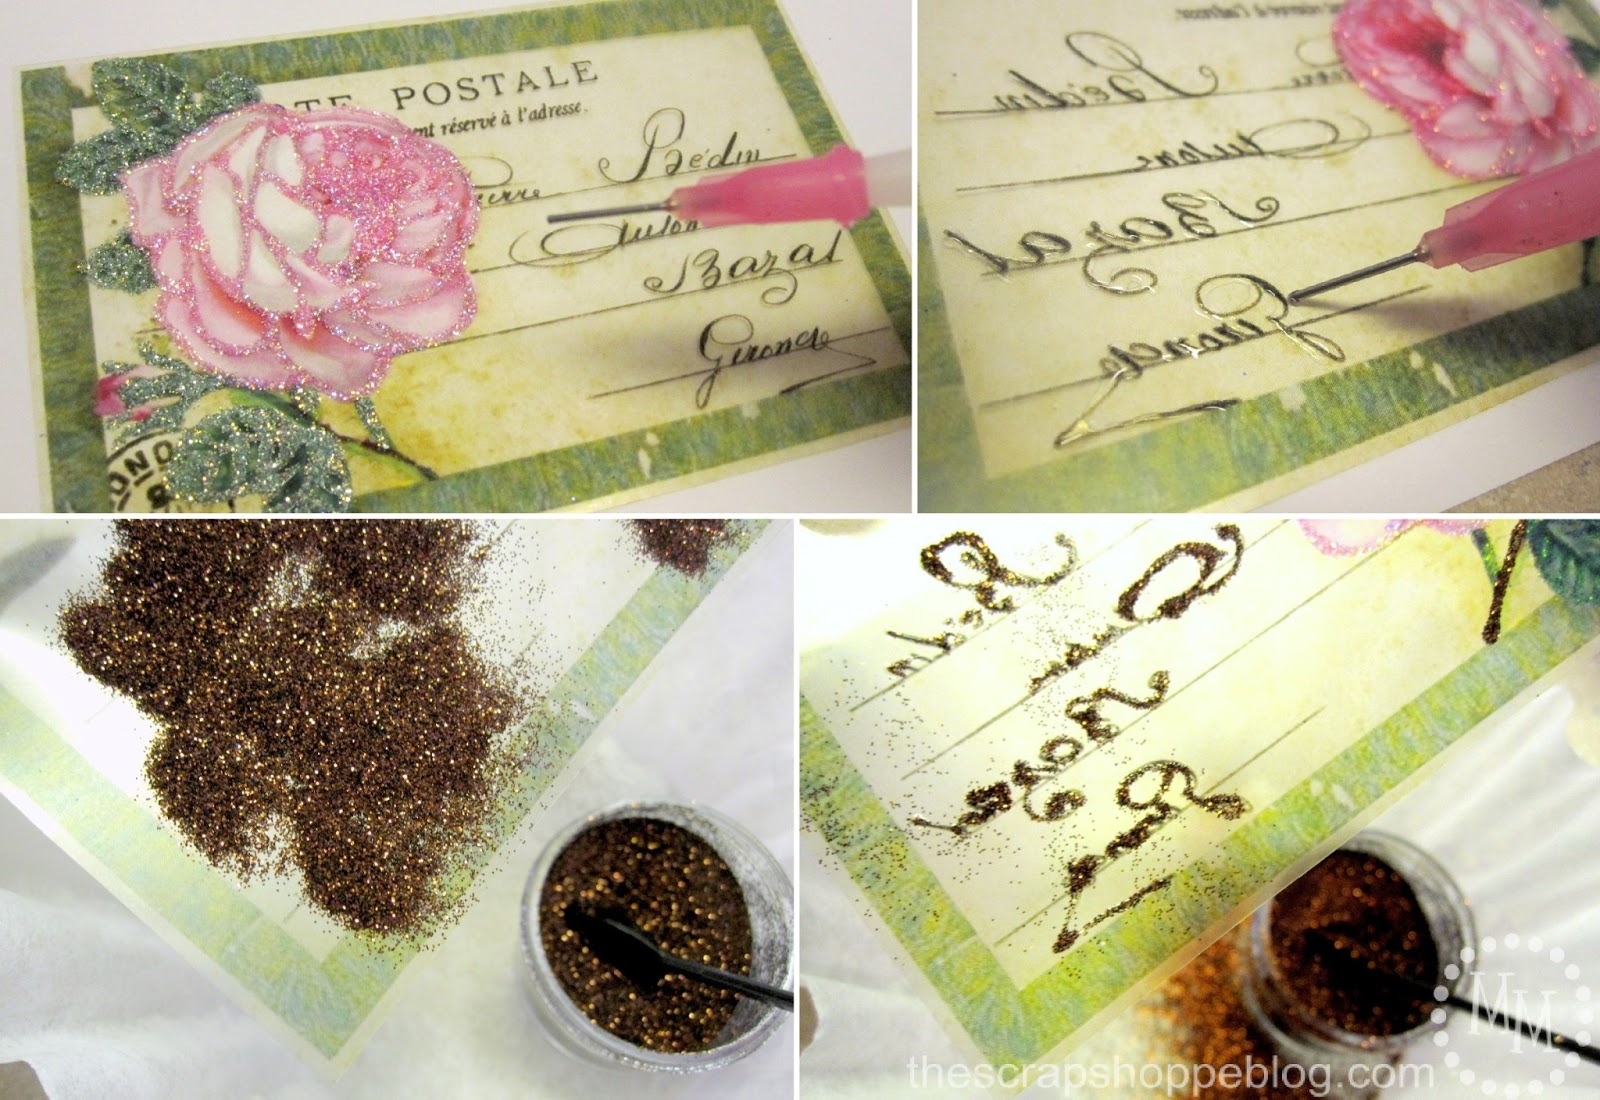
We still need to decorate our Vintage Hue postcard.
This couldn't be easier to do using the Crystal Lacquer and the micro tip attachment.
You simply color in or trace the areas you want to add glitter with the Crystal Lacquer, sprinkle with glitter,
then shake the glitter off and give the acetate a few good flicks with your finger.
Work one color of glitter at a time. You can add the Crystal Lacquer and glitter to either side of the postcard.
Once all of the Crystal Lacquer is dry, go back and give the entire Vintage Hue a good brushing off with the anti static brush to remove any loose glitter.
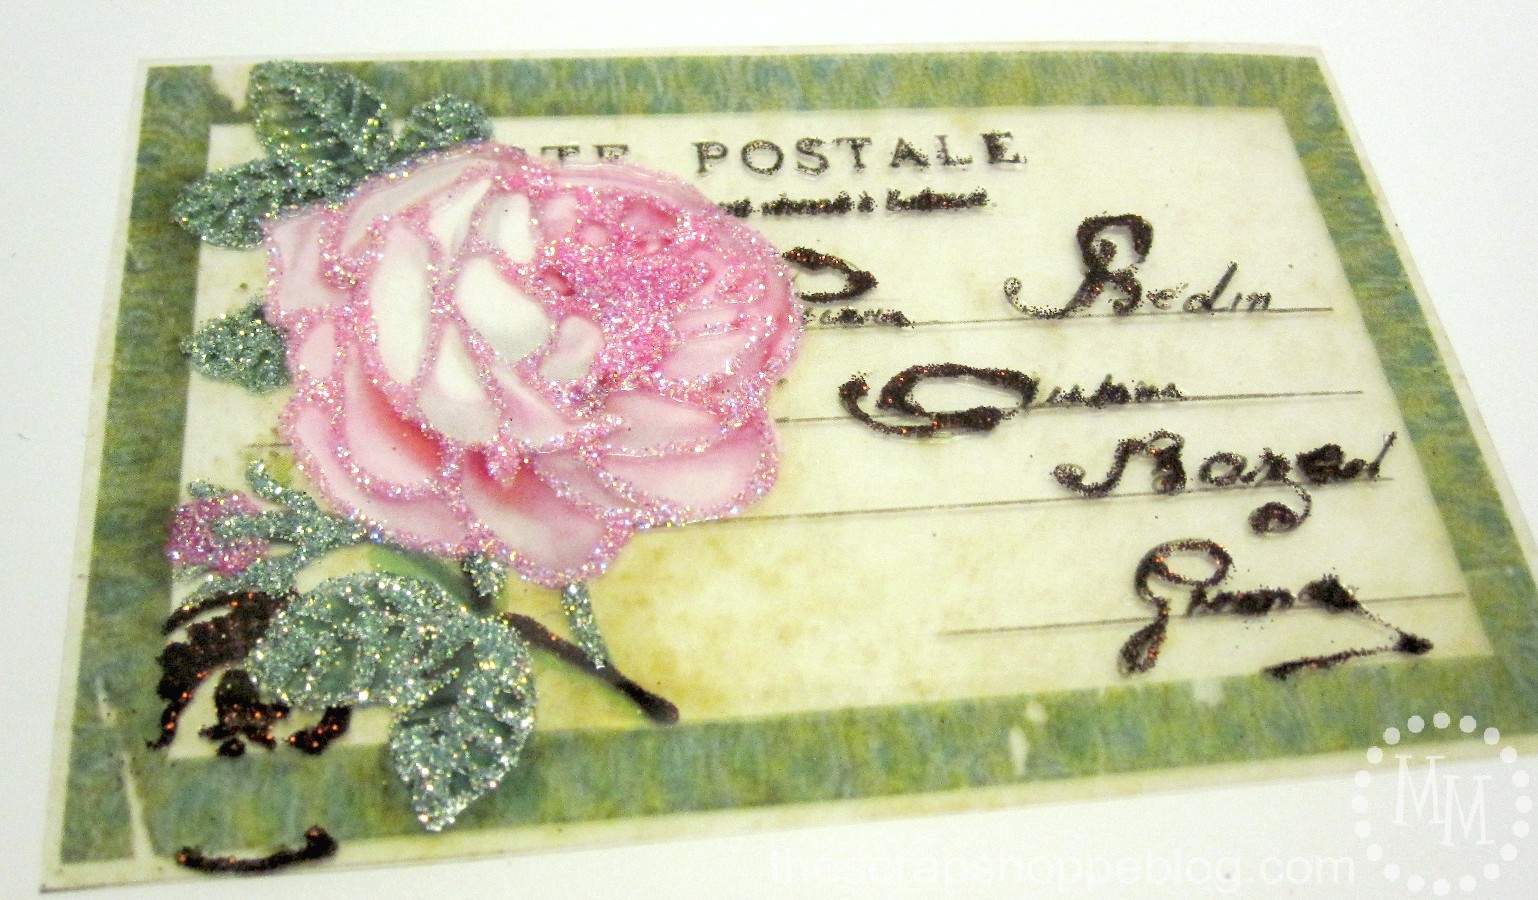
I added the pink and green glitters to the top of the postcard and the brown to the back.
It makes the rose pop a little more!
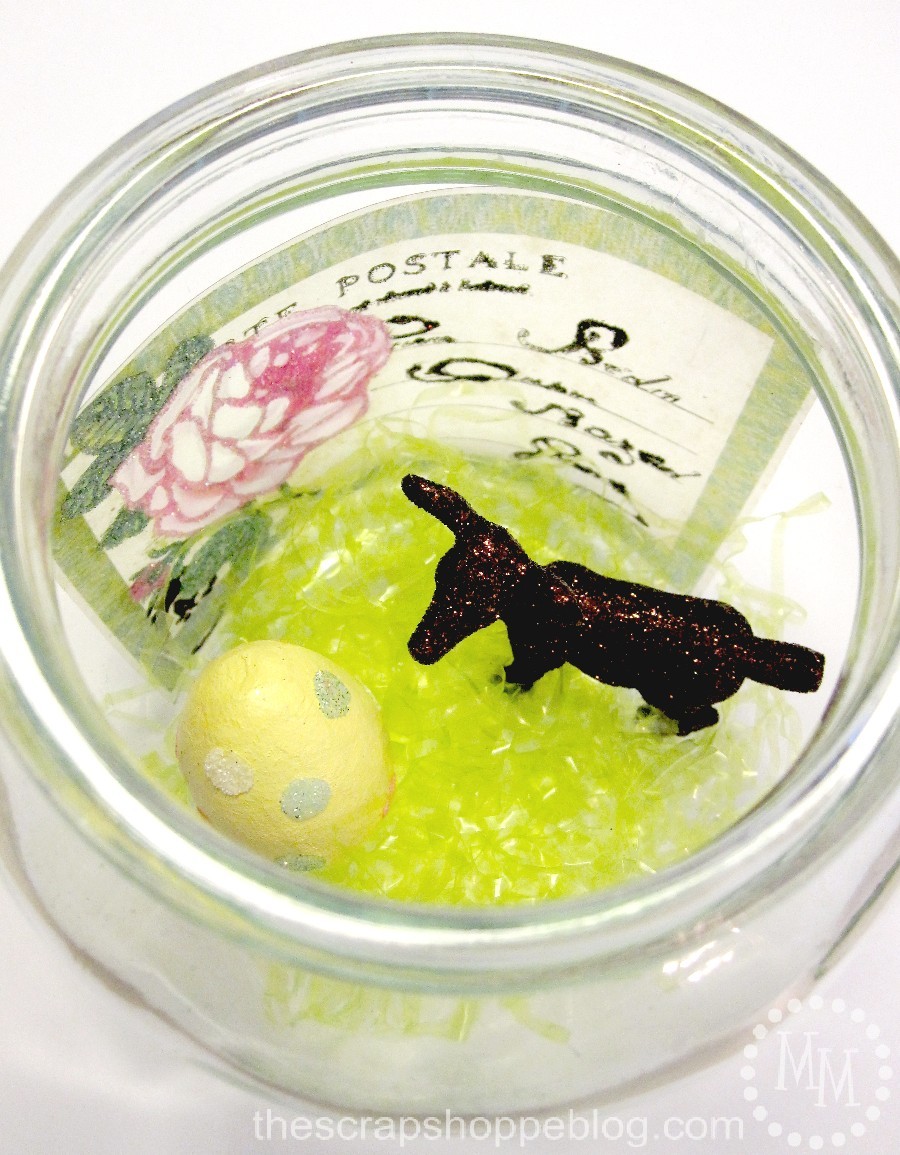
Now we just need to add all of our pieces to the jar!
First I put in the postcard followed by the Easter grass.
Then I carefully added the deer and the Easter egg.

Top the jar with the lid and add a decorative ribbon if you like.
This will look really cute on a shelf with other Easter decor!
And after the holiday I can simply remove the egg (and maybe replace it with a glittery mushroom?) for a fun and woodsy addition to my everyday decor.
Linking up to Flamingo Toes, Skip to My Lou, Today's Creative Blog, The Shabby Creek Cottage, Tidymom, 504 Main, Serenity Now, Whipperberry, My Repurposed Life, 30 Days, Tatertots & Jello, Positively Splendid, and other great parties found on my party page.

I have started truncating my posts to avoid having my content stolen. I hope you'll click over to finish reading the post. Thank you for understanding!


Just wanted to let you know this will be part of the features when this week's link party opens tonight!
so cute, michele!
So cute! I love the glittered deer!
Adorable! I made a Christmas one, I love the idea of an Easter one!
Visiting from Serenity Now!
Congrats on the P.K. Glitz gig! I love their glitter! This is a sweet little piece of whimsy to add to any Ester decor!
That is so neat! I love the tip attachment that let you do the fine details on the postcard.
Love your take on Easter decor! And that glitter is yummy!
I love this! That glitter takes this display to the next level - love it & I am sure you are still finding glitter everywhere 🙂
Thank you so much Michele for sharing this wonderful project! It is just gorgeous and the P K Glitz glitter really makes it sparkle 🙂
Super cute! Love that little deer and all the glitter 🙂
I found you today thru The 36th Avenue Linky. I hope you get a chance to stop by my blog and leave a comment, too!
~ Megin of VMG206
http://www.vmg206.blogspot.com
This is adorable!
Jenny
http://www.simcoestreet.blogspot.ca
Super cute 🙂 Love the glitter deer
Oh how sweet! Love the glitter details..so clever!!
WOW this is amazing! Love this and I love how you glittered the deer in a coffee filter! Genius!
Awwww!! This is just the cutest!! I'm such a sucker for glitter lol! I would never have thought of using the glue dots to do glitter polkadots - that was genius!!