
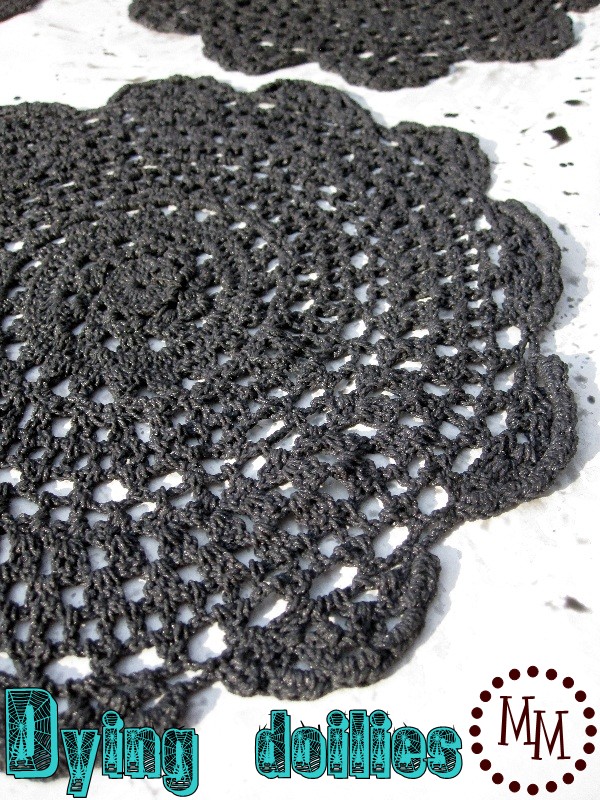
Spider Web Doily Bunting
This spider web doily bunting will spook up your Halloween decor in a granny chic way!

Halloween is my favorite holiday to decorate for after Christmas.
And I love creating my own spooky craft projects!
For today's Halloween project, I'm going to show you how to make SPIDER WEB DOILY BUNTING!
Most inexpensive fabric doilies come in white.
The first thing we'll need to do is dye our doilies black because white just doesn't scream spooky to me.
How about you?
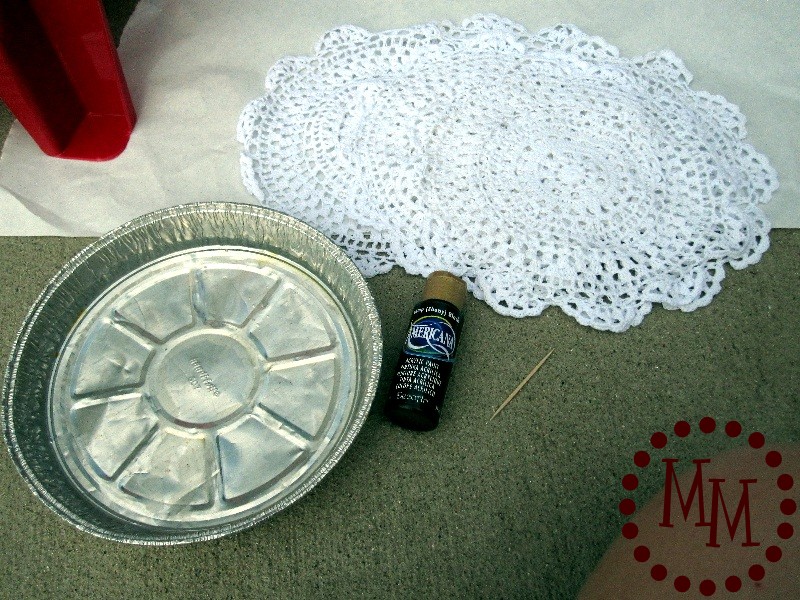
Supplies for dying doilies
pie tin
black acrylic paint
toothpick
inexpensive fabric doilies (mine were $1 each at Michael's) (affiliate link)
freezer or wax paper
latex gloves (not shown)
(Note: You can dye as many doilies as you like! I used 5.)
I chose to dye my doilies with acrylic paint because it was something I already had on hand.
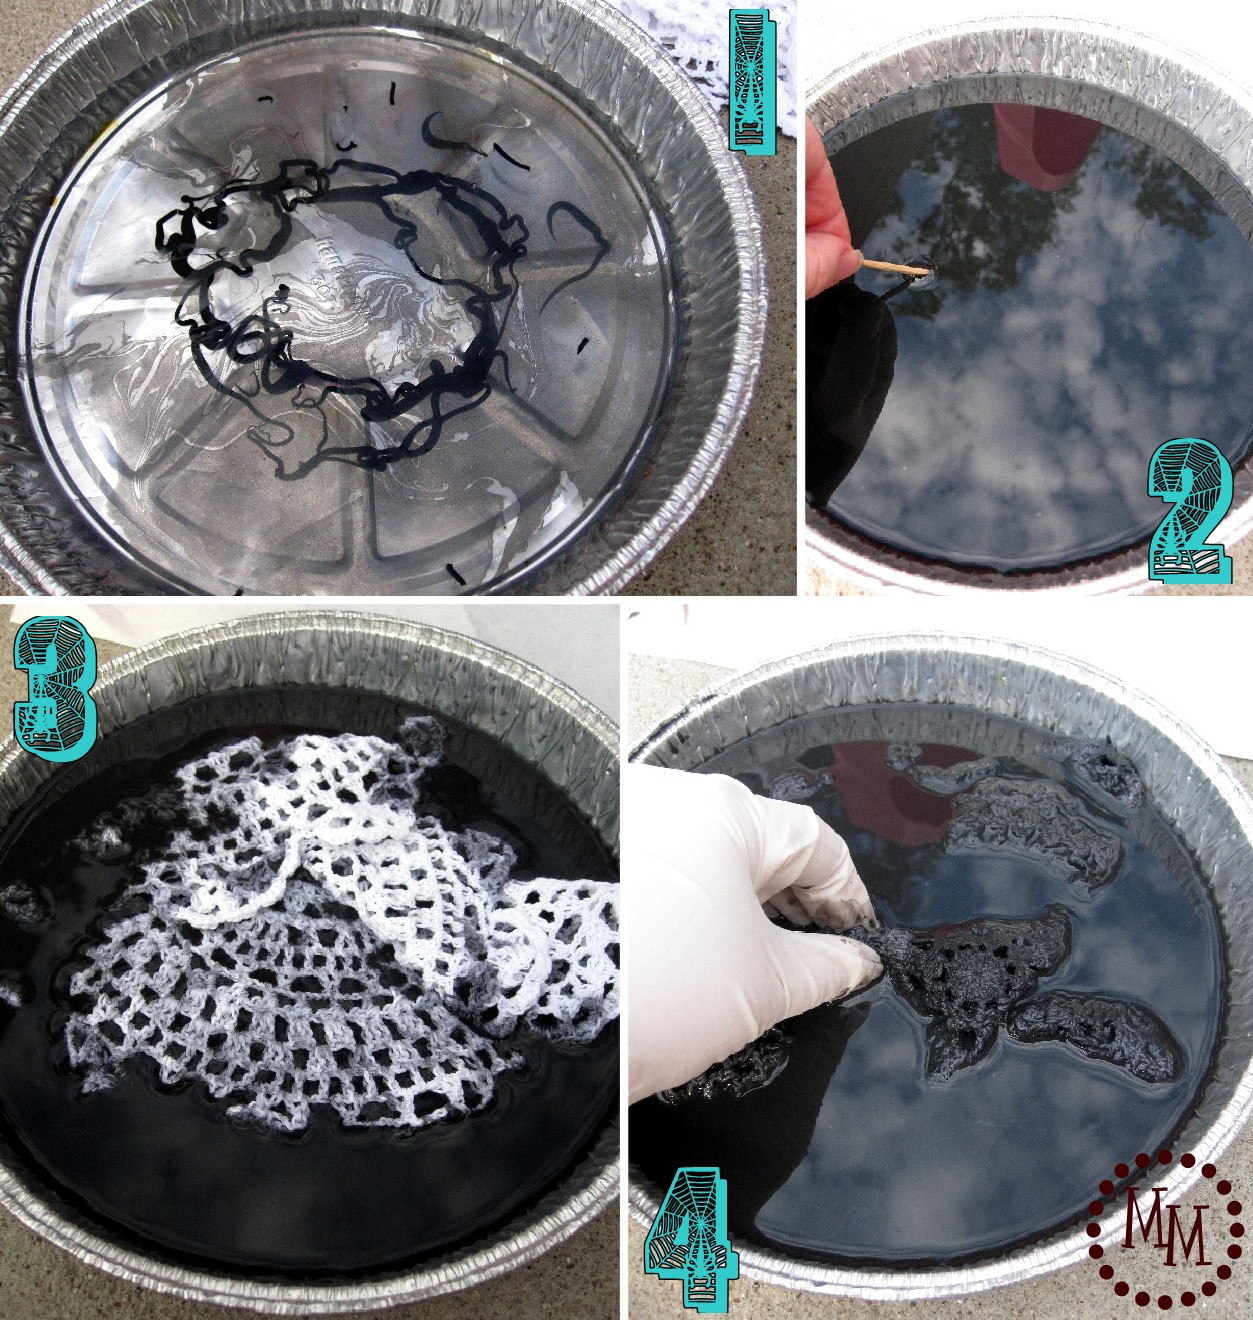
1. Add water to your pie tin then a nice long squeeze of paint.
2. Use your toothpick to mix the water and paint thoroughly. It will look like a big dish of black water.
3. Put on your latex gloves and dip one of the doilies in the water mixture.
4. Using your hand, push the doily around in the water mixture to get the paint into all of the crevasses.
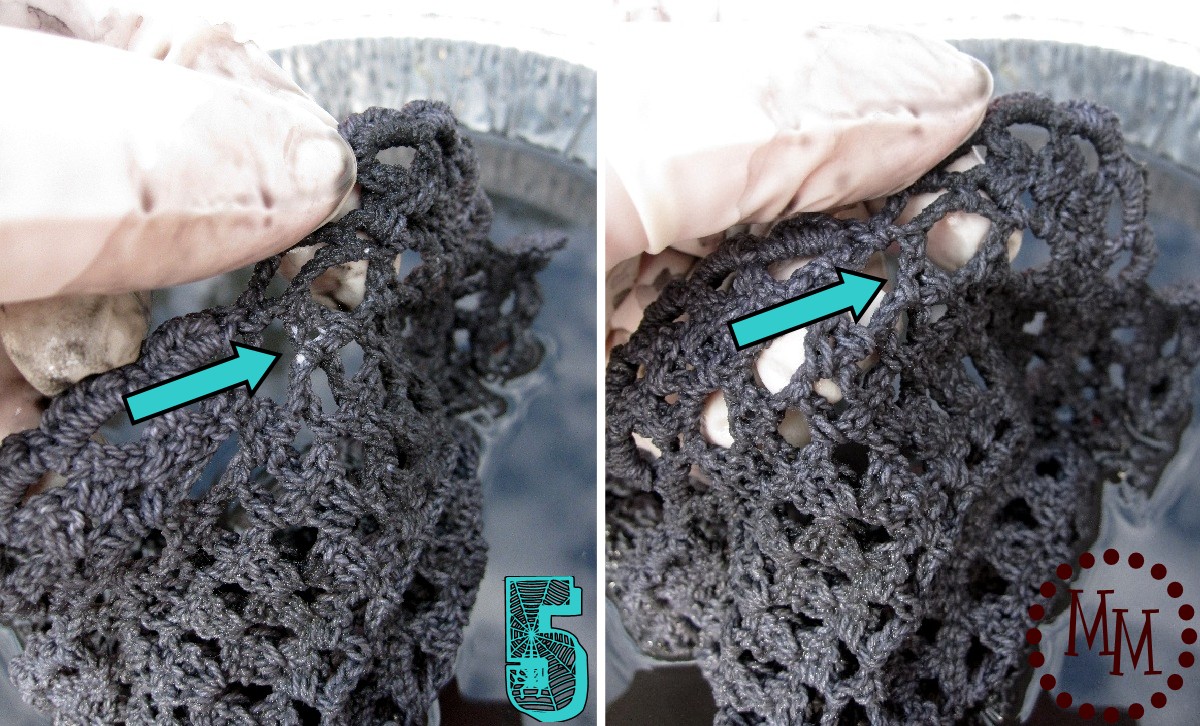
5. If you happen to miss a spot when you start to pull your doily out of the water mixture just dip it back in again and work the water into that area.
The fabric doily will accept the wet paint well.
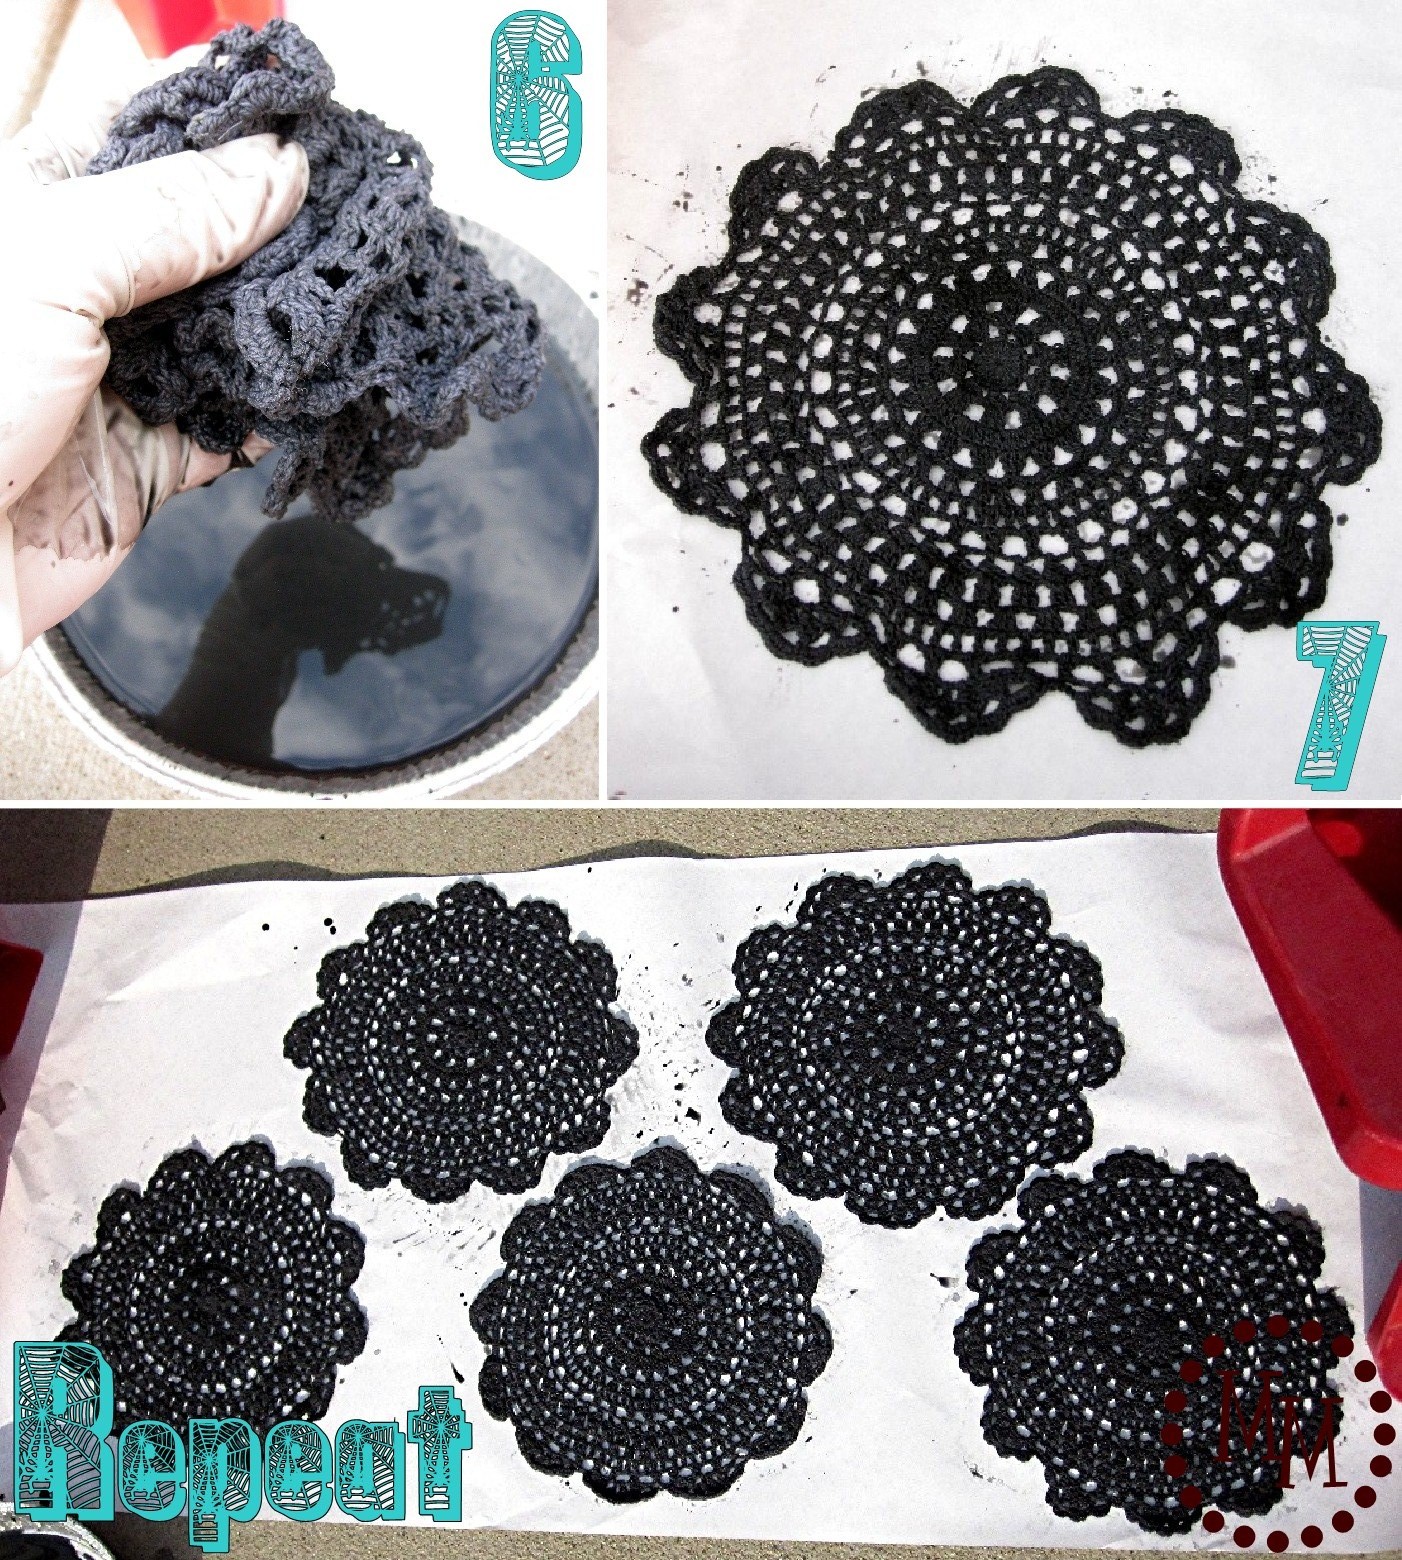
6. Once you are satisfied that the doily has covered with the black paint, remove it from the water and very gently squeeze out the excess water.
If you wring it out too hard you will lose some of the coloring!
7. Lay the doily out flat on your freezer paper to dry.
Repeat with all of the doilies.
(Note: I went through this process twice. After the dying the doilies once and allowing the them to dry in the sun, I felt they were too gray for my taste. I simply ran through the dying process again and was satisfied with the coloring the second time around.)
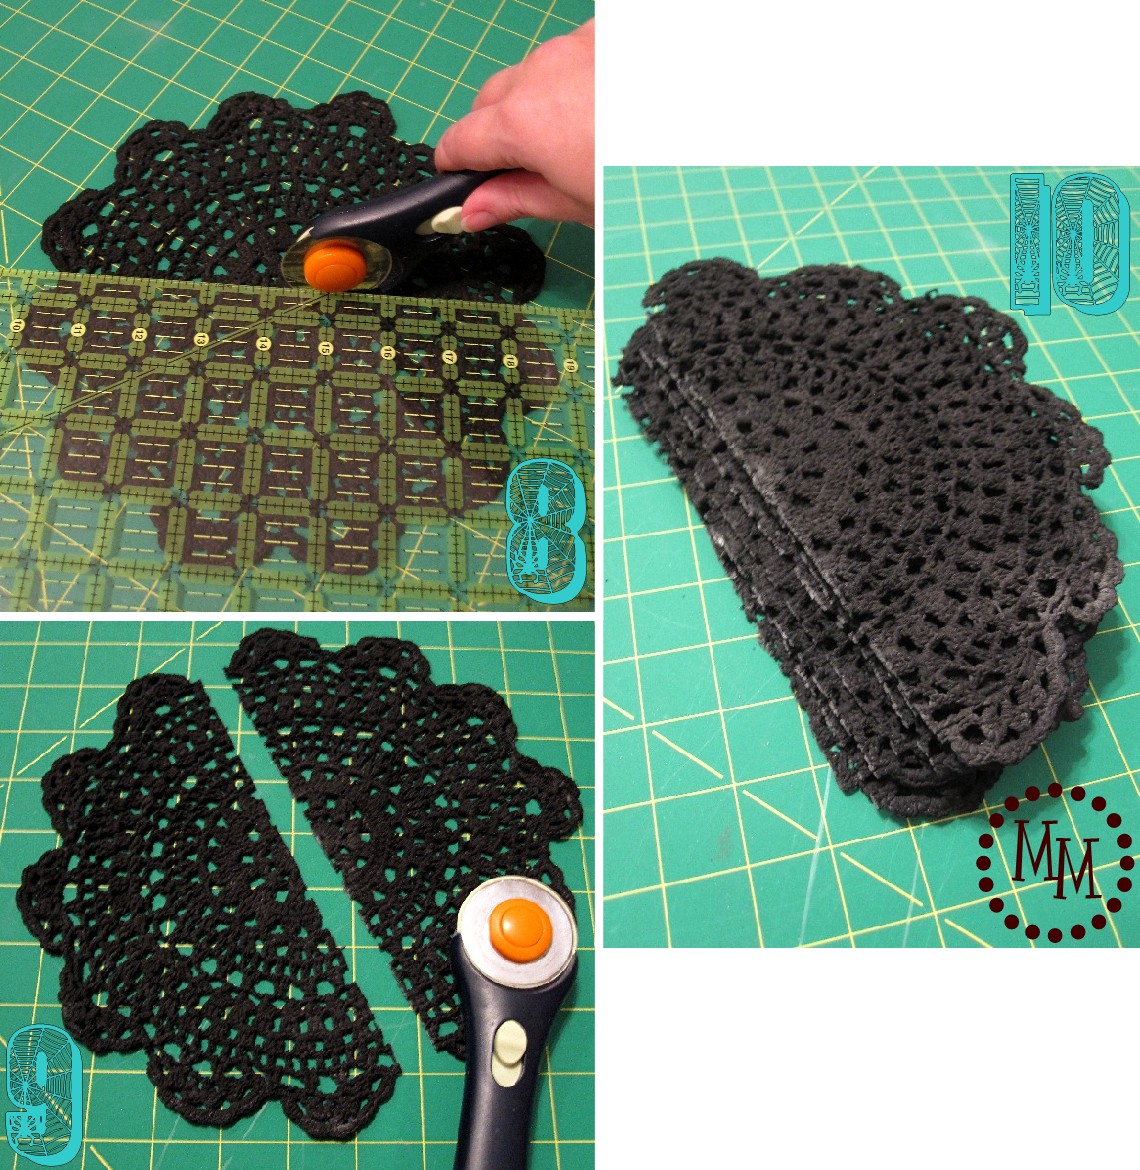
8. Once the doilies are completely dry, use a ruler to measure across the center.
9. Cut the doily in half.
10. Repeat for all of your doilies.
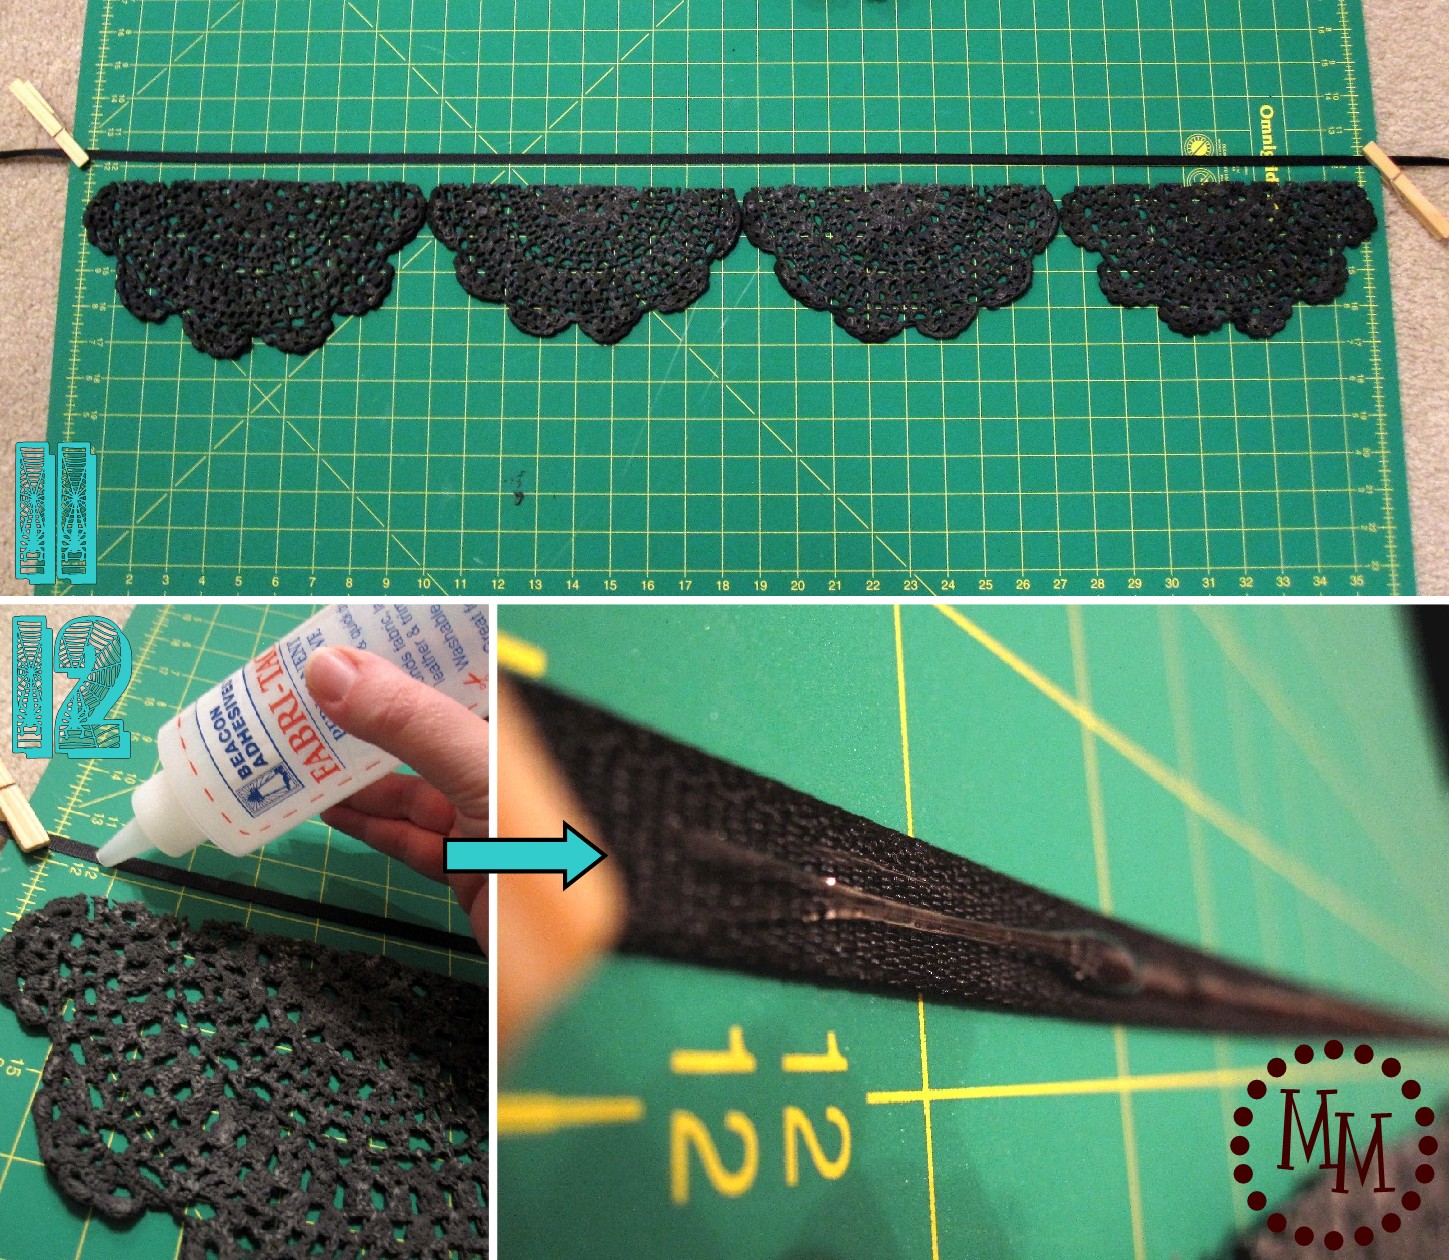
11. Take some black ribbon and stretch it out so that you can line the doilies up underneath it.
I stretched mine across my giant cutting mat and kept the ends taut with clothespins.
You can do something similar with a table if you don't have a giant mat like mine!
When you line up the doilies underneath the ribbon be sure that you lay them out upside down (the back of the doilies may not be colored as well as the front).
12. Take some fabric glue (I prefer Fabri-Tac (affiliate link) from Beacon's but hot glue will work as well) and run it along the length of your ribbon.

13. Place your doily (upside down!) on top of the line of glue. Repeat down the length of the ribbon.
Continue the gluing process until all of your doilies have been added to the ribbon.
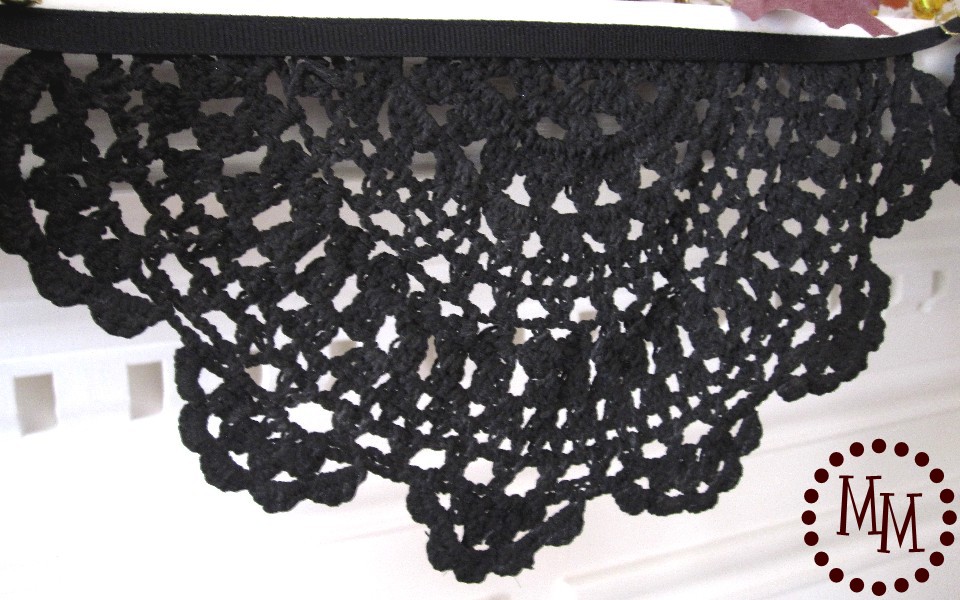
Once your glue has dried and you flip the doilies back around you will have a nice clean look along the top of the doily bunting!
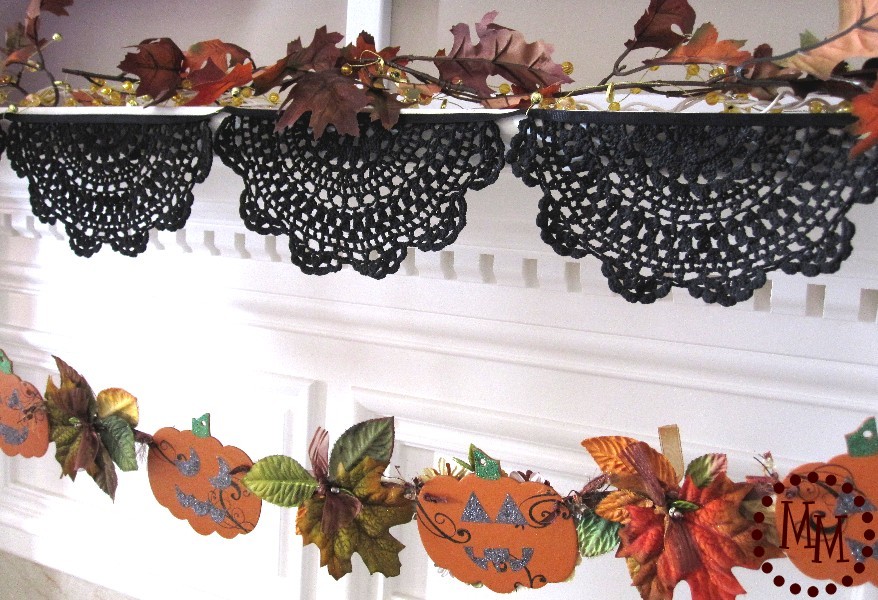
Hang your spider web doily bunting where you dare!
Mine is spookifying my mantle!
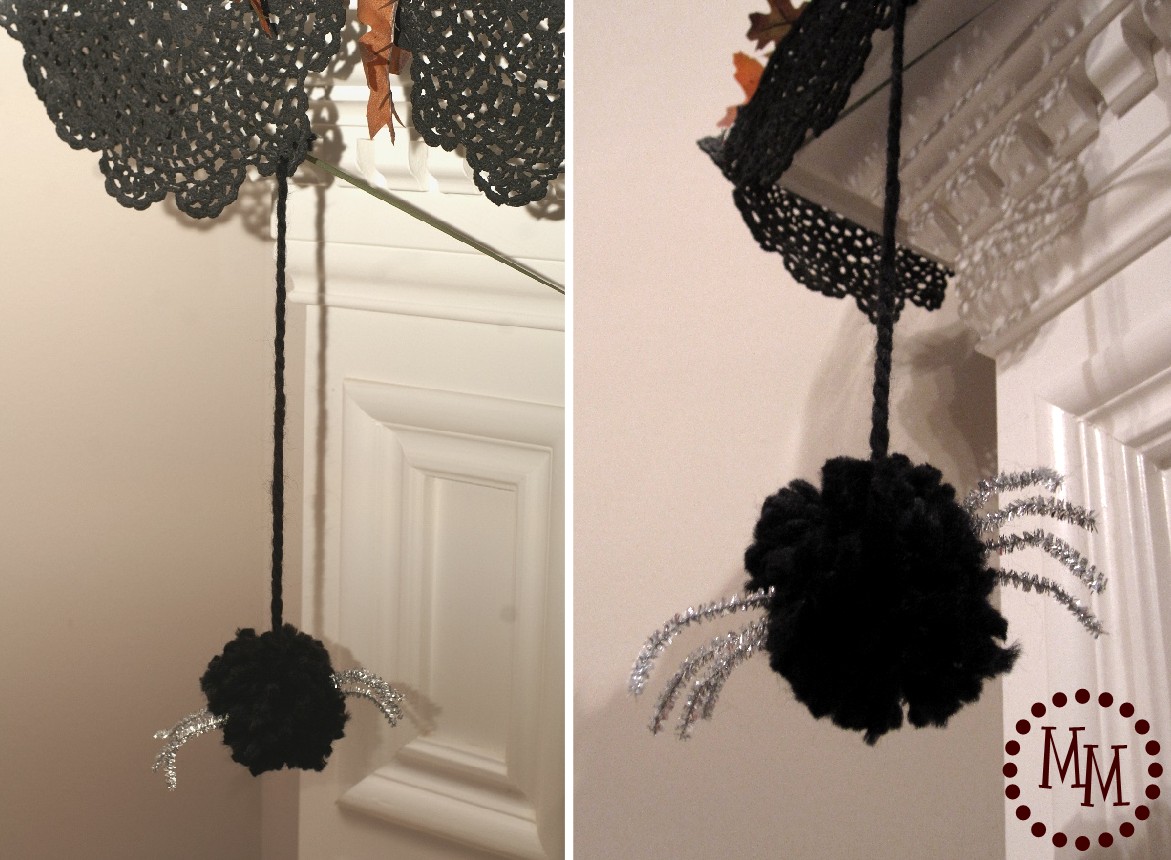
And, of course, no spider web is complete without a spider!
This fat little guy is made with a homemade black yarn pom pom and silver pipe cleaners.
He finishes the look of the spider web doily bunting perfectly.

>> See where I party! <<
This post was originally shared October, 2011.

You can use acryilic paint as a dye? Who knew? The project looks great! Thanks for sharing with us at the #HomeMattersParty link party.
I love this idea of painting doilies black. I have lots of doilies and these would be a great idea to use up some of them.
Thanks for sharing at Turn it Up Tuesday,
Bev
I *LOVE* how this turned out!! Dyeing doilies is one of my favorite pastimes, too. Thank you for linking up at Snickerdoodle Sunday and hope to see you again this weekend. 🙂
Sarah (Sadie Seasongoods)
Love, love, love! I saw this on your mantel post that was linked to a party and had to come see how you made it : ) You are right, it looks FAB draped like that on your mantel. Great project ~ I'm pinning!
I love this idea! We are going to be featuring them tomorrow at Over the Big Moon.
http://overthebigmoon.blogspot.com/
Featured YOU today! Come check it out and grab a button....
http://kim-toomuchtimeonmyhands.blogspot.com/2011/10/good-morning-sunshine_17.html
This is awesome. I think my daughter and I will make some of these this week. Thanks!
Love this idea !!!!
This is such a gorgeous idea, Michele! I loved this so much, I shared it in my Saturday Seven lineup this weekend! http://www.positivelysplendid.com/2011/10/saturday-seven-no-26.html
I love this idea. I've never died anything before but it makes me want to try.
Love it! Stop by and link up if you have time.
Mary
excellent tutorial!!! I need to make this!!
I have seen a few projects with dyed doilies and it looks so great! This is another great idea! Have you linked this up at Creative Me Monday? It's open all week and I'd love to have you.
http://www.thesoutherninstitute.com/2011/10/creative-me-monday_09.html
Jenny
Love love love what you did here! Doilies are perfect for so many purposes! Thanks for sharing!
Love it! You are so clever!!
*hugs*Deb
Ahhhhhh! Deliciously clever, Michele. Love the spider web doilies. Genius. And that spider?? Perfect!
What a great inexpensive idea! This is definitely going on my to-do list. Thanks for sharing.
Really fun idea!
I stumbled this!
What a great idea! I'd love for you to share it on my link party on Wednesday. I hope to see you there!
Awesome spidey webs! Black doilies, who would have thought 🙂
Thanks for the inspiration
What a great idea! The doilies are so pretty but the black gives them just the right touch for Halloween. They look like spiderwebs!I found you through Craft-O-Maniac. Thanks for sharing!
one word..GENIOUS! this looks so cute! thanks for sharing!
Perfect Halloween bunting!!I love the black, what a cute project!
Thanks for posting this great tutorial. It is so cute! I wouldn't mind trying the same thing in red and green for my Christmas decorations!
Gabby
The...Late, Young Family
Michele, my mantle has been in desperate need of "something", but I haven't been able to put a finger on it. Well, your doily bunting is absolutely, positively "it"! Woohoo! Thank you! I'm going to go pick up some doilies this week and am pinning your post to my Halloween board.
Have a great weekend!
Jenn
hehe...come check out my post today...we made a pom pom spider with yarn too...although we had no pipe cleaners on hand and your doily spider web rocks!
Come link this up to scrappy saturdays tomorrow at http://www.candacecreations.blogspot.com!
Candace
This is just awesome!! I love it! I would love if you would come share this at The Crazy Cute Link Party @ Between U & Me! 😀
http://www.betweenuandme.com/2011/10/crazy-cute-link-party-22.html
Looks so cool!
I love this idea. Thanks for showing us how you did it.
visiting from A Glimpse Inside- so creative, dying the doilies!! such a useful tip, you could use it for many holidays and create all sorts of colors and banners 😀
Love that you used lace doilies!! I never thought of dying them with paint. I always used fabric dye but this looks easier.!!
Hugs,
Debbie
Michelle
Super cute. I love how it turned out.
Vanessa
I love the black doilies!! So clever and you could do them in any color!
I'm in love! Fabulous banner and tutorial.
This is awesome!! I love the black doilies - and that spider is super cute! I can't wait to see the whole mantel!!
This is spooktacular!
How awesome! I was thinking about doing something with doilies, but couldn't quite tie it all together.... This would be perfect!
Thank you for the awesome idea and the good thing is, with the right coloring you could do this for any holiday!
Oh my gosh! I love this!!! Those doilies are awesome...what a clever idea...! I would love for you to link them up to my Everything Halloween linky party!
http://midwesternsewinggirl.blogspot.com/2011/10/everything-halloween-linky-party-and.html