
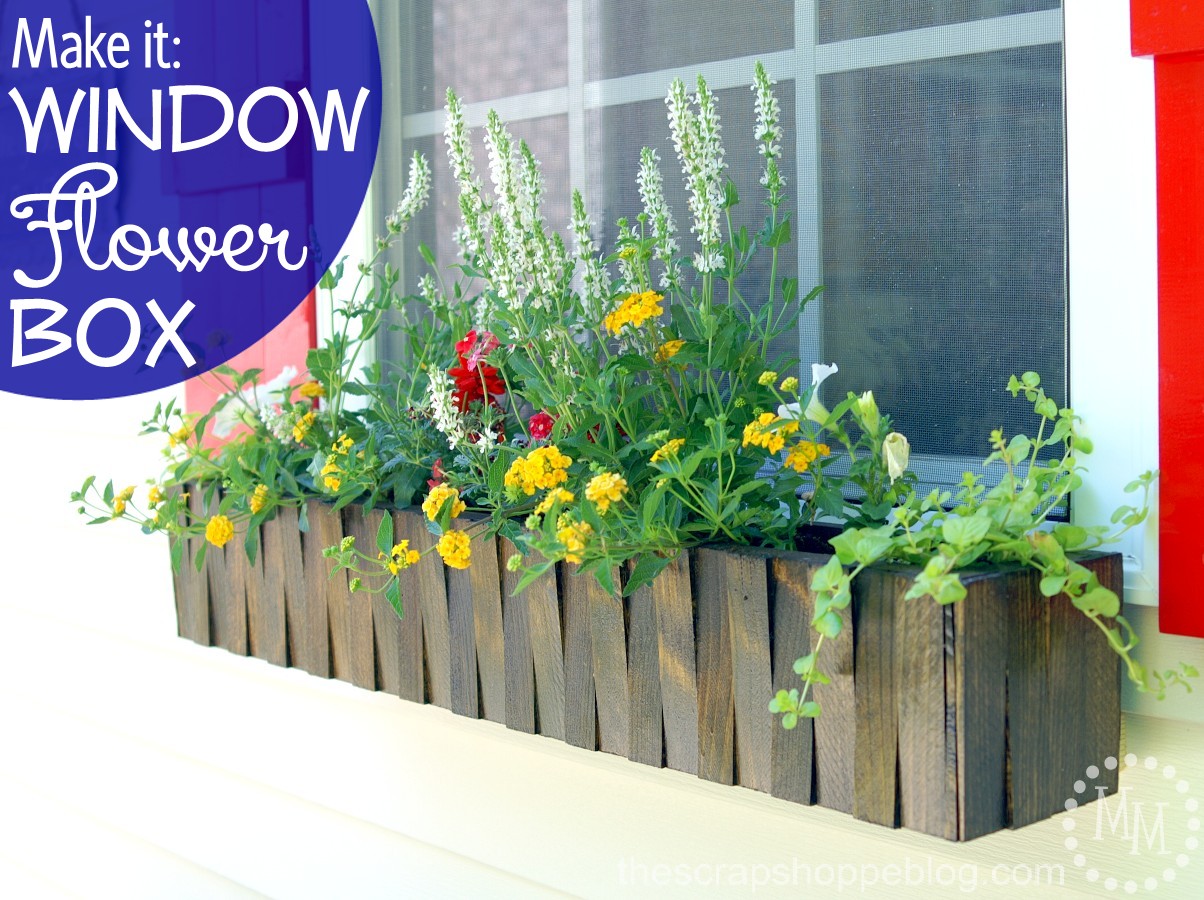
Make It: Window Flower Box
Learn to make a DIY window flower box to brighten up your windows.
I don't know about you, but I love window boxes!
Seeing fresh flowers in front of windows as I drive by a house makes me so happy.
The thought of the person inside waking up and seeing those flowers first thing in the morning... it must be a glorious sight!
I've always wanted window boxes, but haven't really seen any store bought versions that made me giddy.
For my patio makeover, I thought that making my own window flower box to complement my new shutters would be a fun project.
And I'm here to today to share the plans with you!

I know I've been showing this photo a lot, but it is just such a dramatic change from the before to the after that I have to keep sharing it!
In case you haven't seen this photo before, its the exterior of my potting shed pre-makeover.

I've drawn out the plans for the window flower box to make it super simple to reproduce.
You will need:
2 1x6" boards measuring 36"
1 1x4" board measuring 36"
2 1x4" boards measuring 5.5"
3 bags of shims - trim 31 shims to 5.5", cutting off the thin end

Piece together the 1x6's and 1x4's to make the box using wood glue and nails.
This is going to hold so many pretty flowers!

Once the shims have been trimmed to 5 ½", use wood glue to add them to the front and sides of the window box.
As they are placed on the box, alternate which direction they go.
This will give the window box a fun contrast.

How you choose the to hang the window box may depend upon what you are hanging it on.
Wood, bricks, siding...
Mine is going to be hung on vinyl siding which is backed with wood. My husband cleverly built this frame for hanging the box using 1x2's.
He glued and nailed 2 1x2's measuring 24" together, after first cutting the side of one of the 1x2's at a 45 degree angle.
He then attached a second 1x2 measuring 24" and also having a 45 degree edge to the back of the window box.
All of the 1x2's fit snugly together where the wood is cut at 45 degree angles.
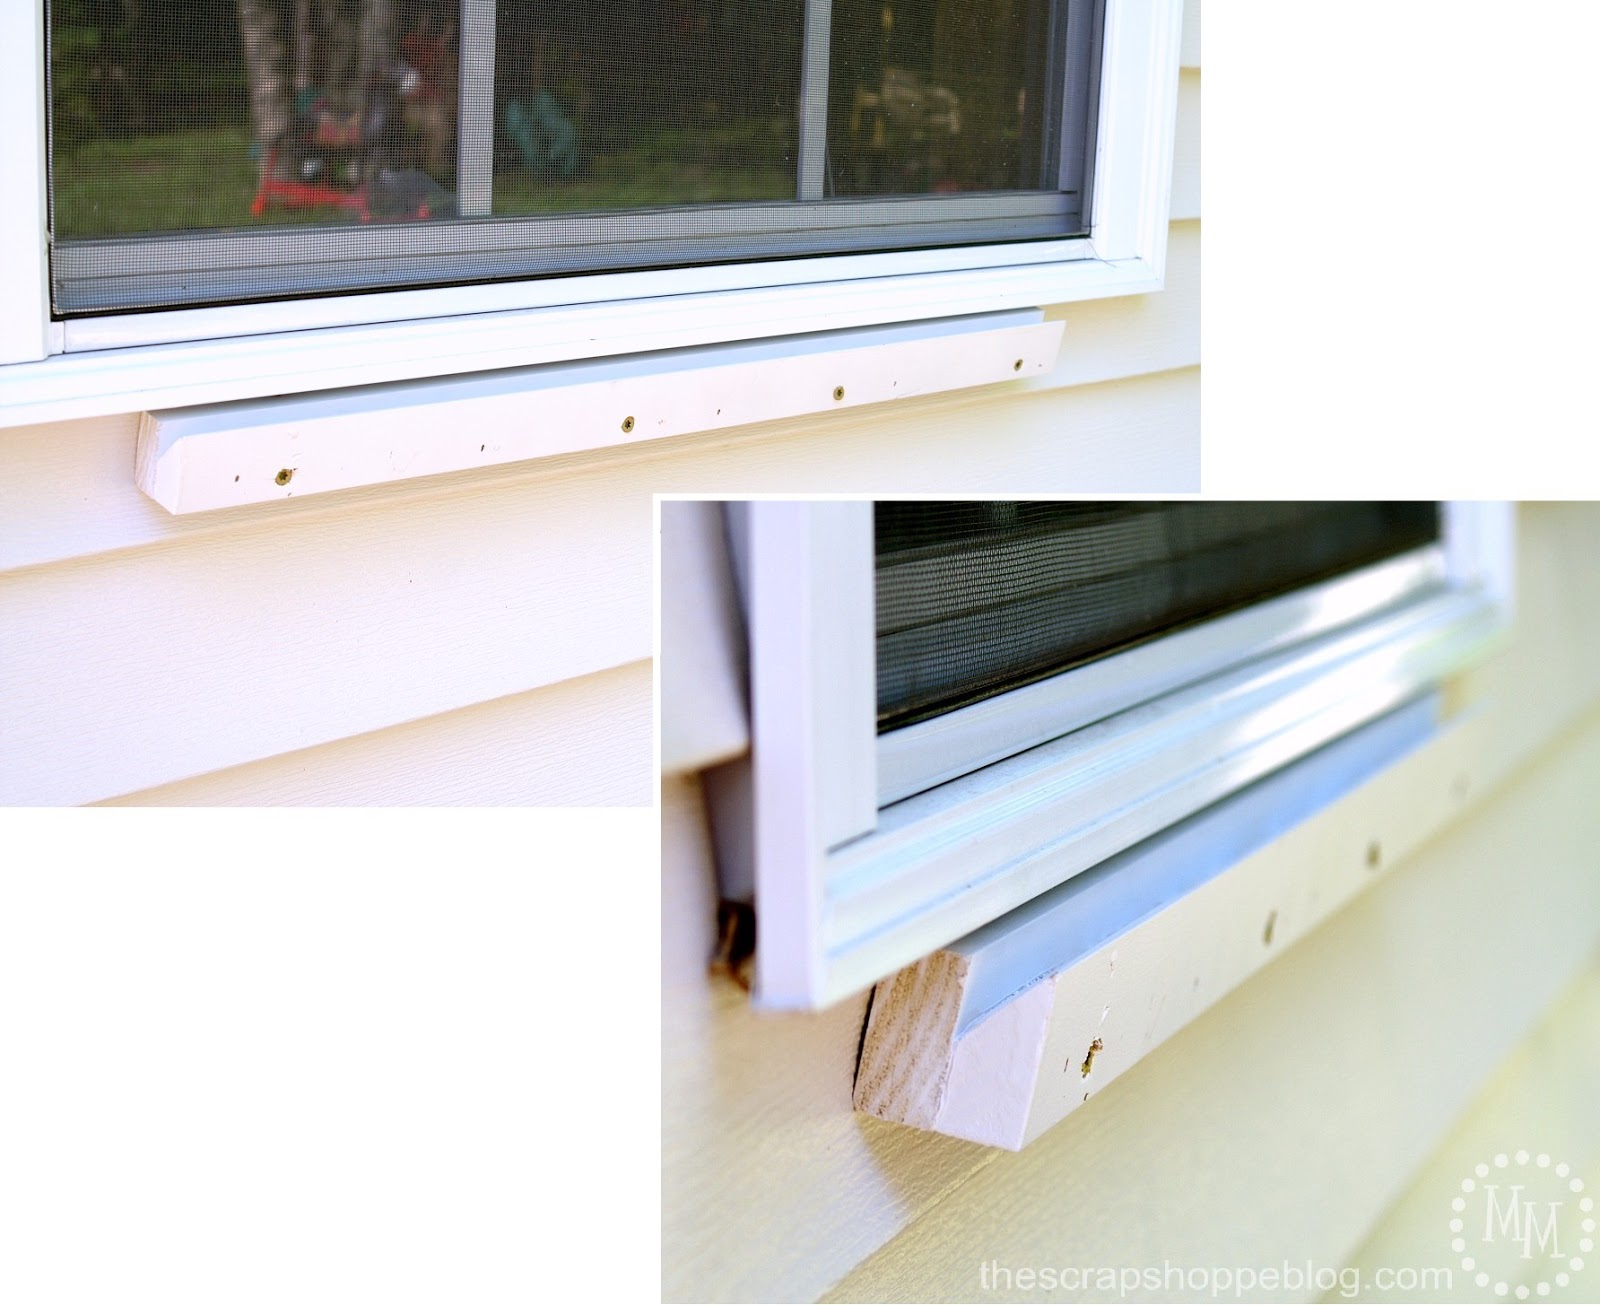
We screwed the frame directly under the window frame and into the wood behind the vinyl.
It's super secure and isn't going anywhere.

I stained the window box with 1 coat of Minwax Dark Walnut stain followed by 3 coats of polyurethane.
I use Dark Walnut for a lot of my staining projects.
The deep brown color is my favorite!
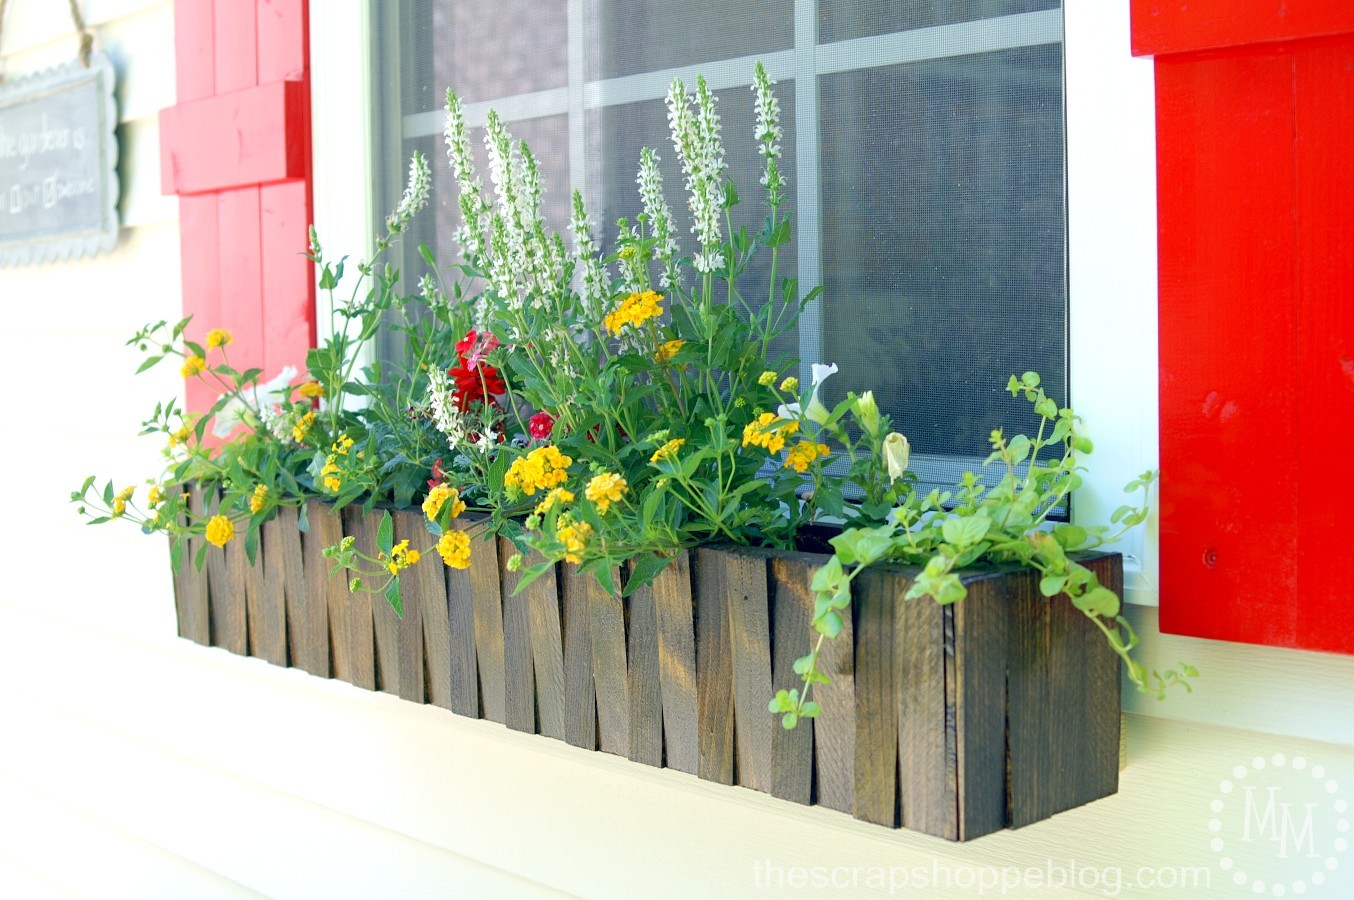
Before hanging the box, I filled it with flowers and plants that would add height and hang over the edge.
The box can be easily set on the frame and removed later for changing out the flowers.

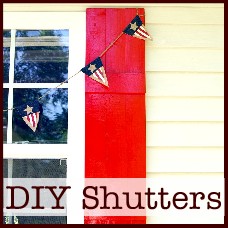
I love the way it looks with the red shutters!
And I purposely designed the window box to not stick out far from the side of the potting shed so that a chair can be set under it and the person sitting in it doesn't have to worry about hitting their head.
And those shims?
I just love how they ended up looking on the window box.
Especially after staining!

>> See where I party! <<
This post was originally shared May, 2014.
You may also enjoy


Oh so beautiful! I love the innovative way of hanging it! Took me a few minutes to grasp the concept! 😆 I love the idea of being able to remove to fill.
This is great. Thanks for sharing at the To Grandma's House We Go DIY, Crafts, Recipes and More Wednesday Link Party. Pinned!
What a great project and it looks so pretty with the red shutters. Sharingl. Thank you for sharing on Merry Monday! Hope to see ya next week!
Kim
Oh my goodness, I love this so much!! I've been considering adding flower boxes to my house. 🙂
Pinning this for sure. Thanks for sharing with us at #MMBH!
I think these are beautiful but our home is built in such a way that I do not think I will be able to utilize it here.
Wow, I just love this! Such a great way to use the shims. Thanks for linking up to #HomeMattersParty
Lovely! Thanks for sharing your creativity!
Super cute! My daughter desperately wants a flower box outside her window. Just need my husband to make us some! Visiting from Share Your Style party.
This flower box looks stunning. A good tutorial as well.
Kathleen
Blogger's Pit Stop
LOVE these... so cute. I've been wanting to do flower boxes, and I think your post is inspiring me to get on that! 🙂
Thanks for sharing!
Using shims, what a great idea!! That is a beautiful accessory to you home and looks super easy to make. I love it!
Hey, Michele! Just wanted to let you know that we loved your Window Flower Box so much when you shared it at the #HomeMattersParty last week, we’ve FEATURED it THIS WEEK! Hope you can check it out when you get a sec! Happy Friday!!! http://theroadtodomestication.com/2015/08/13/home-matters-linky-party-50/
Wow! That looks so great. It really changes the look of the whole house from the outside. Thank you for linking up and sharing this at #HomeMattersParty Hope to see you again soon.
This window box is fantastic! I love the texture on the surface...it gives it such an architectural element. Great pics. Thank you for sharing on #HomeMattersParty.
I love this flower box and it looks quite easy to make! Thanks for sharing with #SmallVictoriesSundayLinkup last week. I've chosen your post as my featured post of the week!
So pretty and really smart using wood shims! Even I could do this! Thanks for sharing at the #HomeMattersParty
so funny I was talking with honey about making me a few flower boxes and we couldn't decide how they hook to the window and I totally forgot to google it. Now not only do I have a cool flower box to make, I know how to add them to the window!!! How is that for lucky!! I love the way the shims turned a boring wood box into something wow!! So unique and whimsical! Great staining too, I love the variations in color! Thanks for sharing with Snickerdoodle though hubby might not be as happy now I can show him what he needs to do lol!
What a cute idea! And way more simple than I would have expected!
Found you at Mom 2 Mom - Thanks for sharing!
oh my gosh! how did I miss this post? LOVE the flower box. genius to flip flop the shims! catching you!
Absolutely LOVE the alternating shim pattern on the outside! Totally makes this flower box fabulous!
I really love the pattern the shims give the planter boxes. Great idea and your after is awesome!