
Easy Necklace Extender Tutorial


We're into day 3 of Jewelry Week with myself and Bev from Flamingo Toes!
What do you think about it so far?
I hope you have enjoyed the previous 4 tutorials we've shared with you!
There is a back story to today's tutorial for an easy necklace extender.
Ready?
I was out shopping with my mom and on the lookout for a good semi-chunky, black & white, multi-layered necklace. Basically something I could wear with a lot of my wardrobe. I'm a neutral gal (with a colorful gal working to get out!), so black and white is my palette. And, hey, I don't make all my jewelry from scratch!
Enter the following necklace that looked perfect on the rack...
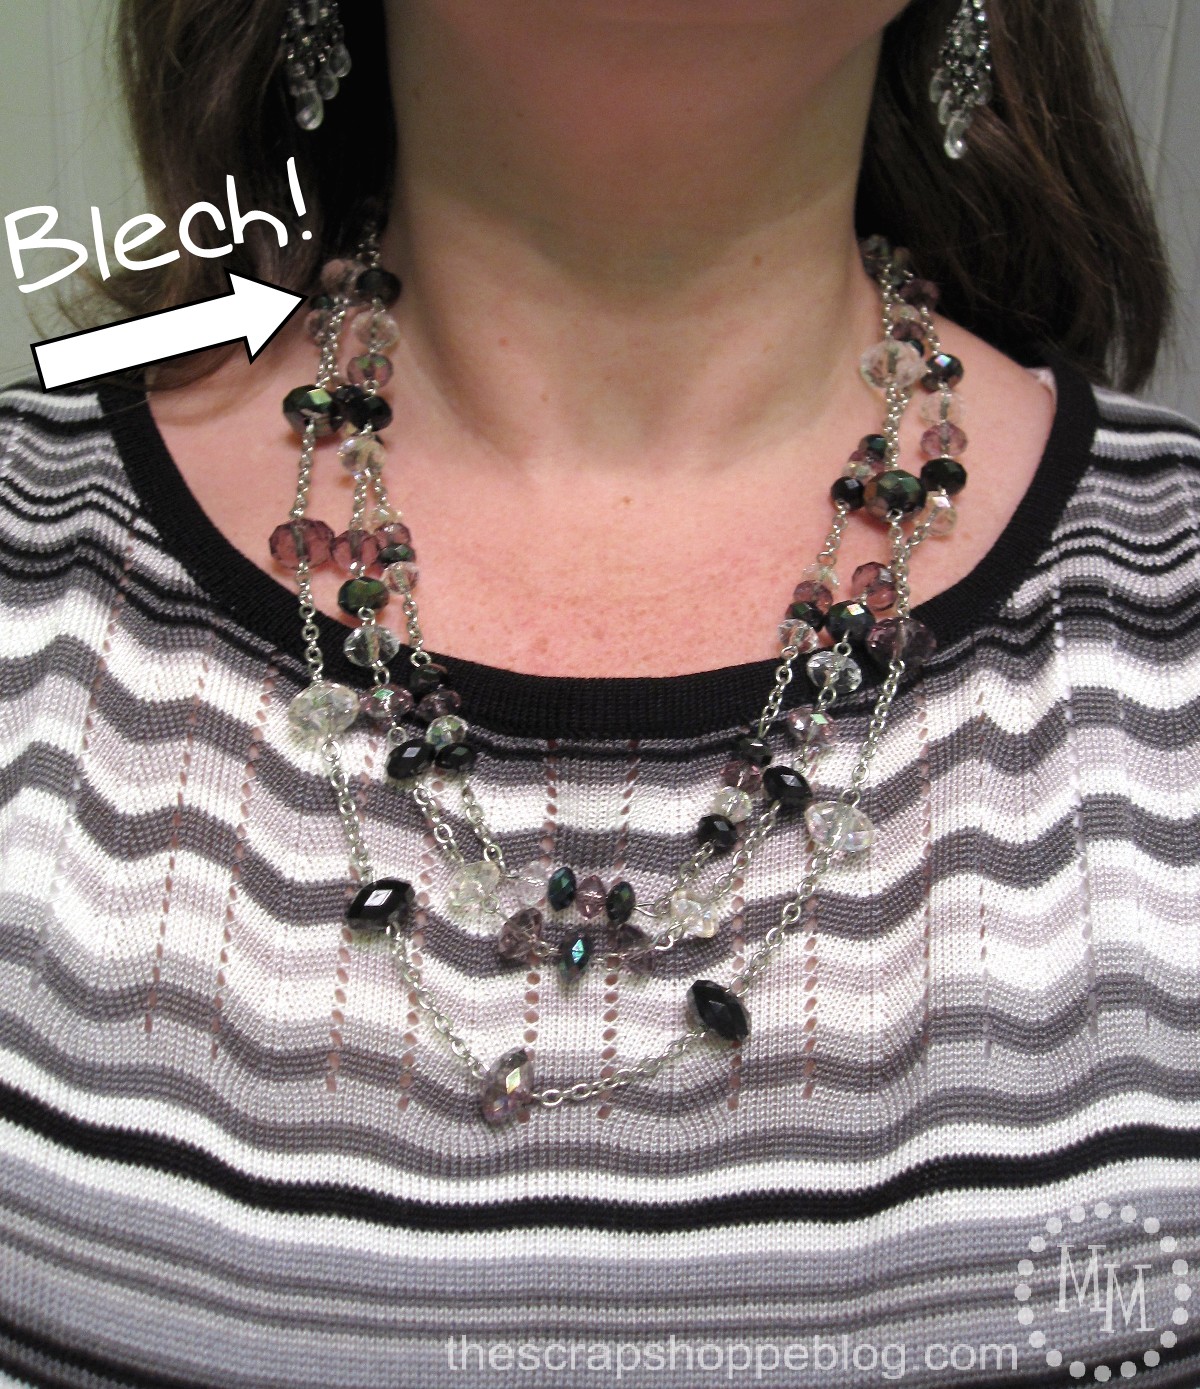
...but ended up being shorter than I had hoped when I tried it on.
Not to mention all those chunky beads all up on my neck.
No thanks!!
I was just about to put it back on the rack when my mom said, "why don't you just make it longer?"
DUH! Am I a DIYer or not?? And, obviously, I am also the daughter of a DIYer!
I just love shopping with my mom!
So I purchased and took it home to work a little bit of magic on it.
You won't believe how simple this tutorial is!
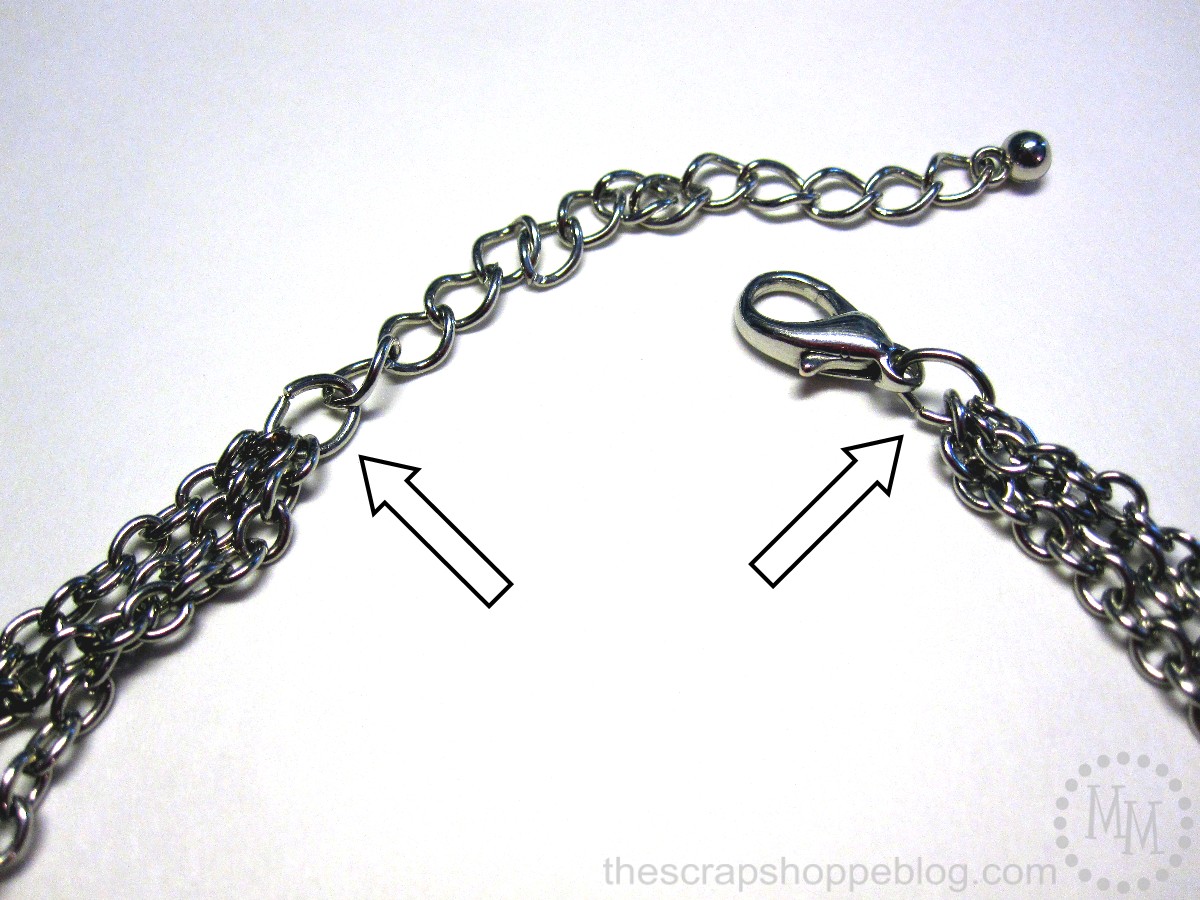
First, locate the jump rings at the each end of the necklace.
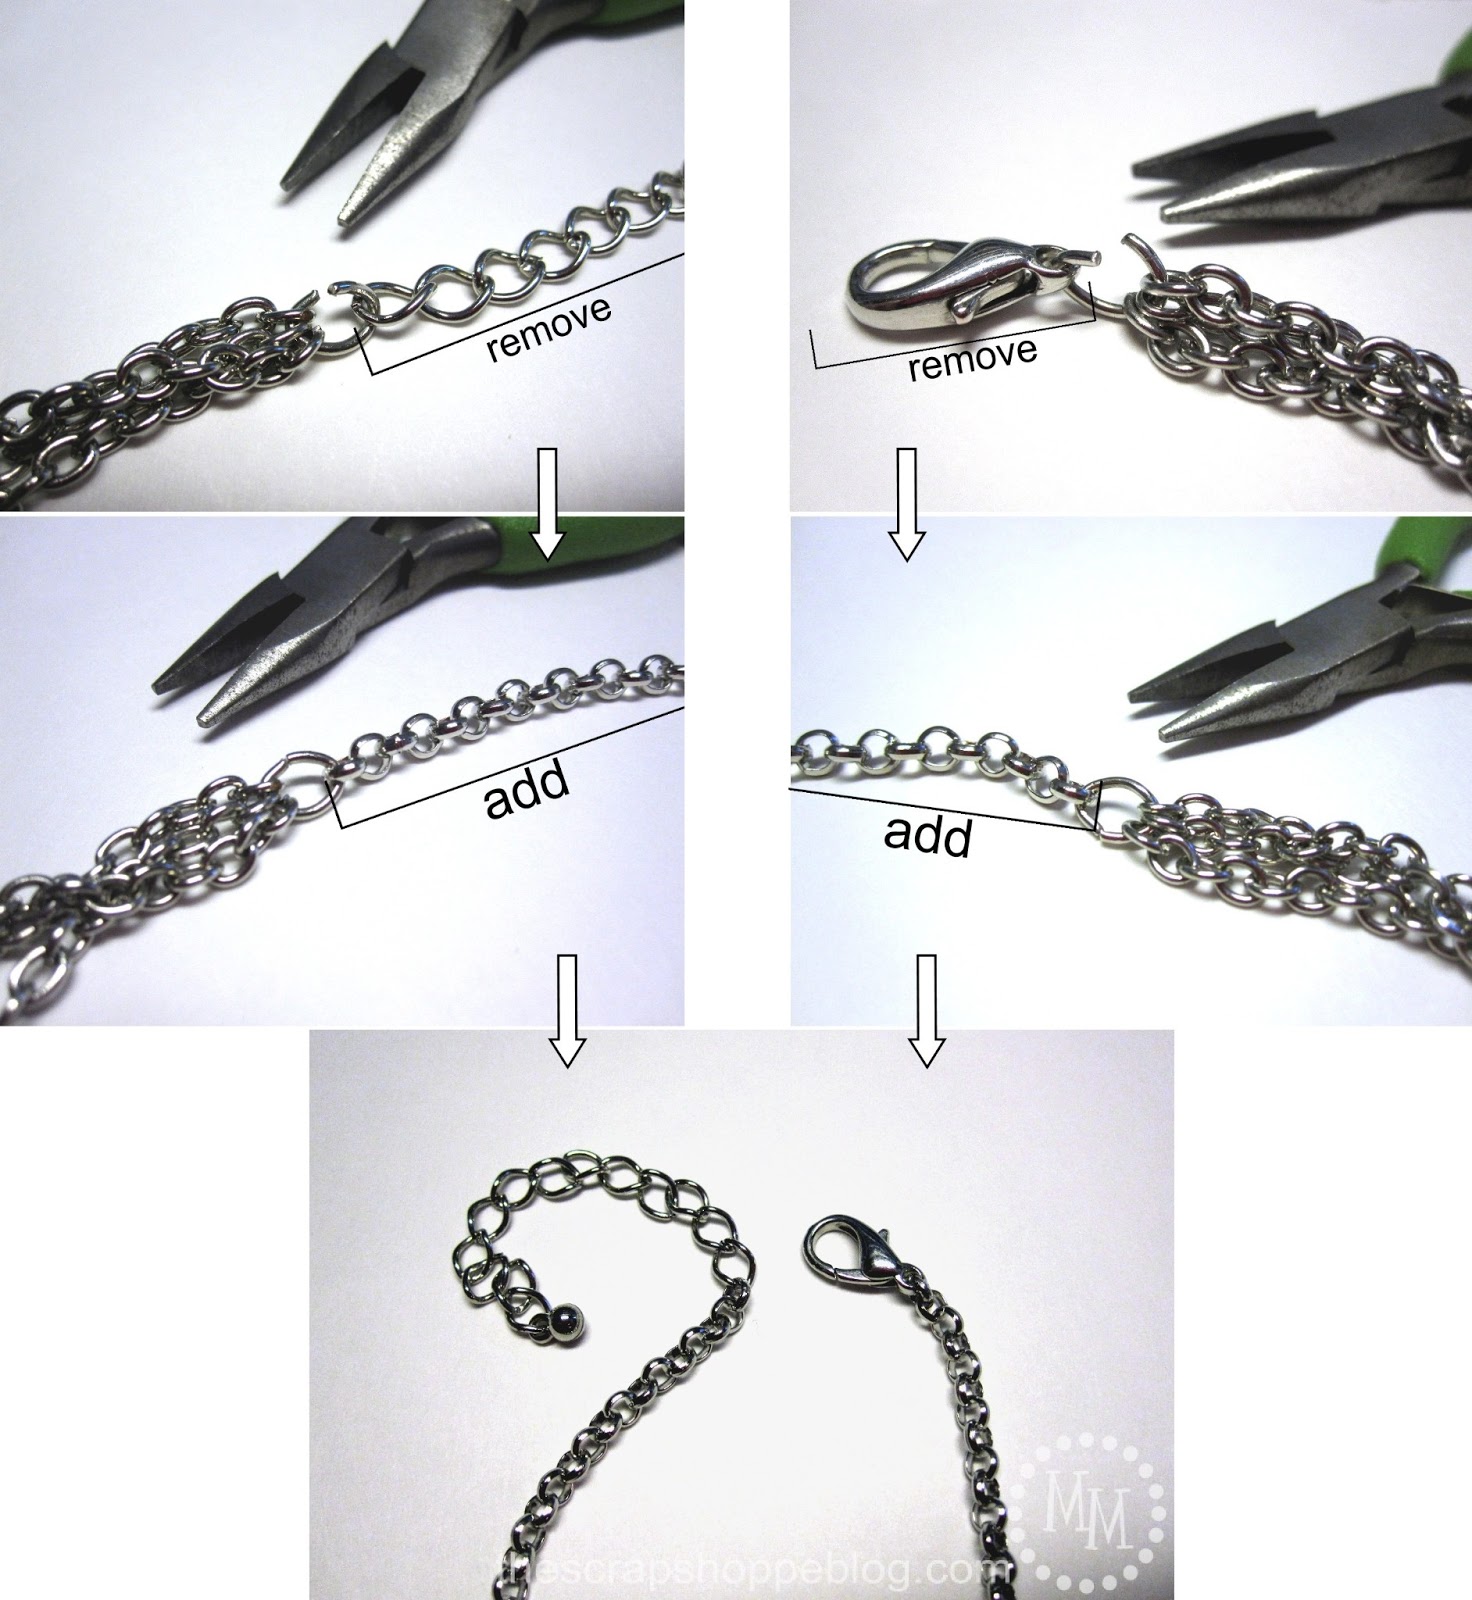
For the left side, we want to open the jump ring and remove the decorative extender (not that it extends very far!).
Add some chain, preferably something similar to what is already on the necklace so it looks more natural, that you have pre-measured to be the new length you want the necklace to be.
Add the decorative extender back to the end of the chain with a new jump ring.
For the right side, open the jump and remove the necklace clasp.
Add your chain, then add the necklace clasp back to the chain with a new jump ring.
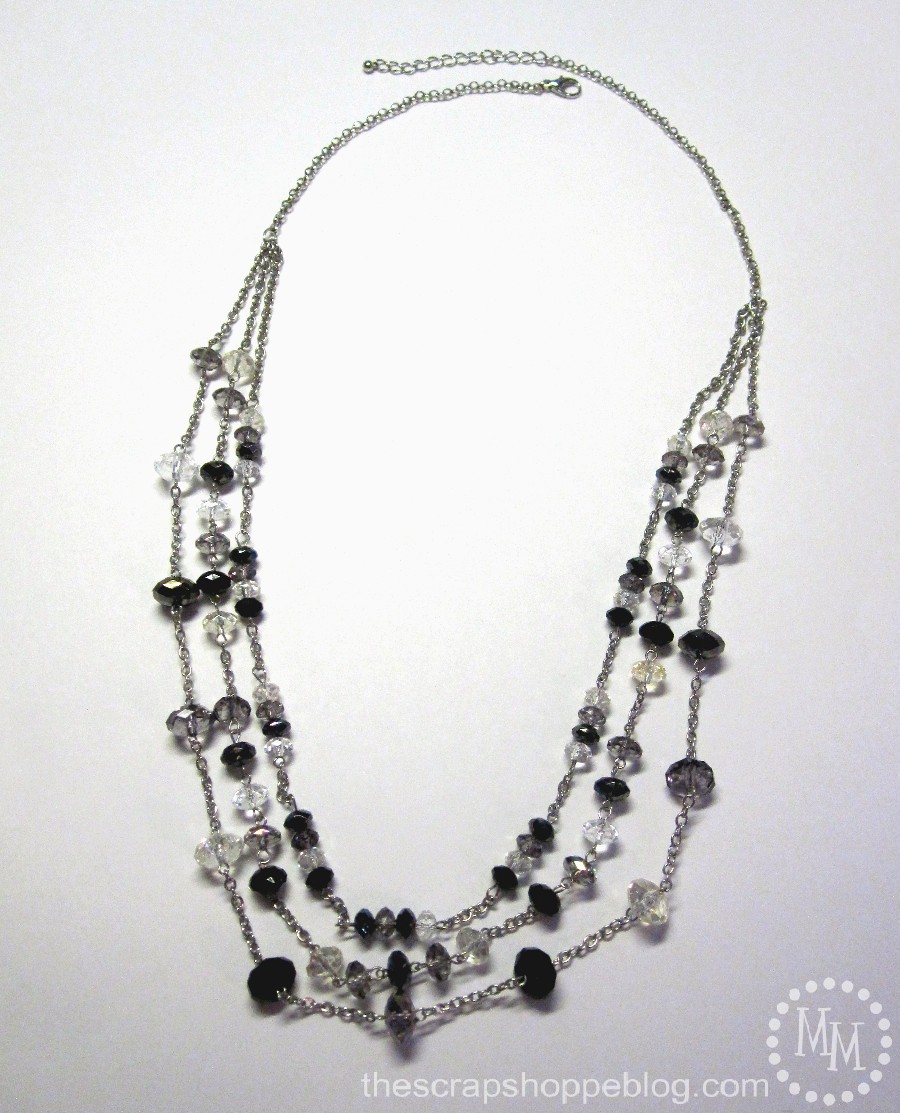
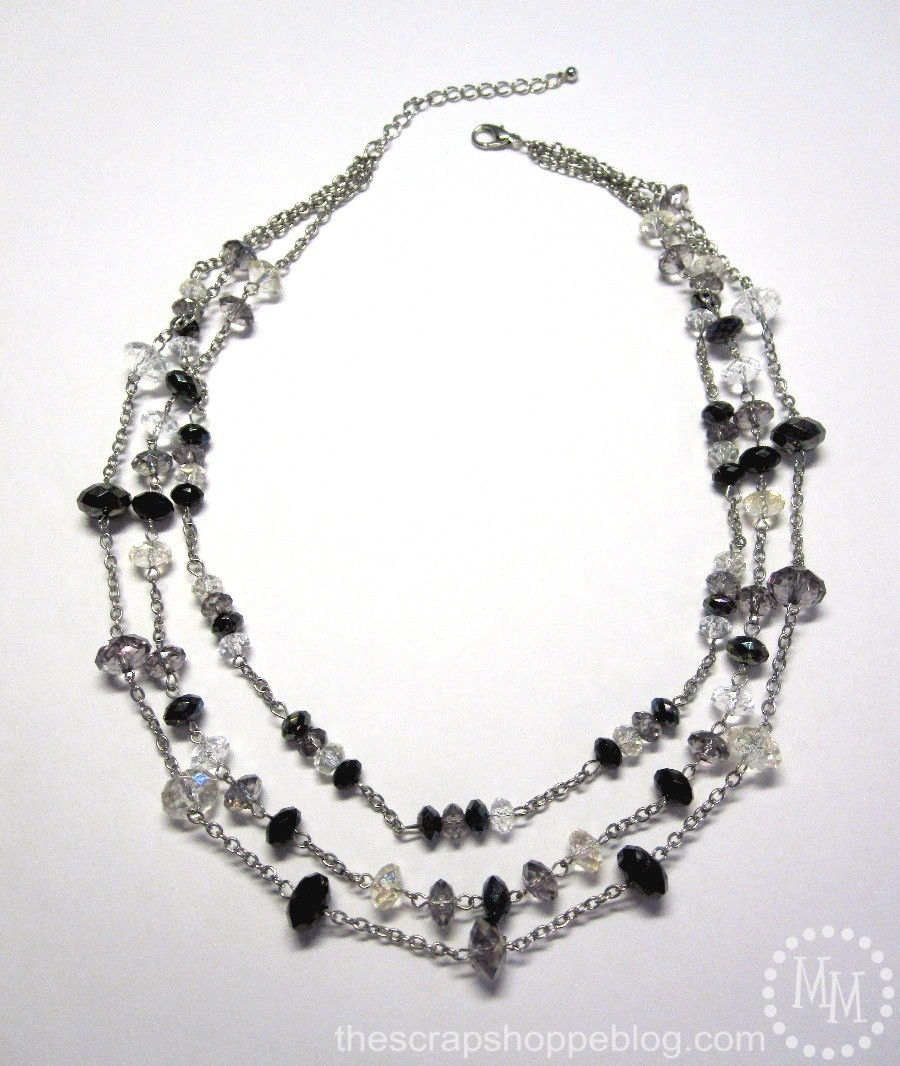
Now we have our new and improved long necklace!
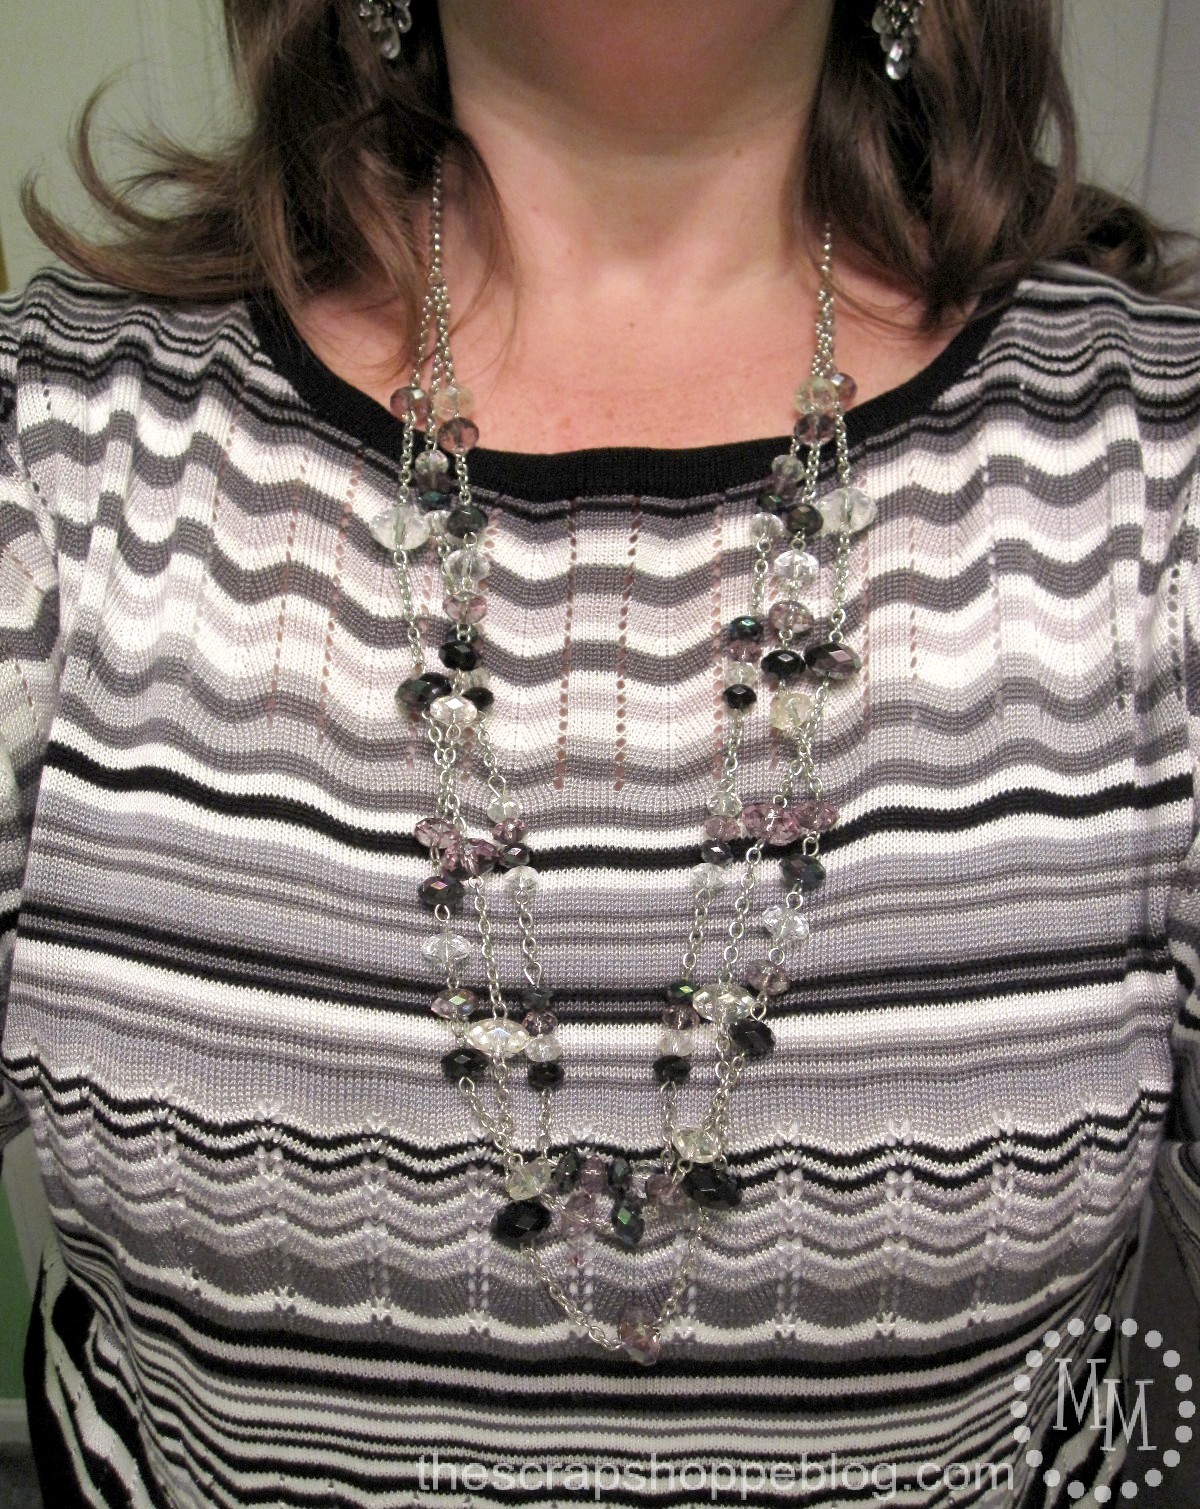
Big difference right?
Its like a whole new piece!
And none of the chunky beads getting all on my neck.
Its exactly what I was going for!
Now won't you look twice at a necklace (or bracelets or earrings!) if they aren't quite the length you want them to be?
Now head over to Bev's and check out the tutorial for these amazing gold dipped earrings!
Linking up to Flamingo Toes, Skip to My Lou, Today's Creative Blog, The Shabby Creek Cottage, Tidymom, 504 Main, Serenity Now, Whipperberry, My Repurposed Life, 30 Days, Tatertots & Jello, Positively Splendid, and other great parties found on my party page.


A great idea to extend a necklace! As for me, I dedicated an extra chain so it can be used to extend any short necklace. Here's how I did it:
http://phattgurll.blogspot.com/2013/03/how-to-extend-necklace.html
Great idea - it works so well on that necklace!
cute! huge difference when you get those pesky (but pretty) beads off your neck!
gail
I also dislike short necklaces and this is a great idea. What I do that doesn't require removing any of the jump rings and clasps is to just purchase inexpensive plain chain ankle bracelets and attach it to the necklace ends.
Brilliant! Thanks for sharing.
Great idea! And I'm sure it's far more comfortable to wear like that.
You make that look so easy! I never would have thought of it or tried it. Thanks for the idea.
KC
Love this, Michele! I do this all. the. time! I have really loved your and Bev's jewelry week! So fun!
What a great idea!! I have several necklaces I can do this to. Thanks for the tutorial!! Loving Jewelry week!!
This is so awesome Michele! And I loved the story with your mom - I probably would have done the same thing and put it back! lol. Love the tutorial too!!
Ok, I have a bunch of necklaces to do this to. Thanks for sharing.
And I love that necklace. Perfect neutral with just enough fun to it!
Such a simple idea but what a difference! I like the longer length much better 🙂
I have loved every one of the tutorials you and Bev have shared this week. This one is no exception.