
Glittered Pumpkins
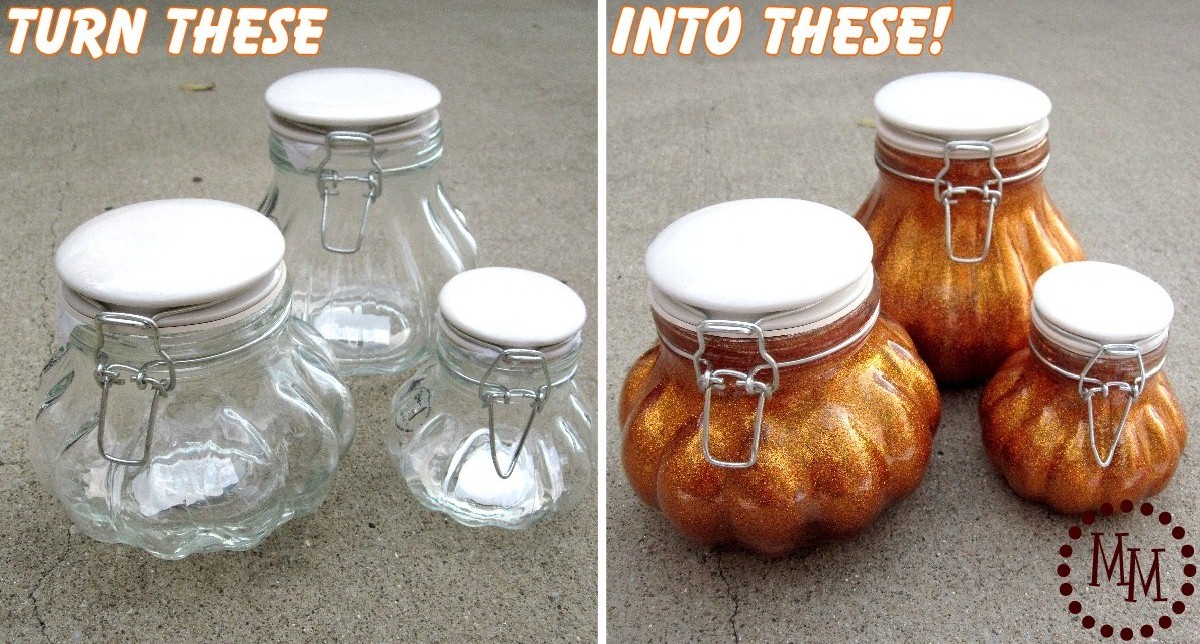
Glittered pumpkins are an easy DIY fall craft that you can create quickly with any glass container.

These glittered pumpkins were without a doubt SUPER fun to create!
I mean, really, there was glitter and fabric involved.
You can't go wrong!
And the best part?
You only need a few supplies to complete this cute fall pumpkin craft.
So without further ado, let's create some Glittered Pumpkins!
I have been wanting to try this glitter technique ever since I saw it on Pinterest.
It sounded too good to be true!
But as you can see in the photo above, it totally worked!
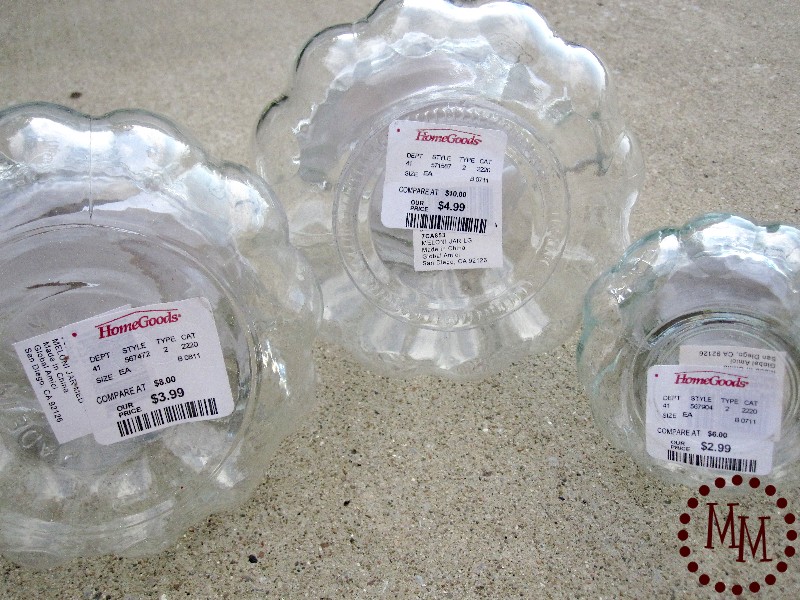
First up, the jars.
I found these glass jars at Home Goods and immediately thought they would make adorable pumpkins.
So I grabbed 3 different sizes for this project.
You can easily use any type of glass jar for this craft, but it must be glass.
You can even use Mason jars to get a similar look to these painted pumpkin jars.
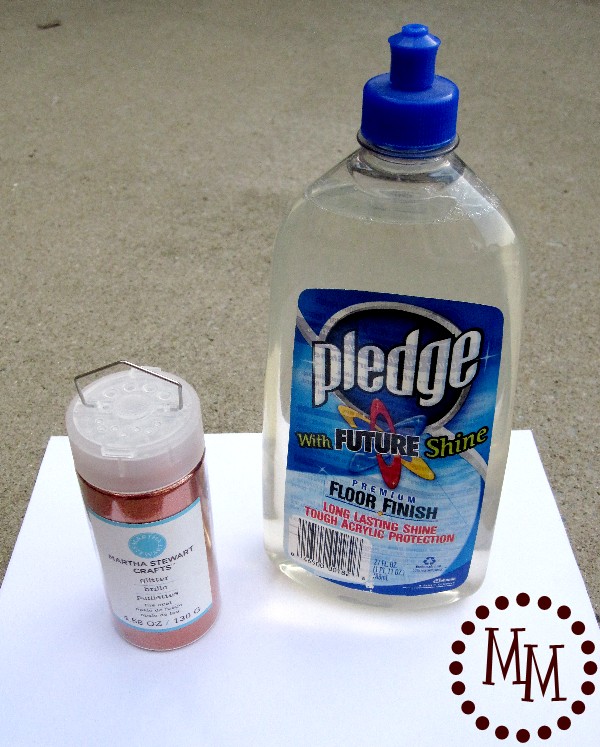
Supplies:
Pledge with Future Shine
A very fine glitter
Green fabric

For my glitter, I chose Martha Stewart's Fire Opal.
Its kind of a darker orange.
I love it!
Add a small amount of the Pledge to your jar.
Swirl it around until the inside of the jar is completely coated with the Pledge.
Remove any excess liquid by holding the jar upside down and letting it drip back into the original container.
Add a small amount glitter to your jar.
Close the lid and shake the container to scatter the glitter.
The glitter will stick to the Pledge on the glass.
Add more glitter as needed until the glass is completely coated.
And that's it!
I admit I was a little skeptical of the glittering technique.
I tried it on my smallest jar first.
It worked like a DREAM!
I quickly moved on to my other two jars.
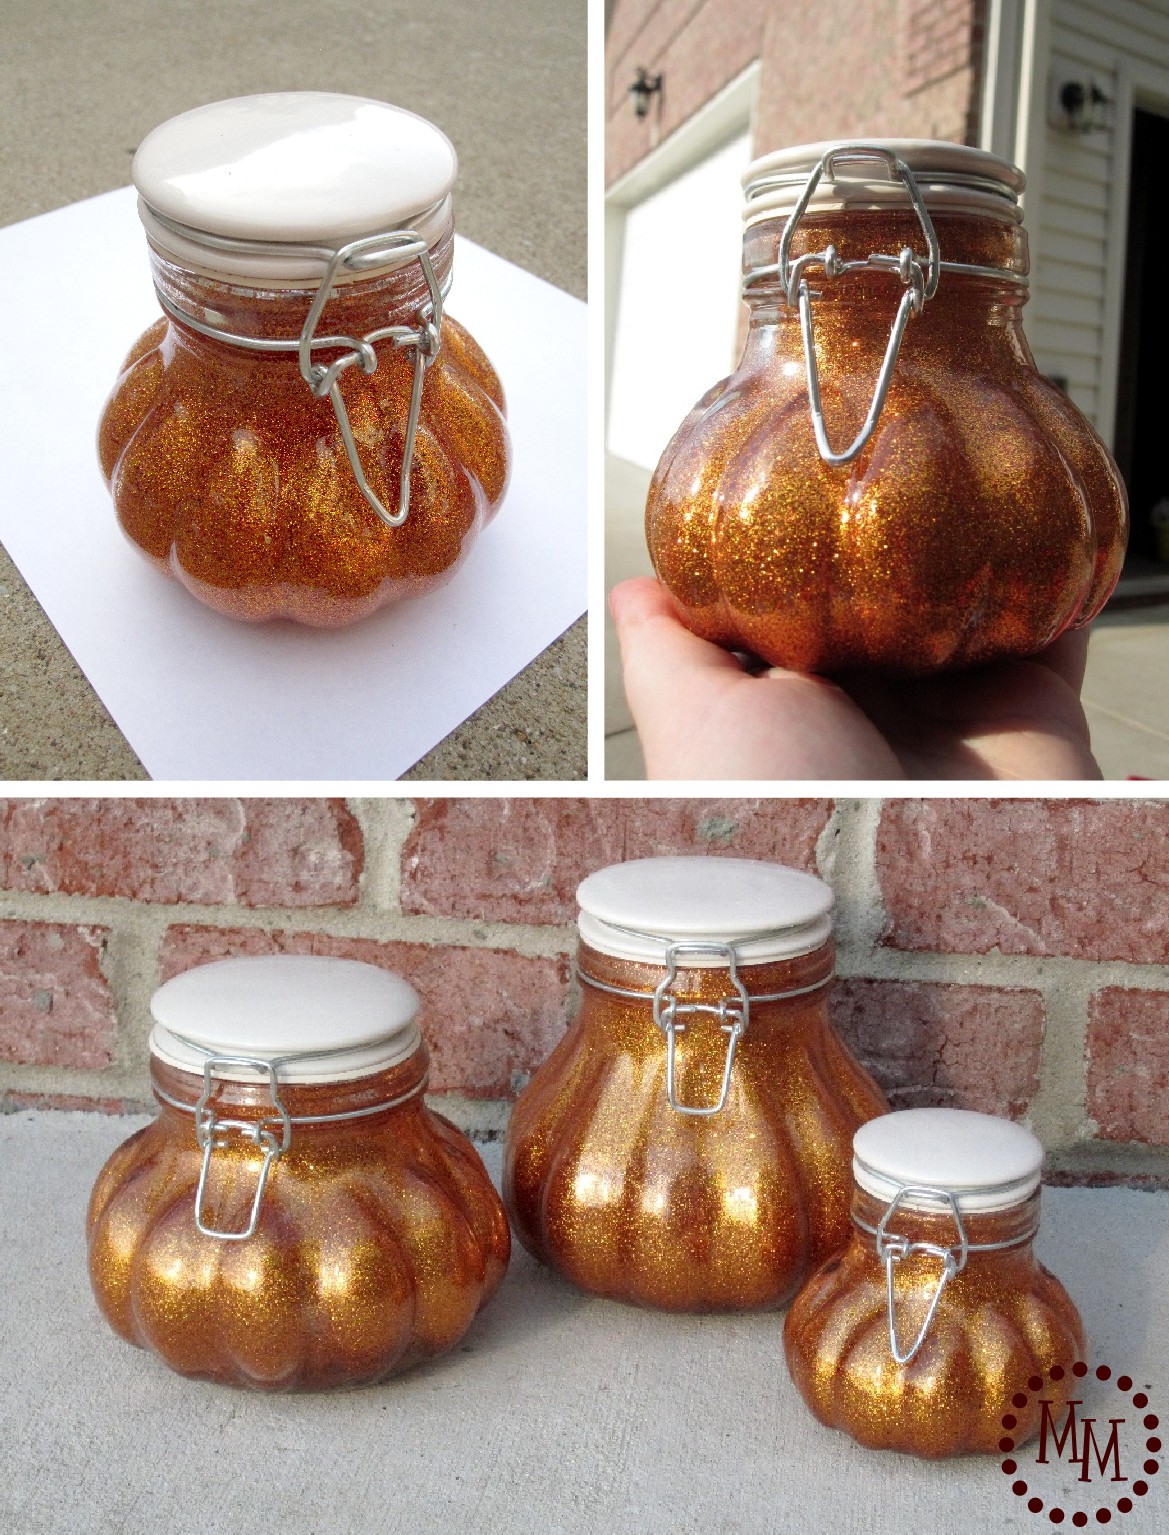
Aren't they looking "pumpkiny" already??
And the sparkle! WOW!!
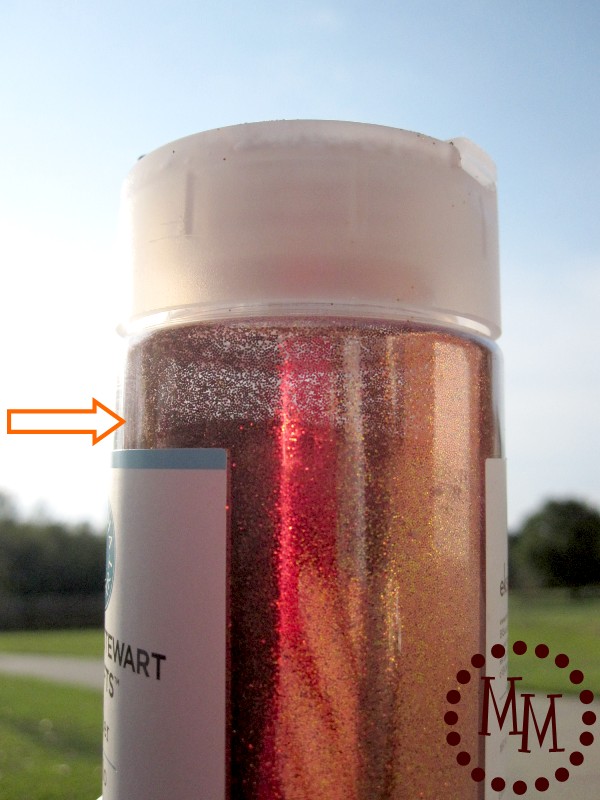
I wanted to show you how much glitter I used.
HARDLY.ANY.
Seriously! I have tons of glitter left!
(No glass surface will be safe in my house now.)

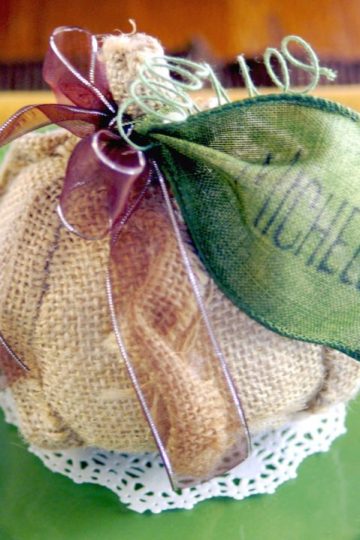
Now to move on to the pumpkin "stems."
I took the wire off of the pumpkins jars and taped the lid on.
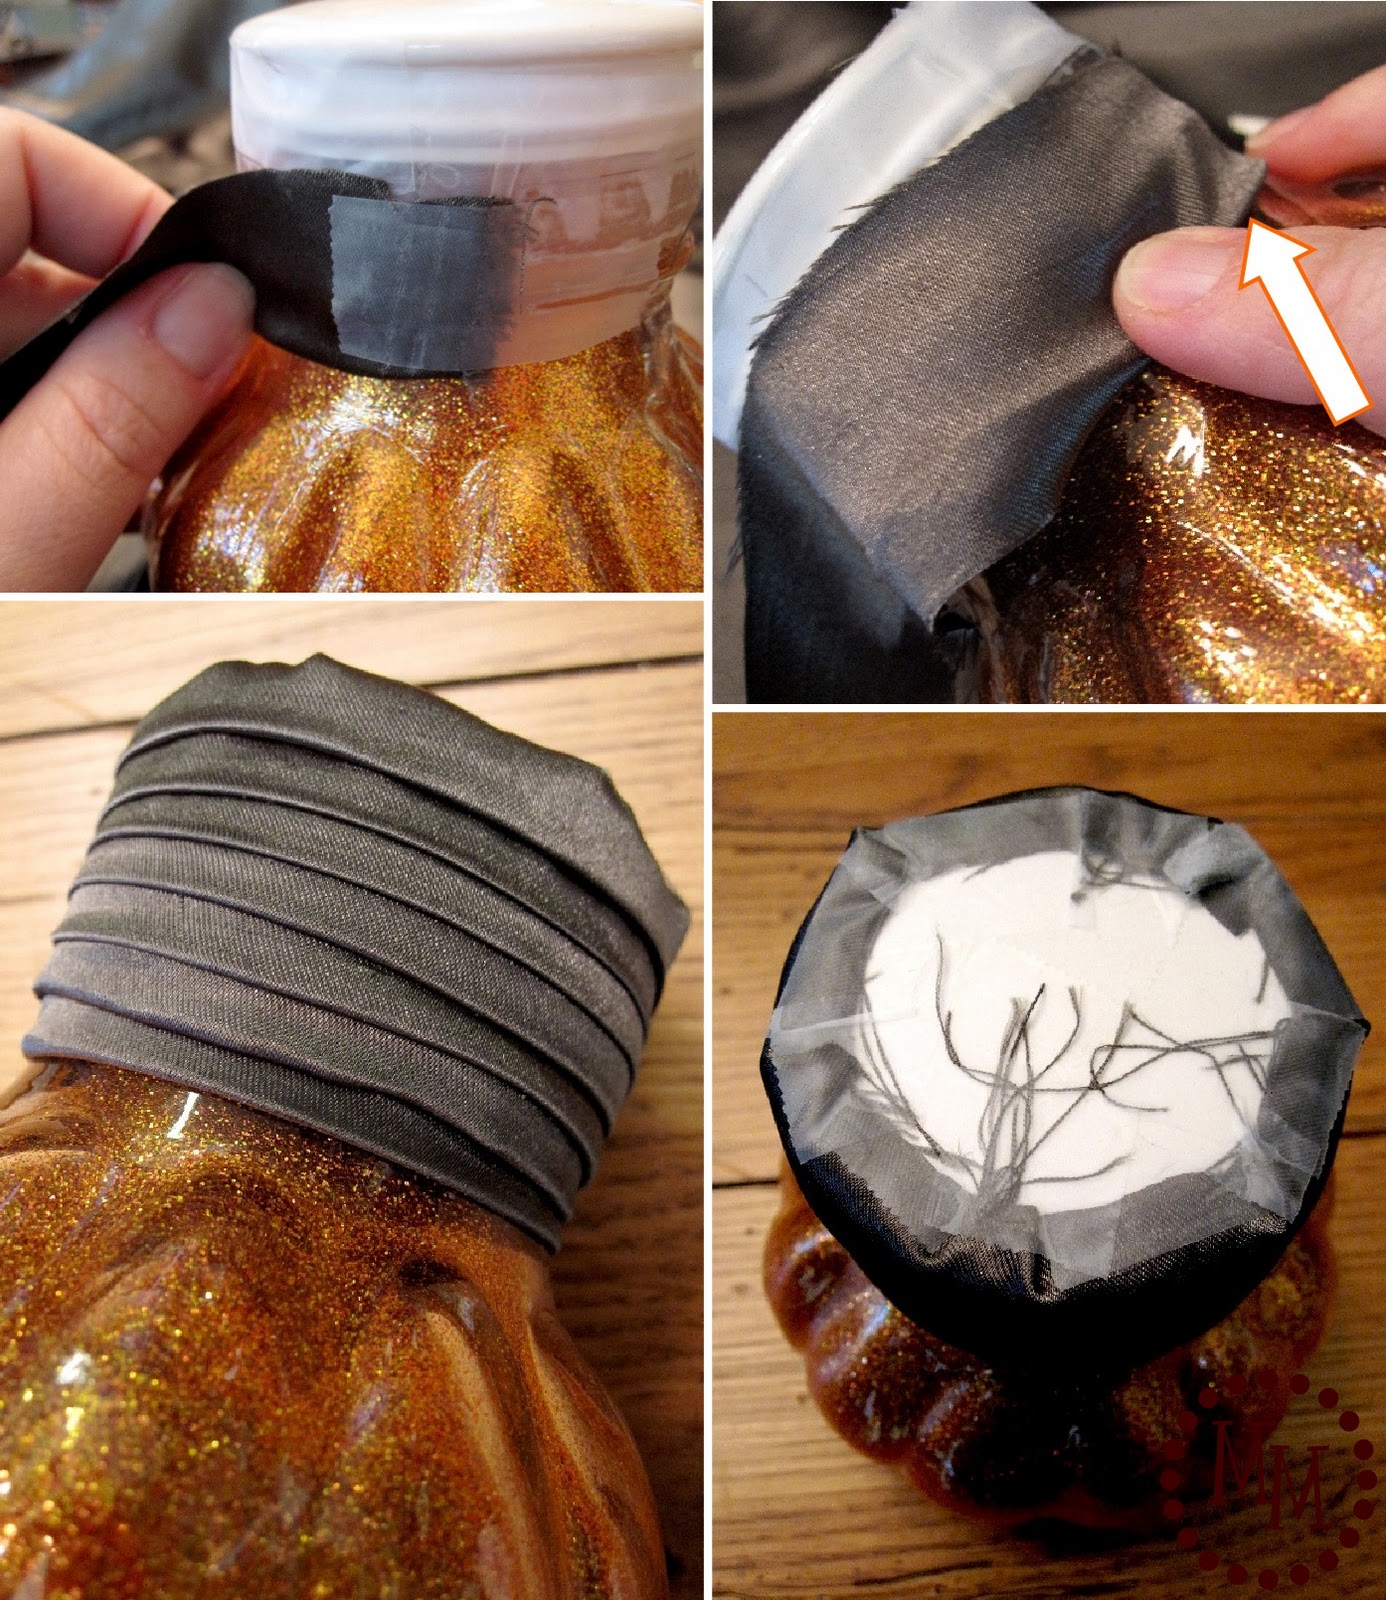
I found some pretty dark green satin in my fabric stash.
(I've never shown you all my fabric stash... its kind of embarrassing how much I have!)
I cut the fabric into strips.
I taped one end of the fabric to the pumpkin and folded the bottom of the fabric under to make a faux hem.
I wrapped the strip around the pumpkin, overlapping as I went and continuing to fold up my faux hem.
Once I wrapped the fabric to the top of the lid, I taped down the edges.

I used a glass as a template to cut a circle to go on top of the pumpkin's lid.
I glued it down making sure to keep the glue around the edges of the lid and not on top.
(Glue will permanently darken satin where it touches.)
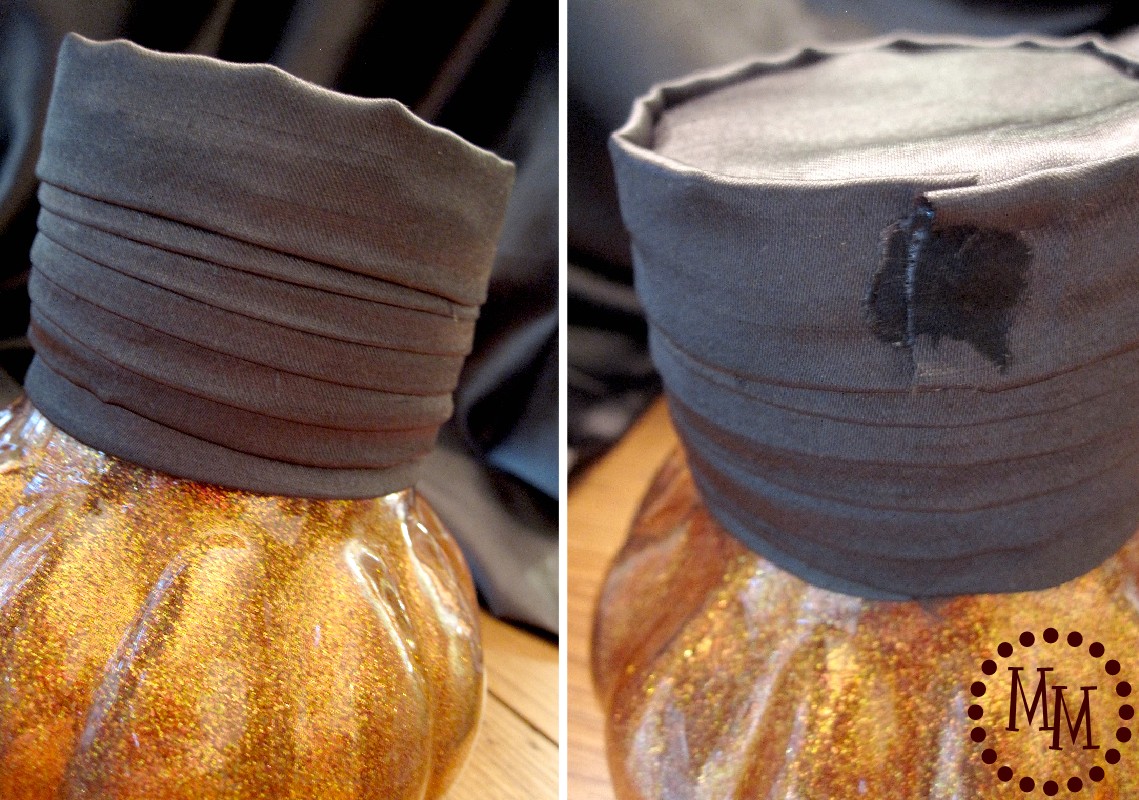
I used a second strip of fabric to wrap around the top of the pumpkin to hide all of my rough edges.
I folded a double hem as I wrapped it.
I glued the strip to the lid.
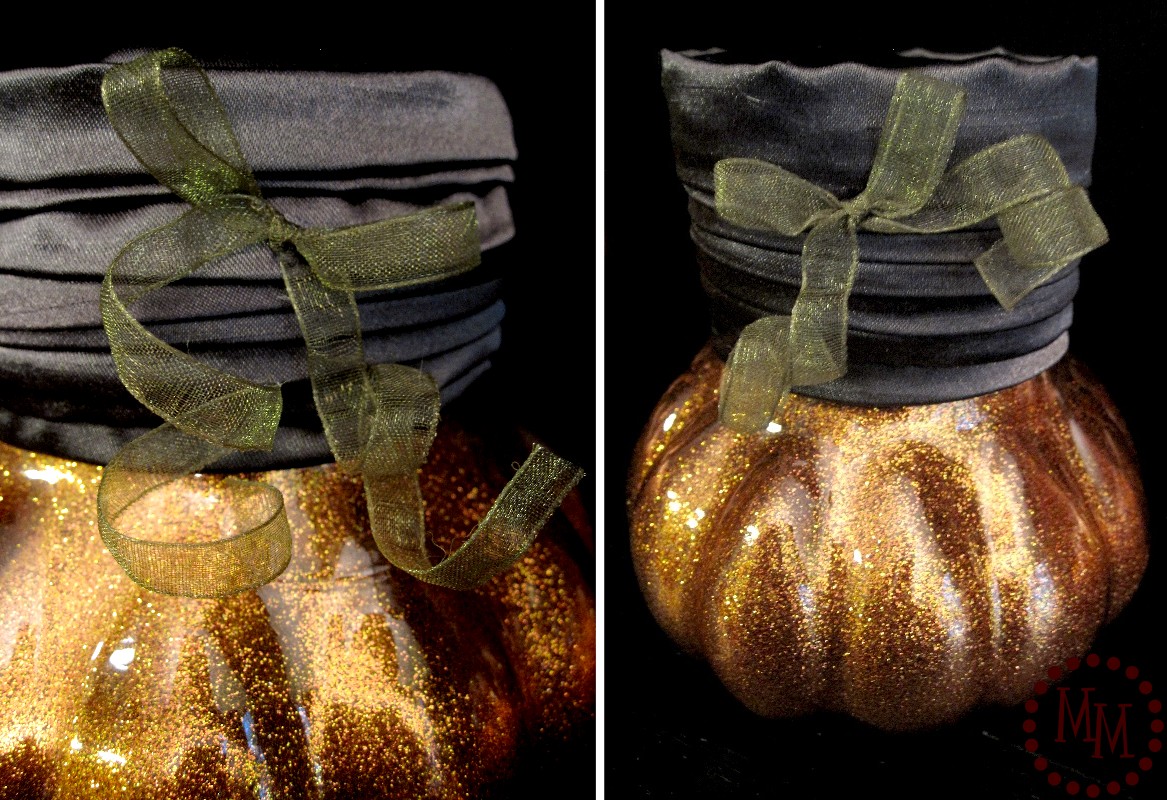
The pumpkin still needed something.
I found some green ribbon in my craft stash and tied some into a bow.
I curly-cued the ends by running the back (non-sharp side) of my scissors down the ribbon.
I glued the ribbon to the satin.

I love, love, love how these turned out!!
The little ribbon curly cue was just what the "stem" needed!

You really have GOT to try this glitter technique!!
In fact, I have a TON of Future Shine and a TON of glitter left over.
Who wants to come over and play?

>> See where I party! <<
This post was originally shared October, 2011.
So Cute! Thank you for sharing.
These are so cute!! I want to find pretty jars like that to make some too.
Thanks for sharing at #bloggerspotlight!
Such a great idea. Love these. I would love to make some. Thanks for sharing at Creative Mondays last week, you will be one of my featured blogs tomorrow 🙂
I saw pumpkins like this at Home Goods, but I didn't want to spend the money even though it was exactly what I was looking for for my office.
And now I see this post and how I can make it myself. 🙂
Thanks for sharing!
Great job and a lovely idea. Thanks for sharing with us at #overthemoon link party.
Stopping by from the link party. Love these sparkle orange glitter pumpkins. Sleek and fabulous Halloween decor 🙂
These glitter pumpkins are so awesome! Featured you today on Living Creative Thursday: http://www.livinglocurto.com/2013/09/fall-diy-craft-ideas/ Thanks so much for sharing your fun project.
Cute pumpkin project and a great toot!
We love what you have done. Please come share it with us at http://obsessiveandcreative.blogspot.com Craft Frenzy Friday! The party starts Thursday to 7pm cst. I won't be a party without you!
Found you on Transformation Thursday and have pinned these awesome pumpkins to my fall crafts and eats board.
so so cute! love it
Those turned out great!
Truly beautiful! I think I have this same project pinned...now I must try it. With the same color glitter. That is beautiful!!
Don't you just love Homegoods? I could buy everything in that store. Those pumpkins are such a cute idea, and seem so simple to make too.
These are so lovely! Would love if you'd join our Countdown to Fall link party! Hope to see you there! Have a great week! :)http://dixie-n-dottie.blogspot.com/2012_09_17_archive.html
Love the look of that dark orange glitter! Great idea. I've heard of the pledge stuff and the glitter but I was wondering if you knew, how long will the glitter stay 'glued' on?
Love your blog, new follower too! Stop by and say hi sometime!
xoxo
Kim
Good question, Kim! I'm pulling them out of storage in a few days so I'll see how they fared over the last year and will let you know. 🙂
Love your glitter pumpkins - adorable! I'm a new follower from the Countdown to Fall, would love if you followed back 🙂
Hey Its Cheri from Its So Very Cheri. Those jars are adorable. I am going to feature them over at 50Plus More on the 13th. Super Super Cute.
Cheri
@Lore - It might, but I'm not certain!
Would the glitter and Pledge work with a plastic jar?
Michele, your glass pumpkins are so cute!
pledge future shine? how cool!
catching you this week,
gail
I love this. Please link it to my linky party & anything else you have to share. Thanks, Peggy.
http://diycraftstomake.blogspot.com/2011/10/whacha-work-up-wednesday-weekly-linky_25.html
These are so fun! I love glitter and will have to try to make these!
Thanks for sharing!
I found your adorable glittery pumpkins at the Whatever Goes Wednesday link-up party!
That are some gorgeous pumpkins - awesome job.
Love for you to link up at:
"Made by ME" Linky Party at JAQS at http://www.jaqsstudio.com/2011/10/made-by-me-4-linky-party-and-features.html
Highlighted this project on my blog today!! I also highlighted the blog you posted with all the amazing treats found on PinInterest. I tried to give proper credit. For example, I mentioned the PinInterest account that you talked about.
If you wanna take a look....here is the direct link.
http://thehomelessfinch.blogspot.com/2011/10/best-of-halloween-from-around-blogs.html
Thanks for such a great stuff!
Lesley
OMG!! You are so creative. I would have never thought of using those for pumpkins. I would love for you to stop by and link up your project to More the Merrier Monday. It lasts through Wednesday so you have plenty of time to link up. I also have a link party for Halloween projects only at http://diyhshp.blogspot.com/2011/09/trick-or-treat-link-party.html that I would love for you to link up to as well.
http://diyhshp.blogspot.com
Love your little pumpkins! Way to think out of the box and find such a interesting thing to make a pumpkin.
These are just too cute! Great job!
Beautiful & creative. Great job!
Warmly, MIchelle
I love these! I wish I had a Home Goods close by! I found you at I Heart Naptime. Thanks for sharing!
Those really are pretty! Love the Halloween bling bling!
~Rainey~ @ The Project Table
These look FABULOUS! I'm a firm believer that glitter makes everything better and these pumpkins prove it! Would you share them here?
http://oneartmama.blogspot.com/2011/10/csh-thursday-link-party.html
So creative!! Love it!! Your pumpkins turned out great!!
These are beautiful Michele! I am so trying this on ornaments! Thanks for sharing at this week's BFF Open House!
These are so cute!! Such a fun piece of fall decor!
Went over to the site to learn how to do it. Brilliant! I love the way your pumpkins came out too. I'm really digging her ornaments too. Ideas are swirling in my head.
Thanks for sharing.
Jessica
I LOVE these too 🙂 so cute!
Found you through Serenity Now's blog hop...am your newest follower.
This is amazing! I am loving glitter right now. This is such a versatile technique too. I would love it if you would link up to my party and share with my readers: http://www.momontimeout.com/2011/10/taking-timeout-thursday-link-party-no-1.html
I love the jars you used - they look so pumpkiny:) I'm definitely trying this.
Rachel
adventuresofadiymom.blogspot.com
Michele I can't wait to try this! I love the idea of the glitter!
So adorable Michele! I just featured them on my FB page 🙂
xox
Jen
So beautiful! I wish we had a Home Goods store in the Seattle area. 🙁
AMAZING! So darn pretty I can barely stand it! Shared it on Facebook - too sparkly not too share!
These look fabulous! I'm pinning them to my fall/Halloween board now! 🙂
These are SOOOO dang cute, Michele! Just pinned! 🙂
Wow Michele!! They are soooooo awesome!! I love them! The glitter is perfect and the way you wrapped the tops for the stems is darling!!
These are fabulously cute!!! Definitely must try this technique but I about fainted when I saw the MS glitter LOL Gotta use my own 😉
They look great, going to check out that glitter technique!