
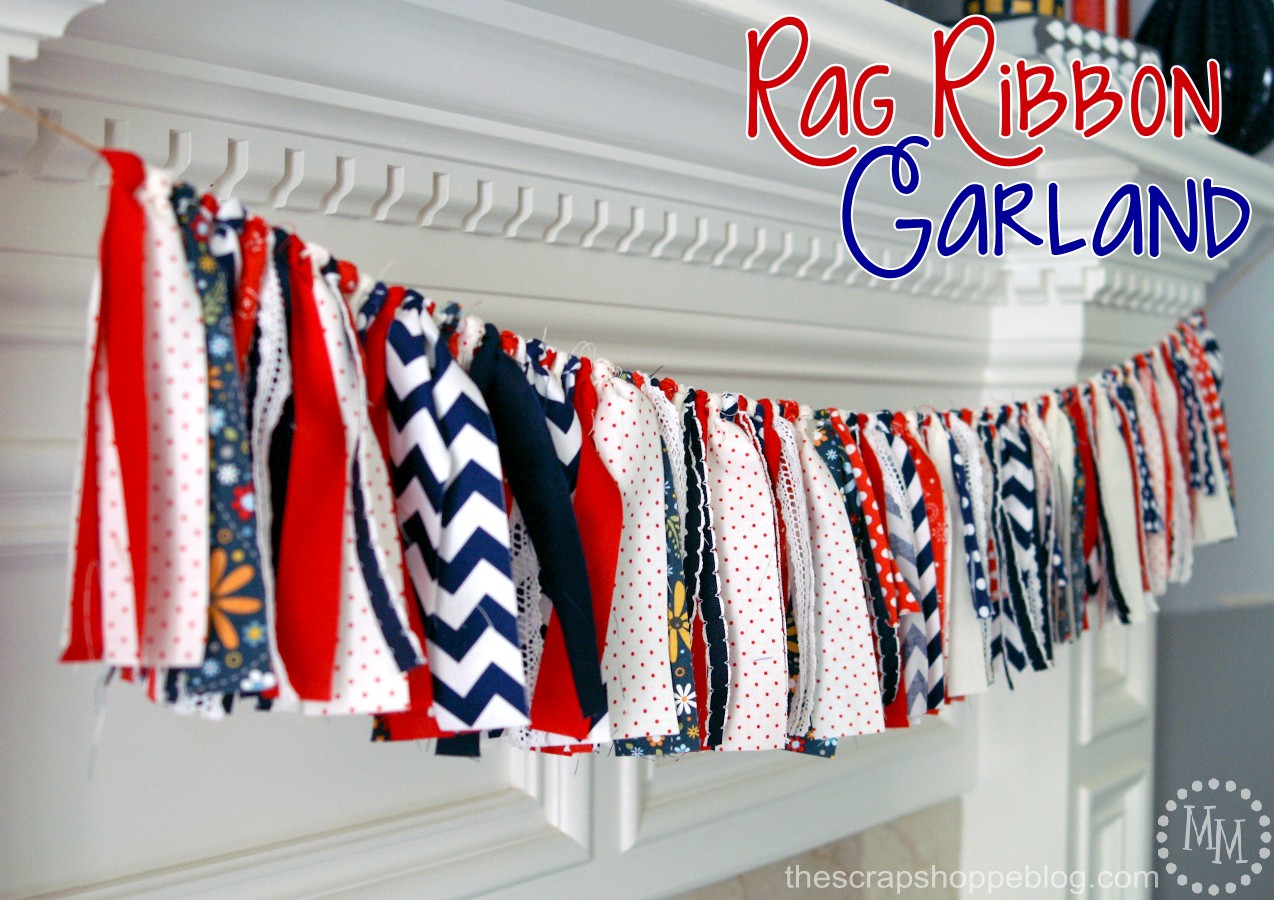
Rag Ribbon Garland
A rag ribbon garland is a fun no sew craft project and a great scrap buster for your fabric scraps!
Hello, friends!
I'm sure you're all aware how much I love decorating my house for all of the summer patriotic holidays.
I keep the decor up from Memorial Day to Labor Day!
Today I have a fun and easy to make patriotic craft to share with you.
I may be fairly new to the whole sewing gig, but fabric and I go way back.
I love using it in no sew projects, and that's exactly what this patriotic rag ribbon garland is - no sew!

Rag Ribbon Garland Supplies:

You can use any fabrics you like.
Ribbon, too!
The more the merrier.
I selected various patterns and solids from The Ribbon Retreat.
Supplies:
Fat quarter of Moda Bella Solids in Porcelain
Fat quarter of ADORNit Nested Owls in Daisy Spray Navy
Fat quarter of Moda Baby Jane in Hop Skip Red
Fat quarter of Moda Bella Solids in Navy
Fat quarter of Moda Bella Solids in Christmas Red
¼ yard of Riley Blake Polka Dot Knit in Navy
Fat quarter of Moda Essential Dots in White/Red
Fat quarter of Riley Blake Chevrons-Small in Navy/White
¼ yard of Riley Blake Polka Dot Knit in Red
5 yards of Moonstitch Grosgrain Ribbon in Dark Navy/White
5 yards of Moonstitch Grosgrain Ribbon in Red/White
5 yards of Laura Lace in White
twine

Start by cutting the length of the fabrics to 15".
Then begin cutting the strips.
For the solid fabrics, I cut 1" wide strips and for the patterned fabrics, I cut 1 ½" strips.
The knits arrived as a long thin piece of fabric 10 ½" wide.
I kept that as their length and cut 1" strips.
If you pull the ends of the knit strips at the same time, the sides will curl around into a tube.
The ribbons were also cut to 15" long.

The fabrics obviously have a front with a pattern and a back without.
We want to ensure that the pattern shows at the front of the bunting.
1. To attach the fabric to the length of twine so that you only see the front of the fabric, place the ends on top of each other, right side up. The top will form a loop. Place the loop 1" above the twine.
2. Take the stacked ends of the strip up behind the twine then through the loop. Pull down gently.
3. Pull both ends of the strip to tighten the knot around the twine.
Repeat with all of the fabric and ribbon.
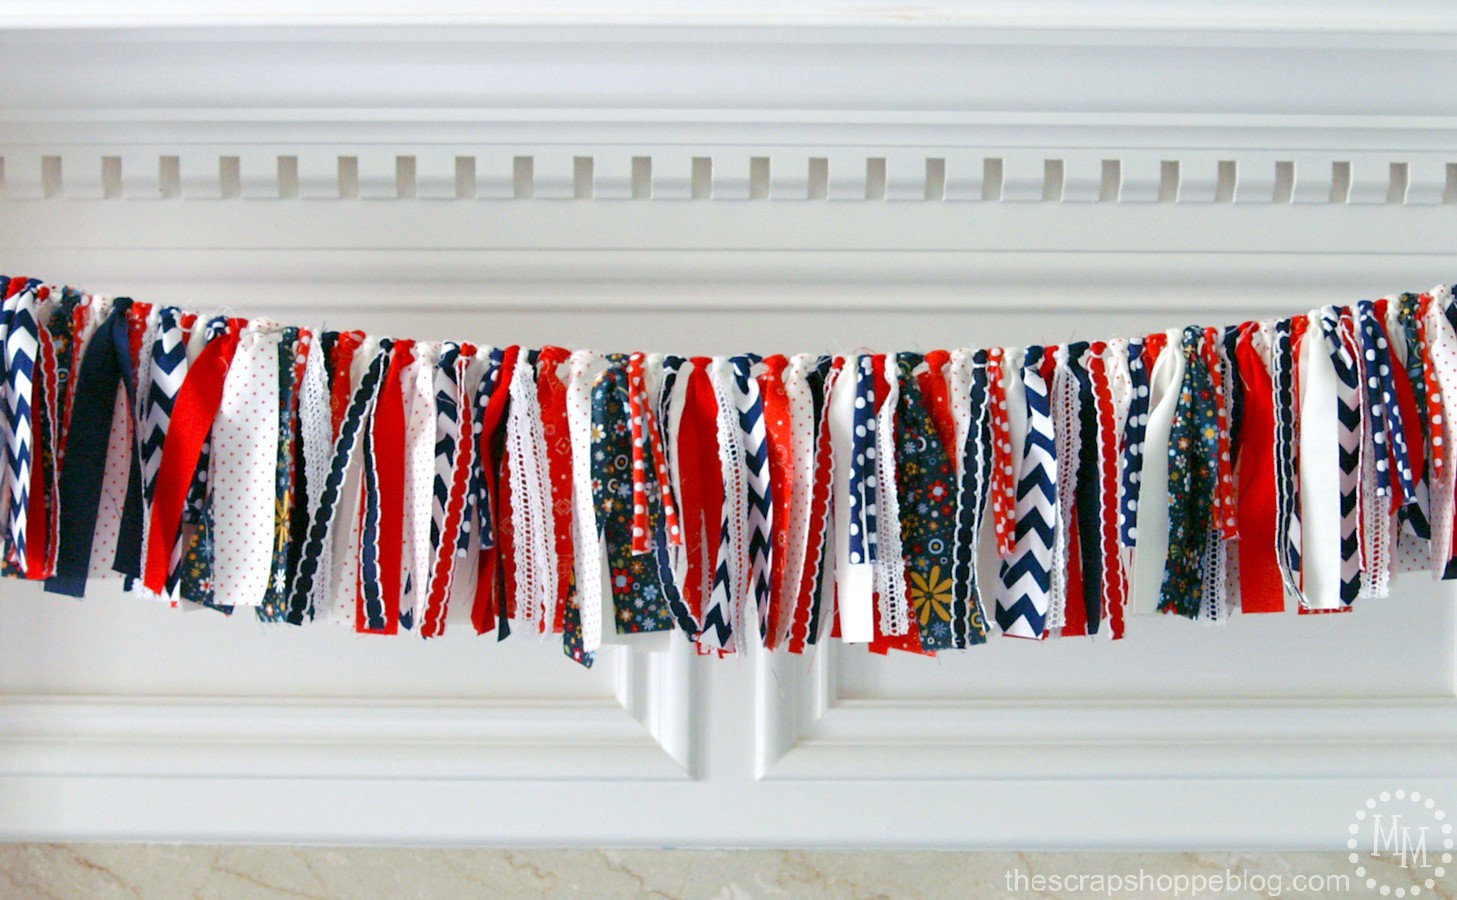
I added the strips in no particular order, only following a red then white then blue pattern.
I used approximately 13 strips of each fabric/ribbon
The final length of the rag ribbon garland was 47", but you can easily make it as long or short as you like.
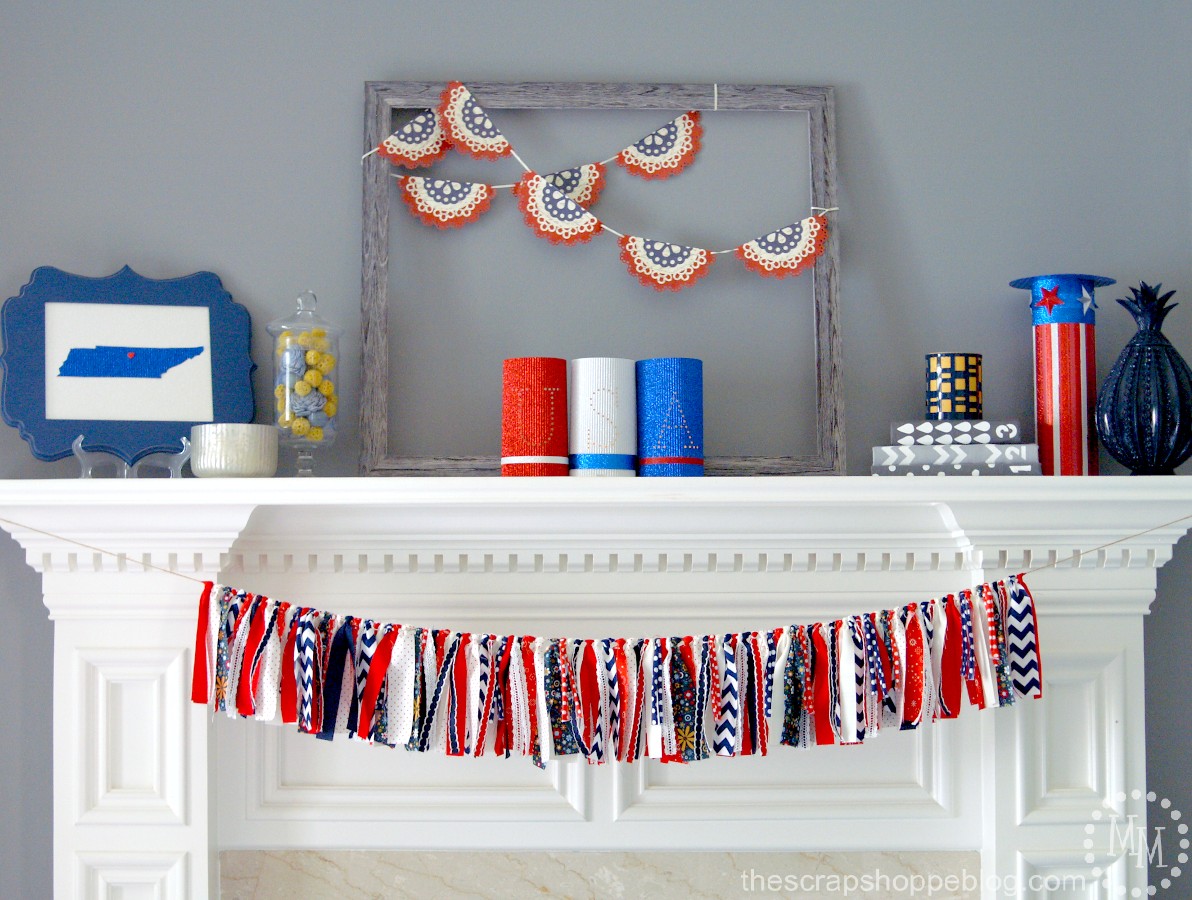
I love a good patriotic project, and I think the bunting has made a great addition to my red, white, and blue mantel, don't you?
And I already have fun plans for a leftover material!

>> See where I party! <<
This post was originally shared July, 2014.


Adorable rag garland. I love making these, and I love the red white and blue.
This is adorable, Michele! Came by way of TFT! Hope you'll share this at Tuesday Turn About... We close tonight at 12pm CST. Pinning to my Patriotic Board!
This garland is SO pretty, Michele! What a fun and festive way to decorate for the 4th of July holiday! Great tutorial! Thanks so much for sharing! <3
The rag ribbon came out so beautiful and I really love the colors.
I need to do this!! This is so darling!
#wonderfulwednesdaybloghop
Great information. It's a very informative topic. Thanks!
I love your bright, patriotic garland. The fabrics you chose are so pretty! Thanks for the tutorial.
I need this garland. So stinkin cute. I hope that you will join us at Family Joy Blog Link Up Party this week. Check it out http://thinking-outside-the-pot.com/?p=676
Love it! We have similar garland on our mantel too!! Funny enough, your mantel looks super similar to our!
How funny is that!! 🙂
This look makes me long for summer to arrive!
This is so cute! And, I'm sure I have most everything I need in my stash! Thanks for sharing at Fridays Unfolded! Featuring you this week 🙂
Thanks for sharing at the party! Pinned & Shared! See you again soon.
Hi Michele, Shared and Pinned! Thanks for joining the weekly party! Hope to see you again soon.
Looks perfect! Thank you so much for sharing at Thursday Favorite Things Blog Hop!
Love this banner - so patriotic and so easy to make. Your mantel is just perfect. Thank you for sharing at Share It One More Time. Cathy
What a great idea! I would love for you to share this at my link party Making Memories Mondays going on now! 🙂
Cathy
What a pretty garland. So nice and festive. Thanks for sharing at the #HomeMattersParty
The garland is so pretty!
I came over from the Sits Girls. I loved the image you used. It really attracted my attention. Great tutorial too!
This is adorable, and it looks great on your mantel! Thanks for sharing at Snickerdoodle! 🙂
These seem to be so popular right now. I have got to make my own. I love all the patriotic colors and the great thing is that you can use it for so many different holidays throughout the year. Thank you so much for sharing your creativity at Motivational Monday link party. Have a great weekend!
Bethany from The Southern Couture
This is totally right up my ally! I have zero 4th of July decorations. Love it. Thanks for sharing!
This is adorable & it's a project my kids and I can do together!
Love this idea, I have so many rags leftover from various projects and I am always on the lookout for interesting projects on what to do with them. This is very creative, thank you for sharing and joining our Oh My Heartsie Girl Wordless Wednesday Link Party.. Have a great day, co-host Evija @Fromevijawithlove
Fun! I love the combination of prints--and the simple construction.
I love it. I've seen these in stores and thought they must be pretty easy. I pinned this so I can try it later!
You had me at "no sew"! This is adorable. I need to start doing crafts like this.
Thanks for linking up with Share the Wealth Sunday!
This is SUPER cute! It is Memorial Day today, so I am too late - but I plan to make this craft for Fourth of July & Veteran's Day. It looks fantastic. Thank you for your inspiration.
Best,
Michelle from simplysantabarbara.blogspot.com
Love it!! What width grosgrain ribbon did you use?
Hi Christy! The grosgrain is 3/8". Isn't it gorgeous?? I love it!
That is DARLING! Love the patterns you used too.