
Framed Advent Calendar {Homemade Christmas Decor}

To start Homemade Christmas Decor week, I want to show you my brand new
Framed Advent Calendar!
Its high time we had an advent calendar around here. With my oldest being 3, we need a little help counting down the days to Christmas!
Here's how I made it...

I found this great frame in the clearance section at Hobby Lobby. $10.80 for a 10.5x14.4 inch frame? Yes please!!
Canvas Corp was kind enough to send me some of their products to play with, so I decided to try out their waxed cotton cording to string along my frame. I tied off each end so it would be hidden behind the frame and put a small dab of Beacon's 3-in-1 in the center of the knots to make sure nothing would come untied.

You may know by now how much I love Kraft paper, so I was beyond thrilled to find several pieces of patterned Kraft paper in my Canvas Corp stash! I selected 5 different sheets and cut them into 25 rectangles for the banners for my advent calendar.
I put some Wonder Film from P K Glitz (a double-sided adhesive sheet) through my Silhouette to cut out some numbers for the calendar. Then I put the numbers on the rectangles of Kraft paper.
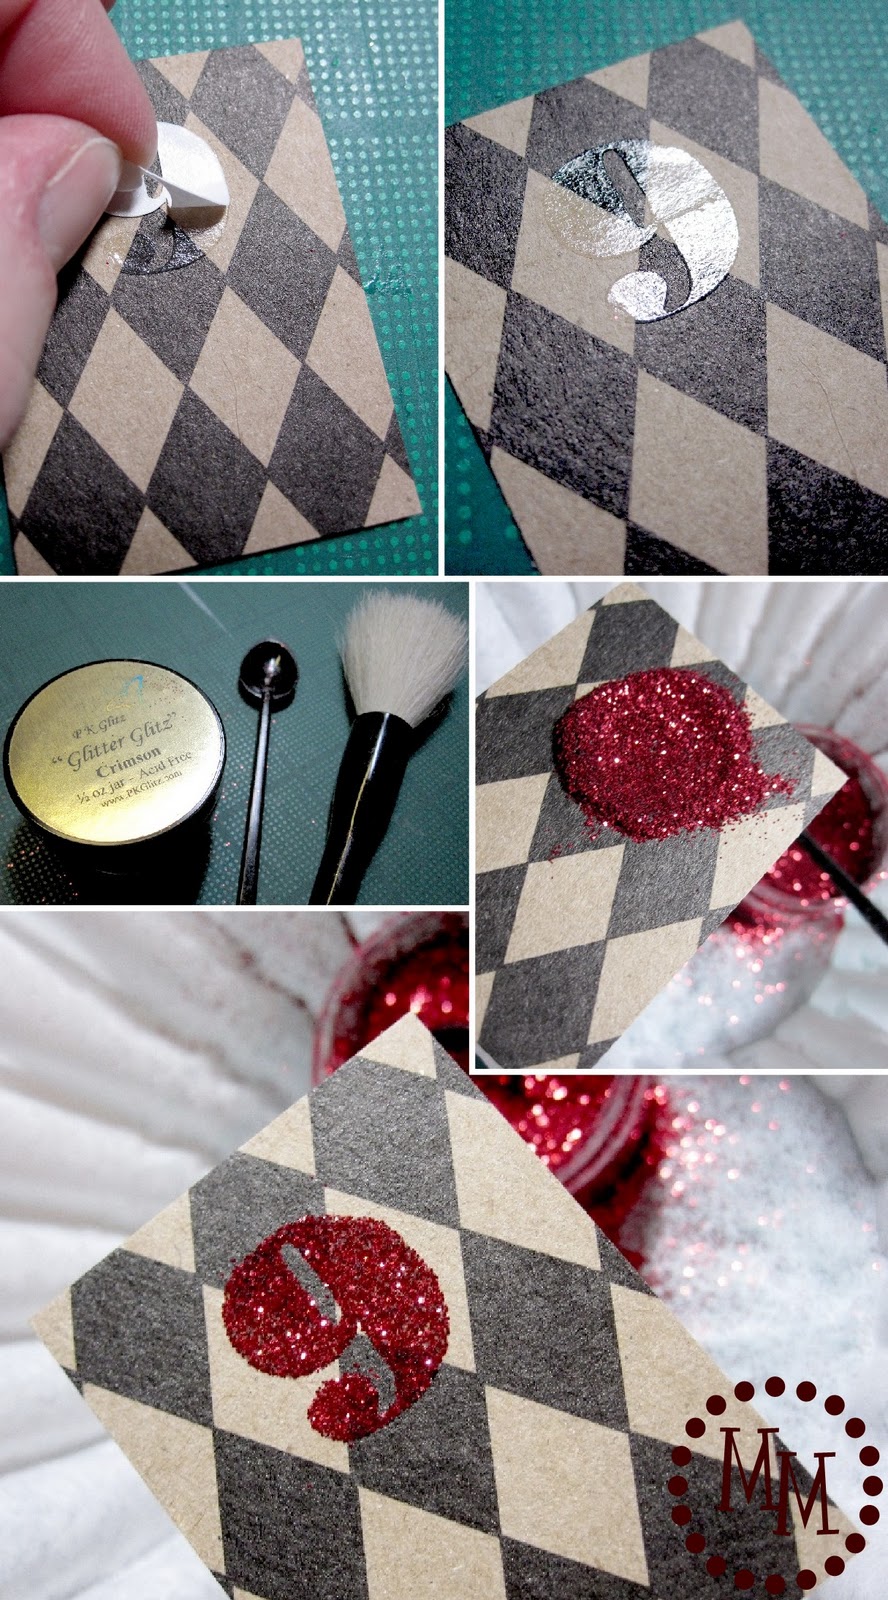
I wanted glittery numbers that would really shine in the Christmas lights so once I took the top layer of paper off of the Wonder Film numbers, I sprinkled them with P K Glitz crimson glitter. They seriously sparkle! And the red looks fabulous on the Kraft paper!

I continued on with all of the numbers, adding the glitter to them all.
Then to make my rectangles into banners, I took the scissors and various border punches to them.

On the back of the banners I added various Christmas decorations I had in my scrapbook stash.
(banners, stickers, stamps, transparencies, buttons...)
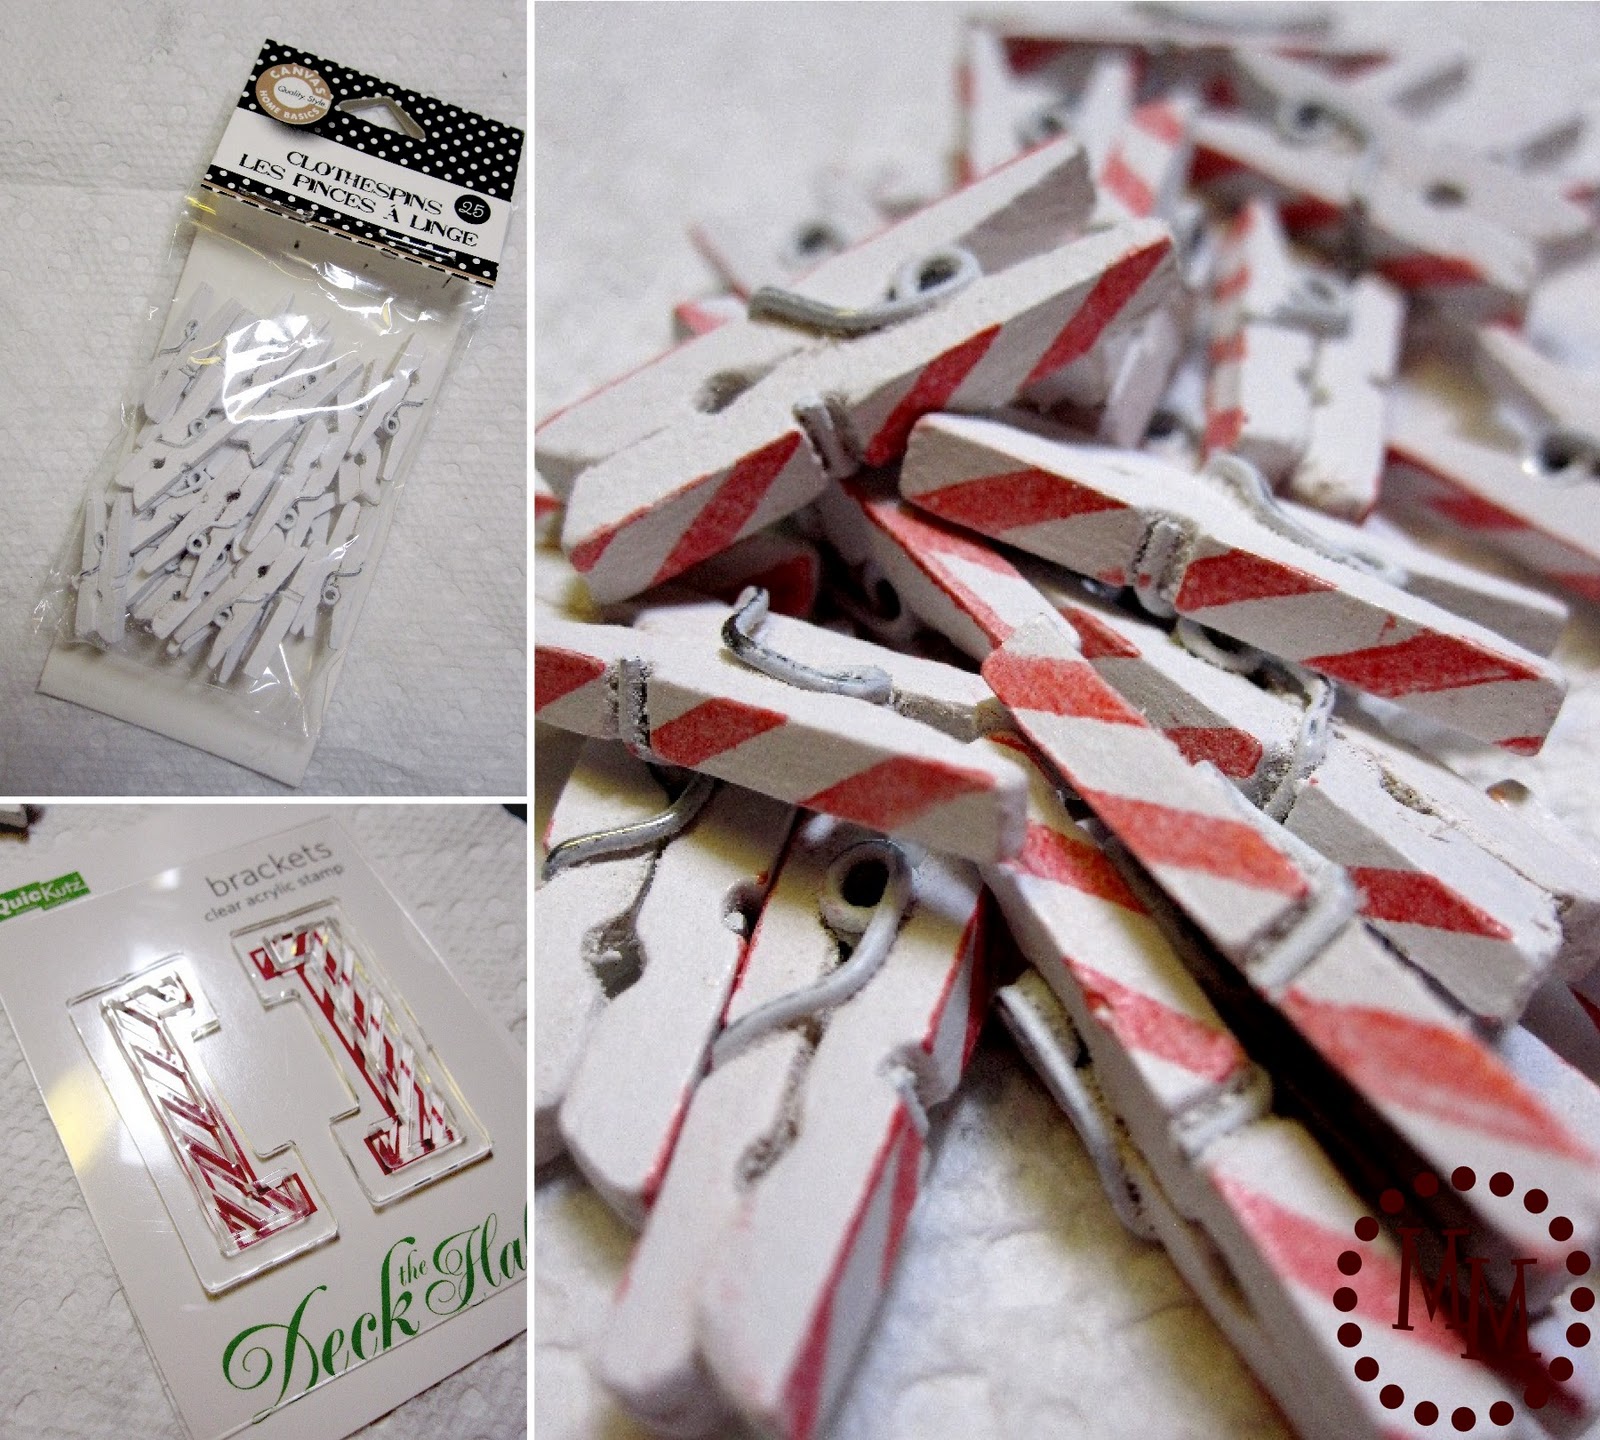
Included in the Canvas Corp stash were some cute mini clothespins. To make them more "Christmas-y" I added a little candy cane effect with some acrylic stamps.

Once the clothespins were dry I hung up all of the banners!
This is the front and back view.

To help decorate the frame, I wound some strips of brown burlap around one corner and made a bow out of some painted burlap ribbon I purchased last year for Christmas.


And this is my little set up for it! On the old Singer sewing machine.
Guarded by Santa!

I think it turned out pretty darn cute!
And its a great countdown for the kiddo. In a few years when the boys are older we might try a more interactive advent calendar. But I will always keep this one for myself!
disclosure: Canvas Corp provided me their products in exchange for my creating fun stuff with it! 🙂
Linking up to

as part of


>> See where I party! <<


i love your kraft tags you made, and so so cute to make the clothepines like candy canes! what a great idea!
-rachel w k
rwkrafts.blogspot.com
Really cute! I have the perfect frame to use for this. And why haven't I heard about Wonder Film before this?? I need that stuff!
Adore Canvas Corp and with what you did with their products here, you should design for them! Gorgeous!
Fantastic!! I think the frame advents are becoming my favorite!!
Would love for you to share this at Show & Share (Wednesdays) and the Special Christmas Soiree (Mondays) going on now!
vintagegwen.blogspot.com
That is freaking adorable! Girl, you just got PINNED!
I love this. So pretty and so special.
When you get a chance - love for you to link up to my "Made by ME" linky party: http://www.jaqsstudio.com/2011/12/made-by-me-9-linky-party-and-features.html
Oh! That is cute! Great idea!
This is beyond fabulous, Michele! I love those red glittery numbers. Your papercrafting skills continue to blow me away!!
I soo love this idea! Thanks for showing it so clearly 🙂
Great idea! Two of my favourite things - old frames and advent calendars!
Oh wow Michele - this is soooo darling!! I love that it's two sided - and your designs are so sweet!! Those glitter numbers are perfect too. LOVE!
I LOVE this!! I love the colors you used, so pretty!! And I love all the embellishments! Looks like it was fun to make!
This is fabulous! You are always so creative!
OK Michele I love this! So cute!
Did you play with your pine cones yet?
How festive!
And what a "stash" you have.
I love advent calendars. I saw a fun one on someone's pinterest page, and I wanted to make it, but I did not. I love yours more!
Its gorgeous I love it!!
Wow! What a beautiful advent calendar! I love all the pretty colors and the cute little clothes pins are adorable. Love it;)
so, so, cute - love those glittered numbers. I don't know which side I like better - the front or the back!