I did it. I decorated for Valentine's Day!
I usually let this holiday go by and stick to my winter decor.
But I've seen so many cute projects in blogland this year that I had to jump in, too!
As a result, I have several projects to share with you in the next couple weeks.
Let's kick things off with these fun
Stuffed Paper Hearts!
Did I mention how super duper simple these are to make?
I made 9 of these hearts during nap time!
I was completely inspired by these stunning hearts at Vintage Fairy Tales that I discovered via Pinterest. And since there is no tutorial for them and mine are a little different, I thought I would show you how to make them!
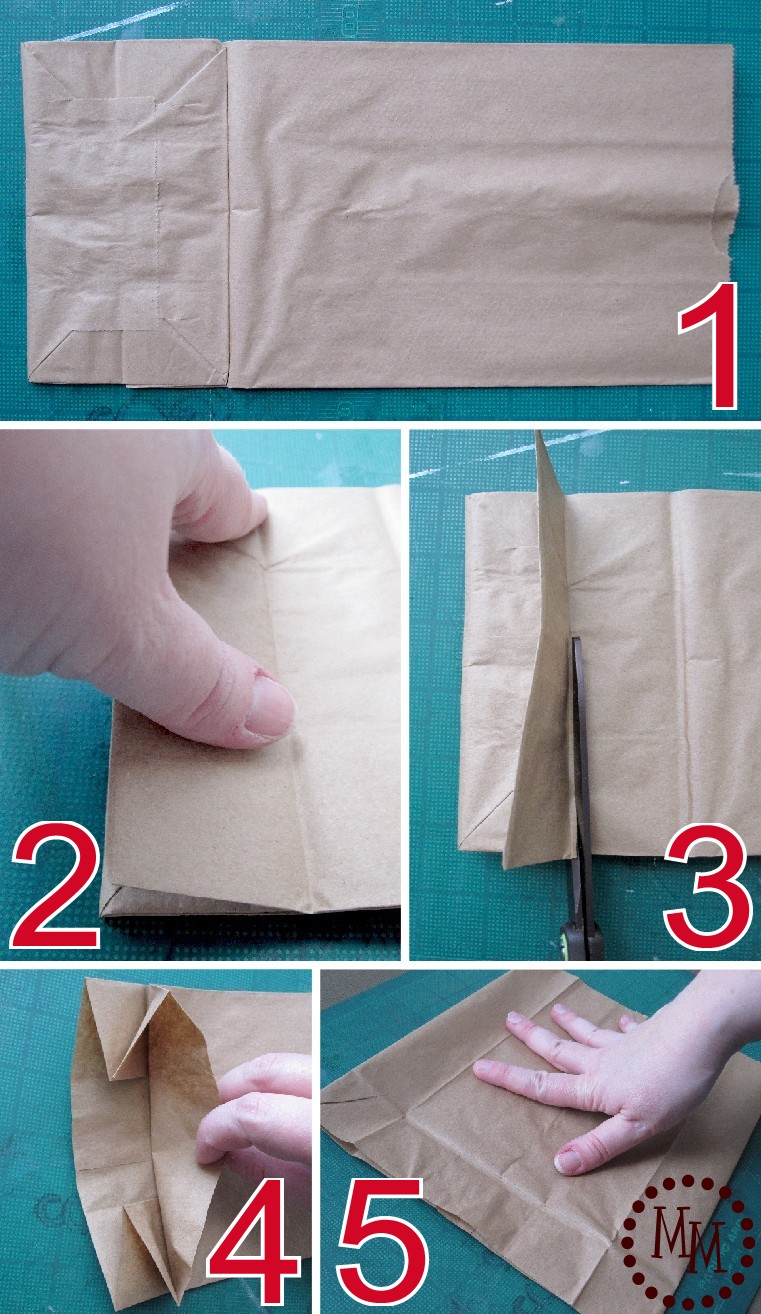
1. Start with a lunch sack-sized paper bag.
2. Fold the base flap back down over itself.
3. Cut off the bottom flap with a pair of scissors.
4. With the bottom flap cut off you can now open the bottom of the bag to see the sides folded inwards.
5. Pull open the sides and smooth them flat so you now have a large square of paper bag rather than the original rectangle.
6. I made a heart template from a piece of cardstock, but you can draw them freehand if you so desire. I draw terrible unsymmetrical hearts so I need a template!
7. Draw as many hearts as you can on the back of the bag (the side with the seam). I was able to fit 9 hearts (mine are ~3 inches wide).
8. Decorate the paper as you see fit. I whipped out several acrylic stamp sets and got my ink on.
9. As I used each stamp on the back of the bag, I also used it on the front of the bag in roughly the same area so that the hearts would look the same on the front and back.
10. Using a paper piercer or thick needle, poke evenly spaced holes around the inside of your heart. Don't get to close to the edge or the paper may rip later when we stitch it together.
11. After piercing holes in all of the hearts, cut them out (front & back together) with a pair of scissors or Xacto knife.
12. Start stitching (from the back) from the bottom of the heart and work your way around.
I'm using 3 pieces of thread.
13. Stop about 3/4 of the way around the heart and find something to stuff the heart with.
Batting, grocery bags, etc.
I like the crunchy sound the grocery bag makes. ;)
14. Gently stuff the heart. If you're too rough it may tear. Use a pair of scissors to help push the stuffing into the corners.
15. Finish stitching and tie the two ends together in the back of the heart.
Continue on with all of the hearts!
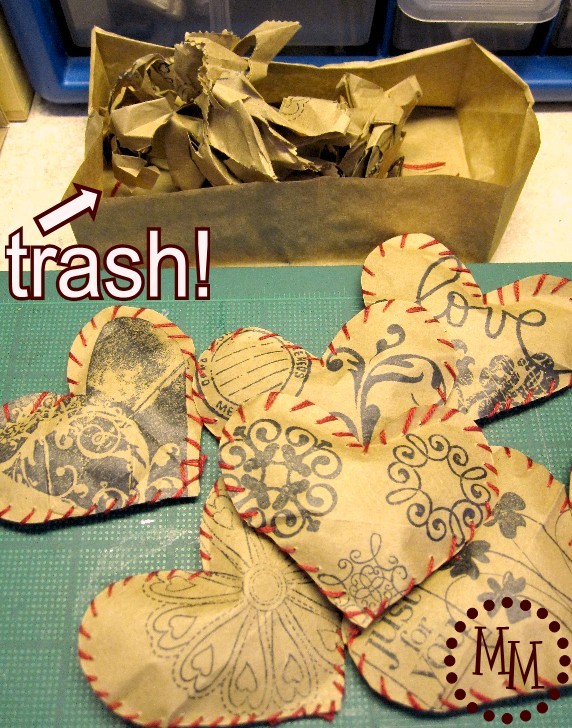
By the way, remember that piece of the bag we cut off in step 3?
It makes for an excellent trash receptacle!
Now the hard part is deciding what to do with them.
Put them in a hurricane? Scatter them on the dining room table? Put them in a wire basket?
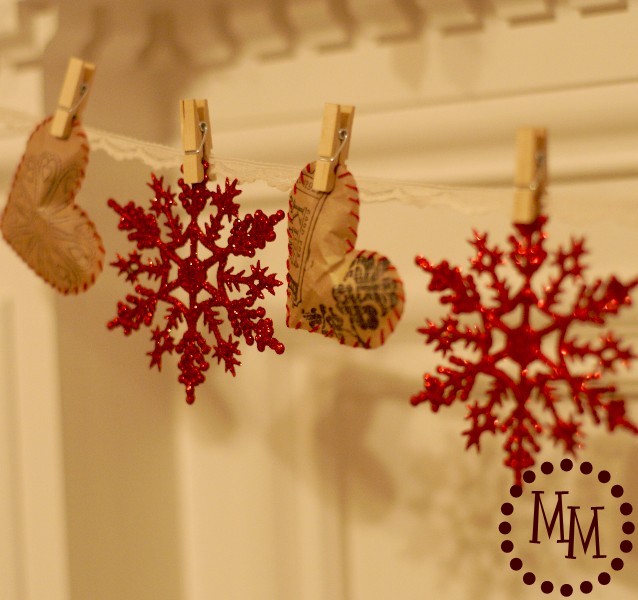
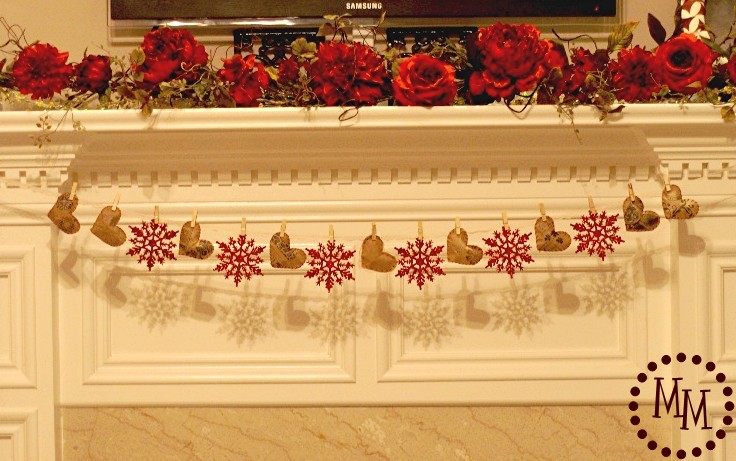
I went with turning them into some Valentine's garland!
And, to keep up with my winter decor, I paired them with some snowflakes.
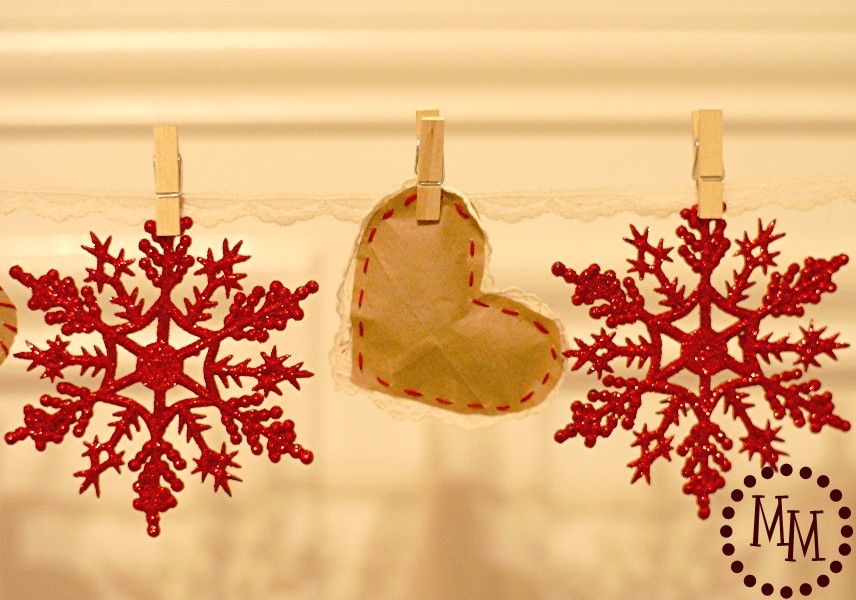
I strung up some lace (if you follow me on Facebook you know I just came in to a LOT of lace) and grabbed some mini clothespins and went to work hanging the hearts and snowflakes.
In the photo directly above you can see another variation I made of the stuffed paper hearts. I love the addition of the lace! Basically follow the same directions as above, but stitch the lace as you go between the two pieces of paper bag.
These would also make for some adorable Valentine gifts if stuffed with small pieces of candy!
Though I'm not sure I could allow anyone to actually take it apart... :)
I link to these fun parties!


Oh my gosh, these little hearts are so sweet! I'd love it if you shared them at our Be Inspired Link Party!
ReplyDeleteCute heart project.
ReplyDeleteHave I told you lately how great your tutorials are?!! They really are super awesome the way you present them through image and word. I am going to PIN this post and maybe do something with it on my blog. But, I gotta at least Pin this for you, cuz people need to see it!
ReplyDeleteThis is absolutely darling!!! And so easy to do too:-) Pinning for sure!!!!!
ReplyDeleteLOVE!!! I'm totally going to do this as we're starting to pull our Valentines Day stuff out :) SO CUTE!!!!
ReplyDeleteSo cute Michele! Pinning and sharing right now!
ReplyDeleteMichele - these are adorable! Stamping the paper before cutting them out is genius!
ReplyDeleteOh my gosh!!! I am in LOVE!!! These are so so cute. I love the stamping and the little stitching - and I think the garland is perfect!!
ReplyDeletePinning, stumbling, sharing - all that stuff. ;)
These are so adorable! I can't wait to make a garland!
ReplyDeleteSmiles,
Carol
Great idea michele and they are gorgeous
ReplyDeletehugs June x
Those hearts just make me swoon!! They're awesome!!
ReplyDeleteSOOOO CUTE!!!!
ReplyDeleteVery Well Done:))))
ReplyDeleteKindest regards
Vintage Fairy Tales Rebecka
These are soooooo cute!
ReplyDeletegorgeous gorgeous gorgeous! your little hearts are wonderful! i pinned those same hearts from vintage fairy tales - thought they were so clever. pinned yours too! visiting from shabby creek cottage link party.
ReplyDeleteI Have a ton of care packages to make for friends and fam and these are perfection! thanks for the inspiration!!!! loving your blog!
ReplyDeleteI absolutely love this post! I recently hung "snow flakes" from the door way at the preschool and we may try a variation of this for February!! The kids absolutely love having stuff hanging from the door way!!
ReplyDeleteThis is so cute! I love that it combines hearts and snowflakes.
ReplyDeleteThis is so cute !!
ReplyDeleteI am over from The Answer is Chocolate. Those are so cute, what a great idea. Thanks for sharing.
ReplyDeleteRhonda
These are adorable! Love them! :)
ReplyDeleteThese are adorable!
ReplyDeleteCute! And they make a great garland!
ReplyDeleteI love this idea and the step-by-step directions. Would you be willing to link up to my Valentine Link Party going on now? I'd love to have you! Thanks, Michelle
ReplyDeletehttp://michellepaige.blogspot.com/2012/01/rockin-valentine-valentine-link-party.html
Very cute. Stop by and link up if you have time!
ReplyDeleteMary
These are adorable! Thanks for sharing!! I'm going to have to have my kids make some of these.
ReplyDeleteHeidi@HomemadeBeautiesByHeidi
Michele! those hearts are so adorable! oh my! love them!
ReplyDeletethanks for linking up to catch as catch can!
gail
I LOVE these! Wow! I'd be so thrilled if you would share them here at my party if you have a minute:
ReplyDeletehttp://oneartmama.blogspot.com/2012/01/shine-on-fridays-11-and-giveaway.html
Those are sooooo cute! I have to make some!
ReplyDeletequick and easy, my kind of craft! Thanks for the tutorial! I would love for you to link up at Handmade 52! http://raisingoranges.blogspot.com/2012/01/handmade-52-3.html
ReplyDeleteHow cute are these!? Great job. I hope you will link up to my I Heart Projects Party! www.itsybitsypaperblog.com
ReplyDeleteSuch sweet hearts, and a great way to use lunch bags. Love quick and easy projects, but even love them more when they are so pretty. It's also great to use the leftover botton as a "waste" bag. My fingers are crossed you'll share these pretty paper hearts at Sunday's Best tonight!
ReplyDeleteThese are adorable Michele!
ReplyDeleteThanks for linking up! I featured your post in my wrap up http://tidymom.net/2012/16-valentine-ideas/
Have a great weekend!
Adorable! I’m hosting a Valentine theme linky party starting tonight at 11:30. Would love it if you came by and linked up! www.serendipityandspice.blogspot.com
ReplyDelete-Melissa
I make something similar and insert candy inside - love the whole recycle aspect of your craft - Very cute!
ReplyDeletePlease stop by to enter my digital scrapbook software giveaway!
How cute are these!! I don't decorate for Valentine's Day but this makes me want to. Thank you for the inspiration.
ReplyDeleteI love your stuffed paper hearts!!
ReplyDeletepatti
Those are so cute! I would love for you to link up at my new Valentine Party at www.cheapcraftymama.com!
ReplyDeleteI think I will make these in graduated sizes and tie them together from small to large. Maybe I will make different coloured backgrounds. They could be put on a nail in the wall or on a cup hook from the ceiling. I will give them to a friend who has been so sick this winter. I will suggest that when the good weather is here she hang them outside - from one of her trees or awnings.
ReplyDeleteSo cute! I have to try these! I am so glad I came across your blog. I am your newest follower and I would appreciate it if you followed me back at my blog! I am also doing a giveaway for free software!! You should come check it out at http://milliemorganmedia.blogspot.com/2012/01/my-memories-software-giveaway.html
ReplyDeleteWhat a great and creative idea! I absolutely love these hearts! Thanks for sharing
ReplyDeleteI love these! Such a simple yet cute decoration for Valentine's Day! I'm going to feature these on Friday. I hope you'll come by for a visit!
ReplyDeleteJen
Scissors & Spatulas
I was looking for an idea for an event I'm hosting on the 12th. I believe this is it. Thank you for sharing. Very cute!
ReplyDeleteOh my gosh - sooooooo cute! Definitely want to try some of these!
ReplyDeleteJeanine
Oh. My. Goodness! Those are adorable! I love the natural texture added with the brown bag!!
ReplyDeleteI would love for you to come link up at my weekly party going on right now "Thursdays are YOUR Days"!!
http://www.52mantels.com/2012/01/link-party-plus-giveaway.html
I'm your newest follower! I love your cute blog!!
These are adorable! What a great project!
ReplyDeleteLove this! I saw some hearts stuffed with candy on Pinterest...but these are WAY cuter. They remind me of a good old fashioned valentines! Featuring you on Tickled Pink!
ReplyDeleteDang girl!! These are genius!! I love the stamps on the paper bags. And the red lacing is so pretty. And you don't decorate for V-Day? But you're so good at it! :) I just stumbled and pinned!
ReplyDeleteI LOVE your stuffed paper hearts! Thinking I need to make some to add to my Valentine's tree!
ReplyDeleteWow! I never would have guessed from the photo that these had been made with a paper bag! So cute! Just pinned them...
ReplyDeleteThese are so much fun - thanks for sharing how you made them!
ReplyDeleteLowri
http://papervinenz.blogspot.com/
So cute! I found you on Pinterest. laurie
ReplyDeleteHi Michelle. I love your beautiful garland and I just pinned it. I'm also your newest follower. Thanks for making this easy to follow tutorial.
ReplyDeleteHugs...Tracy @ Cotton Pickin Cute
P.S. I hope you'll stop by and visit my blog too. I have 3 giveaways running right now.
Brilliant! Thank you for sharing...I think this will be a great project to teach my nieces how art and crafts can help save the Earth. :)
ReplyDeleteArrived via Today's Creative Blog...cheers!
Love this vintage valentine decoration! I just submitted this to the M&T Spotlight http://www.makeandtakes.com/spotlight
ReplyDeleteThank you, Sue!! :)
ReplyDeleteSo cute, so easy, and so cheap!! Your garland is beautiful! I'm pinning this idea!
ReplyDeleteDarling! I love them stuffed!
ReplyDeleteCute and so easy to make. Thanks for sharing.
ReplyDeleteI will visit your blog again.
Regards, Annet
What a great idea! Love it! I am gonna try to make my own! Thanks for the inspiration!
ReplyDeleteGreetings from Holland, Nicole