
DIY Giant Fabric Bins for LEGO Storage
 A couple of months ago I shared some new storage we added to the living room by utilizing the shelf on our Sauder multi-cart, but didn't tell you how I made the storage which is what I want to share with you today! I've got the "how to" for those giant fabric bins because, and I am SO excited to be able to say this, I MADE them! Woohoo!
And even better, they hold all of the loose Legos (read not the ones in kits) my boys have. It's the perfect Lego storage!
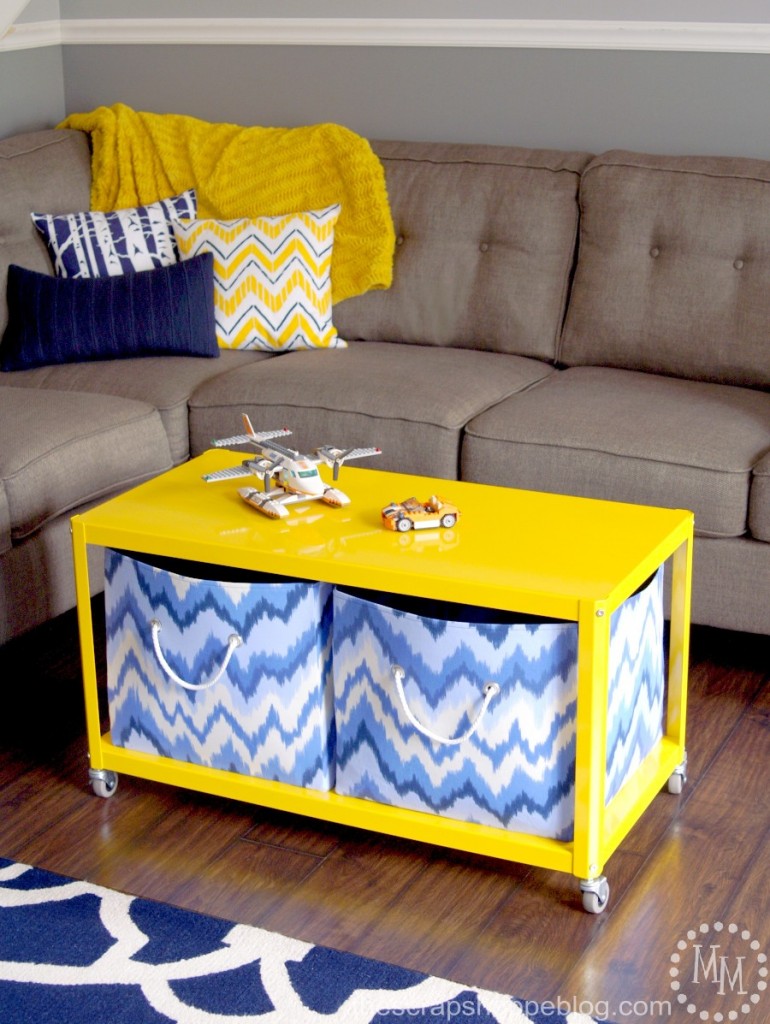
I knew I was going to have to custom make storage bins for this cart because the space is so large. And big totes can be pricey! Not only was I able to get the fit I needed but the color and style I was going for as well. Such a win-win!
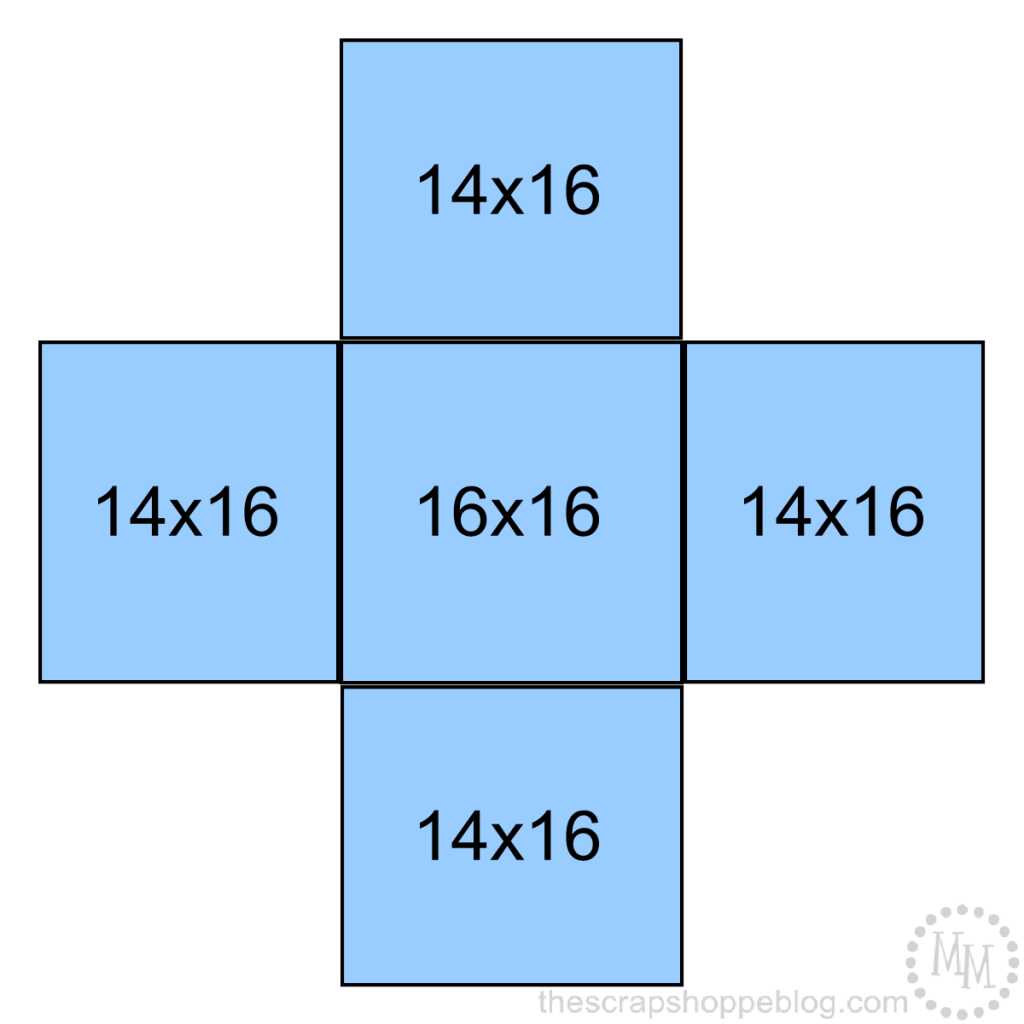
 Supplies (to make 2 14"x16" bins):
2-2.5 yards (depending on width) of outer fabric
2.5 yards of liner fabric
3.5 yards heavy weight fusible interfacing
Stitch Witchery
Grommet Eyelets
Rope decorative trim
Thread
Cut 8 15"x17" pieces each of the outer fabric and liner fabric for the sides of the bins.
Also cut 8 14"x16" pieces of interfacing.
Cut 2 17"x17" pieces each of outer fabric and liner fabric for the base of the bins.
Note: Obviously these measurements can be adjusted to make any size bin you need. I am including a ½" seam allowance so keep that in mind also.
Center each piece of fusible interfacing to the back of the side pieces of the outer fabric and iron on.
Stitch side pieces of outer fabric to base piece of outer fabric. Then stitch all of the side pieces together. Turn bin right side out and set aside.
Repeat the process with the lining fabric, minus the interfacing step, and when finished, leave it wrong side out.
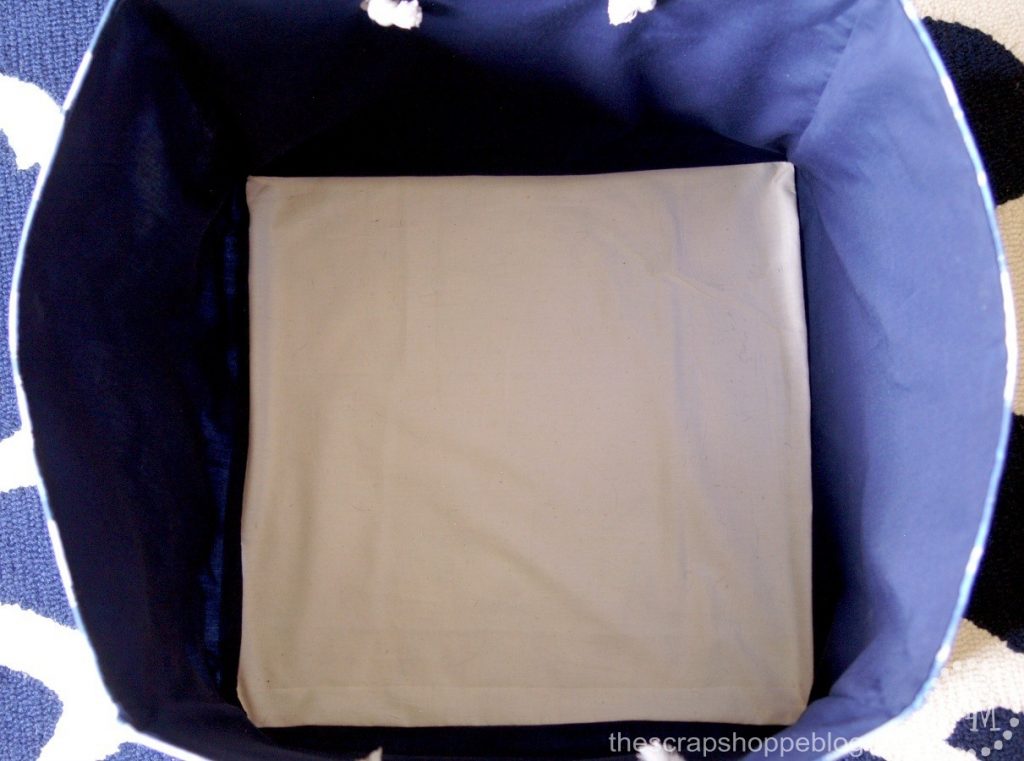 I miss-measured when purchasing my liner fabric and didn't have enough for the base so I subbed in some remnant muslin I had in my stash. Worked like a charm!
 Fold over the top of the outer fabric ½" and iron down.
Repeat with the liner fabric.
Follow the directions on the Stitch Witchery to add it along the folded over edge of the liner fabric. Iron liner to outer bin then add a top stitch all the way around the top of the bin.
 Measure where you want to add the grommets and cut the appropriate holes. Follow directions on the box for adding the grommets. For best results be sure to hammer them down on a hard flat surface.
Measure how long you want the handles to be then add ~3" and cut. Thread the rope through the grommets and tie the ends in knots.
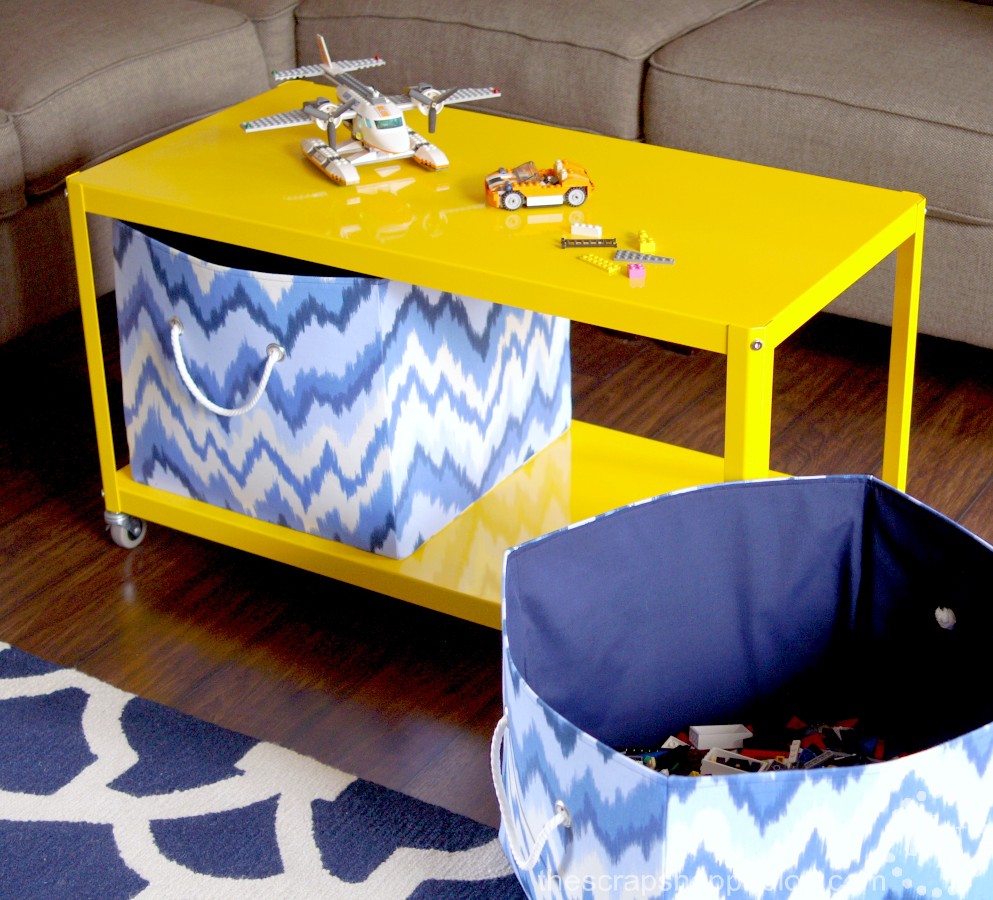 We have approximately 30 lbs of loose Legos in these bins and, let me tell you, my boys LOVE dragging them out to play! And clean up is super easy. No one coming over to visit would even suspect what is in these bins!
I love something that can look stylish and be super functional, don't you?


Do you think I could make these without the Stitch Witchery? Maybe just extra pins in the fabric for the top stitching?
Definitely! The Stitch Witchery just holds it in place to make it a little easier to sew. Pins would definitely work as well.
Those bins came out super cute. I will be featuring this tonight at my Winter Blues Wednesday party that opens at 8pm EST. Please stop by and pick up an I've Been Featured button. Thanks. http://diybydesign.blogspot.com
This is amazing and looks so good. Thanks for sharing.
Great project and budget friendly too. Happy New Year, Kippi
These are so cute and creative. Beautifully done. #OMHGW
Well these turned out amazing! Love everything storage and I'd think they were store bought, for sure. Thank you so much for sharing with us at Funtastic Friday! Pinned
Oh wow! I absolutely love this! I just found your site today. Nice to meet you. Love meeting other bloggers who have similar interests...you sew! Thanks so much for the amazing project. I love that you made the cubes to match your decor! Great project and thanks for your directions. Stopped by from the funtastic friday link party:) Pinned
These are so cute and so versatile! I haven't used my sewing machine in a while and this may just be the project to inspire me to get it out. Thanks so much for sharing at Home Matters Linky Party!
Great idea, esp. making your own bins. We don't have quite that many loose Legos but we seem to have a lot that are beyond dangerous...for mom waking around in the dark barefoot!! Visiting from Happiness Is Homemade party.
I really like these storage bags. I was wondering why you didn't use interfacing in the bottom?
Hi Susan! My main reason for using the interfacing on the sides was to help them stand up. I didn't really need it for the bottom and haven't noticed any sagging or stretched seams from not using the interfacing on the base. You certainly could if you wanted to!
What a great idea. Thank you so much.
Thank you, Elizabe!
This is so beautiful and well designed.Thank you for sharing this tutorial Michele, Storage Elm Park Ltd.
Thanks Michele for the tutorial. I made one out of cotton (used for my quilts) and heavy weight fusible interfacing. I may have used the wrong fabric because mine are floppy and don't stand up like yours. Should I have used canvas weight cotton?
Hmmm, I would think the heavy weight fusible interfacing should be able to hold the bins up regardless of the fabric. I did use a heavier cotton for mine, but it did seem like the interfacing was doing most of the work.
Great idea and nicely done! The fabric bins are great! Thanks for sharing!
I'm a storage bin lover.. These are GREAT!!
Love these, such a great project!
Thanks, Rebecca!
the whole room looks great, i love the pattern and colors in those bins you made.
b
These are great! And the blue is so pretty on the yellow table! I've got a Craft Gossip post scheduled for later this morning that links to your tutorial:
http://sewing.craftgossip.com/tutorial-giant-fabric-storage-bins/2015/01/12/
--Anne
LOVE these! I really wish I could sew because I would make these in a hreartbeat! Saying hello from think pink Sundays! 🙂
Cathy
Those legos can get out of control so easy! I LOVE these bins! They're the perfect way to contain the mess. I'll have to remember this as my son gets older. I have a feeling we'll have LOTS of legos in our home!
These are awesome Michele!! They are so perfect for that space and the fabric is so pretty. I love the little rope handles with the grommets too! You are quite the sewing genius! 🙂