
Faux Agate Slices
Can you believe these agate slices aren't real? You won't believe how they are made!
 Agate slices are all the rage in home decor these days, but just a single large slice can be pricey. So why not DIY several for less than half the cost of just one real one! They are great to use as trays or even hang on the wall.
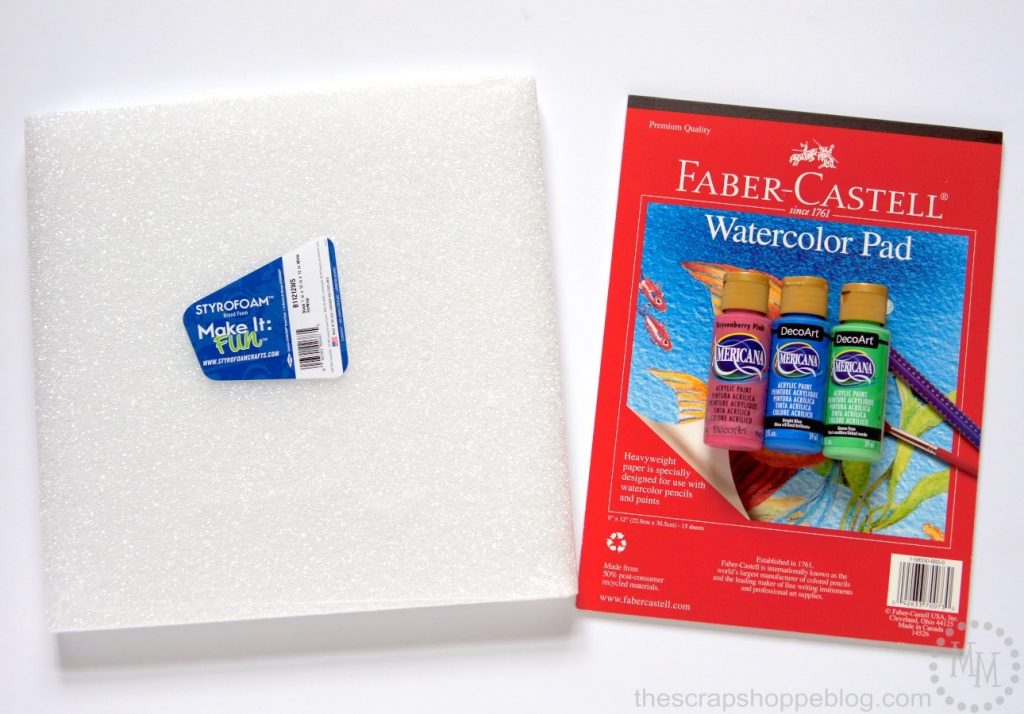
This month's FloraCraft® Make It: Fun challenge was to create a home decor project using their 12"x12"x1" foam boards. Can you believe that is what this agate slice started out as? Let me show you how I created it.
 Supplies:
FloraCraft® Make It: Fun® Foam Block, 12"x12"x1"
9"x12" watercolor paper
Acrylic paints (Americana Acrylics in Boysenberry Pink, Bright Blue, and Green Tree)
Water
Decoupage
Triple Thick Gloss Glaze
Smooth Finish
2 shades of gray acrylic paint
Tissue paper
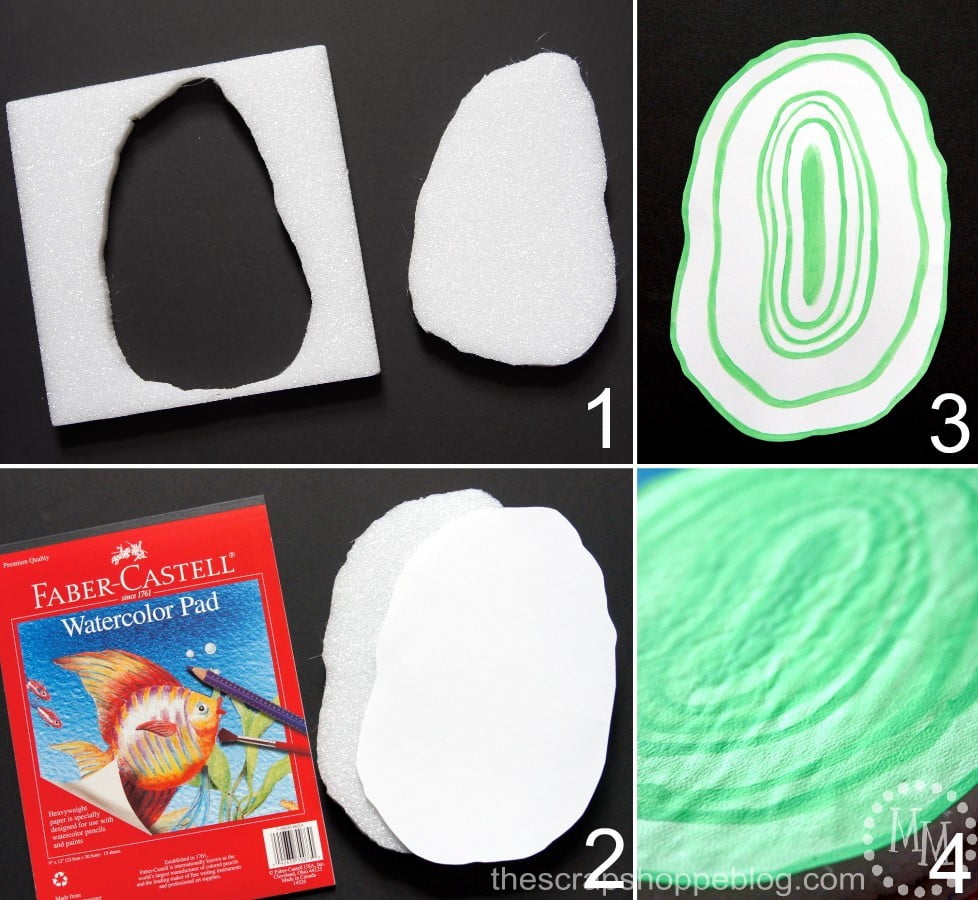 1. Cut an agate slice shape out of the foam board. I used the Styro Cutter for this because it was easy to control the direction the cutter went. Remember, an agate is from a rock so it should be unevenly shaped to be realistic. You can draw a design on the foam first or just freehand it like I did. Sand the sides so that they angle slightly towards the back.
2. Place the slice face down on the watercolor paper and trace the edges. Cut out the shape of the agate on the paper.
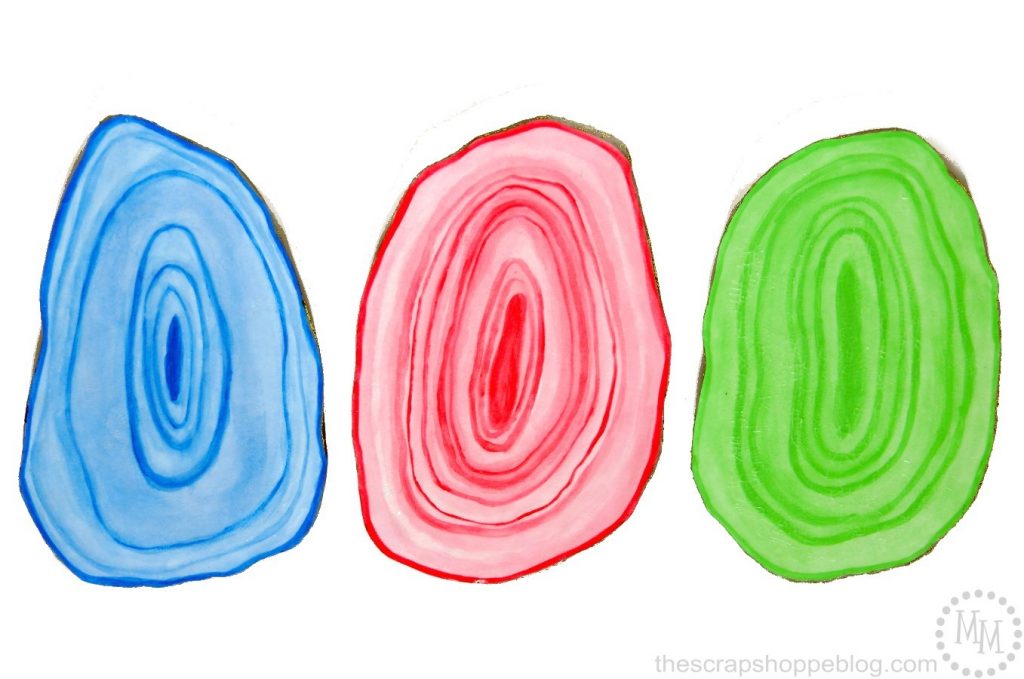
3. Mix the acrylic paint with a small amount of water. The more diluted the paint is with water the lighter the color will be. Start with rings of darker color to make the agate then go back and fill in between the rings with lighter shades of the same color.
4. Once dry, decoupage the watercolor paper to the top of the foam. Turn upside down and put large books or weights on the foam until the decoupage is dry.
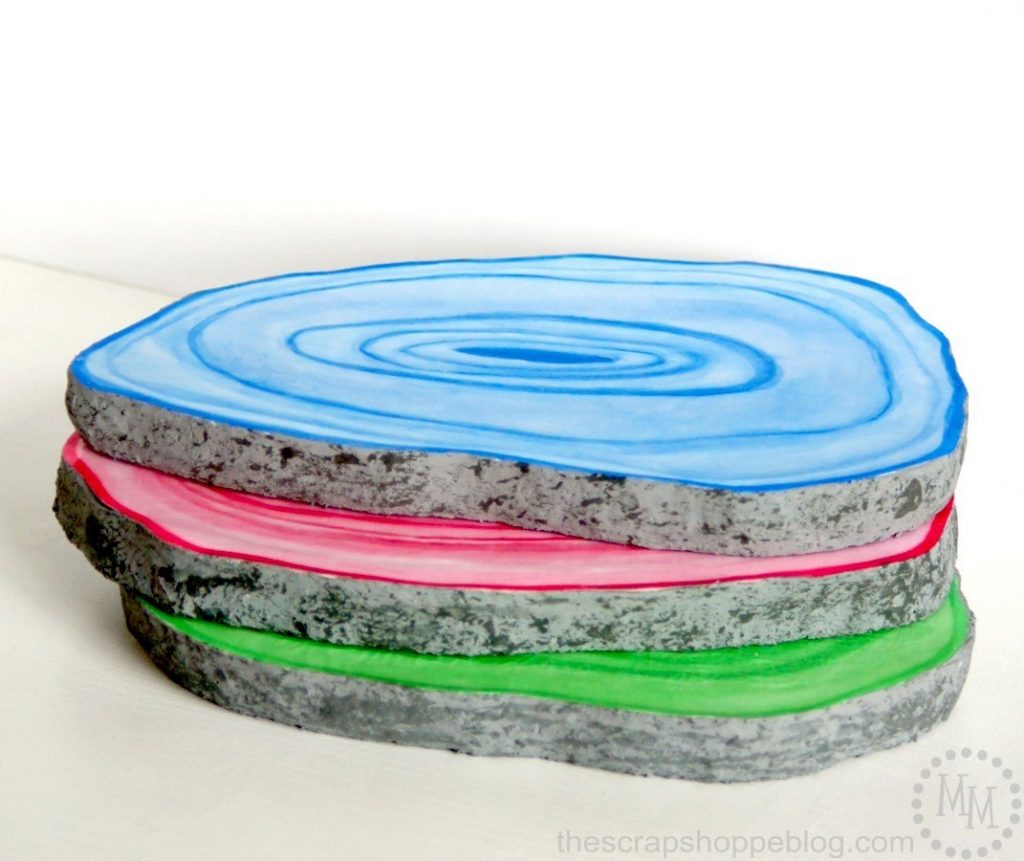
 To give the agate a buffed, shiny appearance add a coat (or 2) of Triple Thick Gloss Glaze.
 Once the glaze is dry, spread Smooth Finish around all of the edges of the foam. While it is still setting, go back and smooth out any pallette marks with your finger. It doesn't need to be perfectly smooth, but you want to have the appearance of the outside of a rock.
Once completely dry, paint over the Smooth Finish with a coat of light gray paint. Once that is dry, crumple a piece of tissue paper and daub it into a gray paint slightly darker than the first. Lightly dab the tissue paper all over the light gray paint. This will make the sides look more like rock.
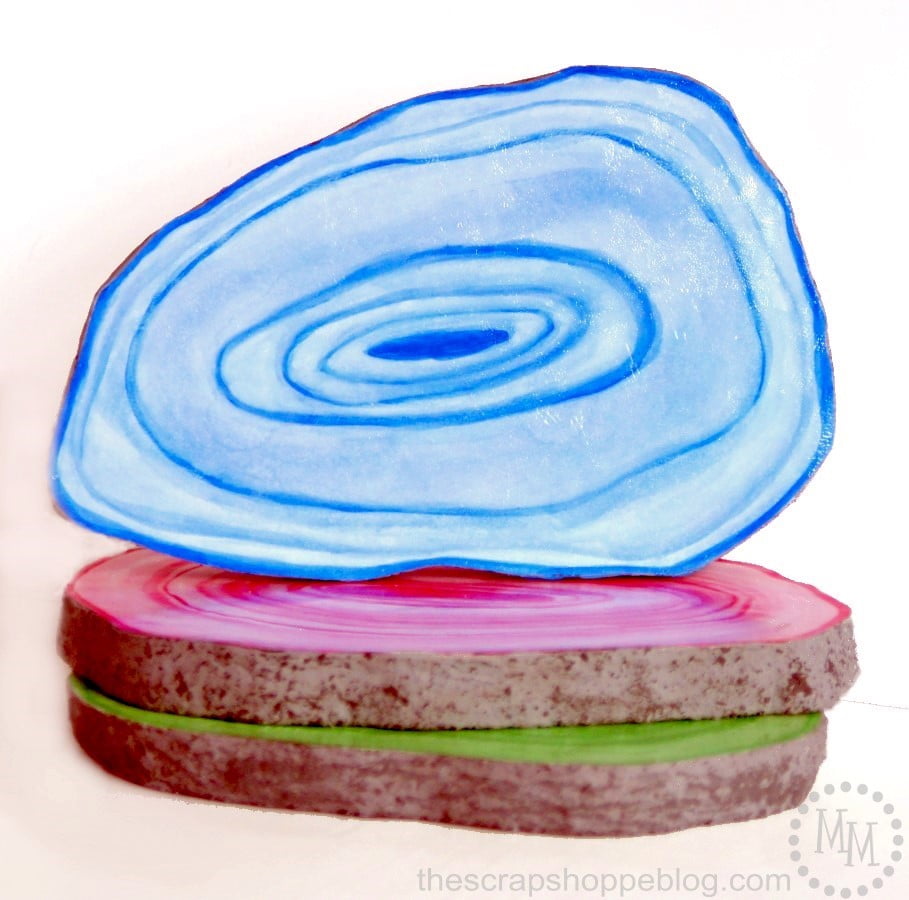 How fun did these turn out??? I can't decide if I want to hang them or set them on end tables.
Not only is this project SOOOOOO much cheaper than buying 3 agate slices, but you can also create custom colors that fit your home!
Linking up to Flamingo Toes, Today's Creative Blog, Tidymom, My Repurposed Life,
Tatertots & Jello, and other great parties found on my party page.


That gloss glaze is amazing stuff! That shine is fab!
I am totally amazed at this. It looks amazing. SO impressive! 🙂
#graceathome
What a fun project!
What a fun project! Beautifully done!
Great idea, very creative. Pinned
What a fun craft idea! Thanks for sharing with us at Funtastic Friday 🙂
Those are very pretty and super creative!!
Thanks for linking up at #bloggerspotligt
These are really cool. Thanks for sharing how you made them.
You make it look so easy and the finished product looks great. I'm not sure I could do it but thanks for sharing with us at #OvertheMoon link party.
Great minds think alike! My daughter just posted a tutorial for this same thing. I like that you used foam core. Nice work.
I can't believe how realistic these look! Fabulous job.
Looks great!!!