
Skull Frame & Candelabra Plaque Tutorial
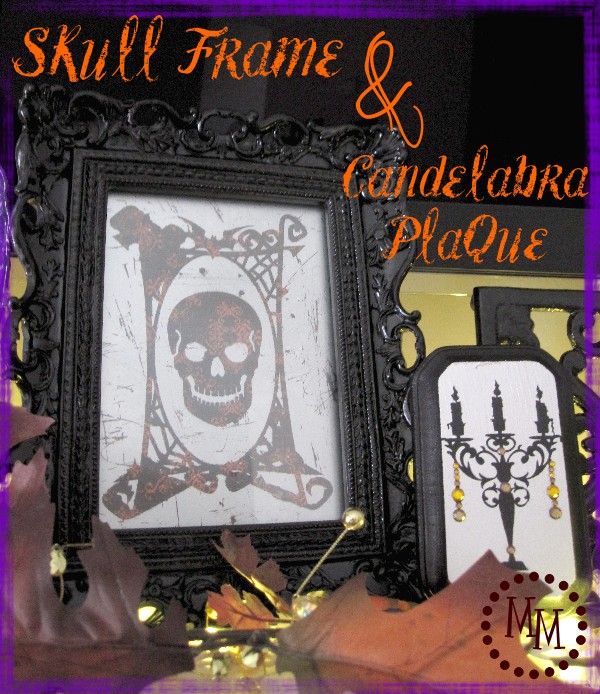
I've already showed off this skull frame and candelabra plaque on my Halloween mantle, but now its time to share the tutorials!
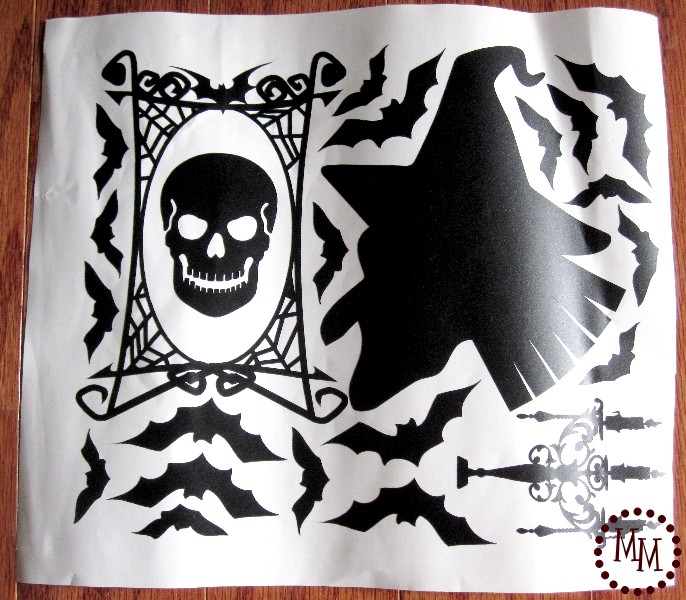
Both projects use reverse stenciling with vinyl, so I cut my shapes using images from the Silhouette Image Library.
Images used:
Spider Web Frame frame_C20090810095627_2581
Skull positionable_skeleton_C20091026105204_19210
Candelabra candelabra_2212
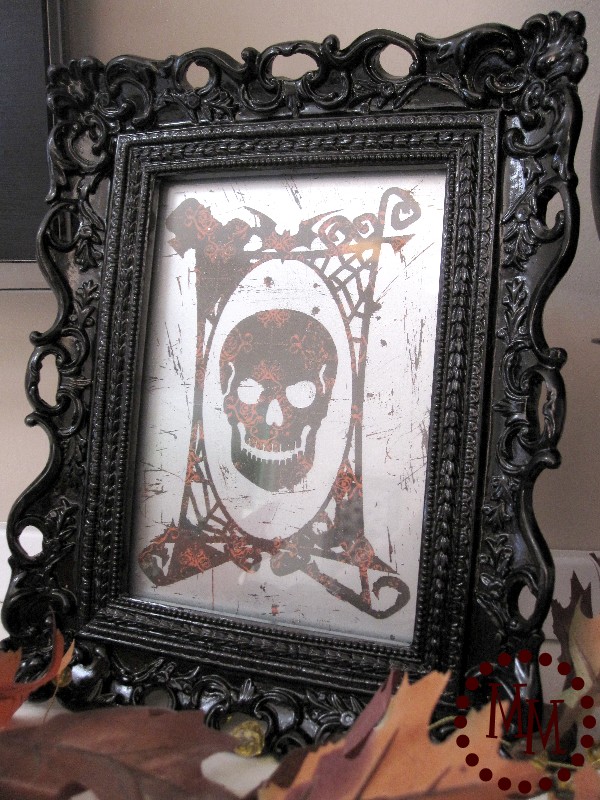
Skull Frame Tutorial
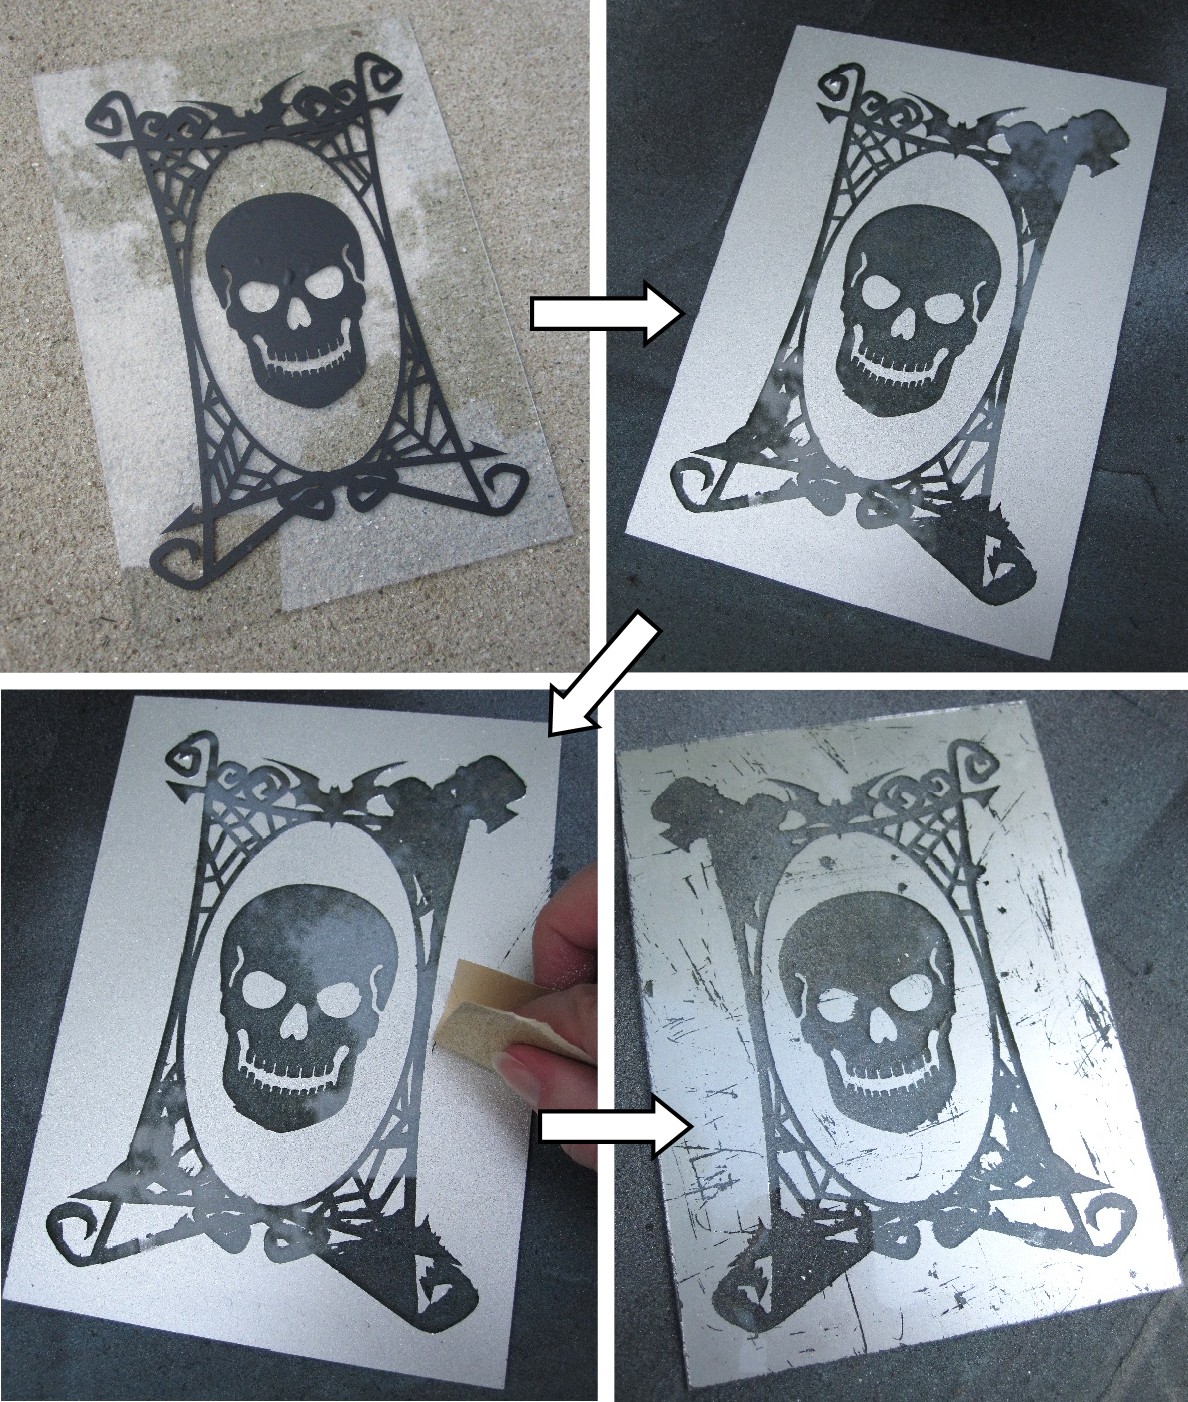
I started with a piece of 5x7 glass I had stashed away from a frame I didn't need it for. I put the vinyl on the glass then applied 2 coats of Krylon's Sterling Silver metallic spray paint.
I waited about 2 minutes too long to peel off the vinyl!
Some of the paint came off when the vinyl came off. 🙁
I was disappointed... but then decided to put my big girl panties on and make it work for me!
I grabbed some really fine grit sandpaper and started scratching some of the paint off to give it a grungy look.
I scratched this way and that way until I was satisfied.
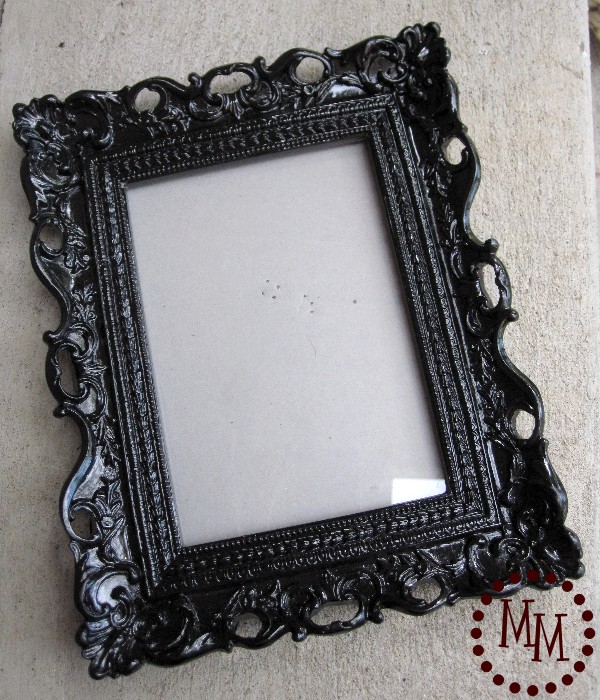
I had this fabulous frame in my stash (what, you don't have a frame stash???) and decided it would be perfectly spooky for this project!
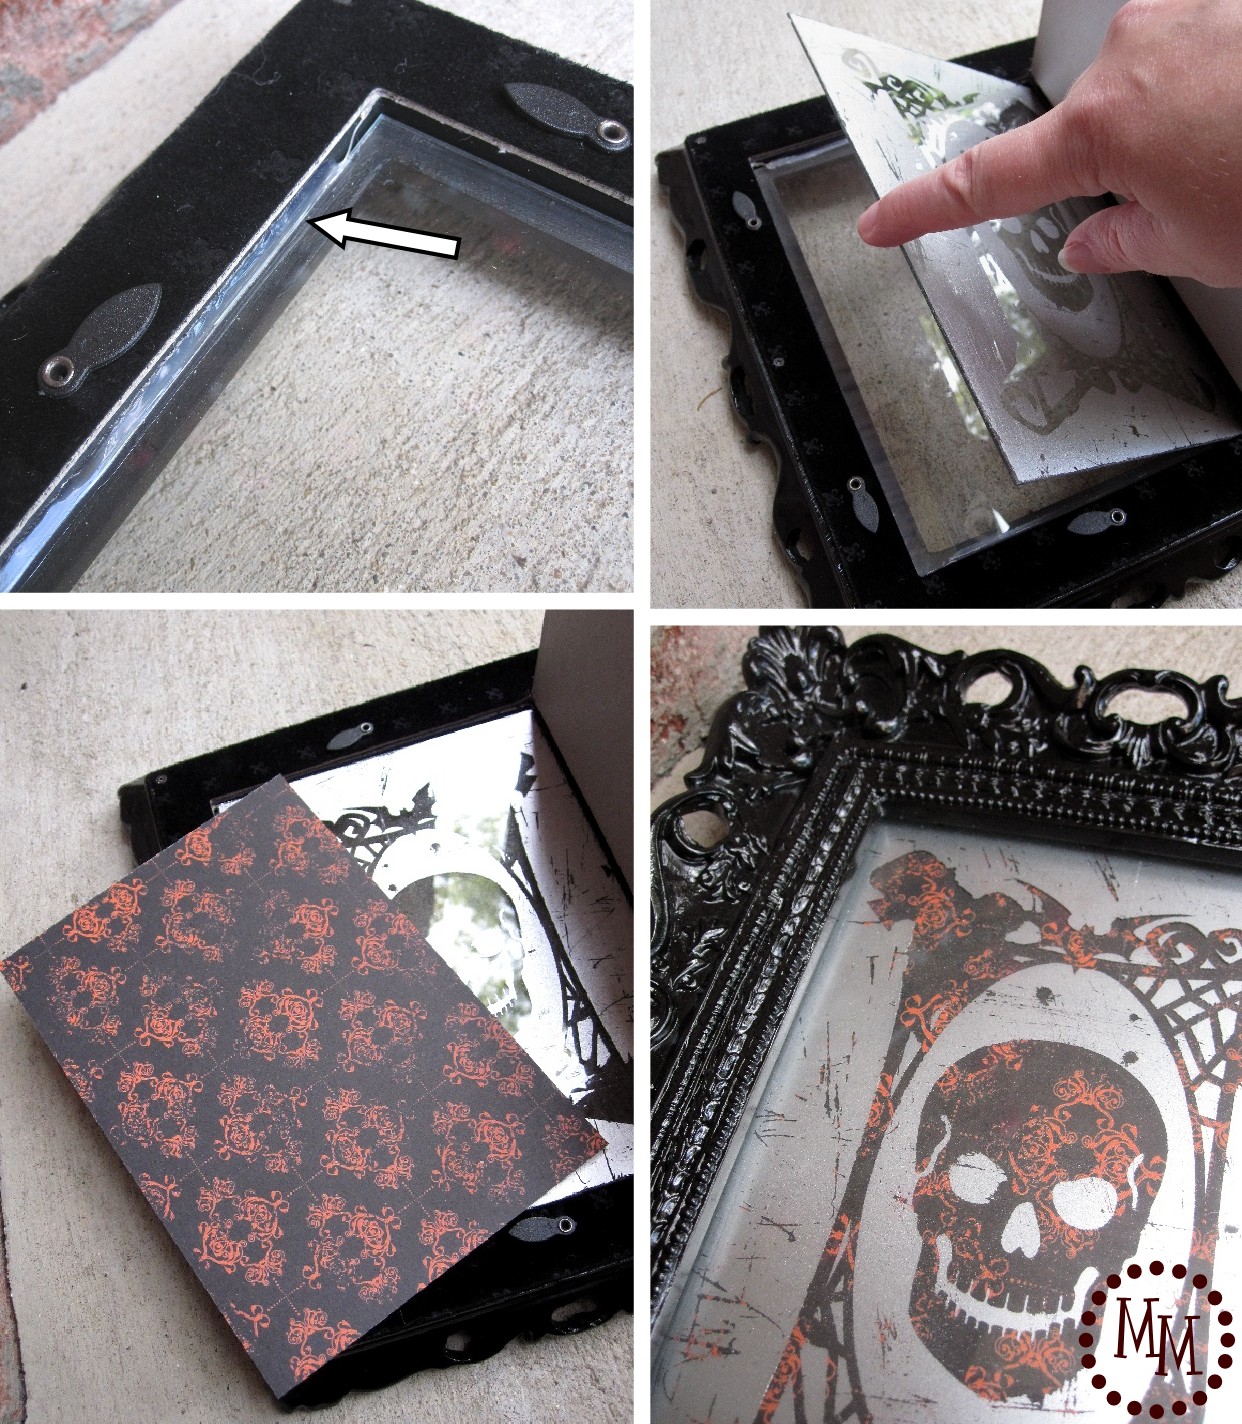
First problem with the frame... the glass in it was glued down!
Luckily there was plenty of room to put the glass with the skull on it behind the glass in the frame.
I cut some Halloween-themed scrapbook paper down to size and
inserted it behind all of the glass.
Perfecto!
It actually turned out perfect that the vinyl didn't come off cleanly!
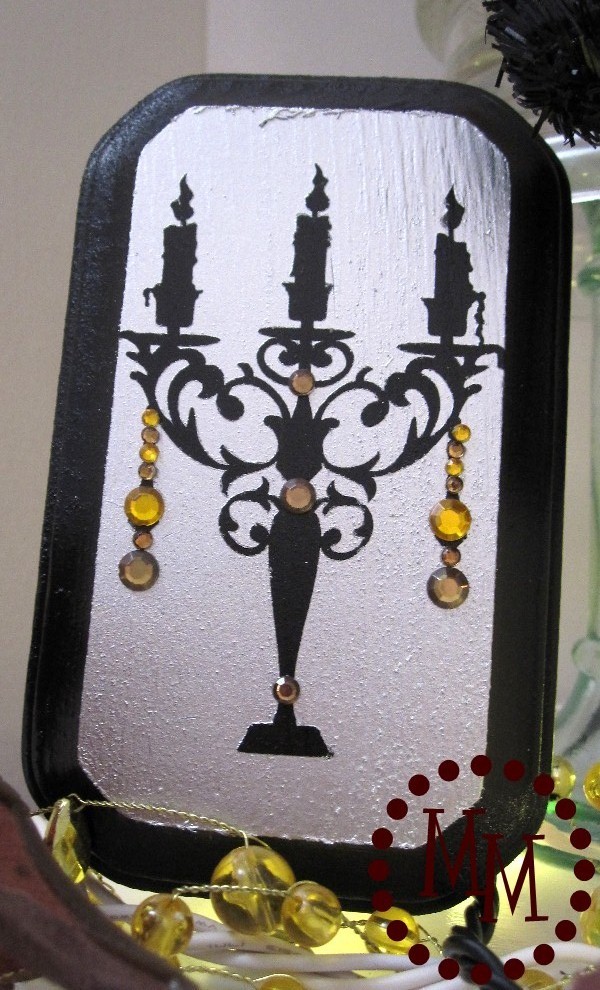
Candelabra Plaque Tutorial
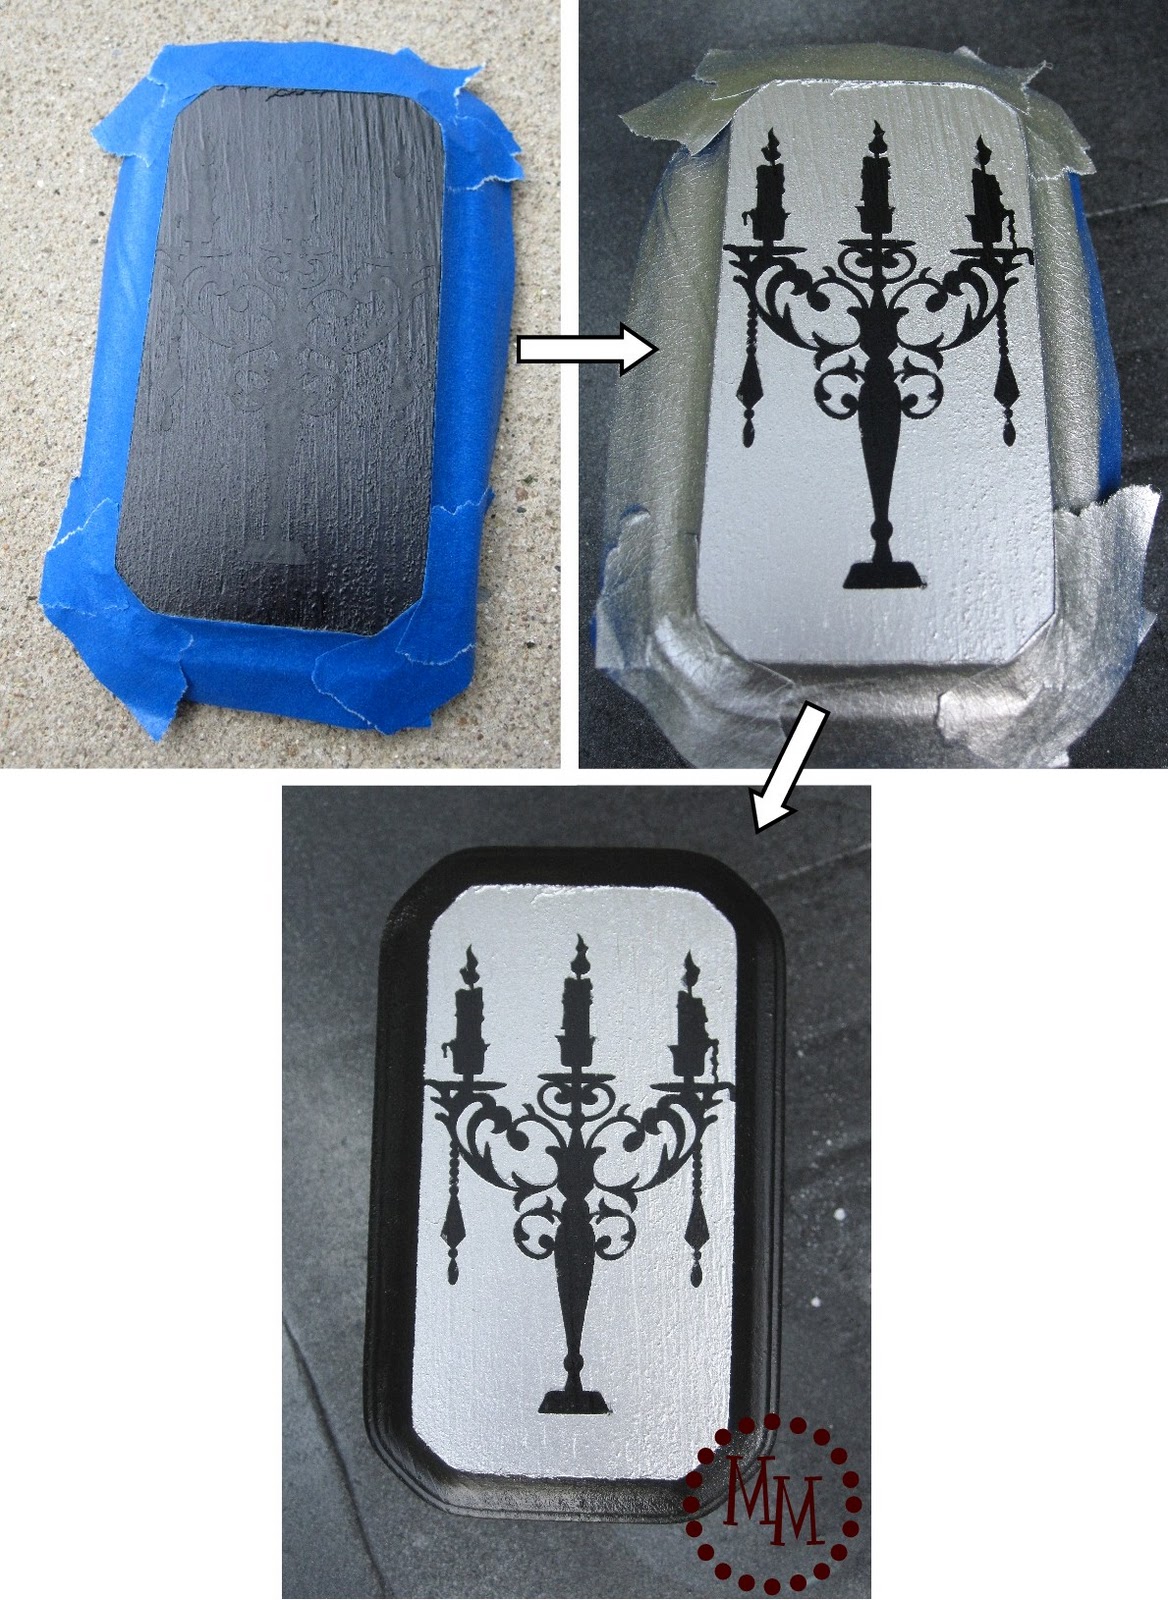
I took a small plaque from the unfinished wood section of Hobby Lobby and spray painted it black.
I taped off the front of the plaque, applied the candelabra vinyl, and gave it a couple of coats of the Krylon Sterling Silver metallic spray paint.
The vinyl came back off of the wood MUCH better than it did the glass with the skull frame!

But the candelabra still needed something...
A little bling ought to brighten it up!
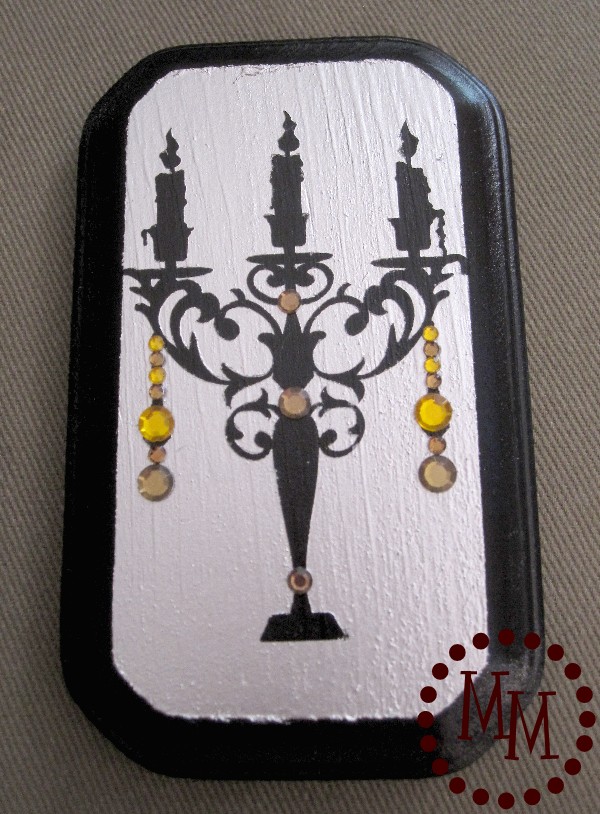
Ahhhh, bling. Gotta love it!
And there you have it.
Two slightly spooky very simple tutorials for Halloween!
I enjoyed the reverse stenciling technique using the vinyl.
I may have to try it again soon!
I link up to these great parties.


VERY creative Michele! Love the bling on the chandelier!
gail
I would love it if you would link this to my link party. It just started 🙂
http://diycraftstomake.blogspot.com/2011/10/whacha-got-weekly-linky-party.html
Very cute outcome! Skull is spooky and the candle piece is well....blingy!! LOVIN' THEM!
Visiting form The Shabby Nest Linky Party,
~Suzanne in NW IL
Spooky! Come see a Wisdom Teeth necklace!
so happy i found you! your blog is way awesome! i love both pictures but as a primitive doll designer and collector the skull picture screams to me the most! thanks for shareing how to make it i would have never guessed it would be so simple. Makes great gift for my daughter's room. sandi
These are way cute! I've been needing to decorate with more halloweenish stuff like this. This is good inspiration. Great job 🙂
Bekah
If Work Permits
Michele--this is so stinkin' cute! I am dying... I MUST.HAVE. that candelabra platter. So clever! Thanks for the tutorials!
This is soooo cool Michele!! I'm so glad you did tutorials on these because I had no idea they were reverse vinyl!! I love the skull frame even more now that I can see it closer - the scratching is fabulous! I like it better that way!! 🙂
oh michele! I love both of these decorations! So clever!!
I love how it turned out grunged up! Nice job:)
will be adding this to my to-do list for sure!!
SOOOOOO Awesome Michele!