
Halloween Lollies

I mentioned a few weeks ago that I received some fun paper crafting goodies from EKSuccess Tools.
Now I am finally ready to share what I made with them!
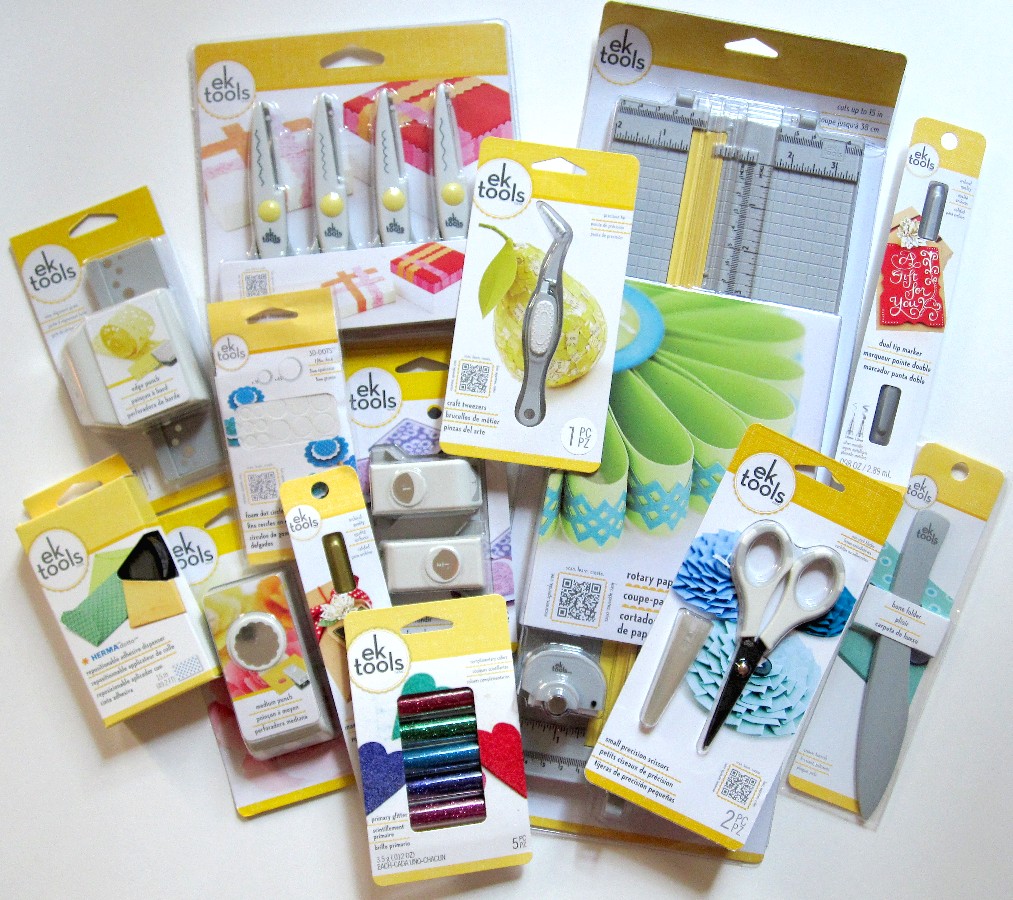
But first, let's have another look at all of the supplies!
Does anything strike you when you look at this pile?
I'm instantly drawn to the packaging! Isn't it bright and fun?
If I saw it on a shelf I would definitely be drawn to it.
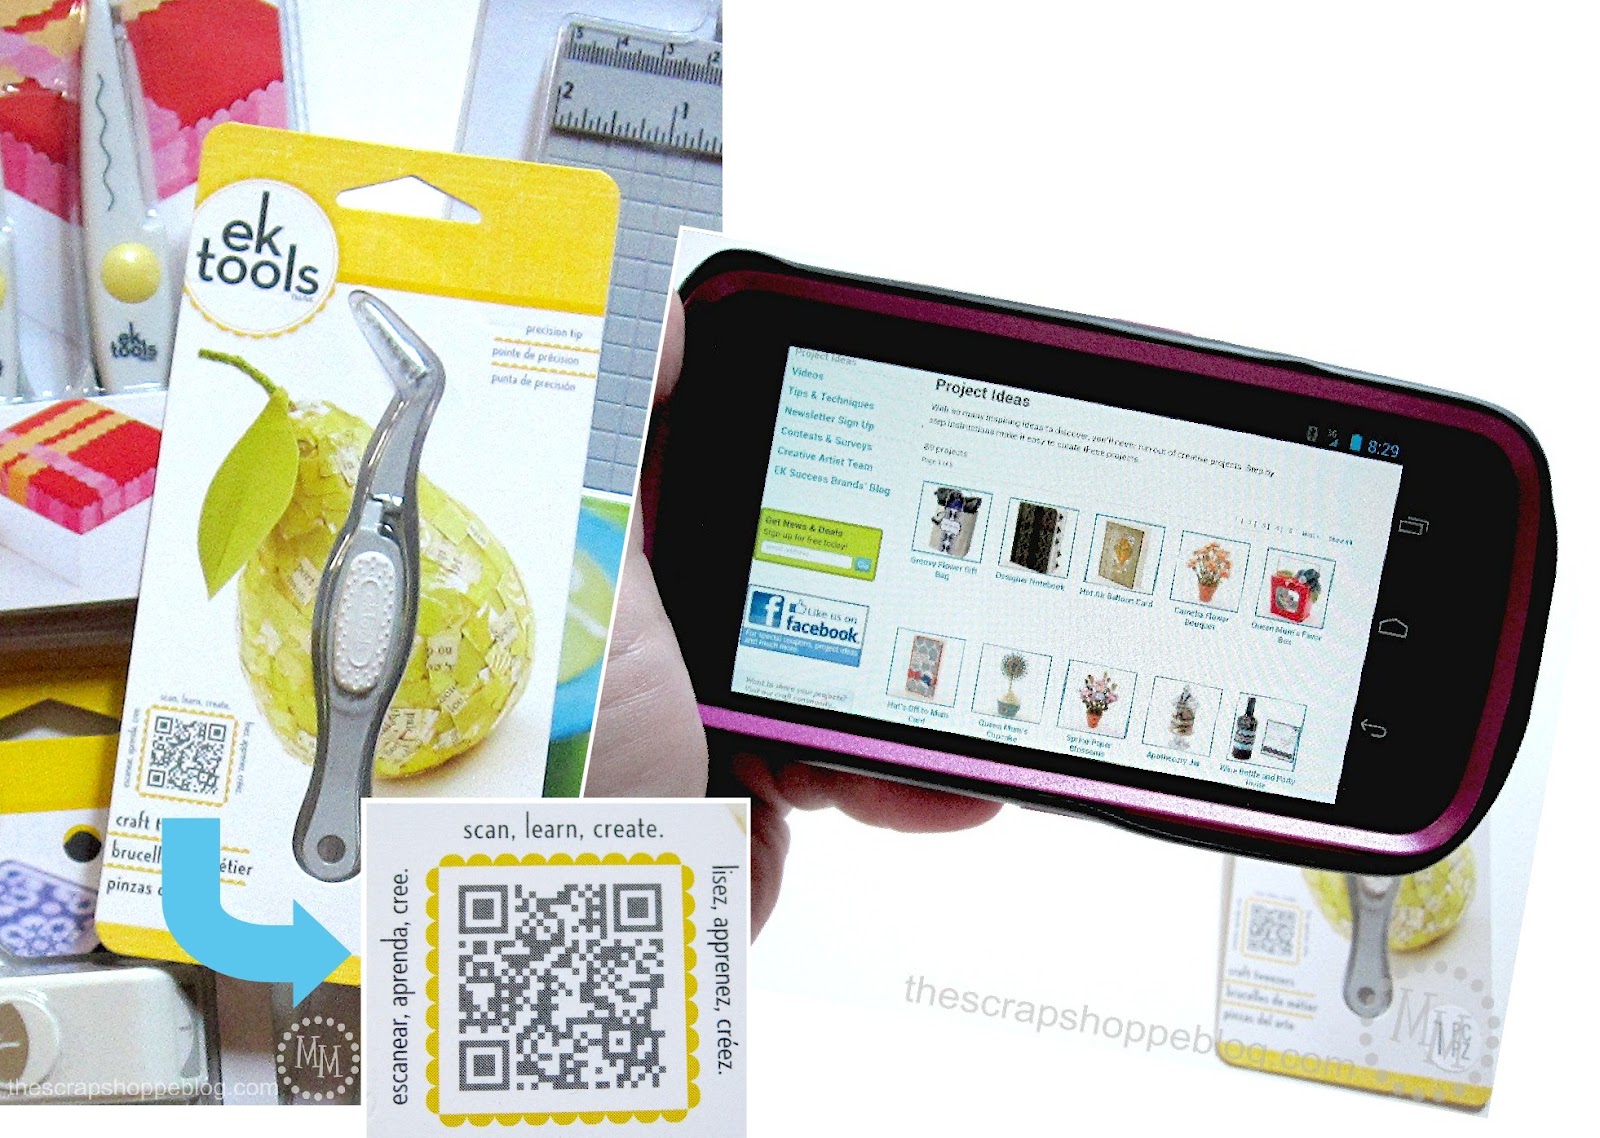
Something else great about the packaging?
All of the supplies have their own QR code you can scan with your smart phone.
Once you do, you're taken to a website full of project ideas that use that particular tool!
You can find these EKSuccess Tools at select Walmart stores.
Okay, on with the project!
I decided I wanted to make some Halloween lollies which is a great paper craft.
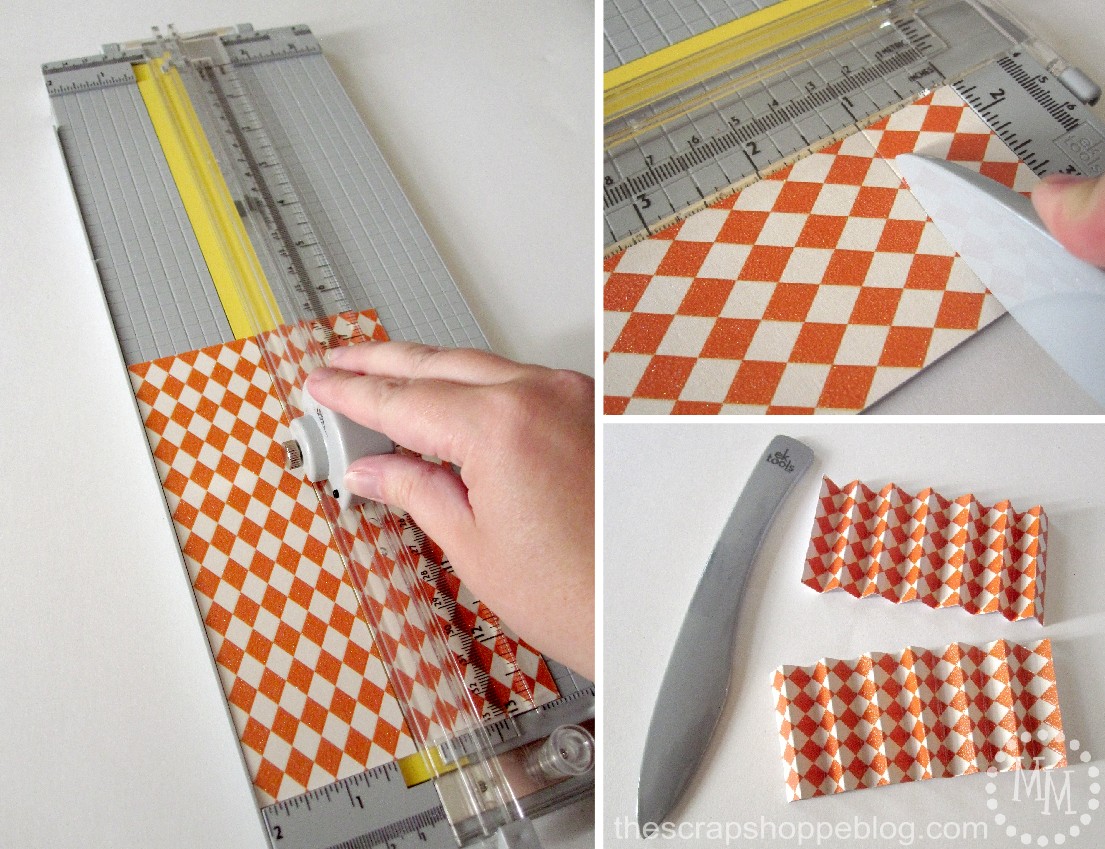
I started by trimming my paper with the paper trimmer (widths vary depending on how big you want your lolly to be). Then, also using the paper trimmer, score the paper every half inch with the bone folder.
The paper trimmer has an indented grid on it so scoring the paper is a breeze!
Finally accordion fold all of your pieces of paper (you will need 4 pieces per lolly).
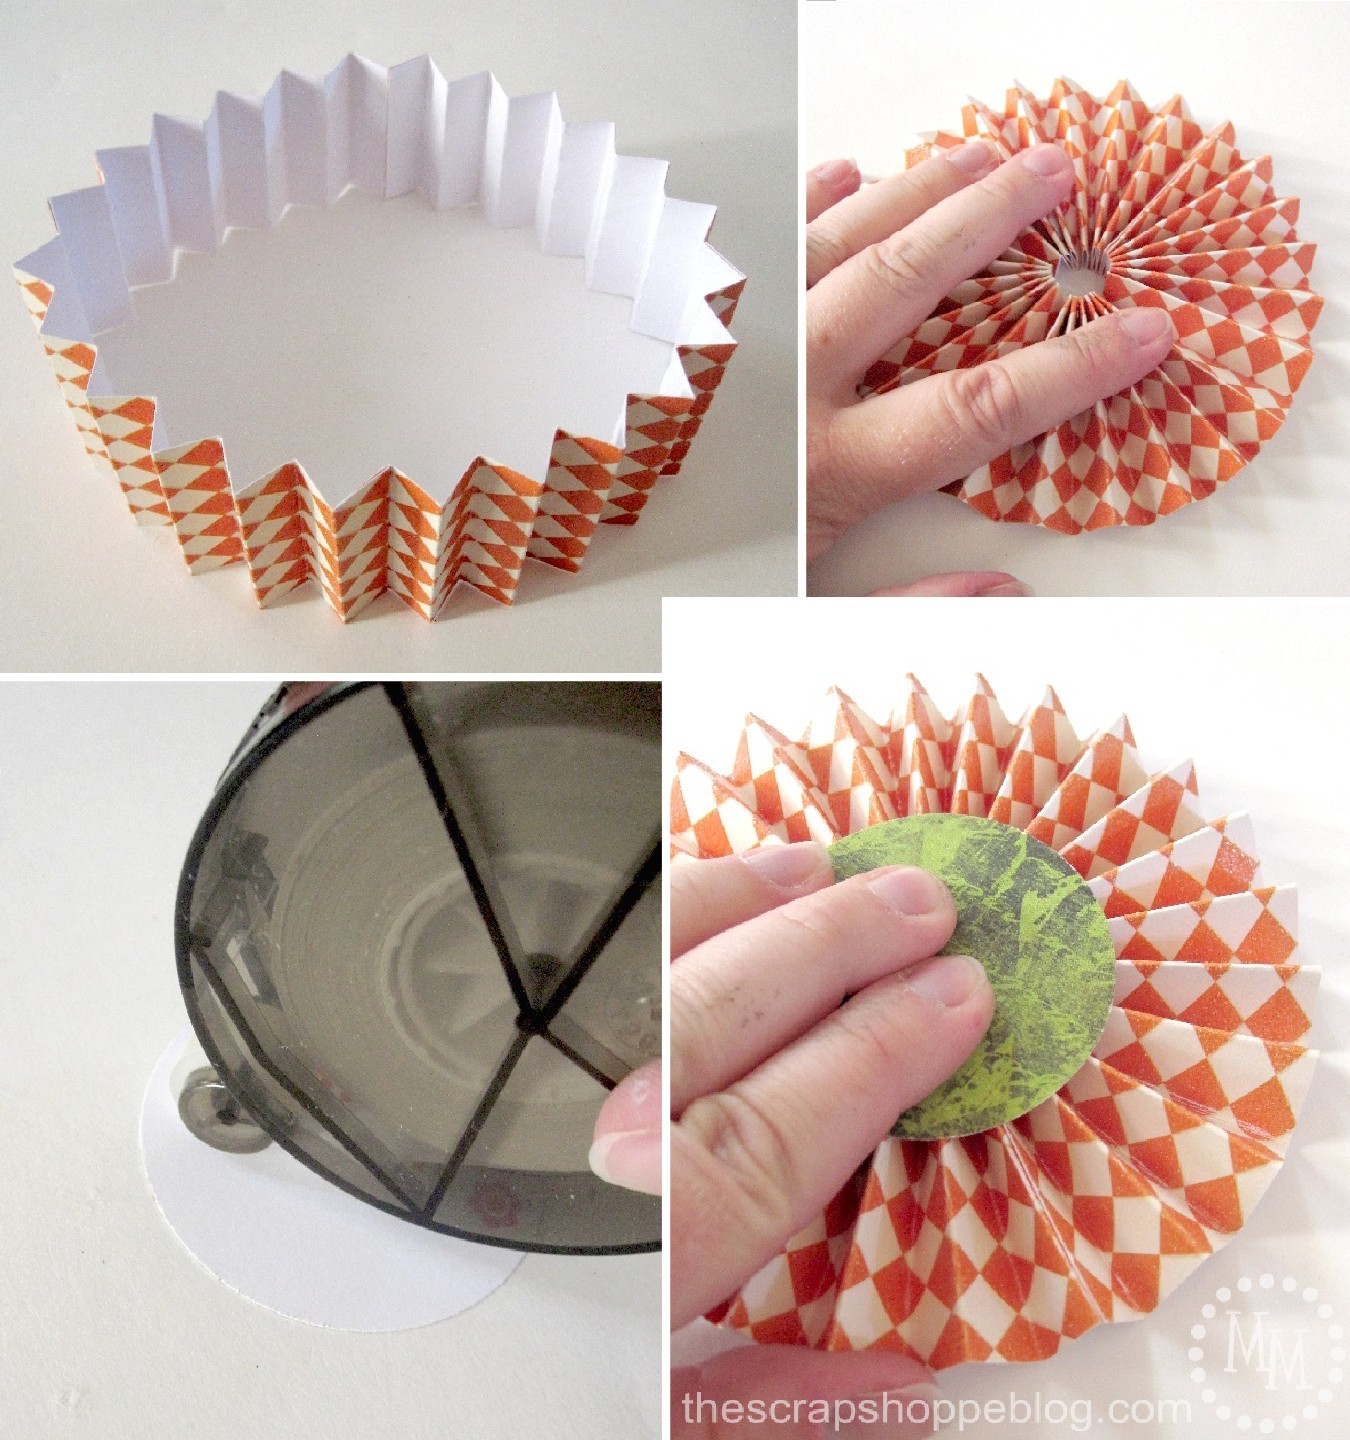
Glue the four pieces of paper together end-to-end to make a big circle.
Gently push the paper down to form the lolly and glue it together to stay put.
Use the Herma Dotto adhesive on a round piece of paper and stick it on the center of the lolly.
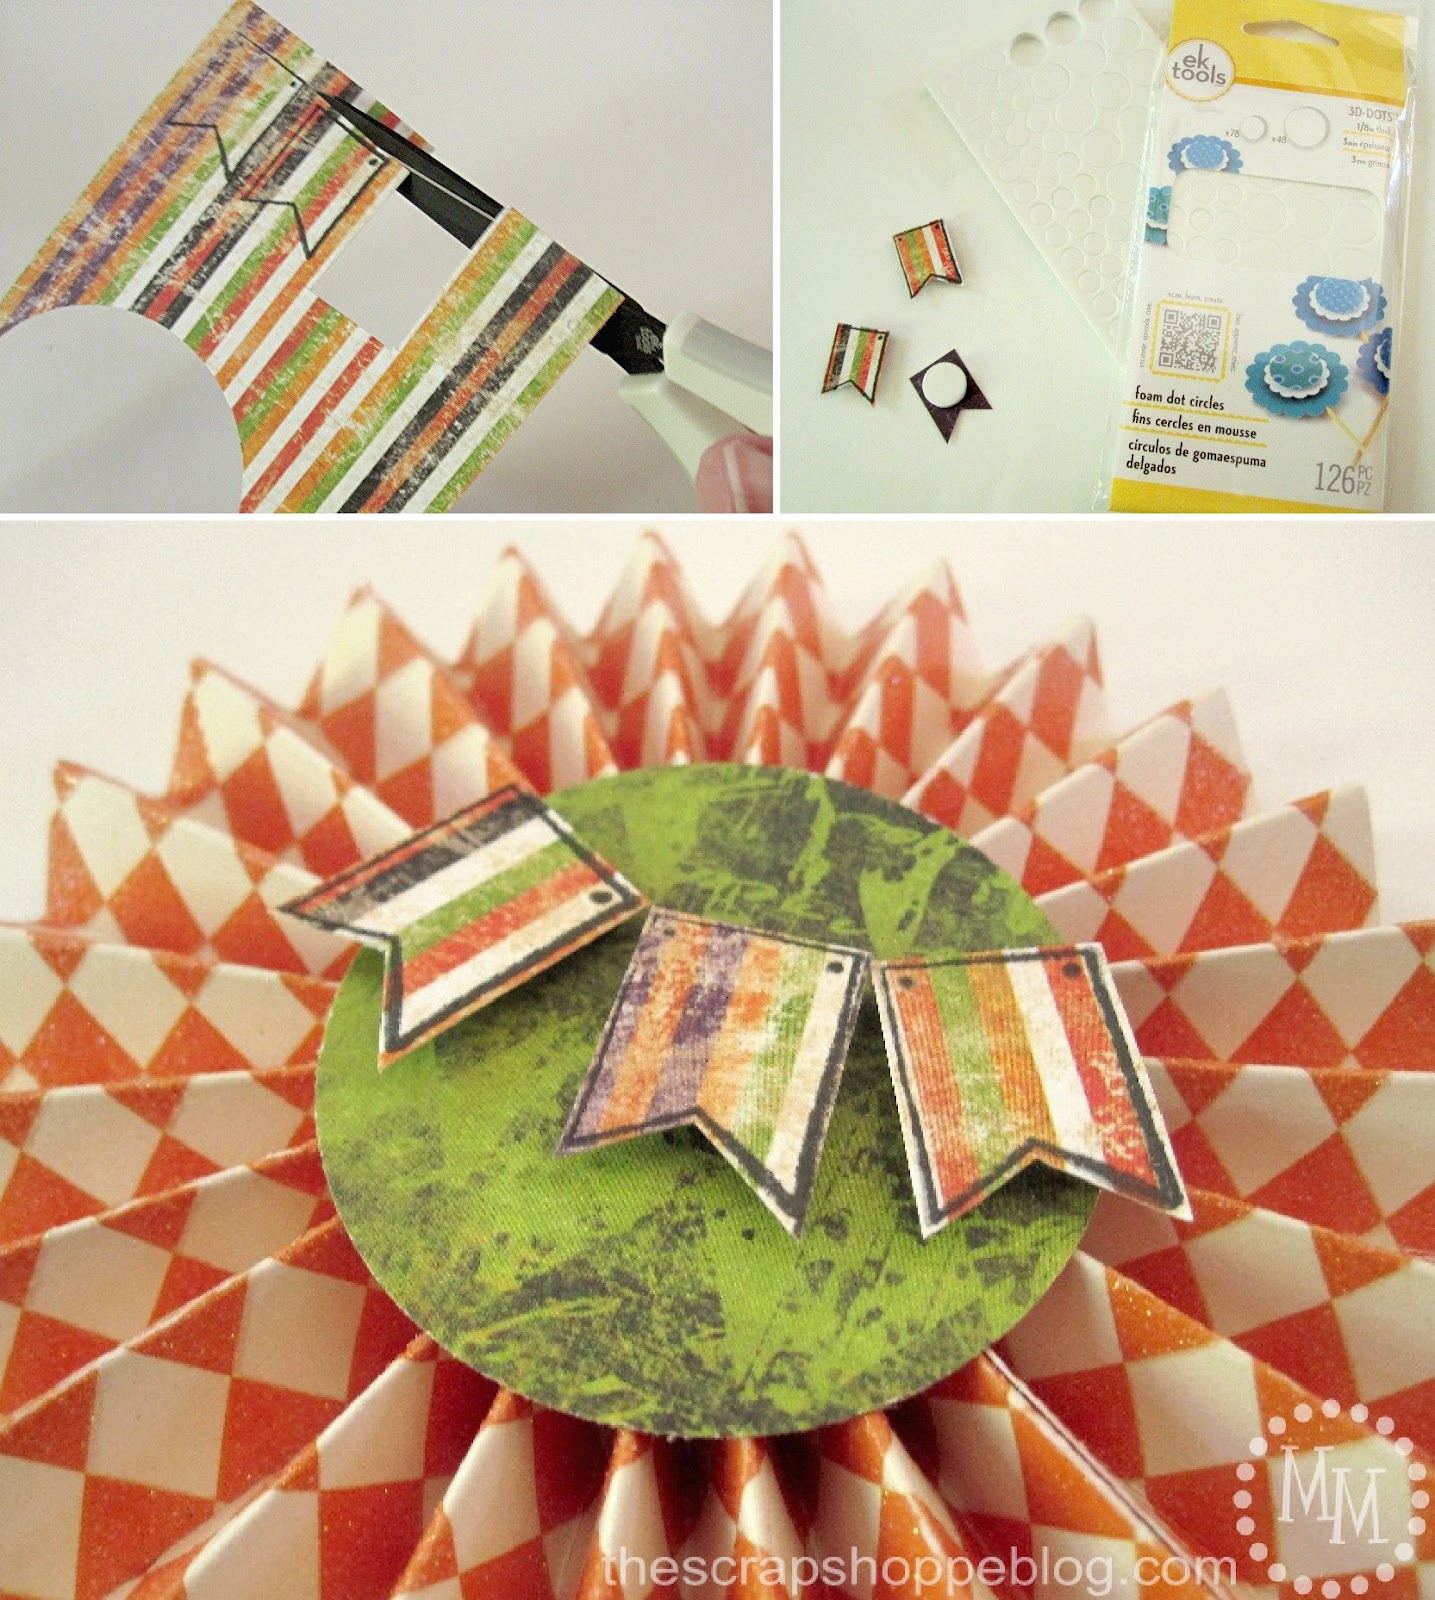
Now to decorate the lolly!
I stamped bunting onto some paper then used the precision scissors to cut them out.
Apply a large 3-D dot to the back of each piece of bunting and put them on the lolly.
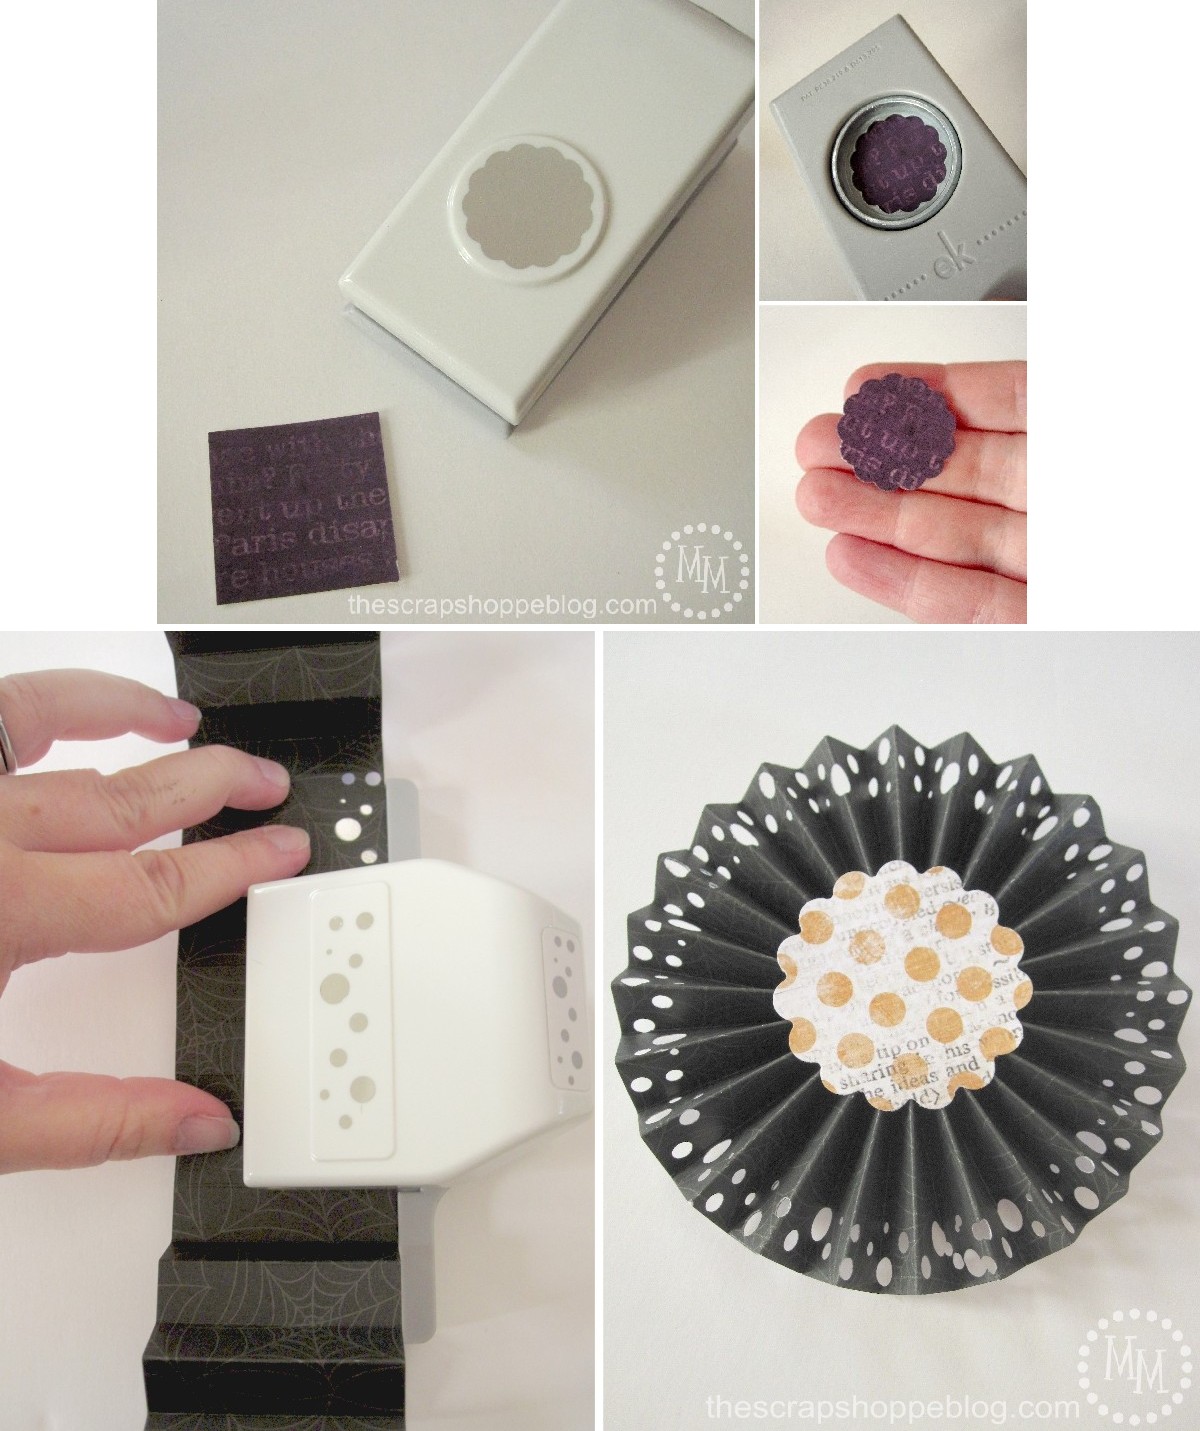
I was itching to use some of the punches I received so I used them on another lolly.
I used the scallop punch on some purple Halloween paper.
After trimming, scoring, and adhering some paper to make another lolly, I used the Swiss cheese border punch around the edge of the paper.
Note: I think by completing all of the steps to make the lolly before punching it out is the easiest process.
Trying to score and fold the paper after it has been punched would be problematic.
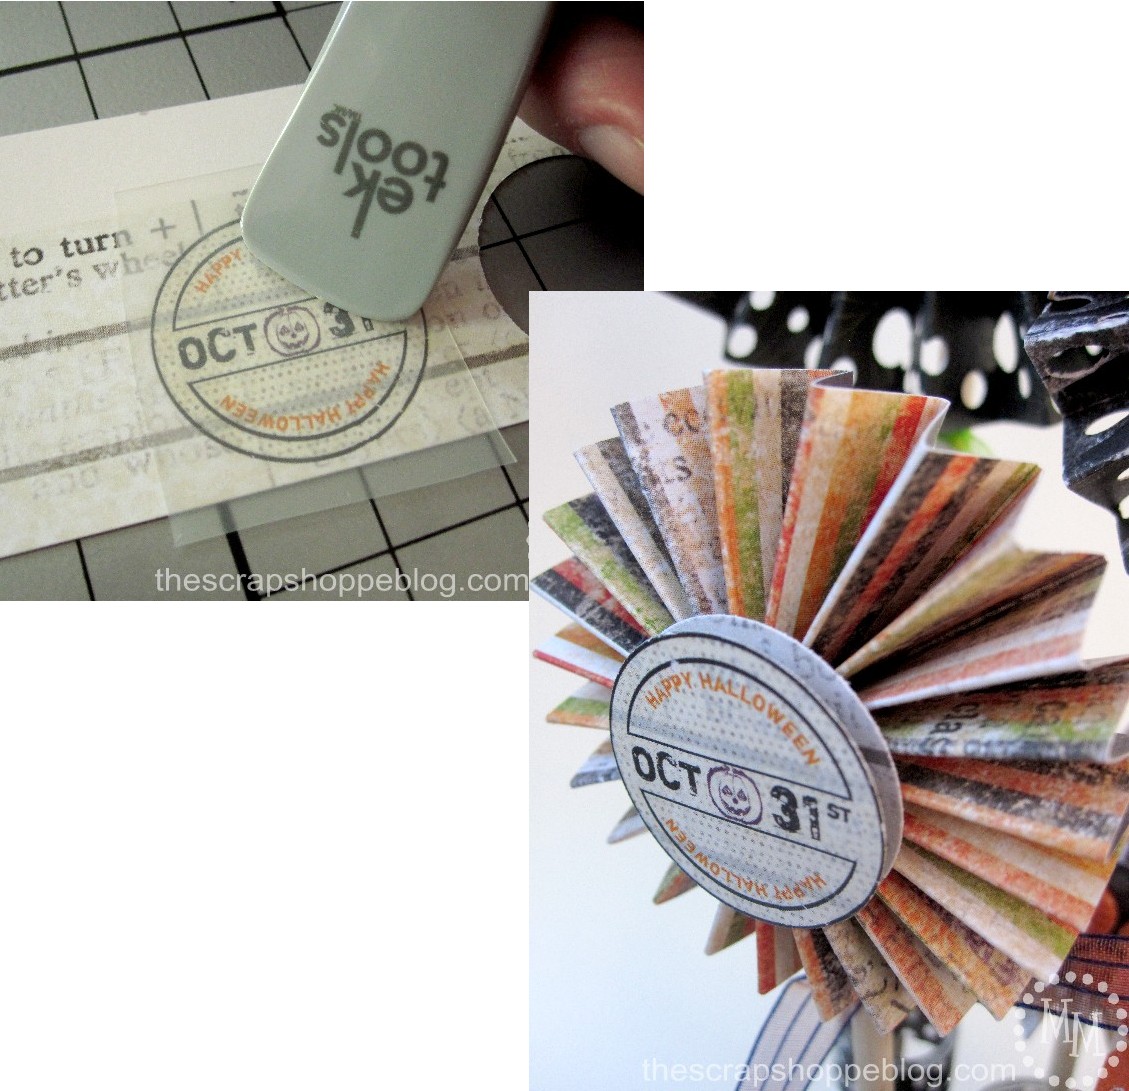
Incidently, one tail end of the bone folder works great for applying rub ons!
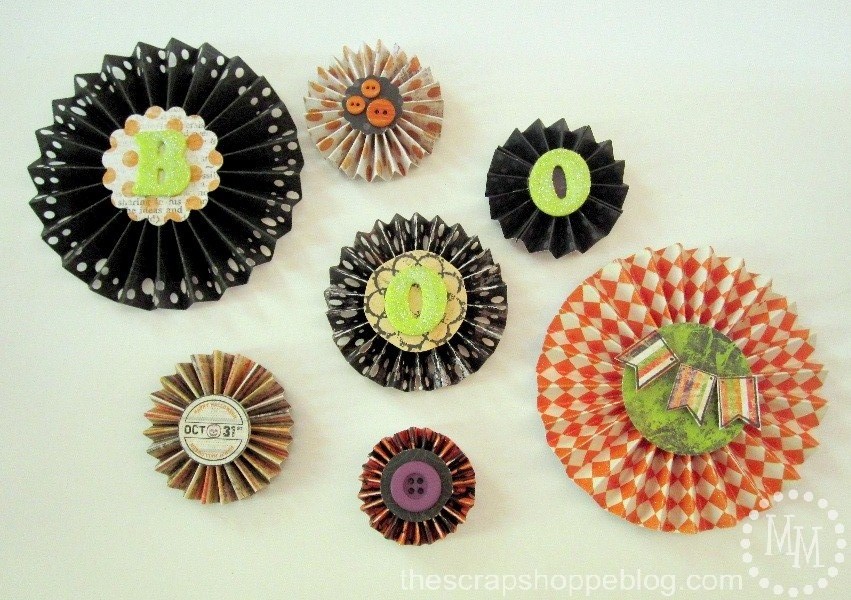
I made several lollies of varying widths and decorated them with paper, buttons, rub ons, etc.
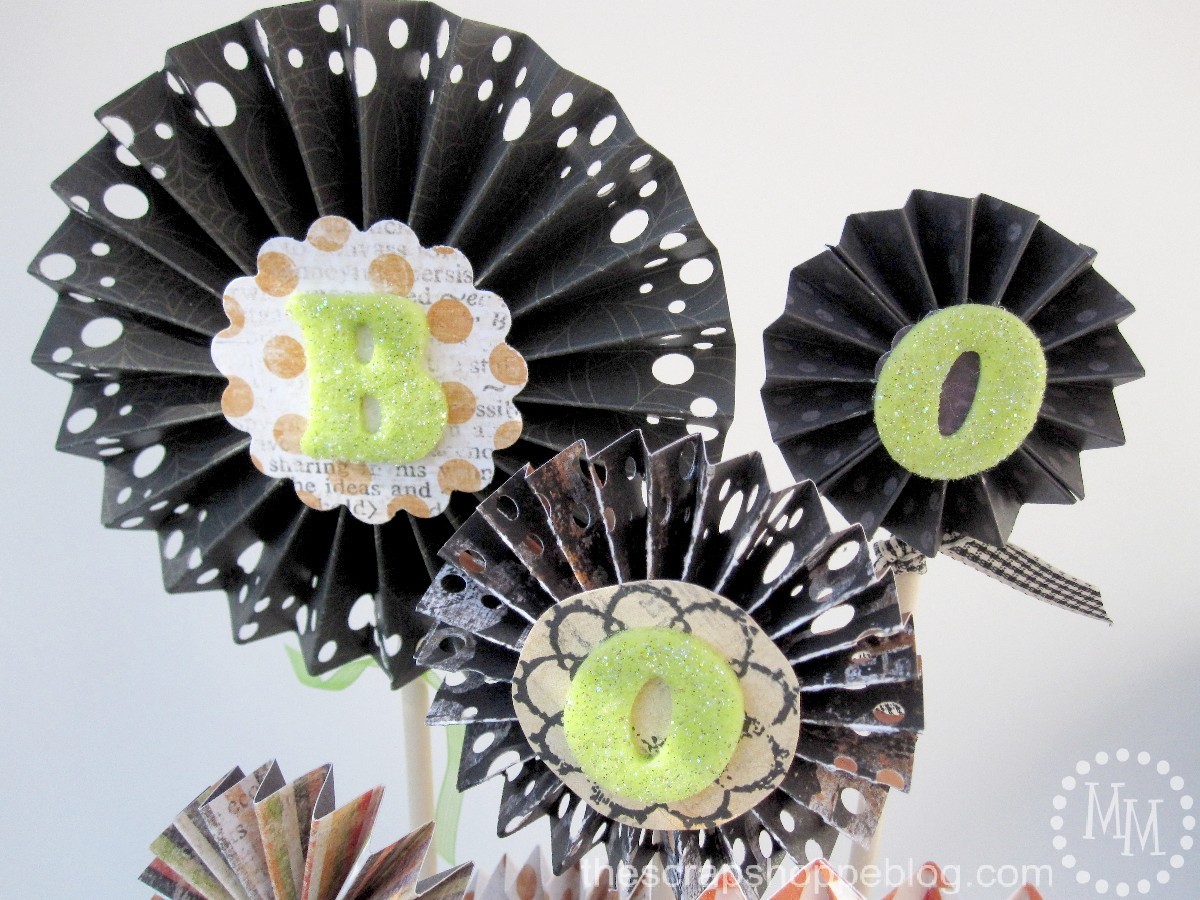
I wanted the lollies to say something, so I used three of them to spell out BOO!
I then attached all of the lollies to ¼" dowel rods.

Now for what we're putting the lollies in!
I took an unfinished wood plaque and painted the edges with black glitter and covered the top with scrapbook paper.
I used an unused makeup brush holder to hold the lollies. I wrapped the top of each piece of the holder with washi tape.
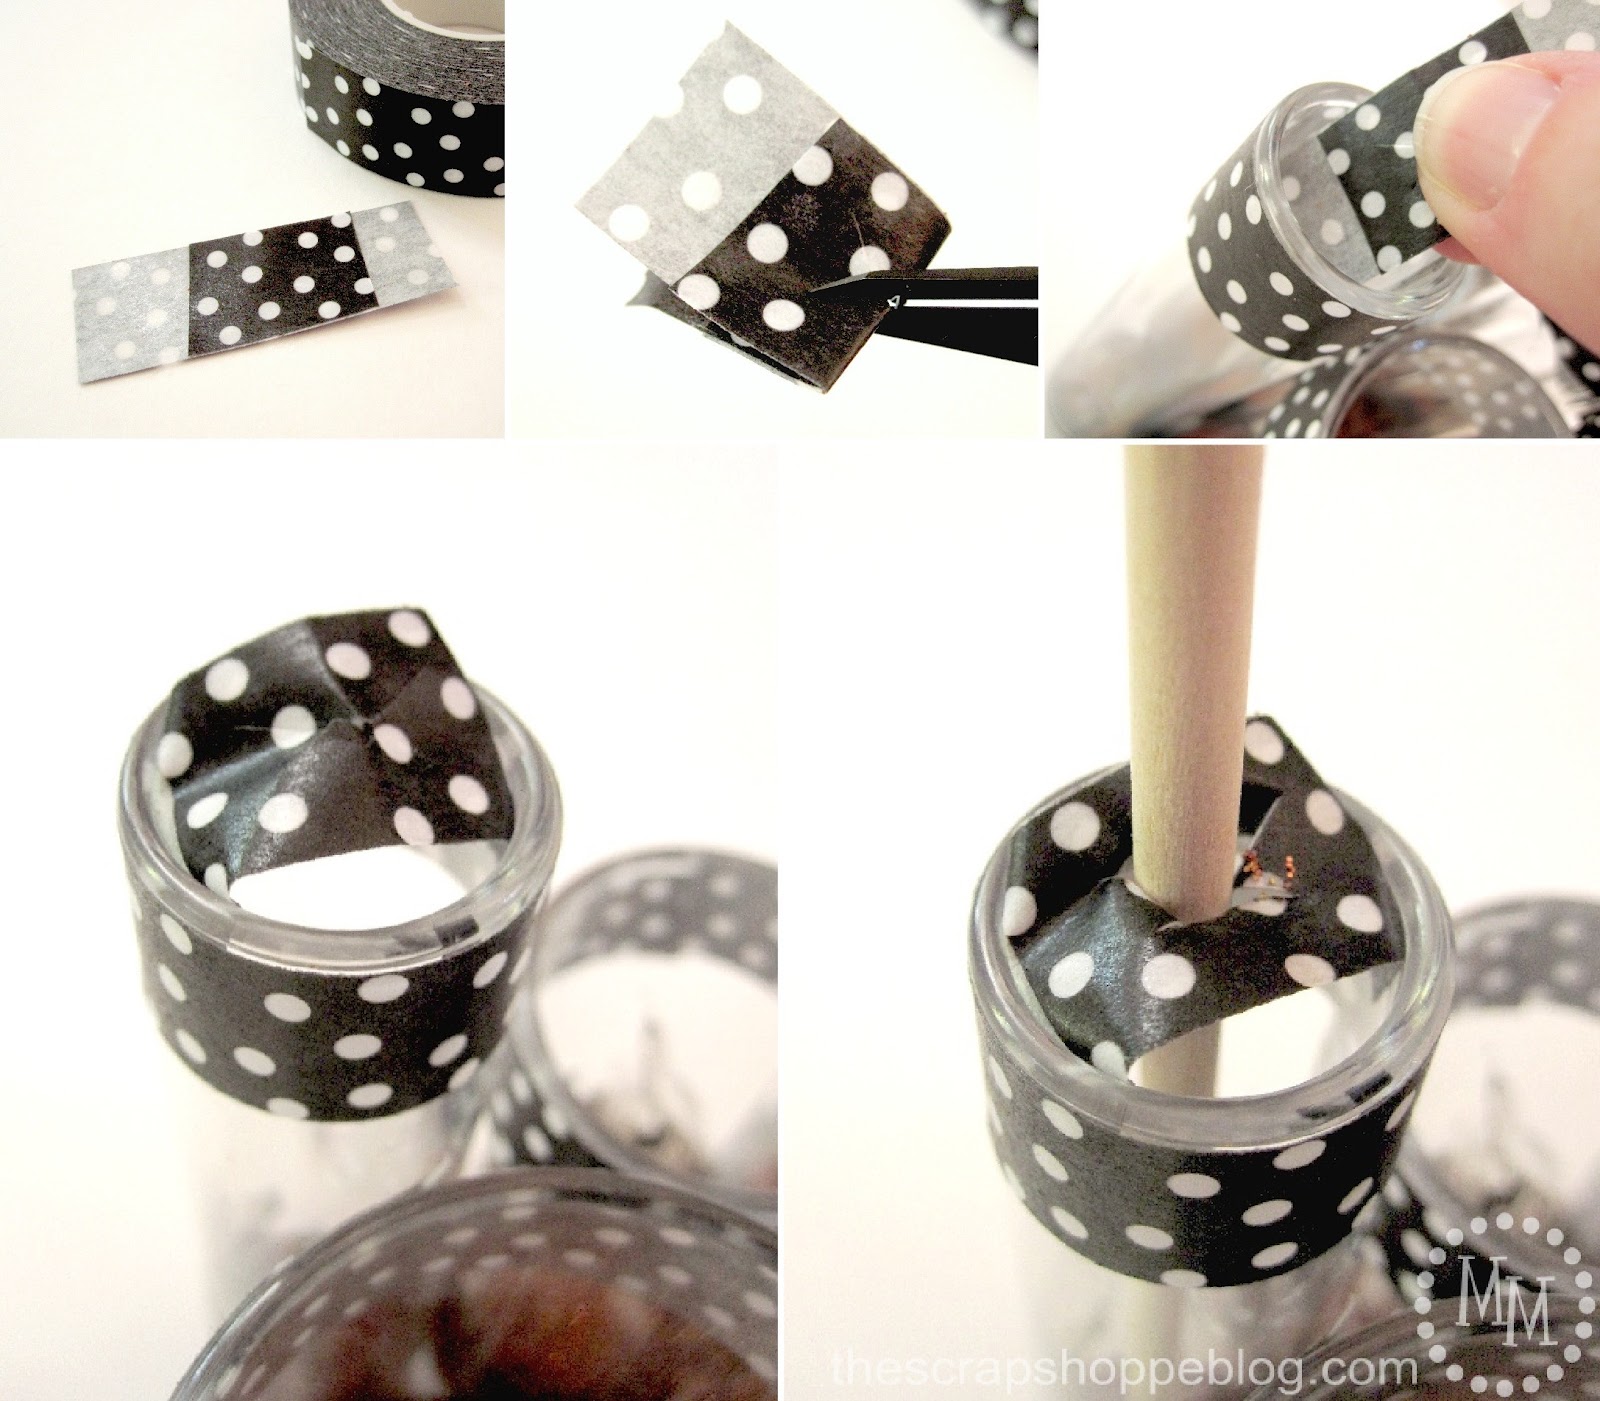
To make sure my lollies would stand up nice and straight, I devised a way to manipulate them with the washi tape.
Take two pieces of tape, one longer than the other, and place them sticky side to sticky side.
Fold the tape in half and cut a small X in the center.
Insert the tape into the makeup brush holder with the shorter piece of tape on top.
Press the sticky ends against the walls of the container.
Now we can put the lollies through the X!
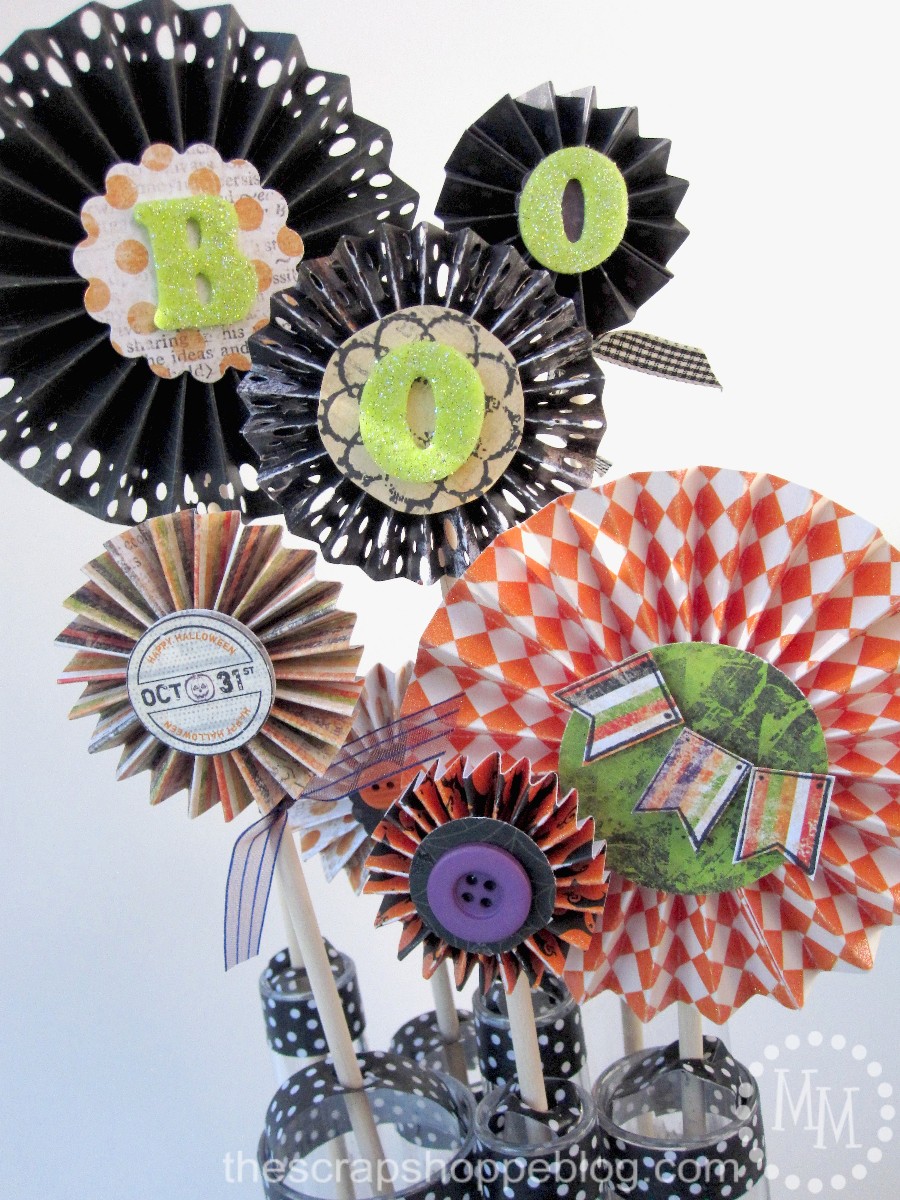
I trimmed the dowels to varying lengths the lollies wouldn't overlap.

Aren't they fun?
I can't wait to use more of the EKSuccess Tools!
You can also follow EKSuccess Tools on Facebook and find fun project ideas at The Spotted Canary.
I link to these fun parties!
Disclosure: I wrote this post as part of a paid campaign with EKSuccess Tools and Blueprint Social.
All opinions in this post are my own.

Check out these other great projects using EKSuccess Tools!
Great idea
What an absolutely stunning display!!! You just inspired me to drag out all those punches I have sitting around and use those for fun lollies! I was going to order die cuts to make those...now I don't have too:-)
These are adorable and so fun!
So pretty! I need to make these to complete my Halloween mantel. Thanks!
These are adorable! I definitely need to get some washi tape and more paper punches. Thanks for sharing!
Cute! Thanks for sharing these with Design Dazzle readers!
Cute lollies Michelle! love that qr code thing...brilliant marketing!
gail
These are so darn cute. I love how you ended up arranging them. Totally Spook-er-iffic!
These turned out fantastic! Amazing what you can do with paper....great job!!!
These lollies turned out so cute! Thanks for sharing!
I just figured out how to do these on my own!!! This would have come in so helpful a few days ago 🙂 I am going to bookmark it for the next time though!
http://mommysordinarymagic.blogspot.com
These are so cute! I love what you created and those EKSuccess tools look awesome! I may NEED some!
I would love for you to link up at my party (my first week!)http://cupcakesandcrinoline.com/2012/09/its-time-to-party-weekly-linky-party/
I hope to see you there. Have a lovely week!
Cute, cute, cute!! Loving the look of the punched edges!
This is amazing! So fun and festive for Halloween. I hope you will link this up to my Wickedly Creative Halloween Ideas Party if you haven't already.
http://www.itsybitsypaperblog.com/2012/09/2012-wickedly-creative-halloween-ideas.html
I really like how these turned out....You chose some great fabric and emblishments that meshed perfectly.
These are great thank-you for sharing.
Super cute!! That touch of washi around the jars is the perfect touch!
So cute! I love the colors and patterns!
These are so cool Michele. I love all of the layers,details, and embellishments.
What cool tools!! I love the lollies...they look very "Tim Burton"esk. Great job!!
Oh - and I love the new header!! So cute!
oh my gosh!! This is the cutest thing!!! I have always loved those little paper lollies but would never have attempted it - but this tutorial is perfect!! I would love to give this a try. So super darling!
Very nice! Love this festive idea!
suzy
this turned out insanely cute! Seriously love all the tiny details. I so need to pull out my halloween stuff
Very sweet!