
This is a sponsored post by Tulip but all opinions and project ideas are my own.
Its not much of a secret that I’m just now dabbling in sewing. I don’t know if I’ll ever work up the courage to actually sew my own clothing. So in the meantime, I am always happy to upgrade items already in my wardrobe. And that’s just what I have to show you today, thanks to Tulip Holiday Sparkle and Shine!
With just a few products, I was able to turn a plain jane shirt into something super festive and fun for the holidays!
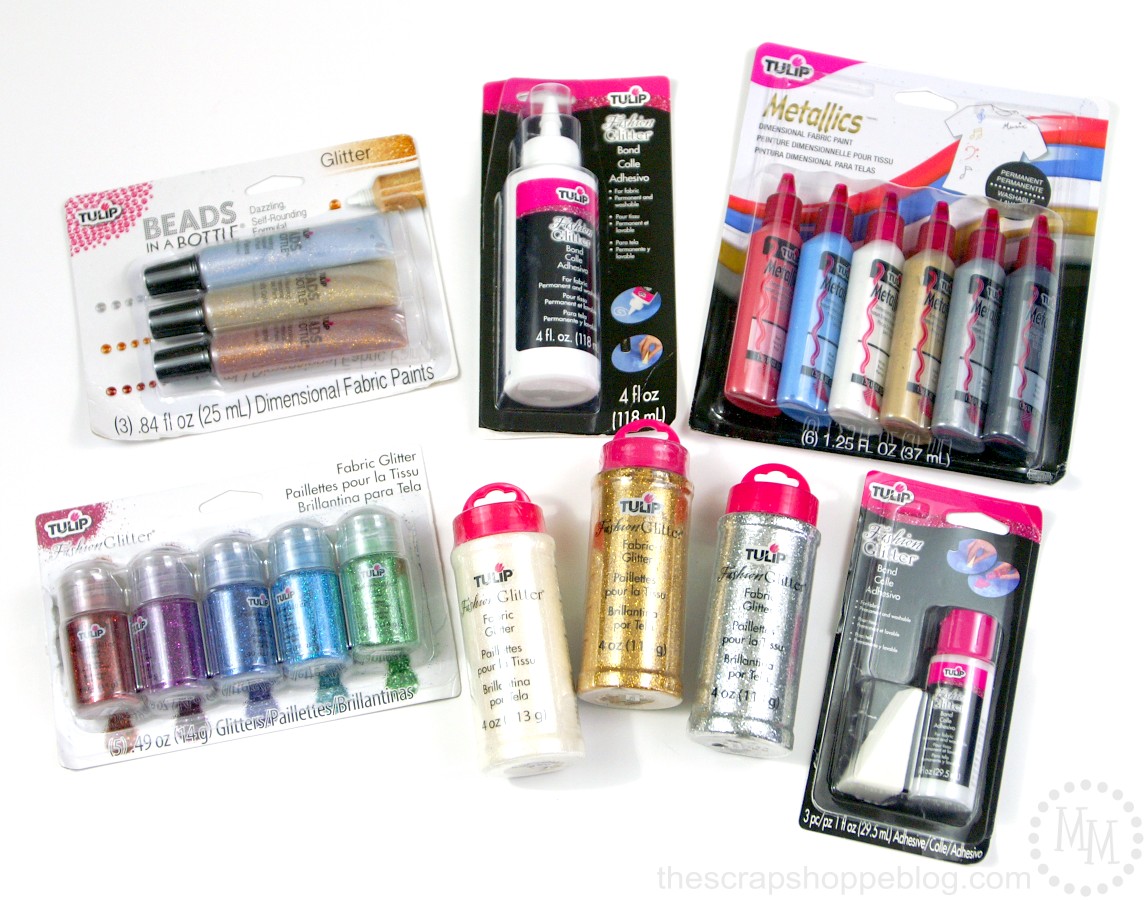
Tulip sent me a box full of goodies that will add sparkle to any fabric whether its for clothing or home decor.
We are talking Beads in a Bottle, Fabric Glitter, Fashion Glitter, Metallic paint, and Fashion Glitter Bond.
All made specifically for use on fabric!

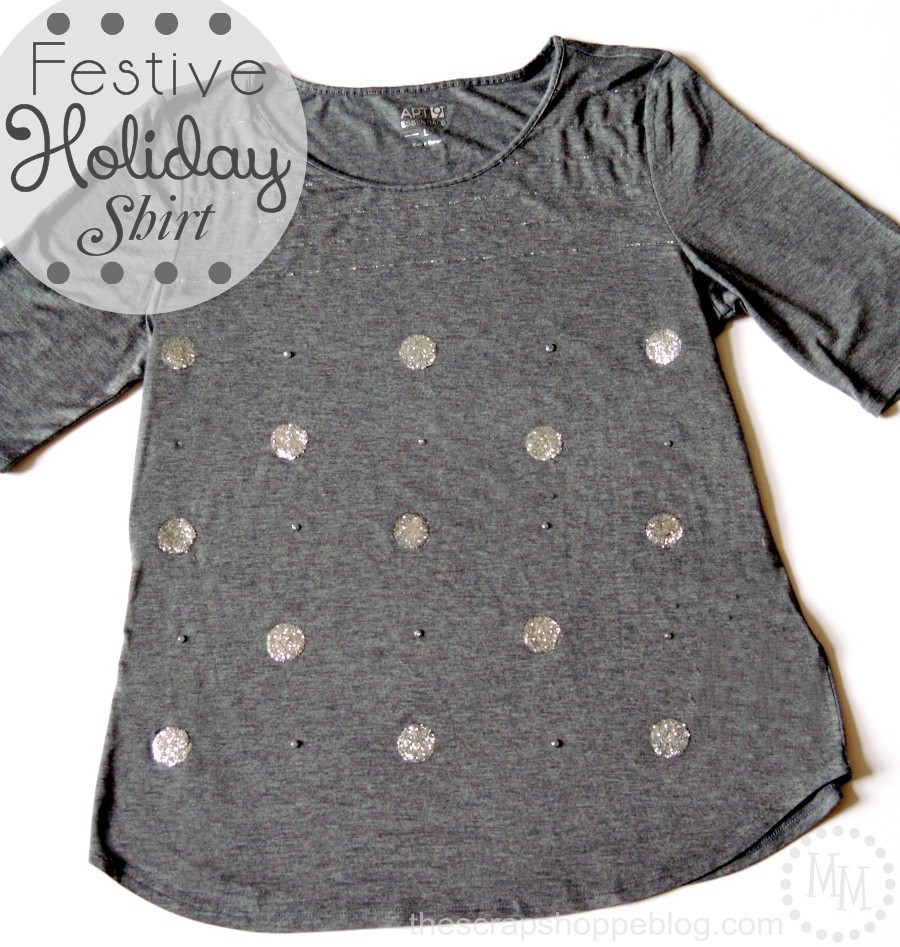
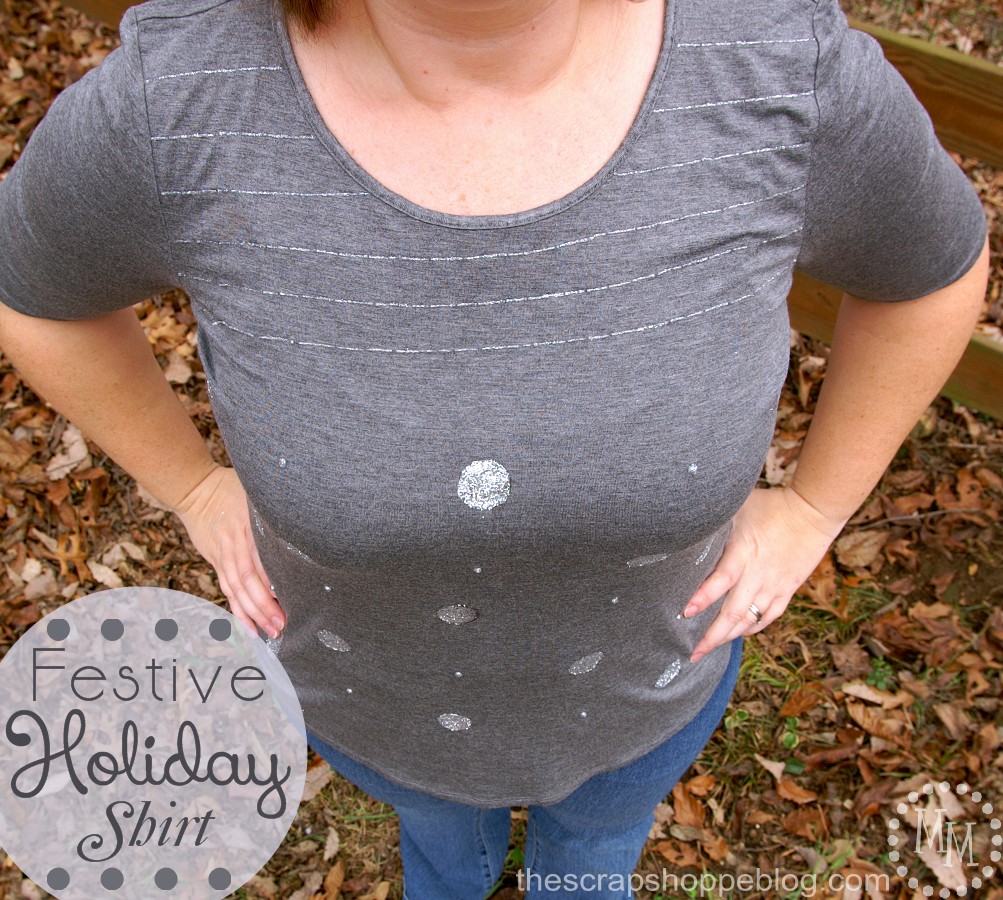
I found this cute top on clearance a couple of months ago. I just knew it would be a great upcycle at some point.
And sure enough, I couldn’t be happier with my new sparkly glitter top!
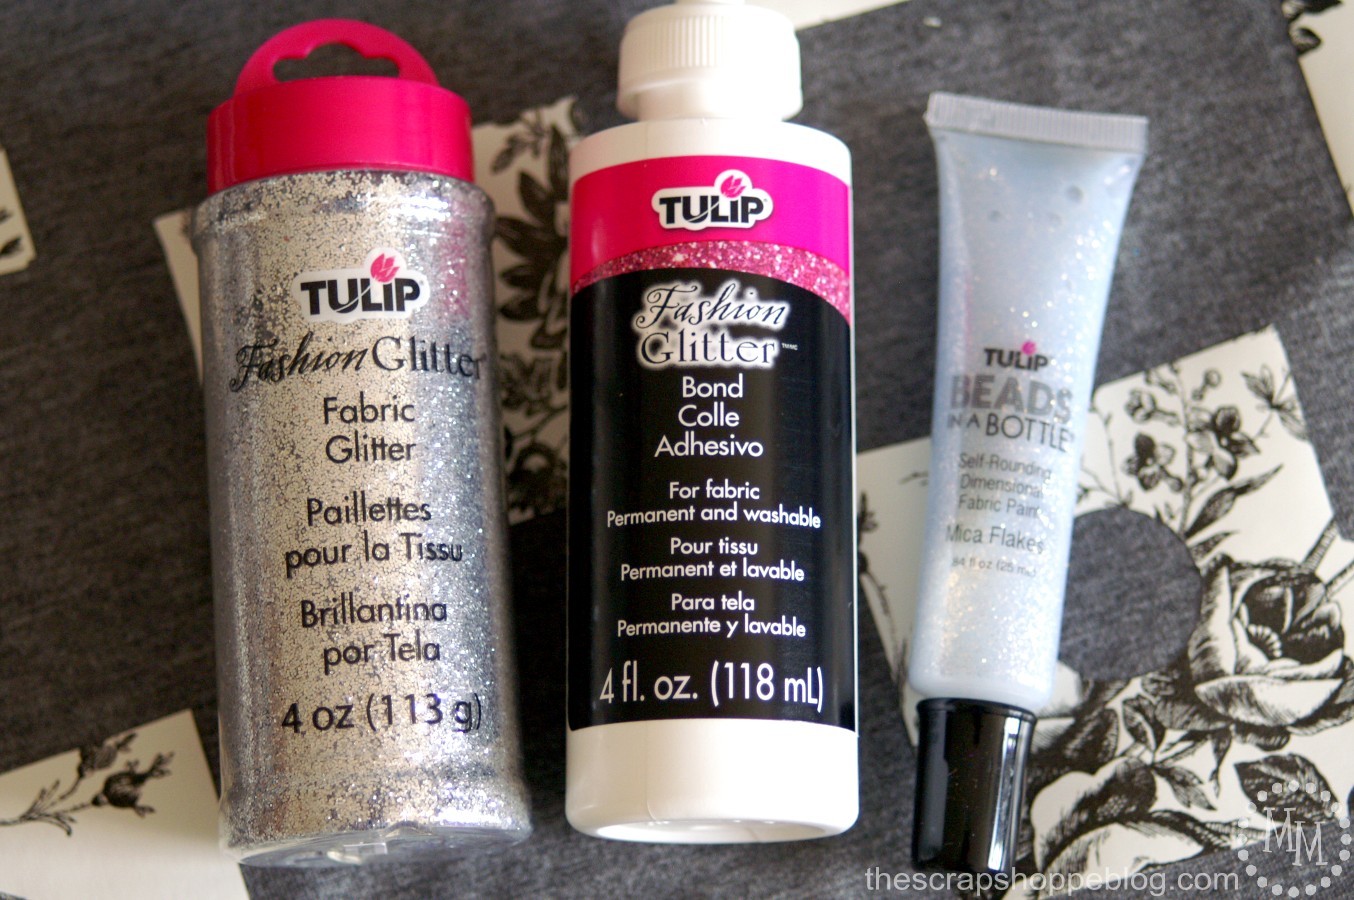
I used 3 of the Tulip products for this project: Fashion Glitter, Fashion Glitter Bond, and Beads in a Bottle.
Because of the dark gray color of the shirt, I stuck with silver for both glitters.
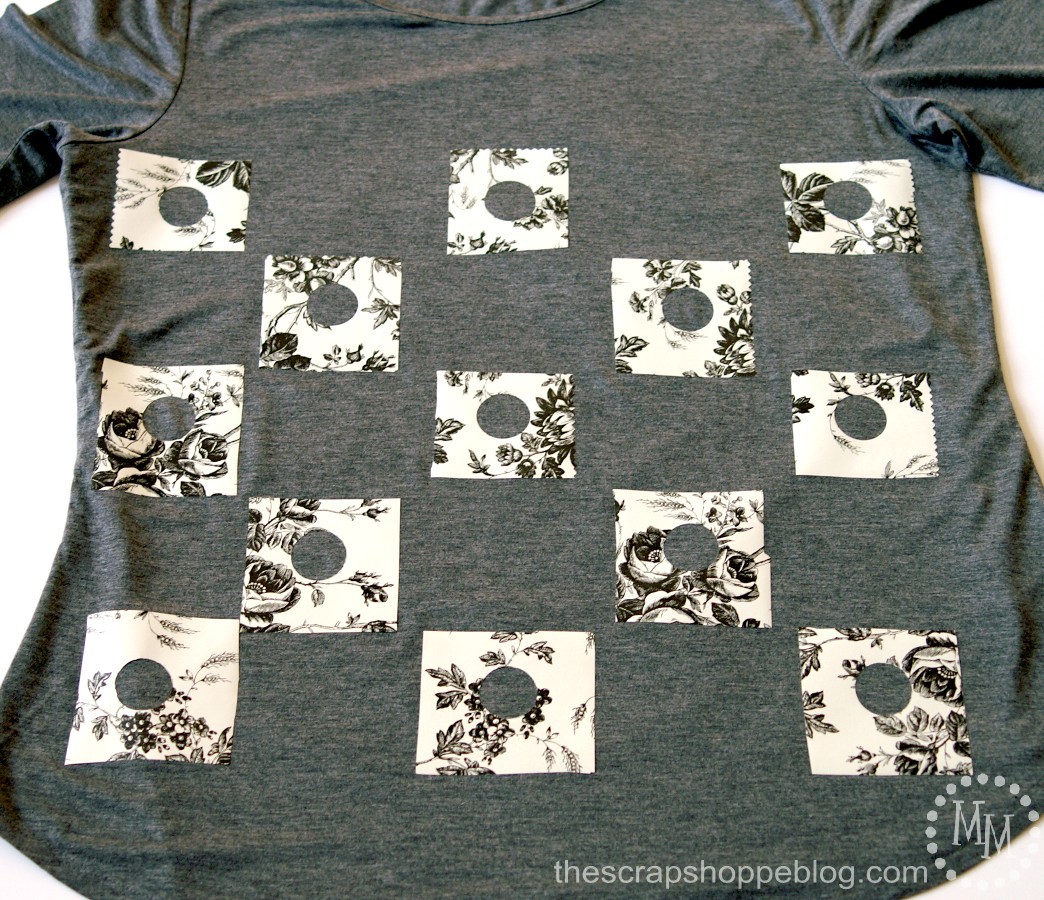
To make the polka dots on the shirt, I cut 1-inch circles out of squares of contact paper using a paper punch.
If your punch stops cutting clean circles, punch through Aluminum foil to sharpen it.
I removed the backing to the contact paper and placed the pieces on the shirt to act as a stencil.
Press firmly for good adhesion.
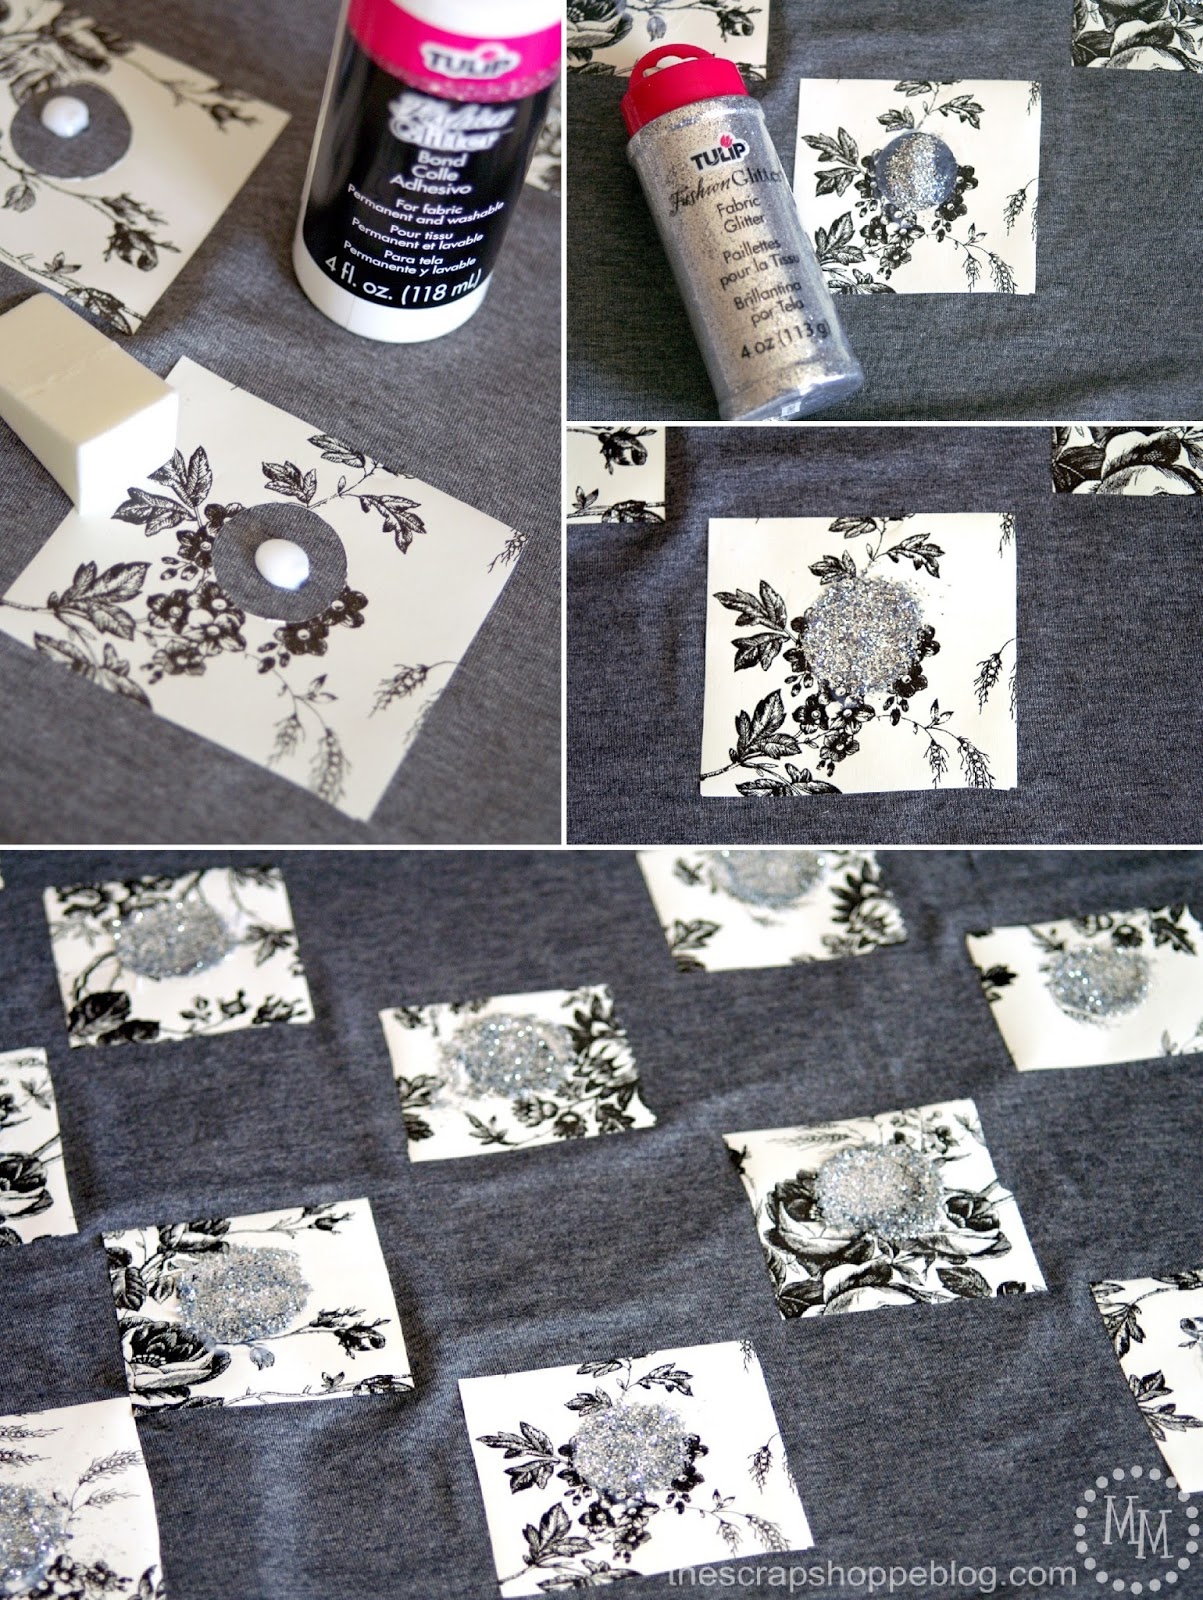
Use the applicator sponge that comes with the Fashion Glitter Bond and spread the adhesive around the stencil. Sprinkle the Fashion Glitter on the adhesive and spread around to fill the entire circle.
I worked on ~5 stencils at a time. Immediately remove the contact paper after applying all of the glitter.
Allow to sit for a few hours before shaking off excess glitter.
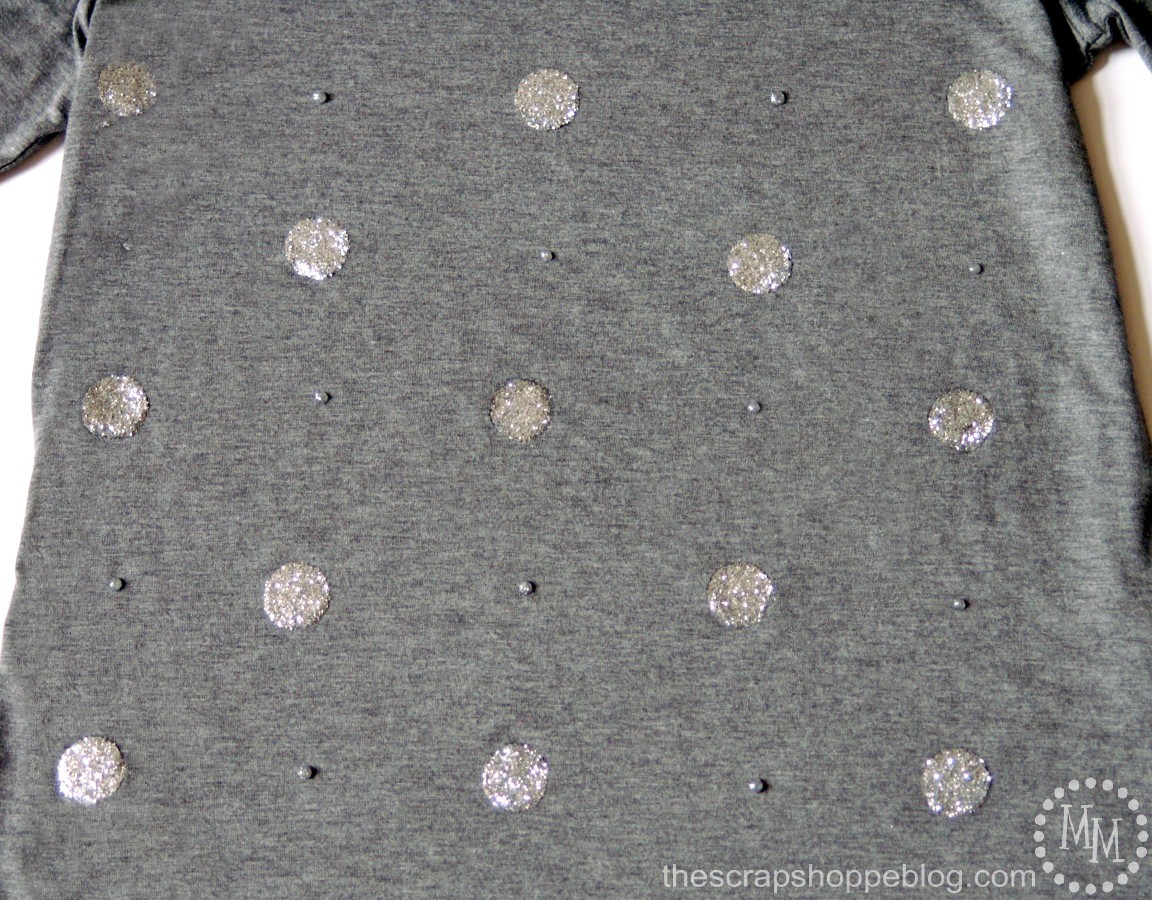
I used the Beads in a Bottle to make contrasting smaller polka dots between the larger ones.
Allow the beads to dry for a couple of hours.
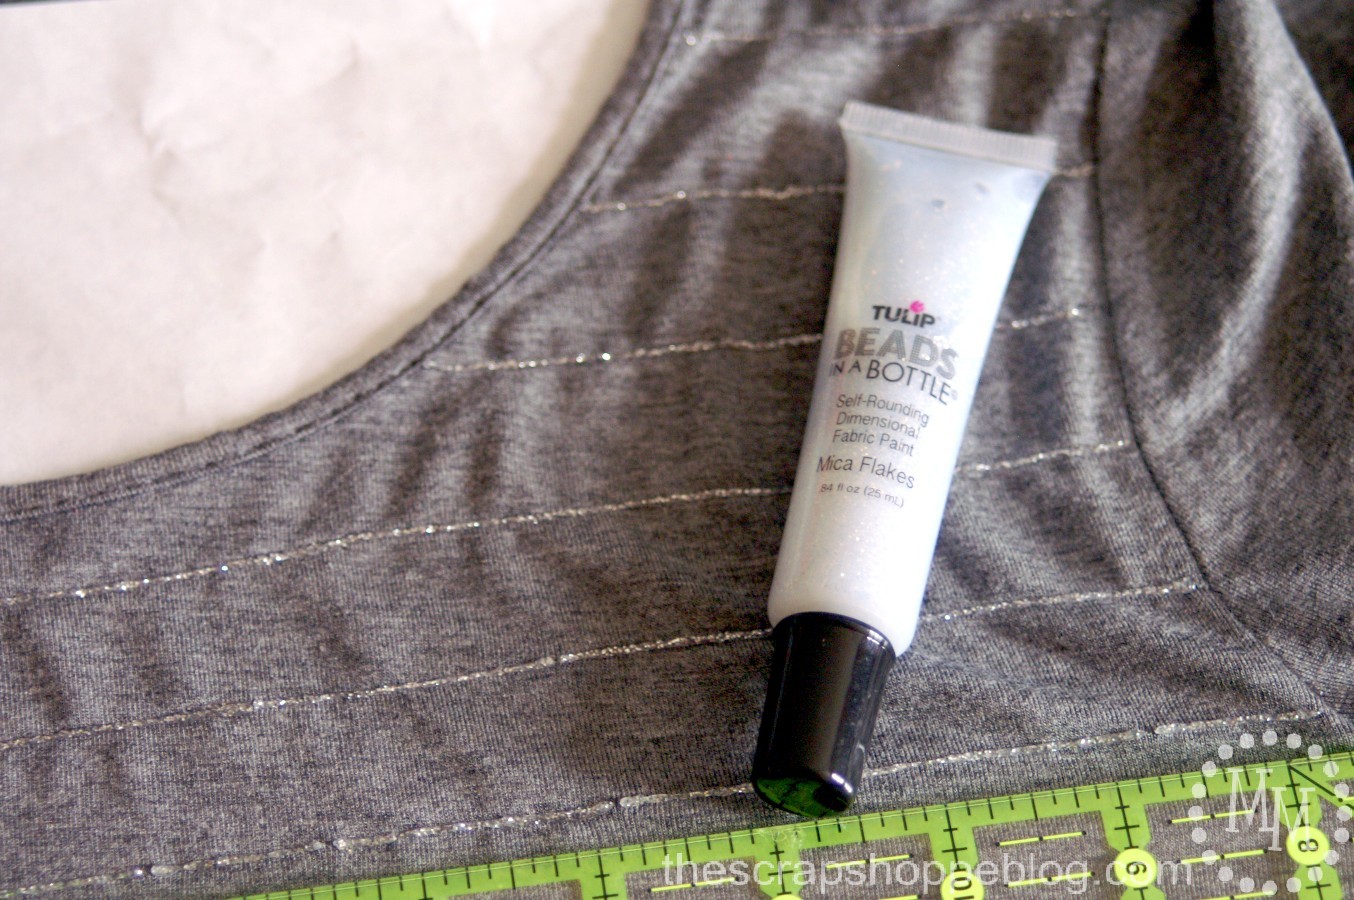
Finally, I used the Beads in a Bottle to draw lines across the top of the shirt. Moving slow and steady, it worked like a charm!
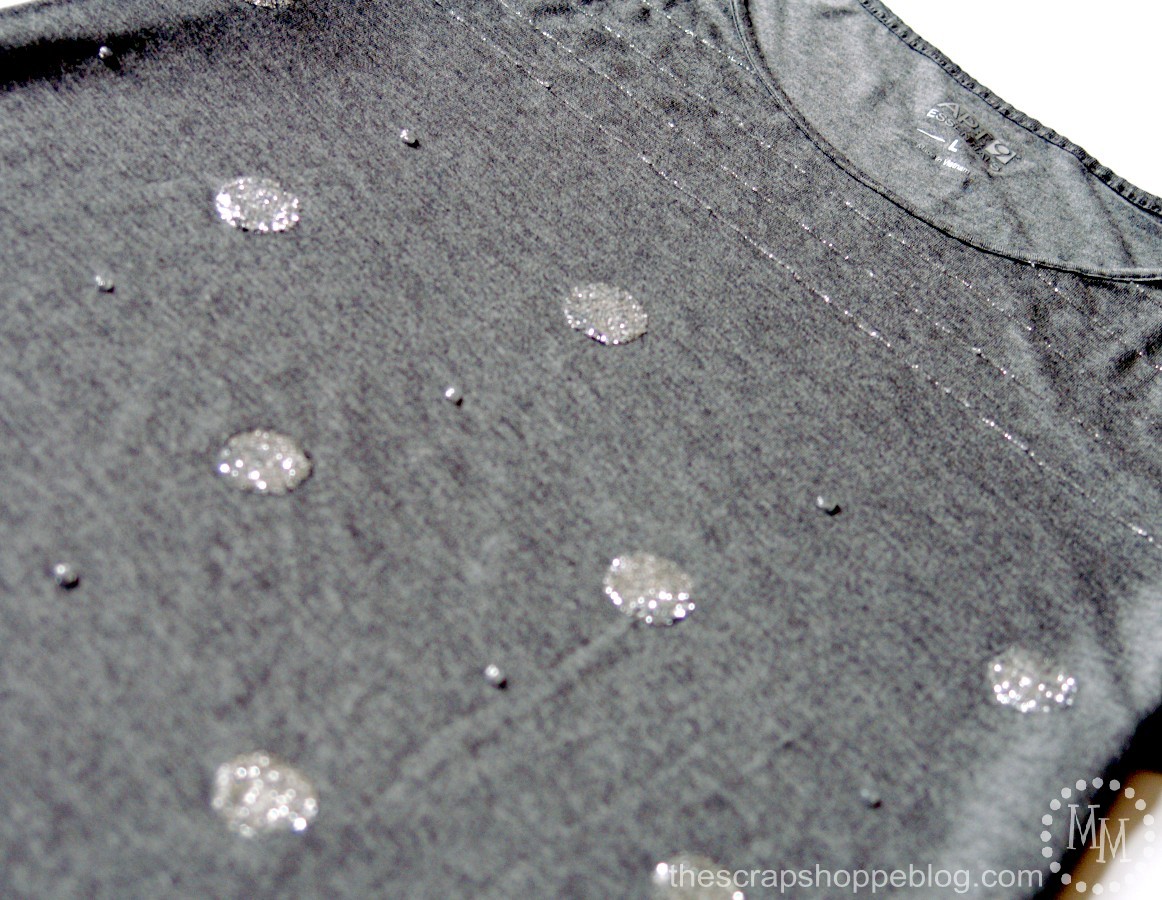
Doesn’t it look super festive? Definitely a lot more fun than it started out!
I love how the silver glitter catches the light.
I am definitely ready for my first holiday party!
I think some glittery Christmas decor may be in order next!
Check out this easy holiday inspiration post from iLoveToCreate! These Christmas trees are so cute and you won’t believe how easy they are to make!
For more creative ideas visit iLoveToCreate on
For more Tulip Holiday Sparkle & Shine ideas visit these fun projects!
Linking up to Flamingo Toes, Today’s Creative Blog, The Shabby Creek Cottage, Tidymom, Whipperberry,
My Repurposed Life, 30 Days, Tatertots & Jello, Serenity Now, and other great parties found on my party page.


Daisy Carter
Friday 27th of December 2019
Wow, this customised t-shirt is looking very beautiful. I am gonna try this one. Nice work Michele!
Heather - Dollarstorecrafts.com
Thursday 5th of December 2013
Cool way to add some DIY bling!
Beverly {Flamingo Toes}
Wednesday 4th of December 2013
Oh I love it!! The Polkadots paired with the stripes is so perfect and I love the glitter! I would wear this all the time. Thanks for the idea!! :)