
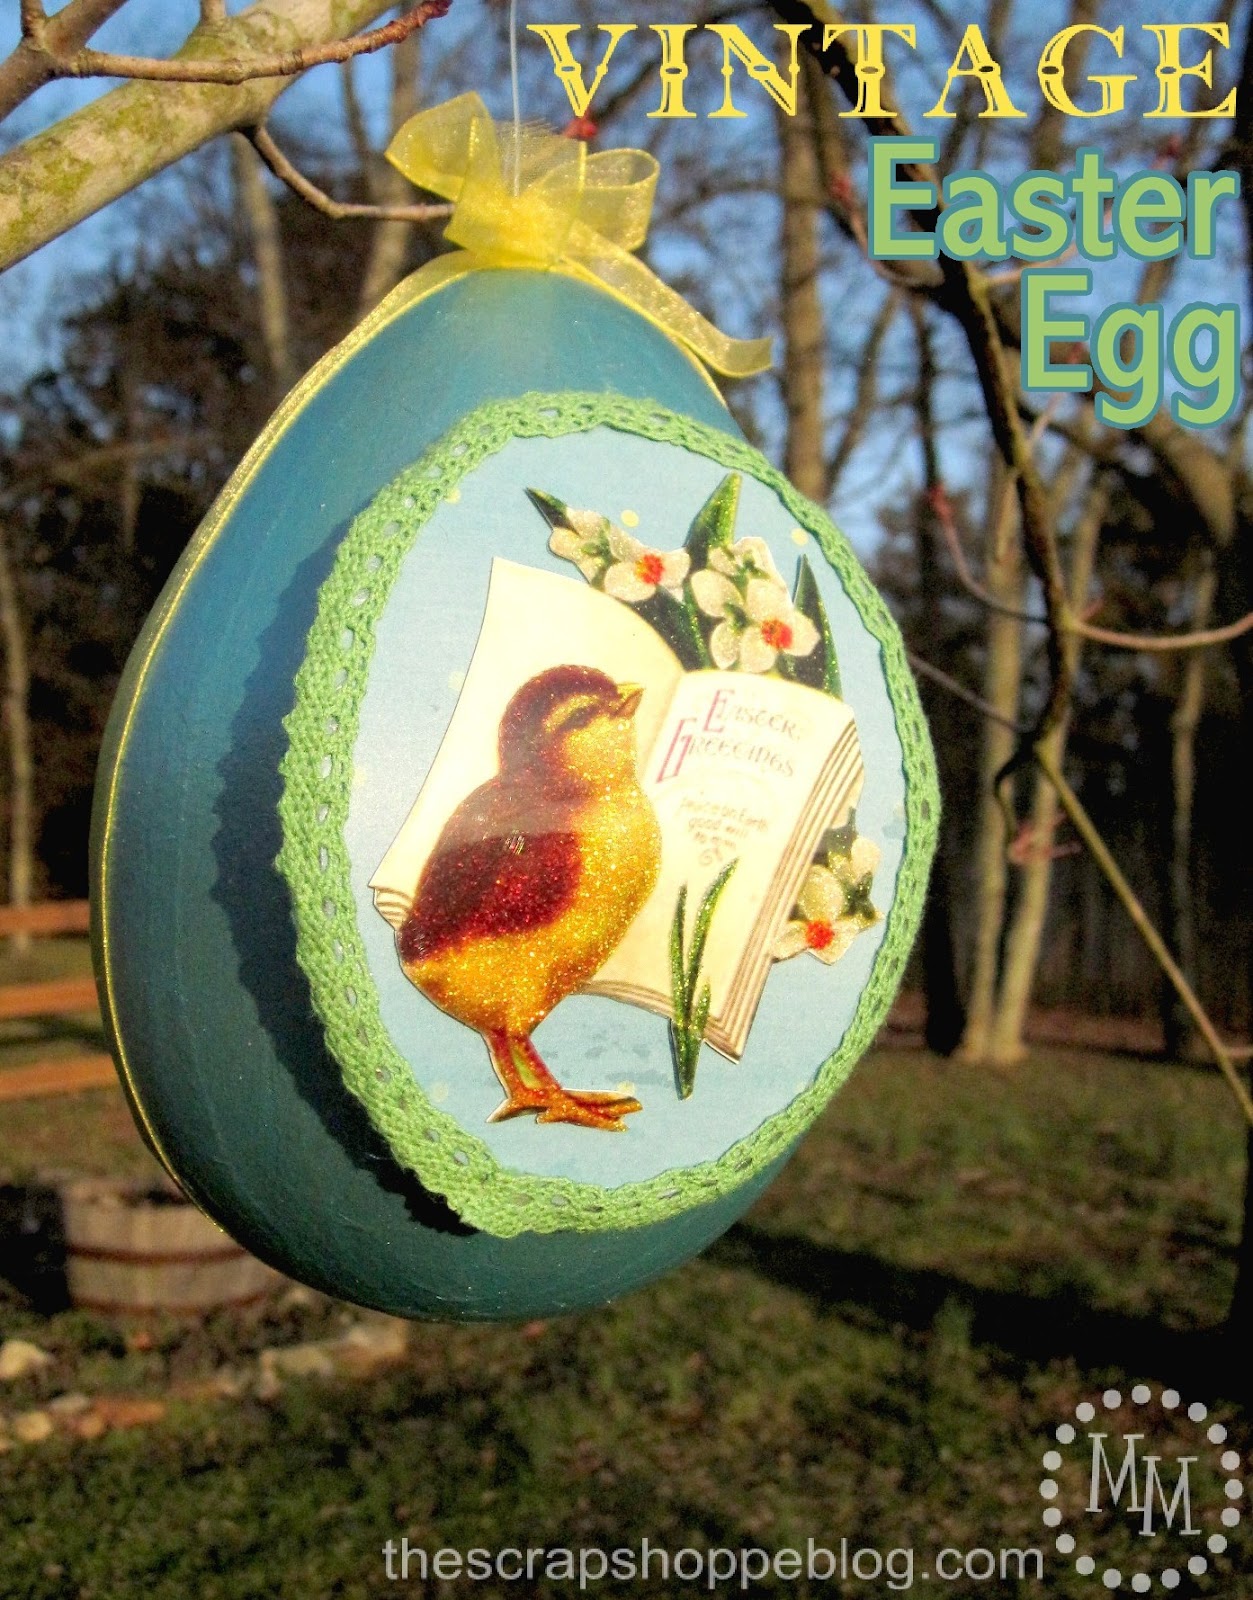
Hanging Vintage Easter Egg
I am excited to present you with my second P K Glitz Easter project!
I have been loving playing with the Vintage Hues. They really have an old world feel!
I decided to use them again to make this hanging vintage Easter.

For this project you will need an assortment of P K Glitz glitter (the Pastel color wheel is perfect for Easter!),
one of the Easter-themed Vintage Hues, and some accessories to help with the glittering process (brush and spoon). You will also need, but not shown above, is 3D Crystal Lacquer.

On the back of the Easter Vintage Hue, color in the chick with the Crystal Lacquer then sprinkle with the Lemonade glitter. I also used the Crystal Lacquer on the flowers and stems using the White Pearl, Peach, and Mint Green glitters.

Dabbing a small amount of glue on the back of the dried glitter, adhere the Vintage Hue to a piece of white cardstock.
Carefully cut out the Easter design then glue it to a piece of oval-shaped patterned scrapbook paper.

We also need a large paper mache egg and acrylic paint.

I used painted several coats of paint on the egg.
I used a color similar to the scrapbook paper that the Easter design is on, and also a color with some pearlescent tones. I think it helps at to the vintage feel!
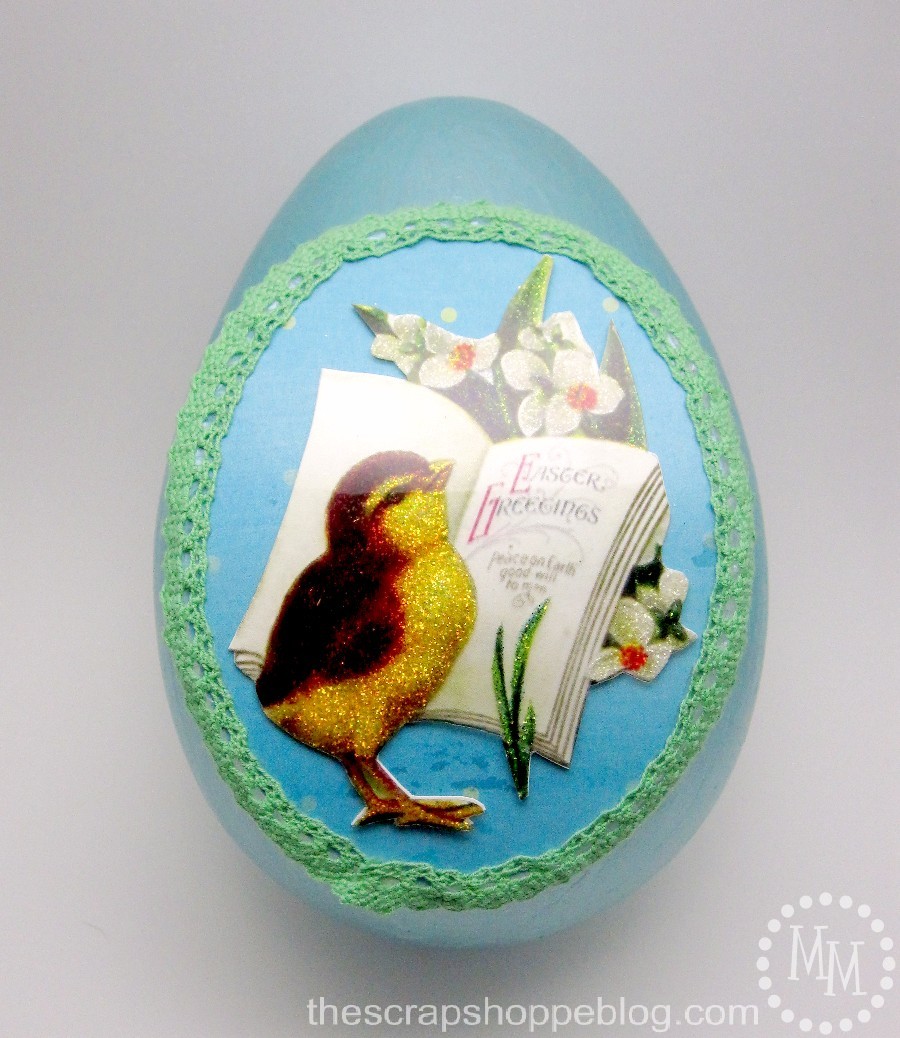
After adding some lace tape around the oval-shaped scrapbook paper, I adhered the entire piece to the front of the egg. The sides of the paper do not have to touch the egg. Just gluing the paper down the middle and sticking it to the egg is sufficient.

To hang our egg we will need to add some ribbon.
Glue your ribbon to the bottom of the egg. Once dry, wrap the ribbon around the egg and tie a bow at the top.
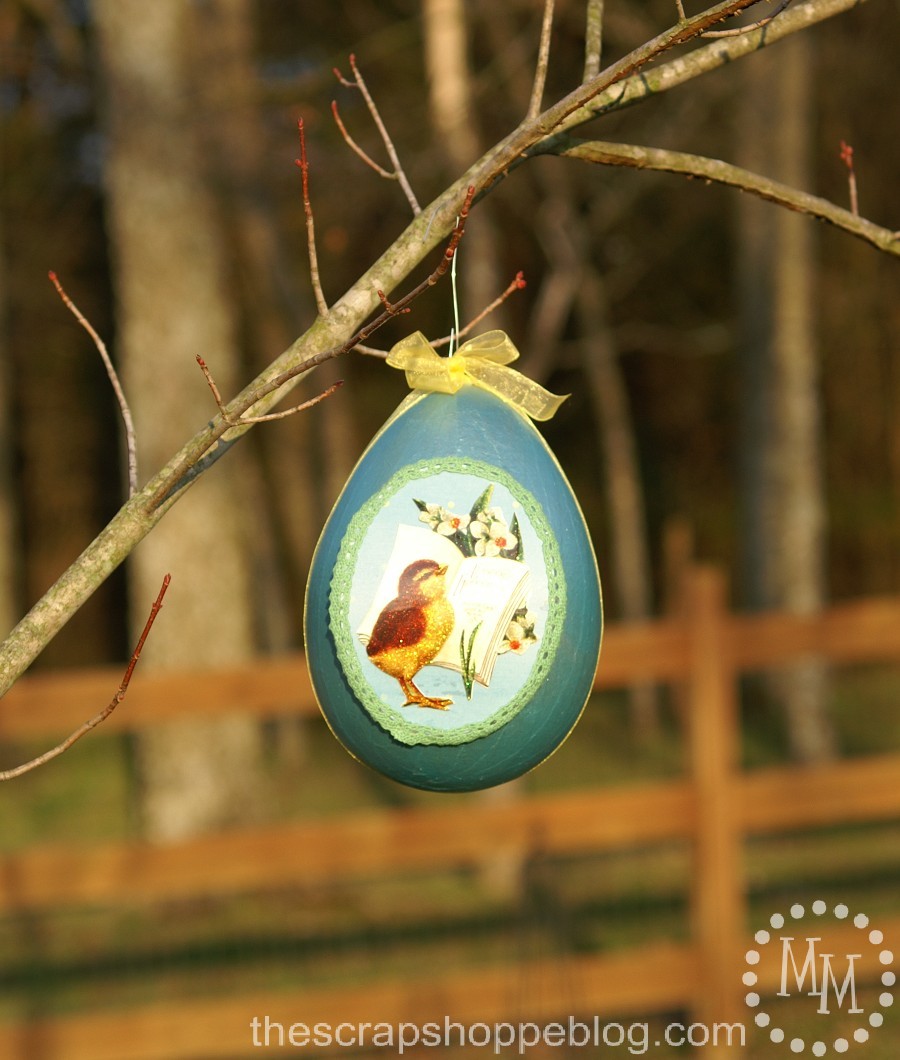
I added a Christmas ornament wire to the top of the bow for easy hanging.
Wouldn't several of these look adorable strung up to make an Easter tree?

I added the vintage egg to my spring moss and burlap wreath, and suddenly I have an Easter wreath!
What would you do with this vintage Easter egg?
There are so many possibilities!
Linking up to Flamingo Toes, Skip to My Lou, Today's Creative Blog, The Shabby Creek Cottage, Tidymom, 504 Main, Serenity Now, Whipperberry, My Repurposed Life, 30 Days, Tatertots & Jello, Positively Splendid, and other great parties found on my party page.


Hi Michele! This is absolutely adorable and perfect for spring. I love that pearlescent blue paint. This looks like such a fun project! I love all the detail you added. Thank you so much for sharing with us at Dishing It & Digging It & congratulations on being featured this week!
The little duckie stole my heart! So cute! And I LOVE the shade of blue you picked for the egg. Beautiful!
What a beautiful egg!
Perhaps you'd care to link to SEASONAL SUNDAYS next week. The link goes up at 7 pm on Saturday evening.
- The Tablescaper
So beautiful!! You did a great job!!
this egg is gorgeous! great tute, I'm pinning too. Little Bit
This comment has been removed by a blog administrator.
I just love your Easter egg. It looks especially pretty framed by your wreath, the perfect match!!!
Wow - Love the vintage look and feel, and adding it to your pretty Spring wreath is the perfect finishing touch!
Awwww - I love this! It looks so sweet and vintage! That design is so sweet and the way you put it all together is just perfect. I love that you added it to your fun Spring wreath too!
So pretty Michele. Looks great with your wreath!
Great Job!! Love a little bling!