
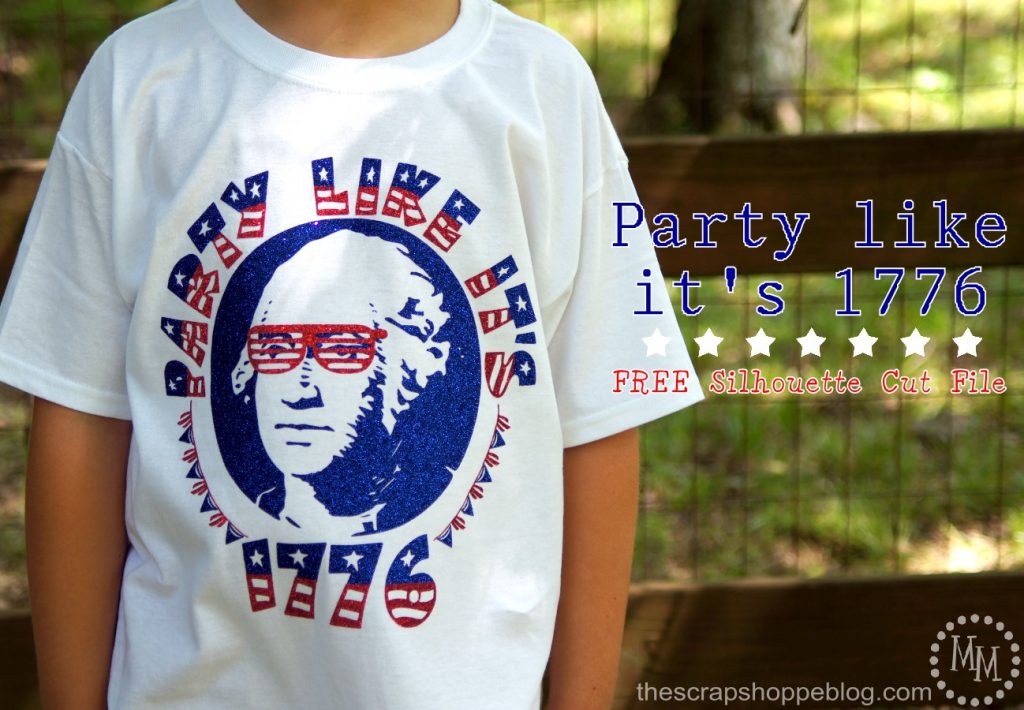
Party Like It's 1776 - FREE Cut File
Party like it's 1776 with George Washington himself with this fun FREE cut file!
This is a sponsored post on behalf of Expressions Vinyl. As always, all opinions and ideas are my own.
This post contains affiliate links.
July 4th, 1776 is THE most important day in United States history.
It's the day the Declaration of Independence was ratified, and we declared ourselves a free nation!
And even though George Washington did not become the first President of the U.S. until 1789, you know he had to be pretty stoked about the newfound independence in 1776 as he was leading the Continental Army during the American Revolution.
(And that is your quick history lesson for the day!)
This humorous design is fun for July 4th parties this summer!
Grab Party Like It's 1776 - FREE cut file and make some shirts, banners, or pillows with it.

Party Like It's 1776 - FREE Cut File
You will need 2 SVG files for this project:
1776-Blue and 1776-Red
The design does not have to be done in more than one color, you can combine all of the elements into a single file if you wish, but I'm going to show you how to bring it together in two colors.
You will need to cut the 1776-Blue file on blue HTV.
I used Royal Blue Glitter Heat Transfer Vinyl.
Note: Remember to flip images horizontally prior to cutting with using heat transfer vinyl!
You will need to cut the 1776-Red file on red HTV.
I used Red Glitter Heat Transfer Vinyl.
Settings for cutting glitter HTV on Silhouette:
Select "Flocked Heat Transfer Material", Set the Blade to 4, Speed to 5, and Thickness to 33
Trim off excess vinyl (you never know when you can use those scraps in a future project!) then weed, weed, weed.
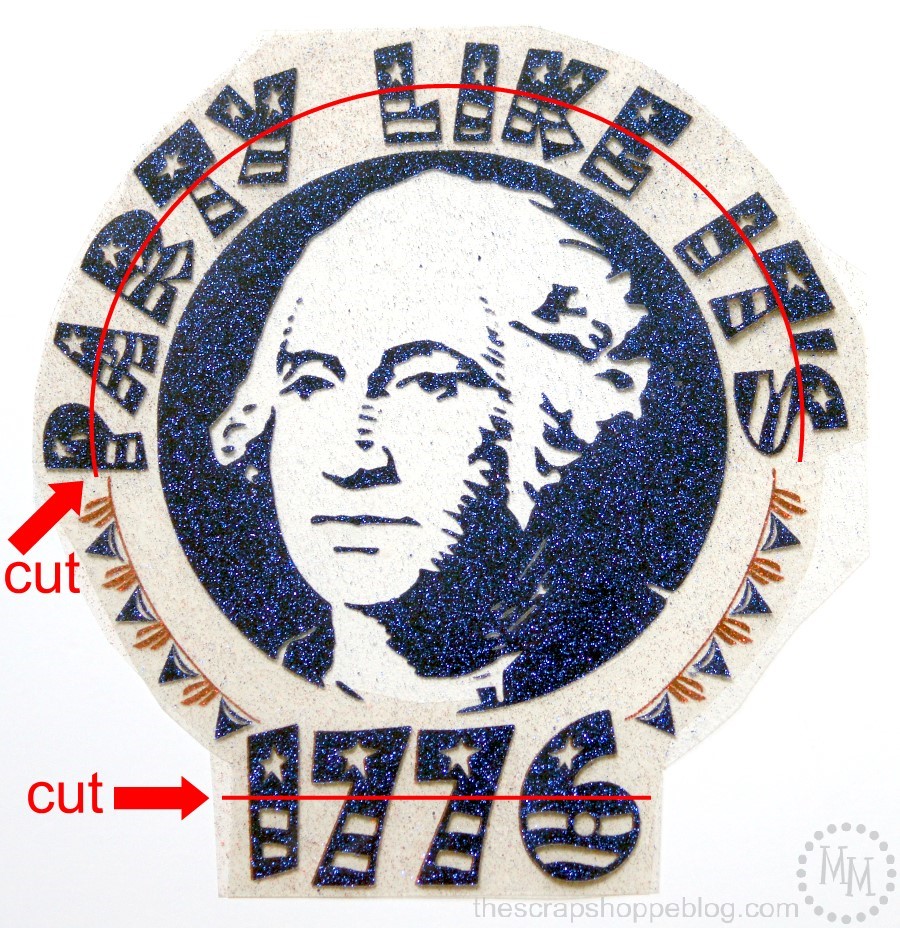
Party Like It's 1776 - FREE Cut File 2 Color Cutting Directions
Layer the two patterns on top of one another and secure together with binder clips or clothespins.
The red is behind the blue in the above photo.
We want the top of the letters (the stars) to be blue and the bottom of the letters (the stripes) to be red so we are going to cut along the red lines as shown in the image above to split the letters in half.

Once cut, go back and remove any letters attached the images that you won't need which will be the blue striped letters and red star letters.
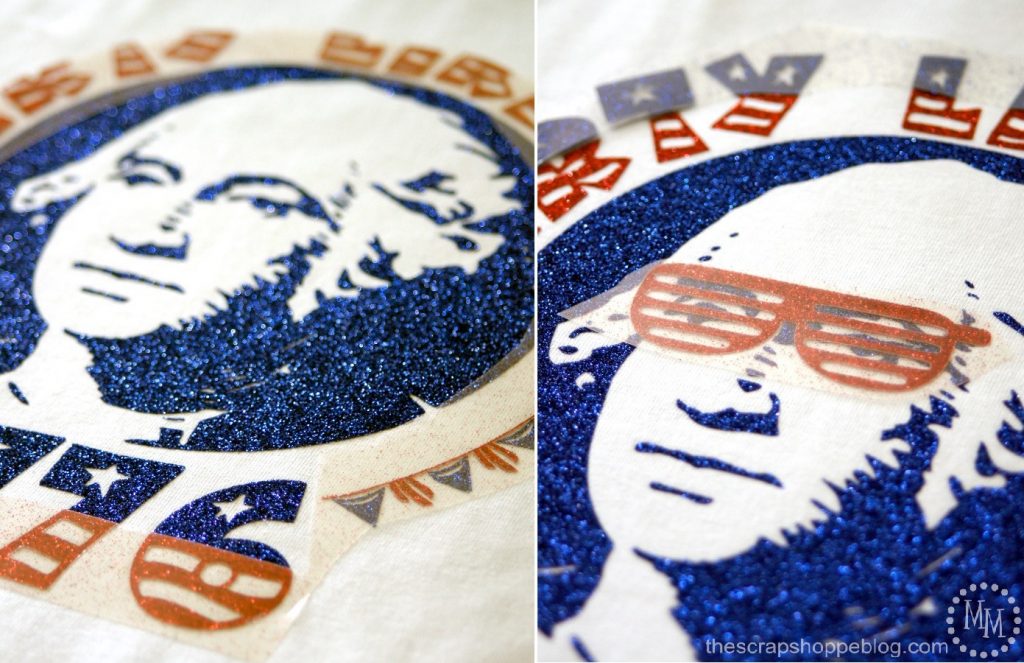
Start with the image of George Washington, which also has the banners and the top of 1776 attached to it, and iron it on to your fabric.
Peel up the plastic from the HTV while it is still hot.
Next, add the red text, which also includes the red banners.
Use the banners to help line up the letters around the top of George's head.
Iron on and peel up the plastic while the HTV is still hot.
Finally, align the blue text above George's head with the red stripes and add the sunglasses.
Iron on and remove the plastic while the HTV is still hot.

Once all of the HTV has been added to the fabric, flip it over and iron the back side thoroughly to ensure a good seal of the vinyl to the fabric.
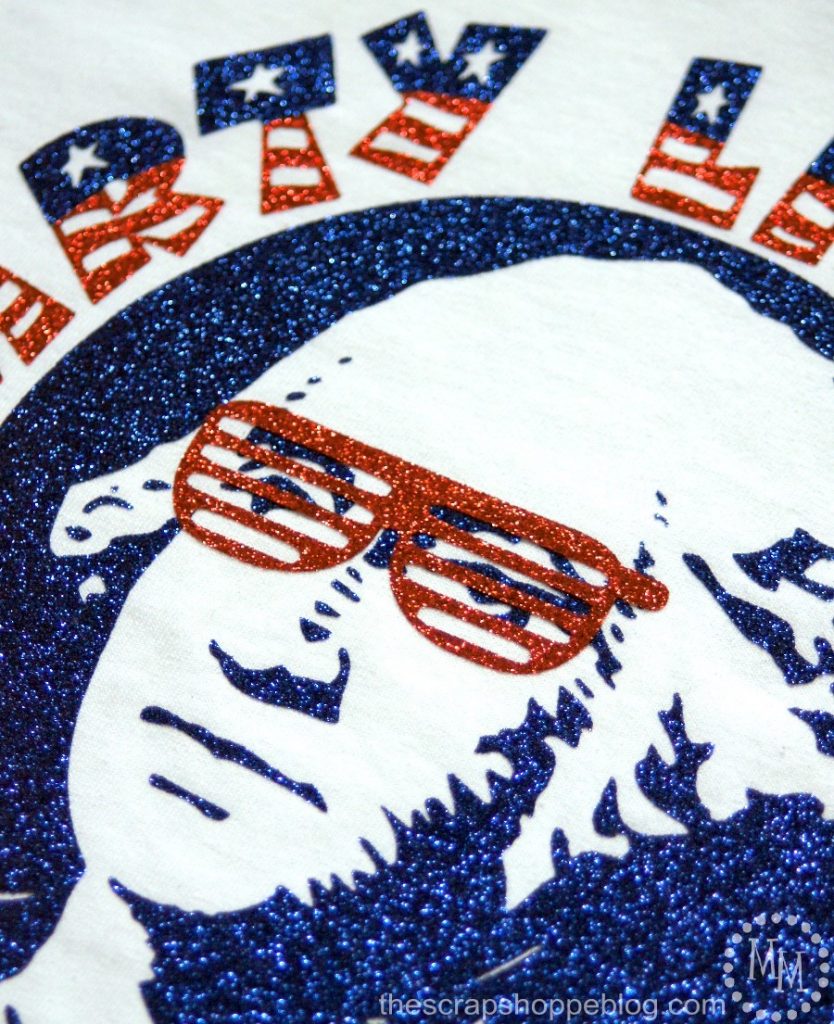
The layering of the red glitter glasses on the blue glitter face worked out perfectly!
Everything adhered just as it should.
And stacking and cutting the red and blue letters at the same time ensured the pieces would match up perfectly.

Now I think I'm going to have to make one of these Party Like It's 1776 shirts for all of us!
It's just too fun not wear all summer long!
Some of my friends have made some fun patriotic FREE cut files, too, so don't miss out on them!

Miss America from A girl and a glue gun
Stars and Stripes pillow from Tried and true
Patriotic Pinwheels from Hey let's make stuff.
Land that I love from Persia Lou
God Bless the U.S.A. from Pitter and Glink
Stars and Stripes from Sugar Bee Crafts
Party like it's 1776 from The Scrap Shoppe
Throwing away my shot from Sew what Alicia

>> See where I party! <<

Oh my goodness- this is sooooo cute! I want to make a shirt like this for myself!
This is amazing! The overlay/combination of colors is so cool. Pinning! 🙂
#madebyyoumondaylinky
awesome. Great idea! Very creative. What is the font style which you choose while designing?
I love my Silhouette and really love fancy glitter transfers and so does my daughter. Anything glittery makes these little girls smile! So fun! Thanks for sharing!
I really love how you layered the two up to create the effect. That glitter transfer is a top notch choice Michele. Obviously bit late to the July the 4th party but popping them away in a file for next year!
I have a silhoutte but when I go to download the files, it says they are not supported.
Hi Colleen! Box.com is saying that because it cannot generate a preview of a .studio file. You can still download the file and save it to your computer and then open it in your Silhouette software.
I don't have a Silhouette but this design cracks me up!
I'd love to make this, but I don't have a Silhouette.
Hope you'll consider uploading PNG versions of the files so that it can be cut on a Cricut. 🙂
I'm stopping over from the Craft Schooling Sunday link up.
This shirt idea is so cute! I wish I had a Silhouette machine to make one!
Thanks for sharing at INSPIRE ME MONDAY link party. This is a fantastic t-shirt idea. Love it.