The Scrap Shoppe

A Place to be Crafty

  • Home
  • About
    • About Me
    • T-Shirts
    • Disclosure
    • Privacy Policy
  • Crafts
    • Must Have Craft Tips
    • Kids Crafts
    • Gardening & Outdoors
    • Jewelry Making
    • Paper Crafts
    • Faux Flowers
    • Paint Projects
    • Silhouette Crafts
    • Clothing
    • Bunting & Banners
    • Monograms
    • Wreaths
    • Fabulous Fonts
    • Scrapbooking Tips
    • “Other” Crafts
  • Holidays
    • New Year’s
    • Valentine’s Day
    • Mardi Gras
    • St. Patrick’s Day
    • Easter
    • Mother’s/Father’s Day
    • Patriotic
    • Fall Crafts
    • Halloween
    • Thanksgiving
    • Christmas
    • Gift Guides
    • Winter Crafts
  • Sewing
  • Home Decor
  • Organize
  • Parties
  • Printables
  • Recipes

PEACE Burlap Banner

December 10, 2013 By: Michele McDonald30 Comments

This post is part of a social shopper marketing insight campaign with Pollinate Media Group™ and Sharpie, but all my opinions are my own. #pmedia #StaplesSharpie http://cmp.ly/3/8vNxcO.
 
Its no surprise that banners and bunting are one of my favorite home decor items for holidays. I’m always looking for new variations to make. And today’s banner was so simple to create, I know I will be making more soon! I made this fun PEACE banner using burlap and Sharpies! Can you believe it? It looks custom stamped! And with silver and gold being so on trend right now, the Sharpie metallic markers were the perfect accent for the banner.
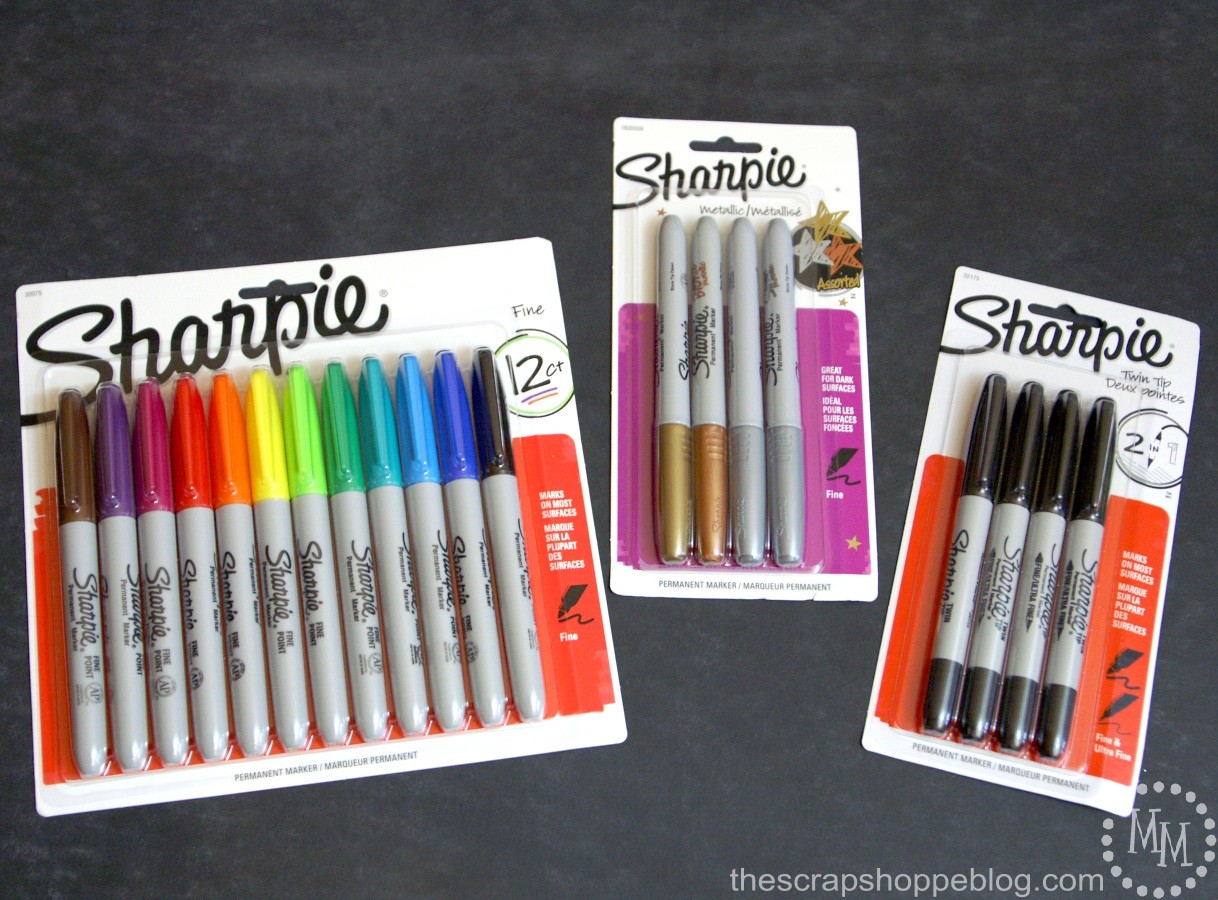
Right now Staples is running a great deal on Sharpie markers! The 12-CT Assorted Color Pack and Twin-Tip packs are only $6 each and the Metallic Multi Pack is only $3.39. Such a great deal! I just had to snatch up these 3 sets. They can be used for so many things. Like my PEACE banner! Let me show you just how I made it.
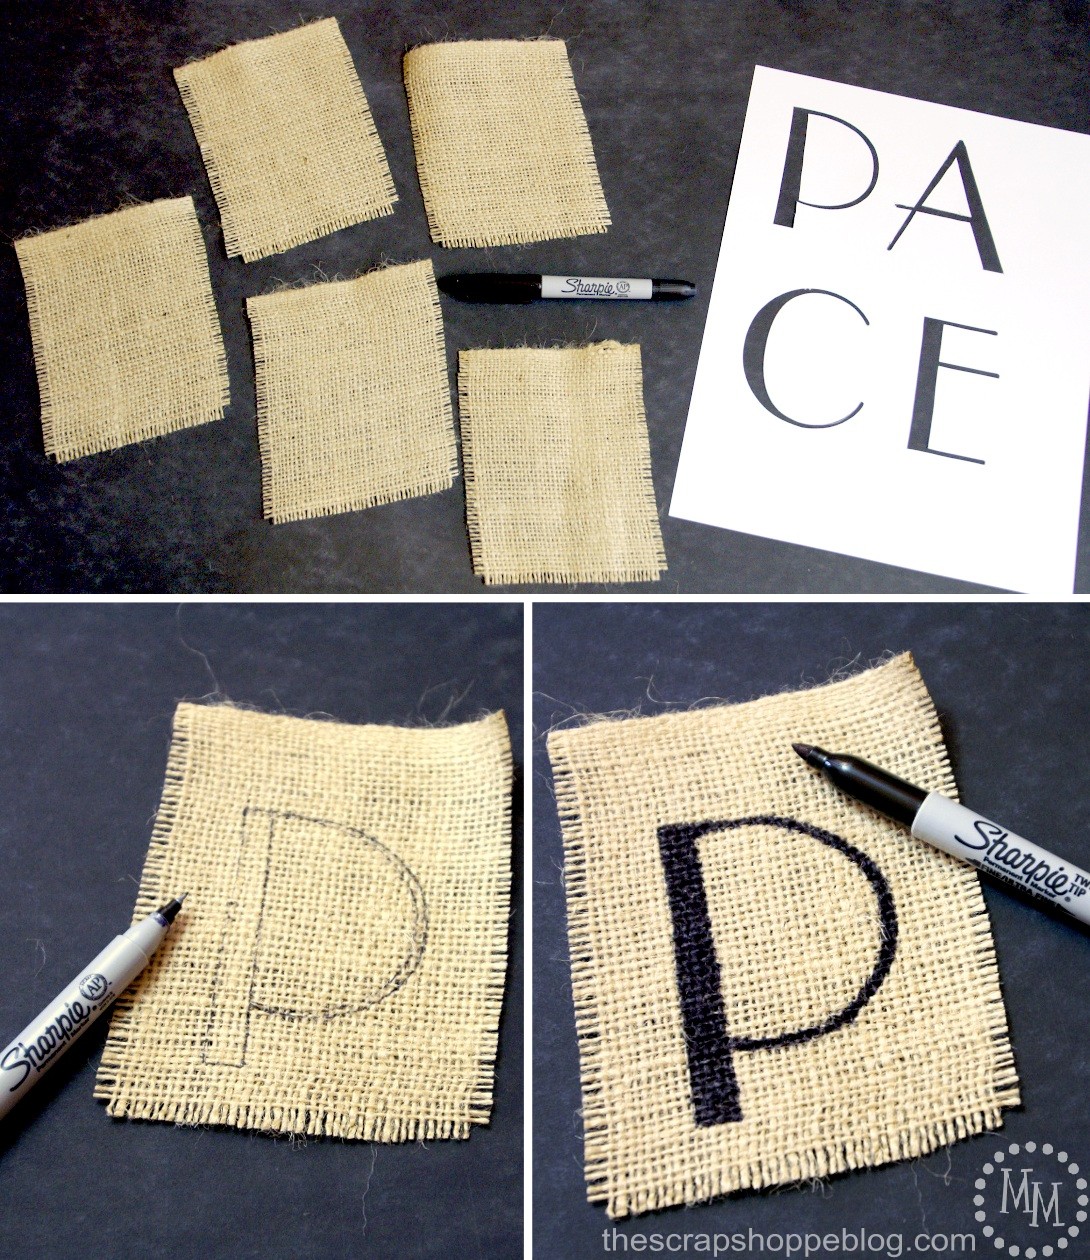
I cut scrap burlap into 4×5 rectangles. Then I found the perfect font, printed out the letters for the banner, and cut them out to create a stencil.
I used the fine point of the Twin Tip black Sharpie to trace the stencil then filled it in with the wider tip end of the Twin Tip.
I used a 1″ circle punch to create a circle template and used it to trace 2 gold circles on each piece of the banner. I went back and freehanded 3 smaller silver circles on each banner piece.
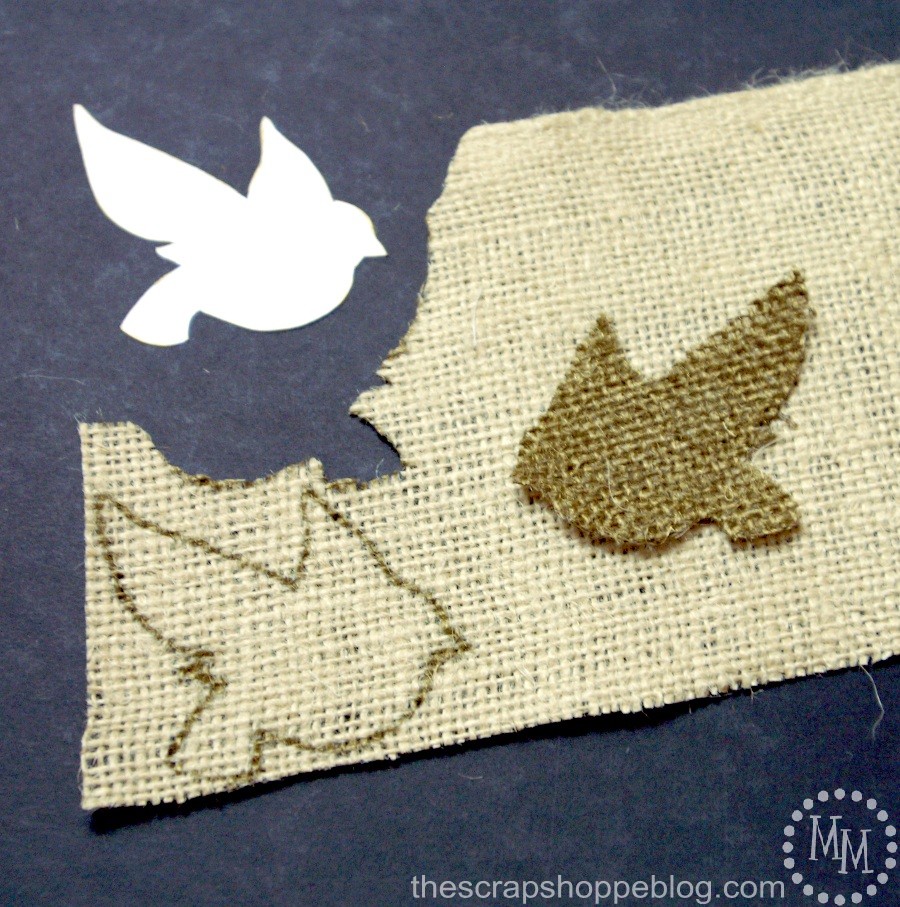
I printed a dove on cardstock and cut it out to use as a stencil. Trace the dove on the burlap with the gold Sharpie then color it in and cut it out. Make 2, facing opposite directions since we will be adding them to each end of the banner.
Next, I glued gold ribbon across the top each piece of the banner.
Also glue the doves on to the ribbon, letting them overlap slightly with the first and last piece of the banner.
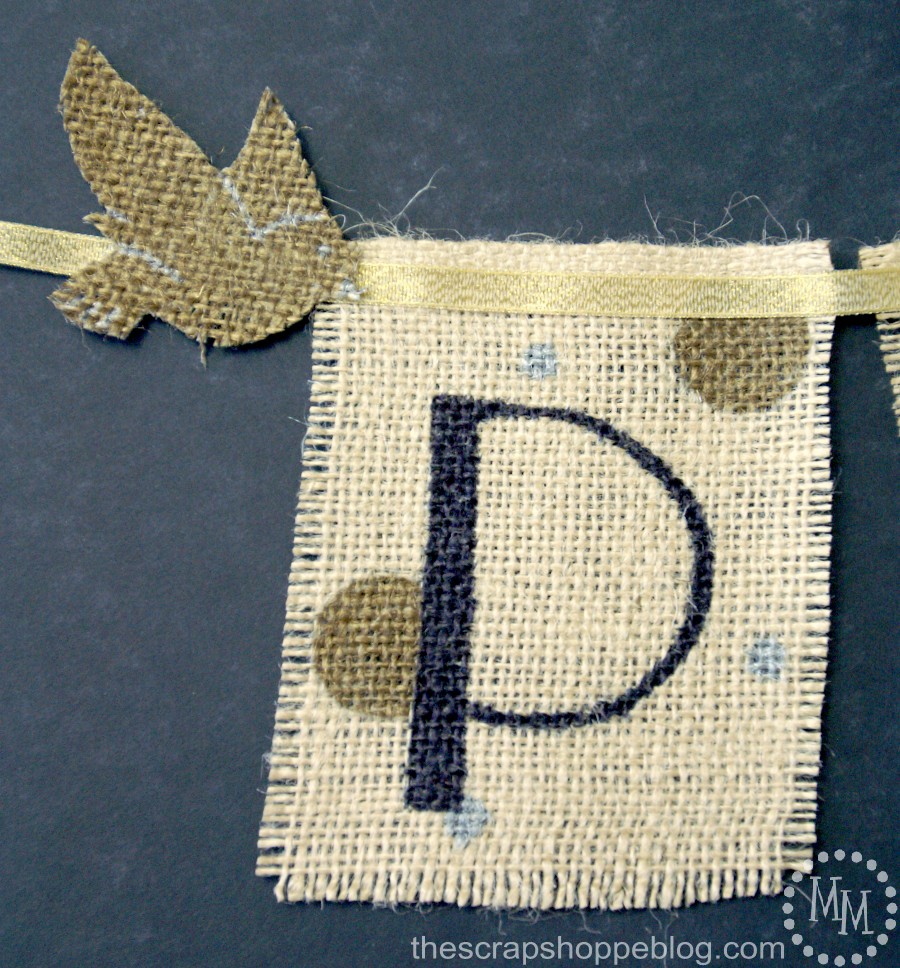
It kind of looks like the dove is helping to hold up the banner, don’t you think?
Isn’t it fun? I’m thinking of all the cute banners I can make with the Sharpies now. Especially with all those fun colors!
Be sure to visit your local Staples to grab the 12-CT Multi Colored Pack, Metallic Assorted 4-CT Pack, and other fun Sharpie packs while they are on sale. They can be used on so many surfaces! Use them to create holiday ornaments, decorate gift wrap, customize mugs, and more!
For more Sharpie ideas, visit them on Facebook, Twitter, Instagram, and Pinterest.
Linking up to Flamingo Toes, Today’s Creative Blog, The Shabby Creek Cottage, Tidymom, Whipperberry, 
My Repurposed Life, 30 Days, Tatertots & Jello, Serenity Now, and other great parties found on my party page.

Comments

  1. Jamie says

    December 15, 2013 at 12:15 PM

    This is too cute! Would love to have this hanging from my mantel.

    Reply
  2. Emily Thompson says

    December 15, 2013 at 6:54 AM

    that turned out great! I wanted to do this campaign… :o) Aren’t sharpies the best??? Pinned! [email protected]

    Reply
  3. Yana says

    December 15, 2013 at 2:38 AM

    Lovely! I envy your steady hand.

    Reply
  4. Heather SettingforFour says

    December 14, 2013 at 6:21 PM

    Gorgeous holiday banner!! I love the dots you added!

    Reply
  5. Laura Rhodes says

    December 13, 2013 at 11:35 PM

    love it and thanks for sharing! Have a blessed Christmas! Laura R.

    Reply
  6. Emily @ Two Purple Couches says

    December 12, 2013 at 11:09 PM

    Very pretty & a great tutorial! I adore the little doves you added!

    Reply
  7. Lisa Nelsen-Woods says

    December 12, 2013 at 4:58 PM

    Thank you for this tute! It is just what I need to use up my burlap stash!

    Reply
  8. MrsMajor Hoff says

    December 12, 2013 at 4:51 PM

    So pretty! I can see so many versions of possibilities– and metallic sharpies—Be still my heart!

    Reply
  9. Laura Silva says

    December 12, 2013 at 10:20 AM

    I love this! I really like the font you chose. I am surprised how well the Sharpies covered on the burlap. Off to pin this!

    Reply
  10. Chiwei @ One Dog Woof says

    December 12, 2013 at 9:38 AM

    I love those metallic sharpies!

    Reply
  11. Bonnie and Trish @ Uncommon Designs says

    December 12, 2013 at 9:15 AM

    Oh love this!!!! Those metallic sharpies are amazing!

    Reply
  12. Randi~Dukes and Duchesses says

    December 12, 2013 at 7:32 AM

    That’s so pretty! I love those metallic Sharpies!

    Reply
  13. Vanessa says

    December 12, 2013 at 7:31 AM

    I love how cute and easy this is! I had no idea that the Sharpie lines would be so crisp on burlap!

    Reply
  14. malia says

    December 11, 2013 at 11:04 PM

    Love this! You did a beautiful job!

    Reply
  15. Gail Wilson says

    December 11, 2013 at 9:56 PM

    I love this Michele! so pretty and easy! I just got a bunch of Sharpies at Walmart on Black Friday. It was a big set… maybe 25? Jamie and I split them, but taking turns picking our colors. 🙂 it was fun.

    pinning!

    gail

    Reply
  16. [email protected] says

    December 11, 2013 at 9:38 PM

    This is fantastic! I love it!

    Reply
  17. Four Marrs and One Venus says

    December 11, 2013 at 7:52 PM

    What a great idea. So simple..yet so pretty!

    Reply
  18. Crystal says

    December 11, 2013 at 3:51 PM

    Love it!! It’s so easy and yet so pretty!! Thanks for the tutorial!!

    Reply
  19. Pauline Molinari says

    December 11, 2013 at 12:51 PM

    So pretty! I love this idea!

    Reply
  20. Rachel Willis says

    December 10, 2013 at 11:12 PM

    I am so addicted to Sharpie pens! I love this idea!

    Reply
  21. Jennifer Curtis says

    December 10, 2013 at 10:23 PM

    this is so pretty! I love it!

    Reply
  22. Kara says

    December 10, 2013 at 8:30 PM

    So pretty!! LOVE me some Sharpies and this banner turned out so cute!

    Reply
  23. Debby says

    December 10, 2013 at 7:44 PM

    Very nice.

    Reply
  24. Amy Latta says

    December 10, 2013 at 7:16 PM

    This is lovely! I think metallics are extra pretty for the holidays! I’d definitely hang this in my house!

    Reply
  25. Carol TheAnswerIsChocolate says

    December 10, 2013 at 7:04 PM

    So cute Michele. Can’t believe you did that freehand!

    Reply
  26. Britni Vigil says

    December 10, 2013 at 5:52 PM

    That’s some incredible free handing, I can’t draw a circle to save my life.

    Reply
  27. Erin Spain says

    December 10, 2013 at 4:25 PM

    I love this! What a great idea. I’m loving crafting with Sharpies for the holidays too. How fun!

    -Erin @ DIY on the Cheap

    Reply
  28. Katie says

    December 10, 2013 at 3:32 PM

    Love this banner and love me some sharpies!!!

    Reply
  29. Meredith @ Wait Til Your Father Gets Home says

    December 10, 2013 at 12:59 PM

    I love little banners for each holiday, and this one is perfect!! Metallic Sharpies are AWESOME!

    Reply
  30. Beverly {Flamingo Toes} says

    December 10, 2013 at 12:58 PM

    Wow this is so cute! I thought you had used polka dot burlap – those dots are perfect! I love sharpies – I’ll definitely be checking out those metallic ones!

    Reply

Leave a Reply Cancel reply

Connect with:
Facebook Google Twitter WordPress Instagram

Your email address will not be published. Required fields are marked *

This site uses Akismet to reduce spam. Learn how your comment data is processed.

Never miss a post!*
Please enter all required fields
Correct invalid entries
Please choose a color:

Categories

Never miss a post!
Name: 
Your email address:*
Please enter all required fields
Correct invalid entries
No spam, ever. Promise. Powered by FeedBlitz
Please choose a color:
Visit The Scrap Shoppe

Visit Michele {The Scrap Shoppe}’s profile on Pinterest.

Follow on Bloglovin

AMAZON AFFILIATE
Amazon and the Amazon logo are trademarks of Amazon.com, Inc. or it's affiliates.
Michele McDonald is a participant in the Amazon Services LLC Associates Program, an affiliate advertising program designed to provide a means for sites to earn advertising fees by advertising and linking to Amazon.com.

MyFreeCopyright.com Registered & Protected
DISCLOSURES
disclosure
PRIVACY POLICY

Copyright © 2021 · Web Hosting By RFE Hosting

This website uses cookies to improve your experience. You can choose to opt-out if you wish.Accept Reject Read More
Privacy & Cookies Policy

Privacy Overview

This website uses cookies to improve your experience while you navigate through the website. Out of these cookies, the cookies that are categorized as necessary are stored on your browser as they are essential for the working of basic functionalities of the website. We also use third-party cookies that help us analyze and understand how you use this website. These cookies will be stored in your browser only with your consent. You also have the option to opt-out of these cookies. But opting out of some of these cookies may have an effect on your browsing experience.
Necessary
Always Enabled

Necessary cookies are absolutely essential for the website to function properly. This category only includes cookies that ensures basic functionalities and security features of the website. These cookies do not store any personal information.

Non-necessary

Any cookies that may not be particularly necessary for the website to function and is used specifically to collect user personal data via analytics, ads, other embedded contents are termed as non-necessary cookies. It is mandatory to procure user consent prior to running these cookies on your website.