
Stenciled Wood Canvas
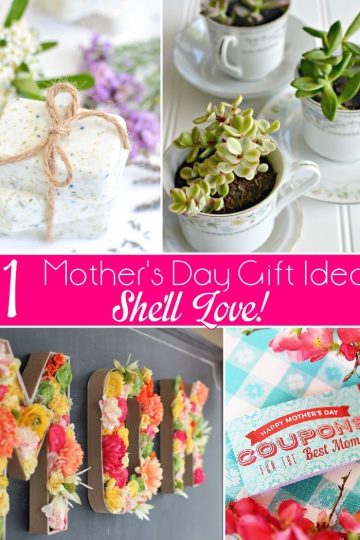
Mother's Day is right around the corner, and luckily I was able to get a head start on it thanks to a fun campaign sponsored by Plaid using some new products from Martha Stewart Crafts!
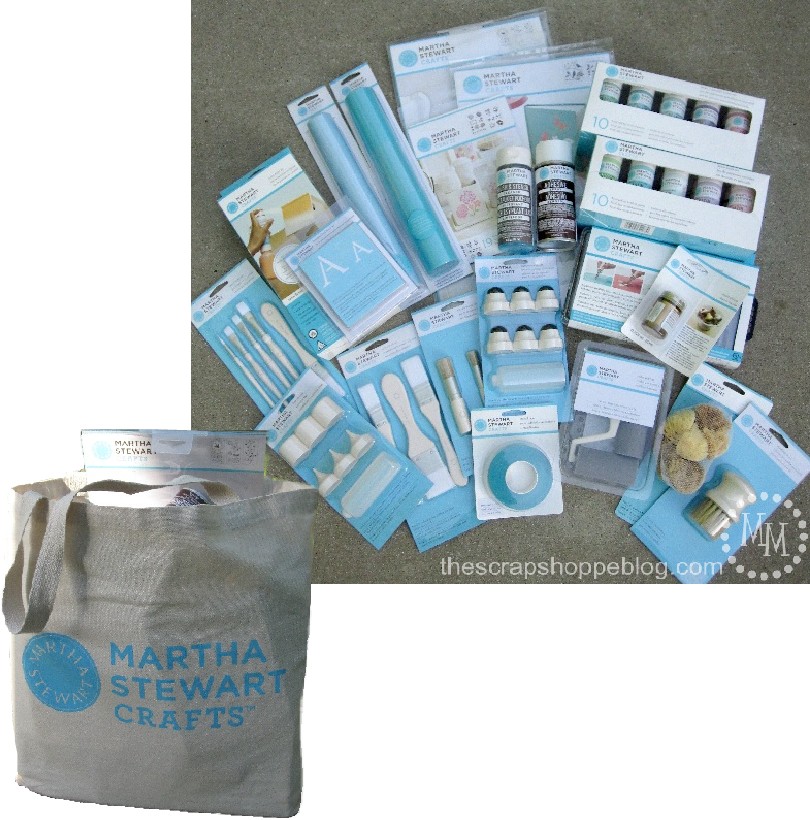
I showed you a sneak peek of the items I received the other day. Can you believe all of these supplies? I was so stinking excited to sort through it all! Tons of paint, stencils, brushes, and other fun accessories.
Where to begin with my crafting?
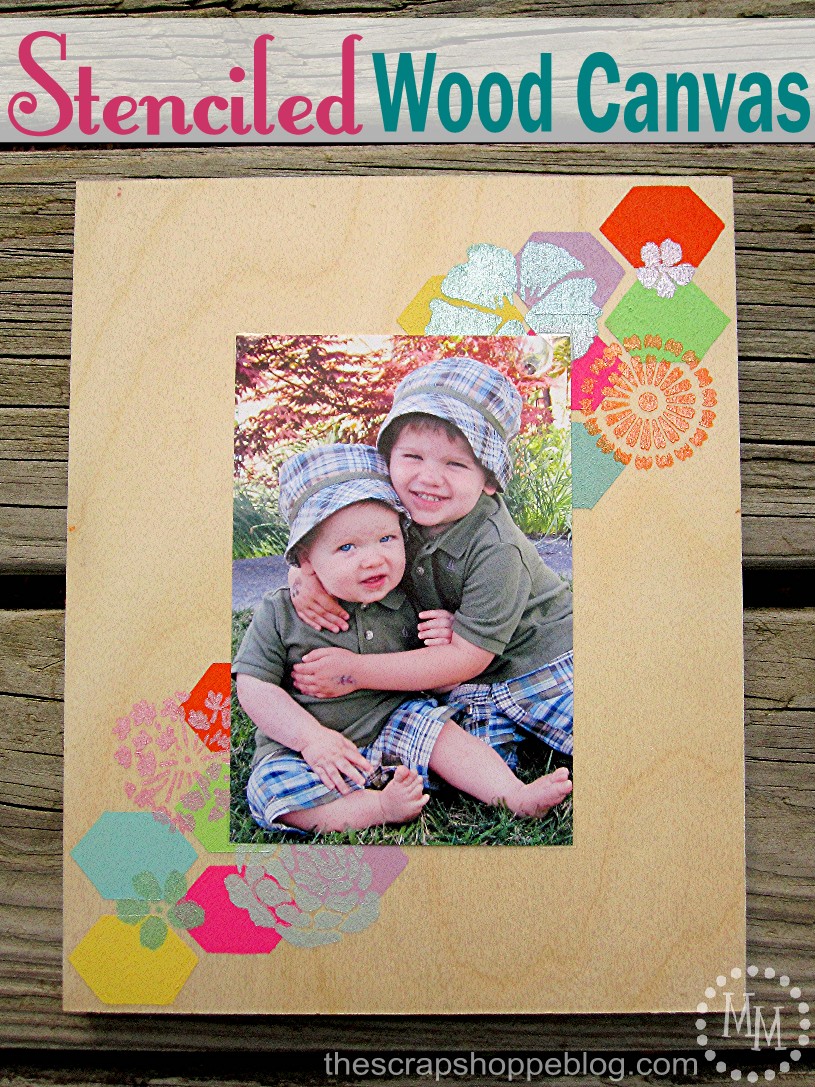
I found a fun piece of wood canvas at Jo-Ann's which also happens to be carrying the products in this campaign if you go looking for them.
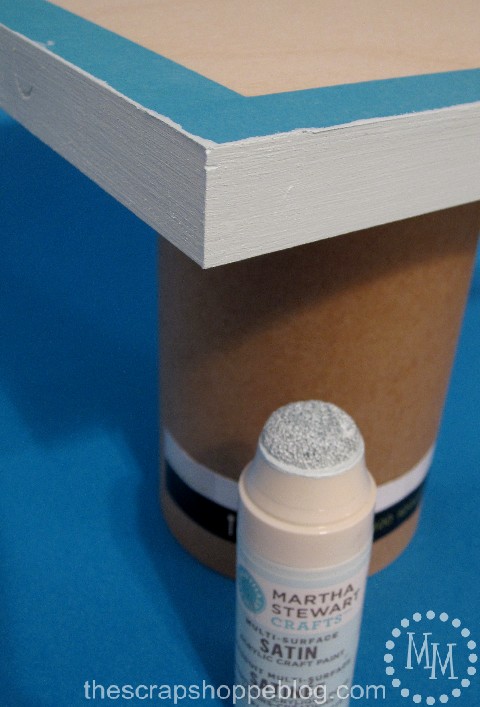
I taped off the front of the canvas with stencil tape and painted the edges with a fun satin paint called sea lavender which looked like a pale aqua. I used a Martha Stewart foam pouncer top to paint onto the wood. These things are so cool! You just take the cap off of the paint and screw on the pouncer top. Easy peasy! I gave the wood 3 light coats of paint.
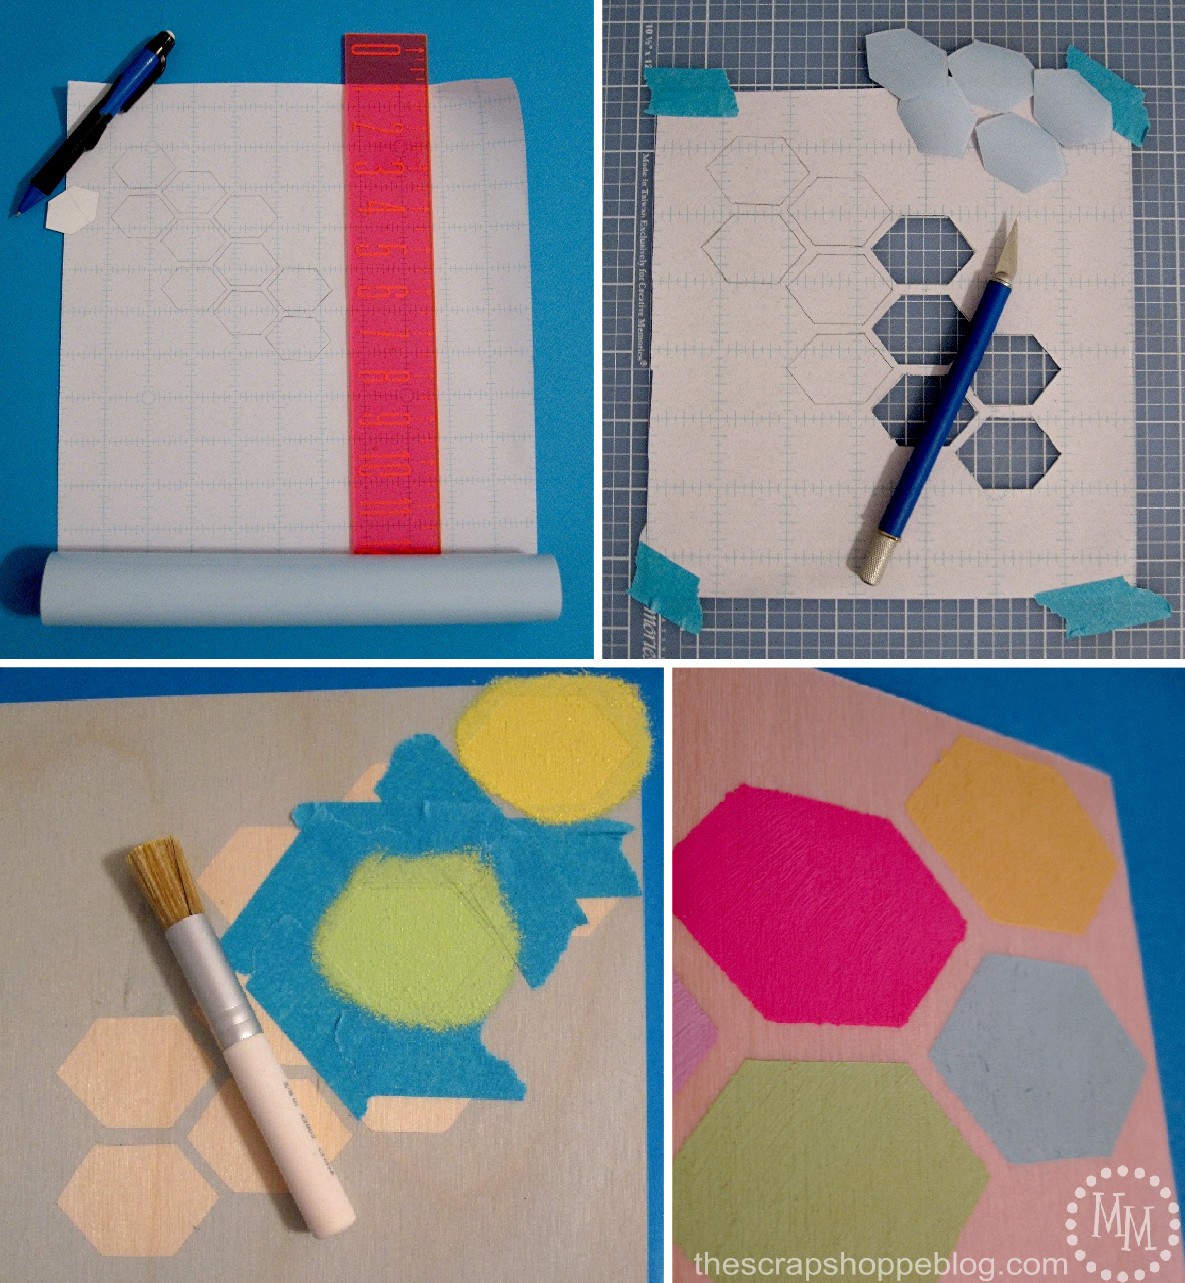
I decided I wanted to make my own stencil so I took advantage of the adhesive stencil film that was included in my goodie bag. I made a hexagon template out of cardstock and traced the pattern on the back of the stencil film. I used an X-acto knife to cut out the pattern.
The film stuck perfectly to the wood canvas. I taped off each hexagon as I painted them because, well, I'm a messy painter! I used the stencil brush to stipple on my paint. For the hexagons I used various colors of satin paint.
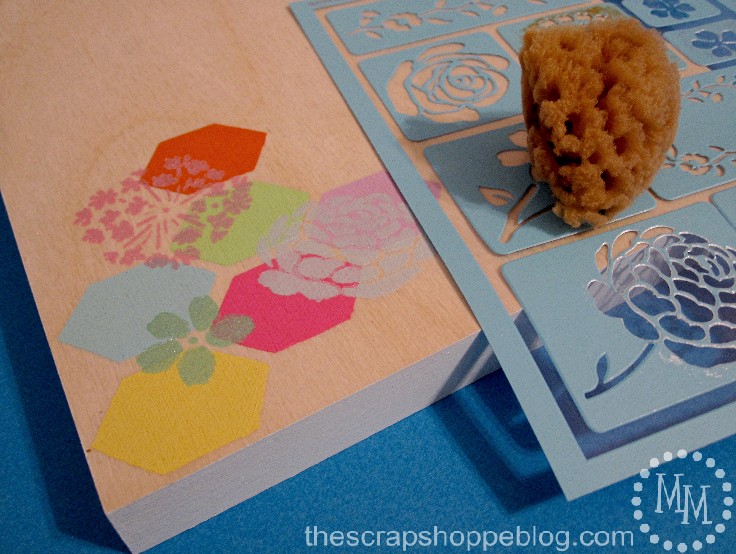
Because I was itching to try them out, and I thought they would add extra interest, I also painted on some of the adhesive floral stencils on top of the hexagons. For the florals I used the same colors of paint but in the pearl sheen to make them softer. I used the sea sponges to paint these stencils.
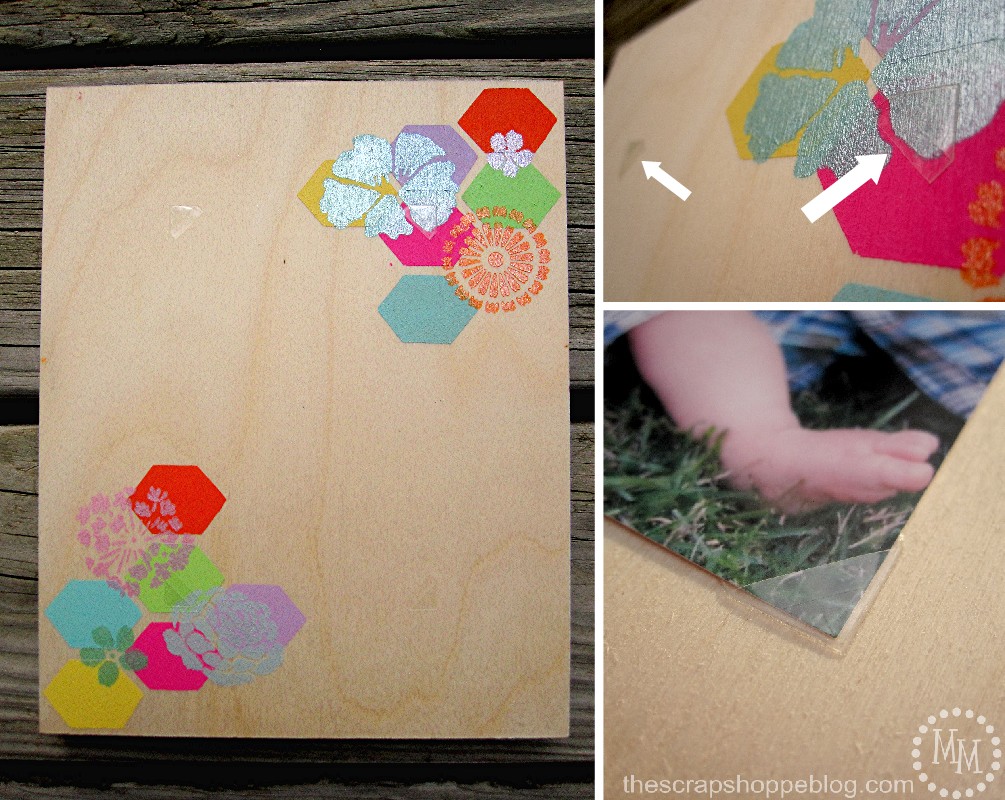
I wanted to be able to change out the photo I put on the canvas so I added some clear photo corners to the wood. I've used them in other projects and know that they are nice and sticky and will definitely not fall off of the wood.
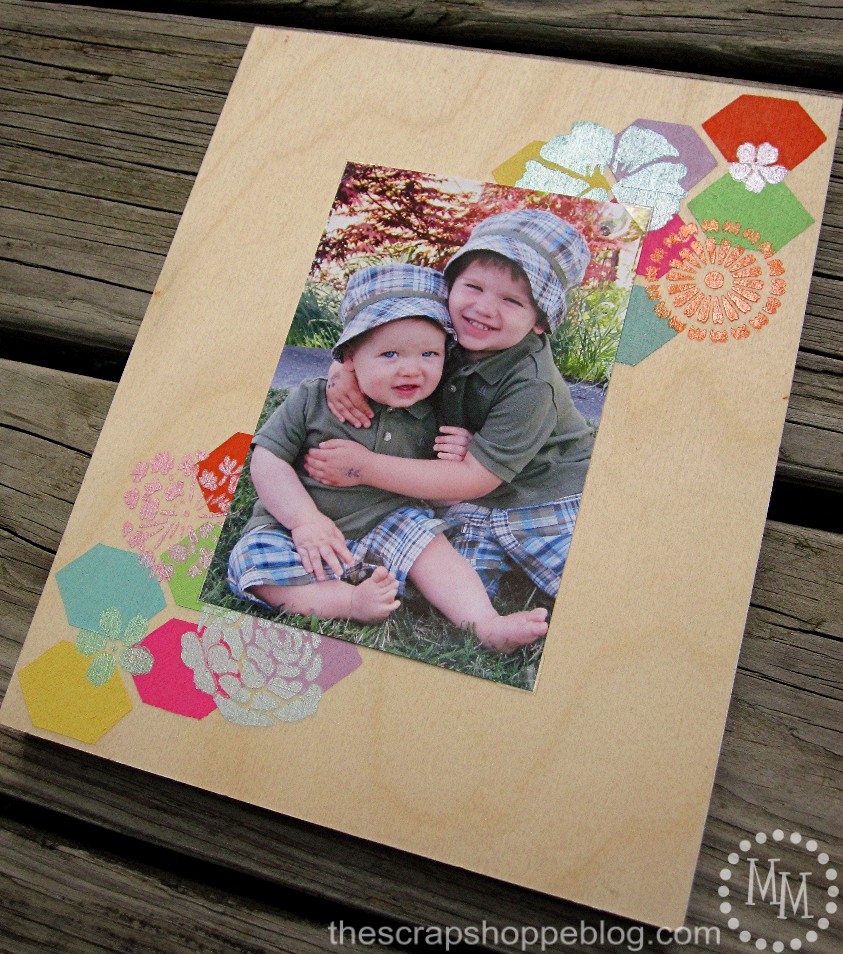
I love the fun bright colors on the soft wood background!
This photo is from Easter this year. Aren't my boys the cutest?
I'm not partial at all.
How this photo came to be is a story unto itself. Maybe I'll share it this weekend!
Needless to say I love it, and I love how the colors from the paint show it off!
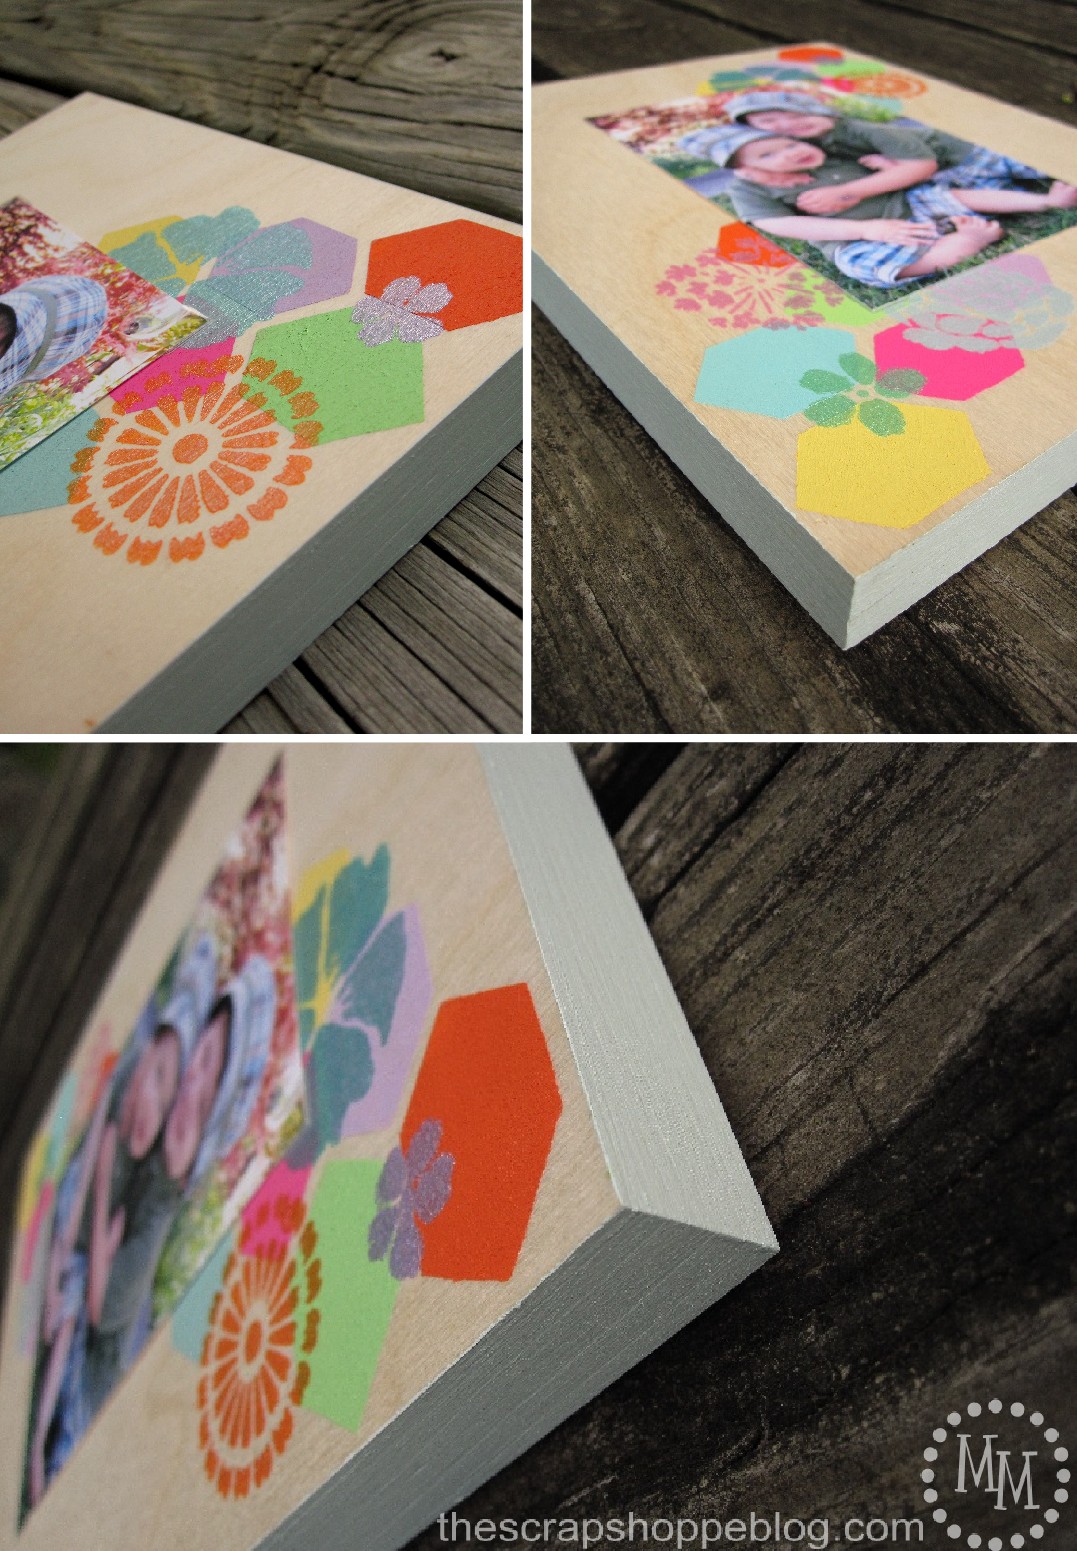
I really love the little extra pop the painted sides give the canvas. The pearl sheen of the florals keeps them from dominating the project.
I wrote this post as part of a paid campaign with Plaid and Blueprint Social.
All opinions in this post are my own.
Hi Michele! Just wanted to stop by and say that I loved this hexagon tutorial so much I had to share the link to your project on my blog. Have a look: http://ecoscrapbook.blogspot.com/2012/10/scrapbooking-diy-hexagons.html
Michele, first...YES...Your boys are adorable!!! Makes me long for those days when my boys had those cherub cheeks. And 2nd, I love how you made your own hexagon stencil. This is an adorable project and the perfect Mother's Day gift. Thanks for sharing it in the DIY Talent Parade!
LOVE martha's products and you did a fabulous job showcasing them. That stenciled wood looks great, but ohhh those cute faces--that's the icing on the cake!
gail
can we talk about those boys, first?
they are so cute! so adorable.
your frame looks great too. you are so detailed! wow!
have a super week!
xo
that's adorable Michele! Love the picture of your boys too!
This is so cute! Such a great idea! I love the stencils you made and the colors you used!
I have never seen the wood canvas before. Clearly I'm not going to JoAnn's enough lol. This turned out so great...bright and fun and I love the mix of the geometric patterns with the flowers. And your little guys are too stinkin' cute!
Thanks for showing how you did the stencil. I enjoyed seeing the process. Looks great. Thanks for sharing with us. Michele, if you get a chance come over to visit. I am new to blogging and would love for you to come over.
Cindy
Oh how fun! Definitely like the idea of using the photo corners for the canvas 😉 Great summer colors! {Tammy}
This is so cute! And I am not at all jealous of your goodie bag of awesomeness...
Ooooooo I LOVE this idea, Michelle! Putting photo corners on a canvas is genius!
Oh wow Michele! I love it!! The colors are so super cute and I love the way they really show off the photo!!
This turned out so great!
So bright and cheerful!
That's beautiful! I've never heard of wood canvas before! I'm definitely going to have to try the foam pouncers. That was one of the few things from my box that I haven't opened yet, but I love the way yours turned out! Great job!