
Witch Silhouette & Broom Parking Plaque Tutorials
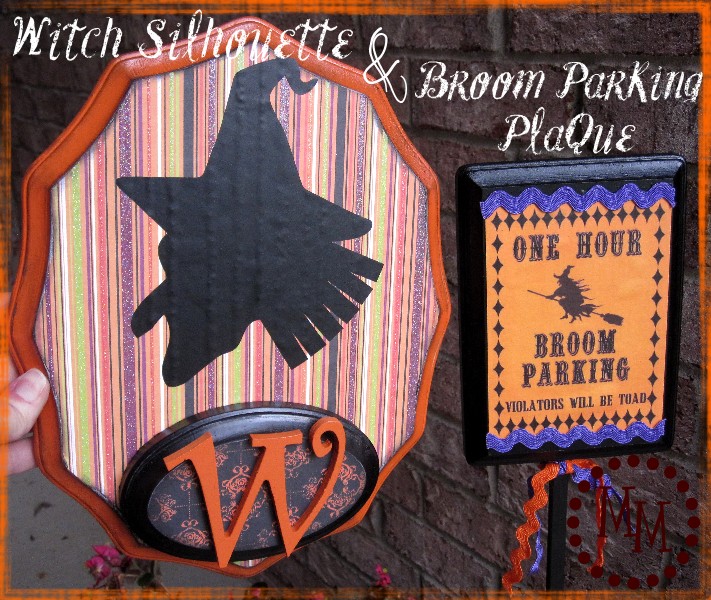
Time for the witch silhouette and broom parking plaque tutorials
that I first showed you on my Halloween mantle!
Witch Silhouette Tutorial
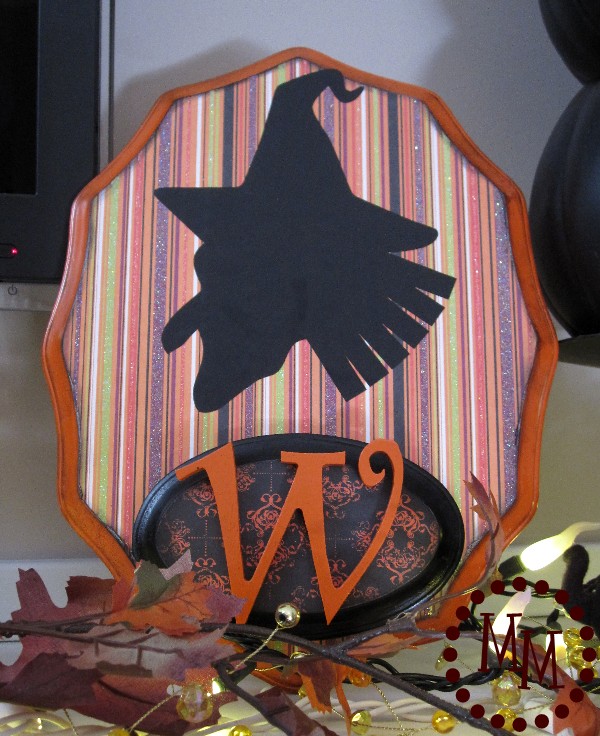
I've nicknamed my little witch Witchy. Not super original, but its what the scripty "W" represents on the completed plaque. Because, hey, even a witch needs a monogram! 😉
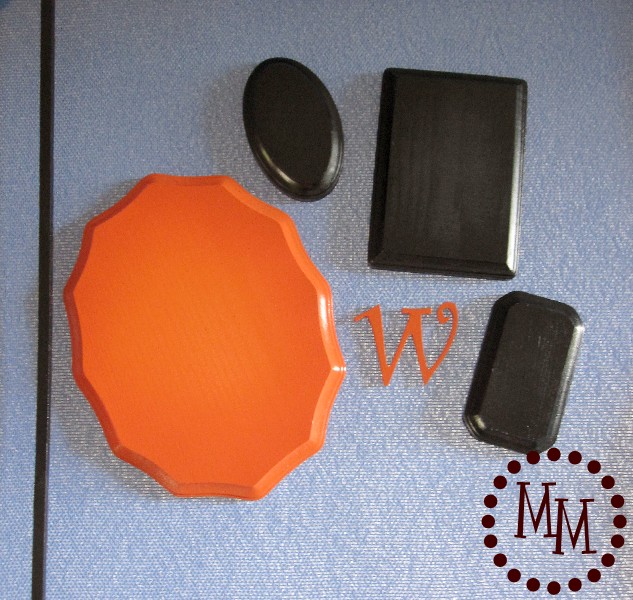
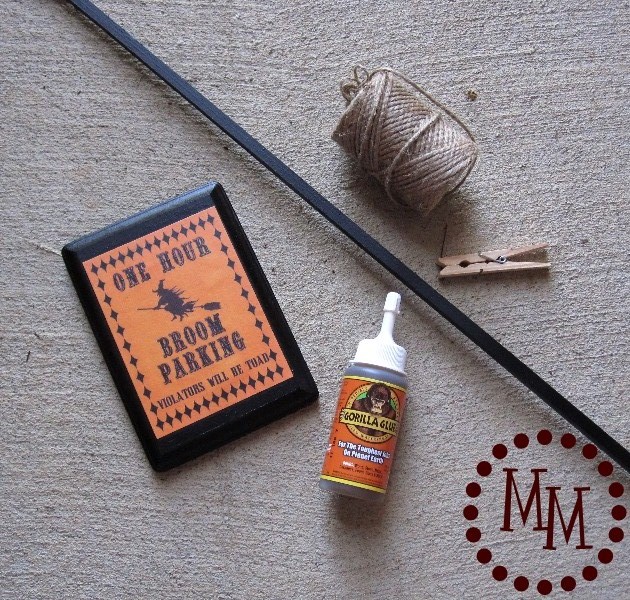
For this project, you will need to take some unfinished wood plaques (mine are from Hobby Lobby) & and small wood W and spray paint them your favorite Halloween colors. I used Krylon's Pumpkin Orange and Flat Black. In hindsight I probably should have used a primer, but I'm an impatient crafter...
After several coats of paint (mainly because of my lack of using the primer), I used Mod Podge to attach some Halloween-themed scrapbook paper to two of the plaques. I sanded the edges to get the excess scrapbook paper off.
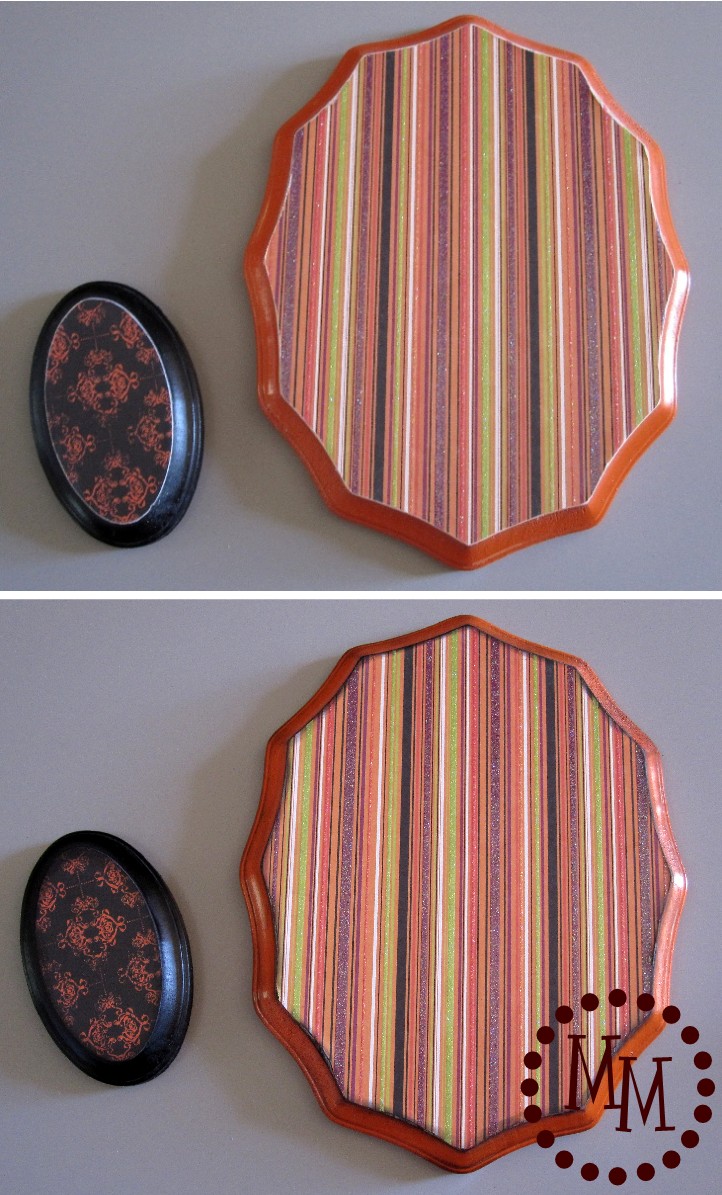
Then I inked all of the edges with black distress ink to remove any of the white of the paper from showing. I also inked the edges of the orange plaque itself to grunge it up a bit.
Can you see the difference between the two photos above?
The top is uninked, the bottom is inked.
Its a subtle difference.
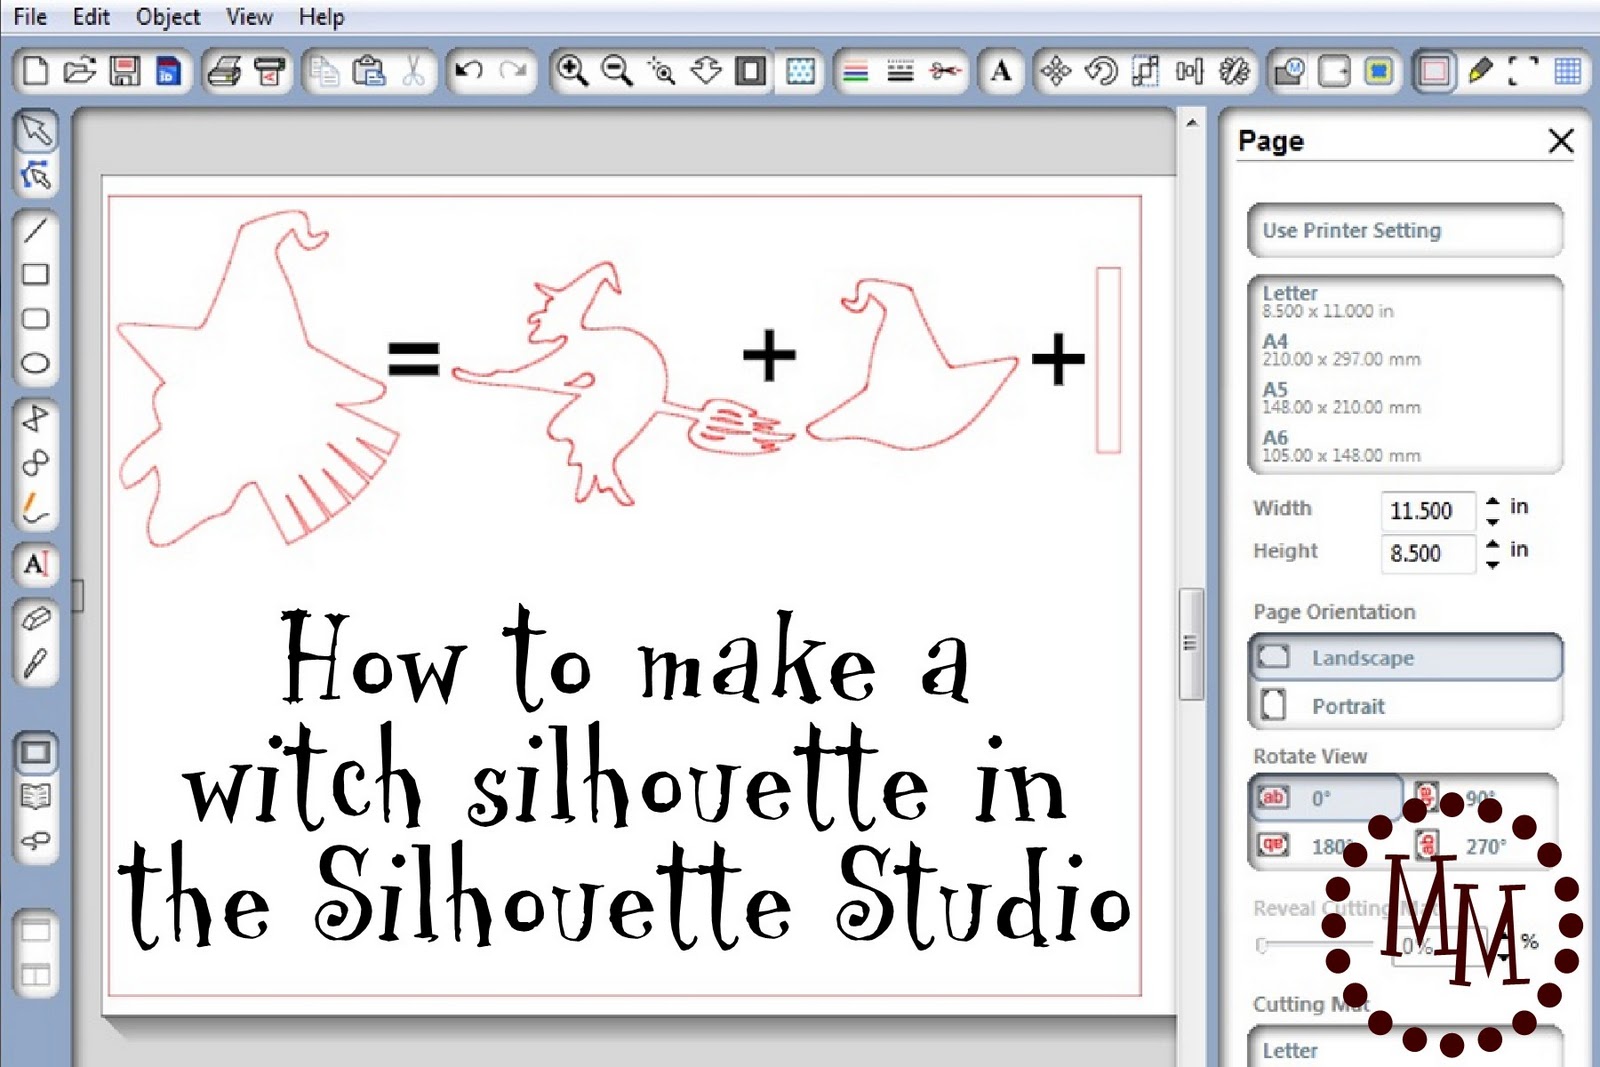
There are a couple of witch silhouettes available in the Silhouette Library, but I didn't care for any of them. So I chose to make my own!
I know I've often showed you images from the Silhouette Image Library that I've altered, but I've never shown you how I've done it. So I've decided to give you a quick tutorial!
You really only need to be familiar with using the software to be able to complete this tutorial.
(If you have questions, please feel free to leave them in the comments section of this post (or email me!), but be sure your email address is attached to your Blogger account or I won't be able to respond to you!)
To make this witch silhouette you need 3 images:
1) ugly_witch_C00646_19547
2) witch_hat_C20090901105432_20509
3) a rectangle you can draw in the software
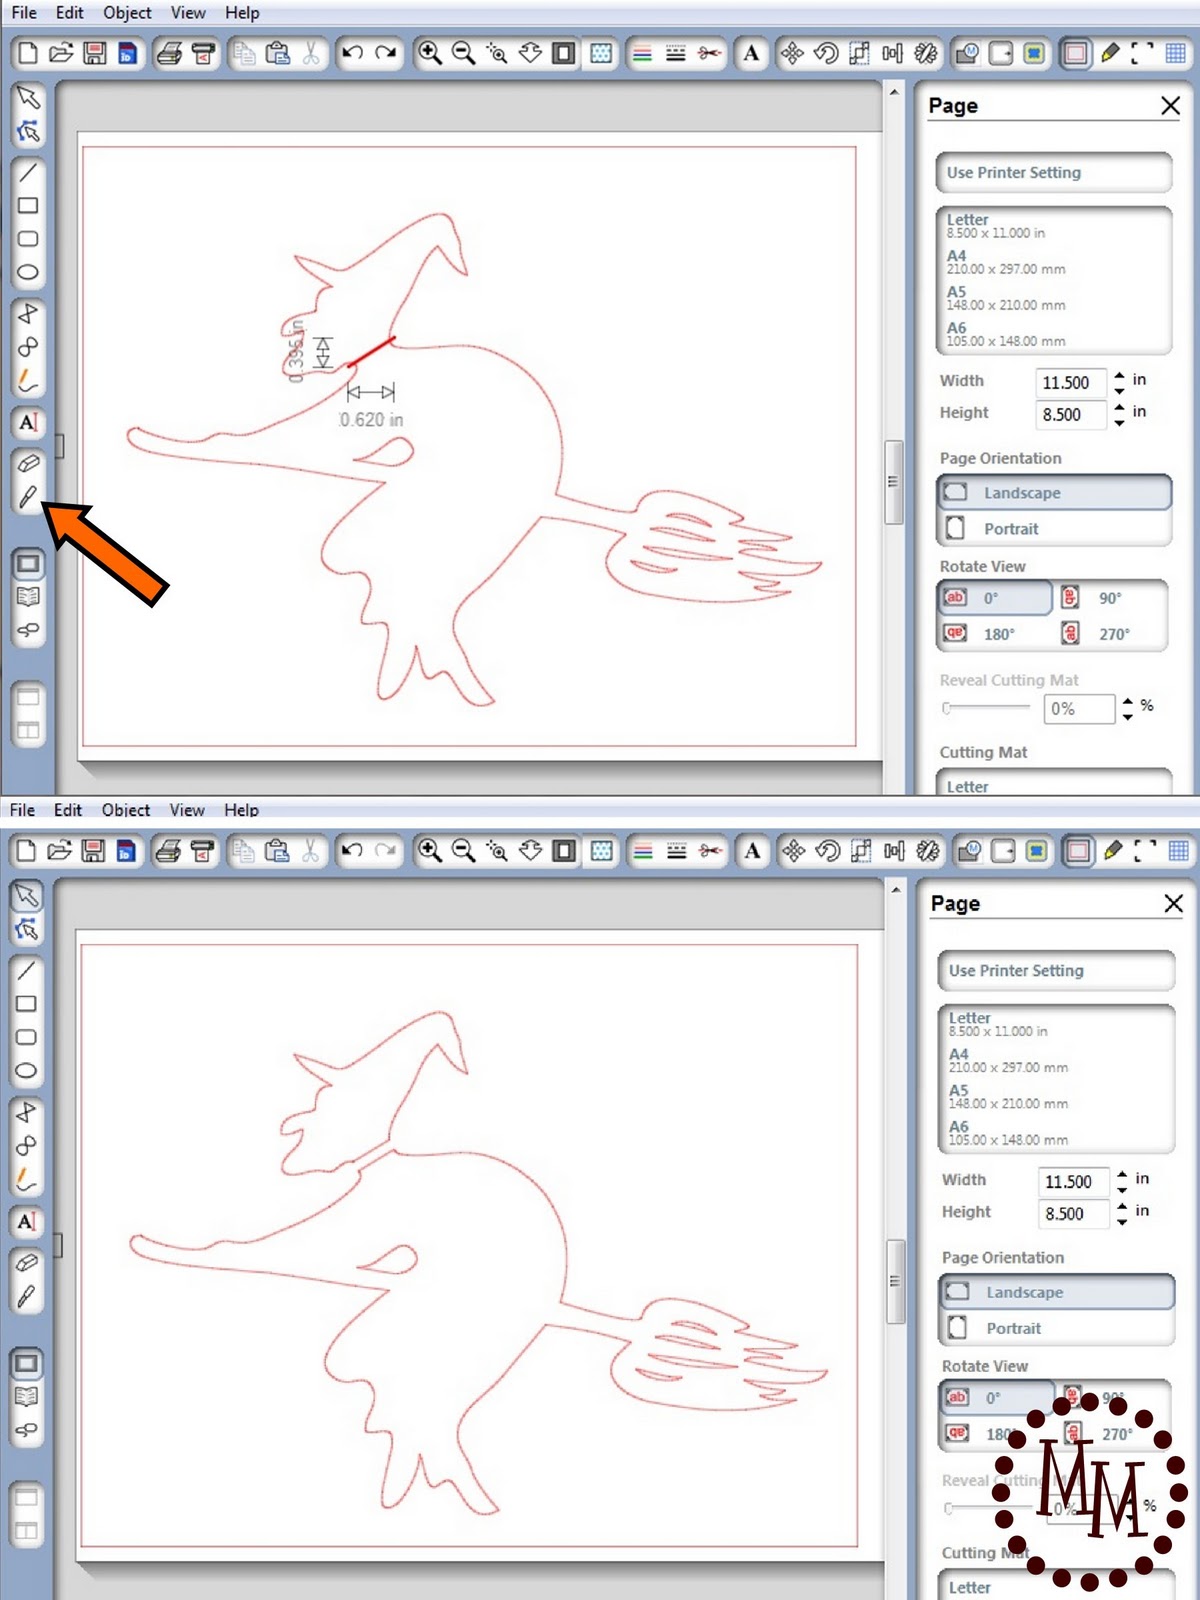
Start with the image of the witch on the broom.
All we want is her head so we're going to cut off the rest of her body.
Use the knife tool (see the arrow) to make a cut across her neck.
Separate the two pieces and delete her body.
(Geez, this is sounding morbid!)

I don't care for the shape and lack of a good brim on this witch's hat, so we're going to use a different one.
Open the witch hat image, right click on your mouse, and select Flip Horizontally so that the hat will be facing the right way on our witch's head.
Resize the hat to fit on the witch to your liking and estimate where you want it to go.
Move the new hat out of the way and, using the knife tool again, cut the old hat off of the witch.
(Note: The knife tool is not selective about what it cuts even if you have selected only one image. It will cut anything in its path so be sure the image of the new hat is out of the way!)
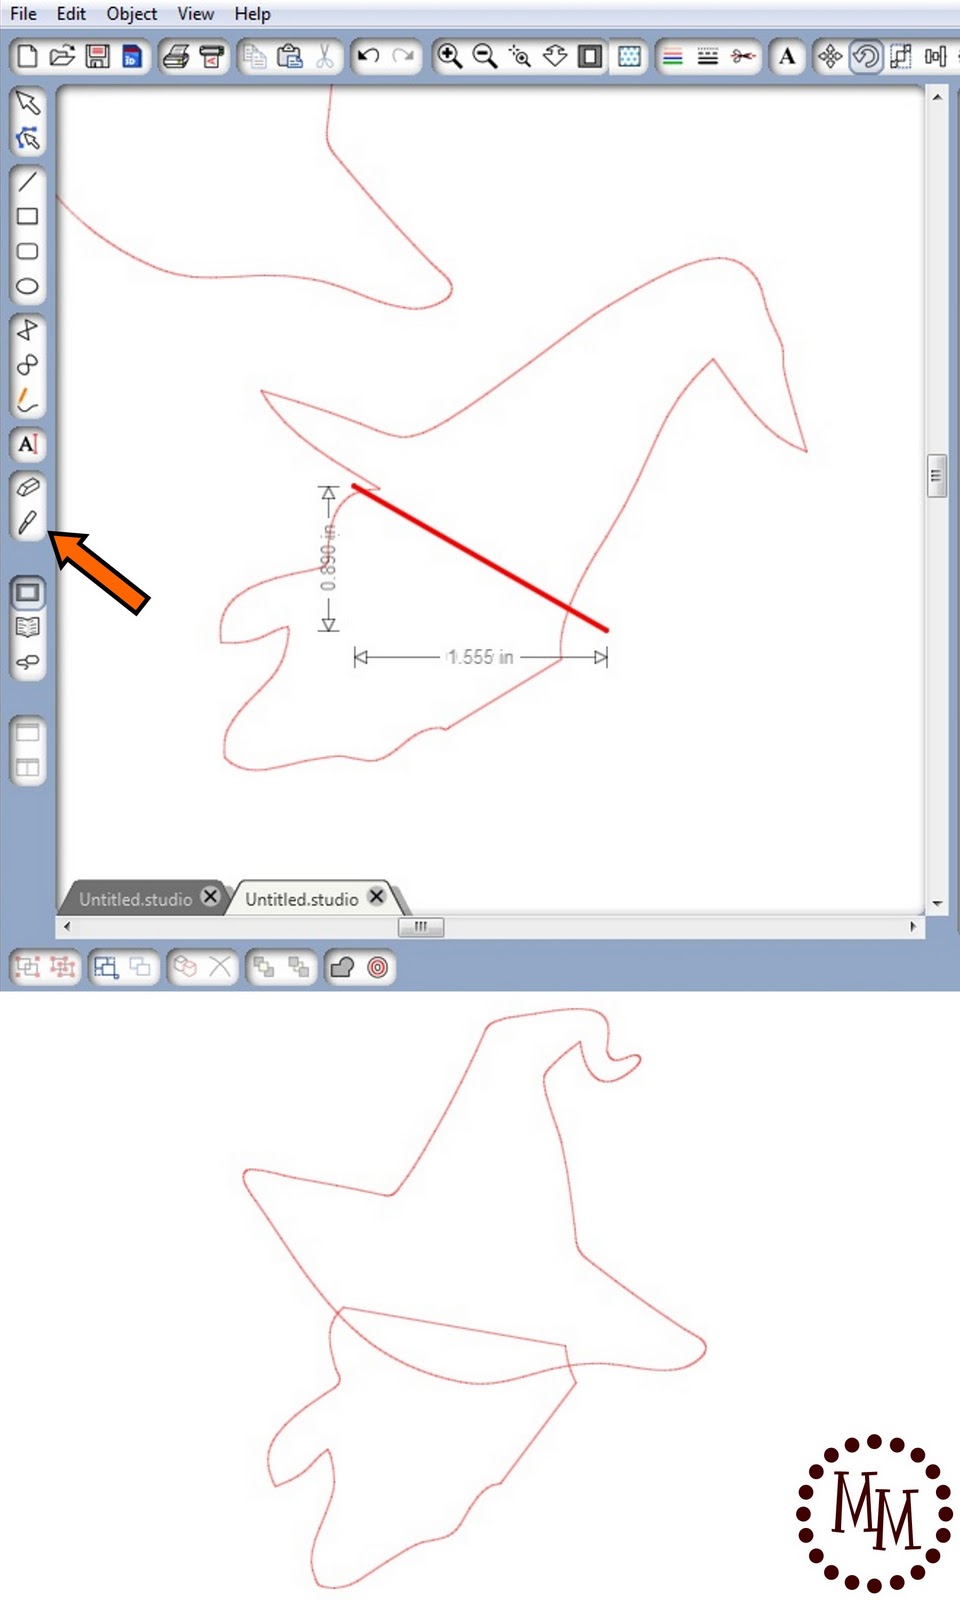
Angle the witch's head into the position you want it to be in and replace the new hat on her head, reangling and resizing as needed.
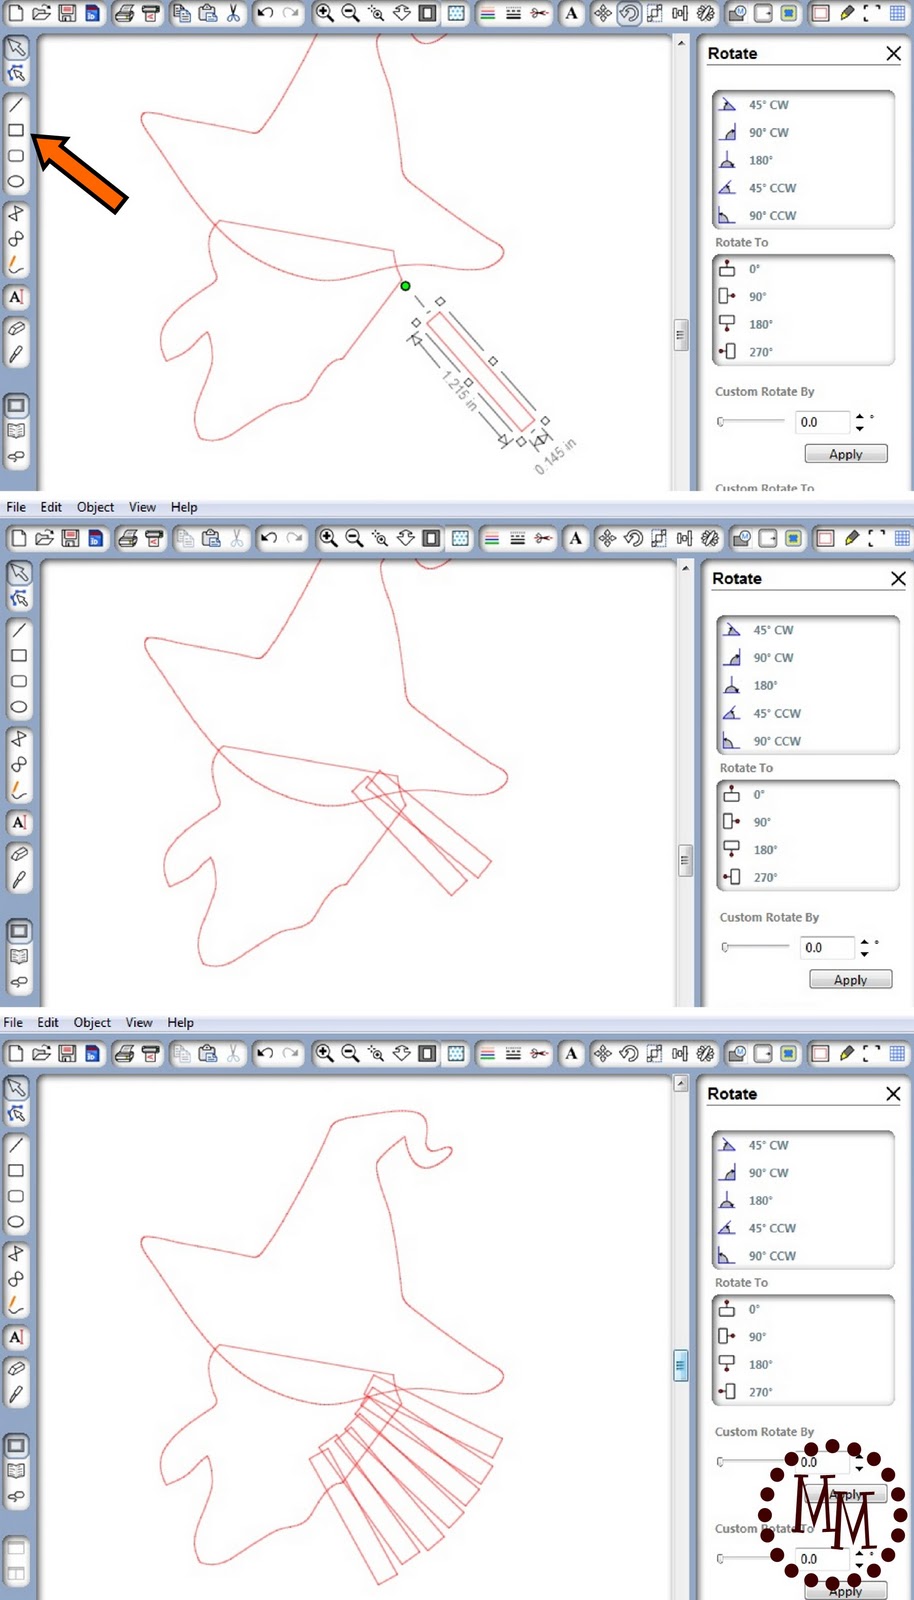
Draw a rectangle. Size it to be a good fit for a stand of witch's hair.
Copy and paste multiple "strands of hair" and angle & overlap them to fit between the hat and the front edge of her neck. You want to cover up the area of her neck you cut off in the very beginning. Arrange the rectangles until you are satisfied with the way they look.

Select all of the rectangles, the hat, and the witch's head.
Right click and select Weld.
The individual images will actually weld themselves together leaving you with a single image.
Resize the image to fit your plaque and cut it out with the Silhouette on vinyl or paper!
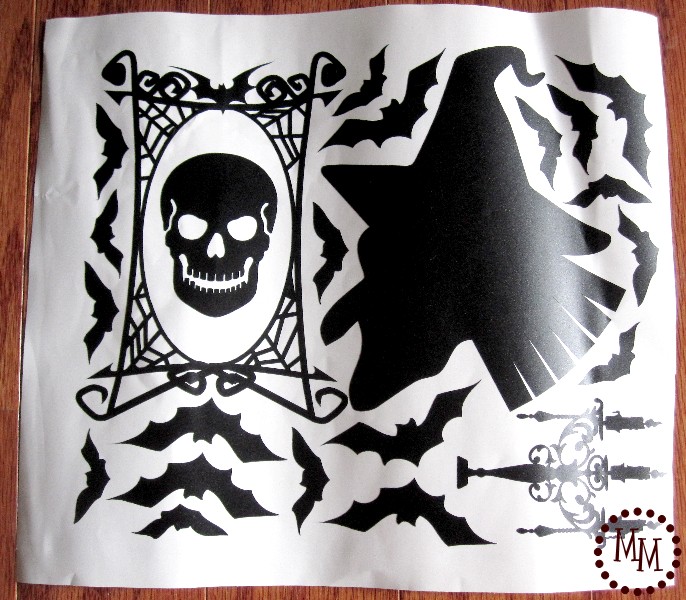
Here is my Witchy cut on vinyl (along with more images for other projects!).
You can see what I used the skull and candelabra for here.
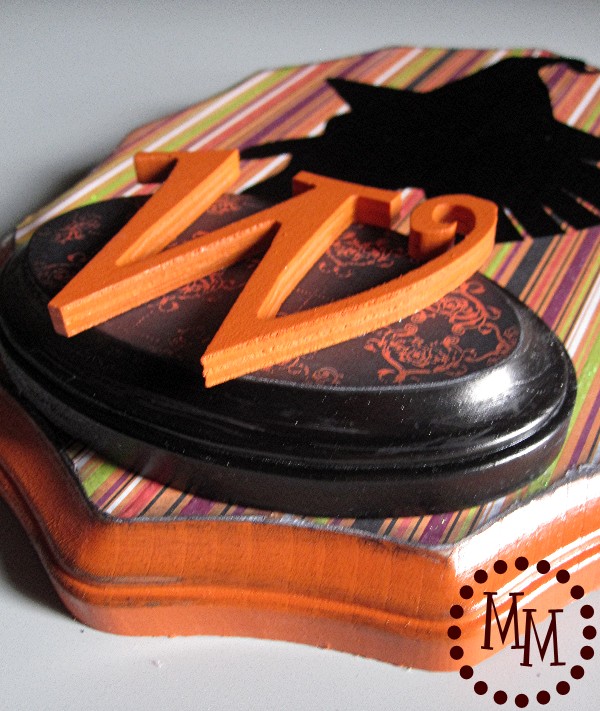
I glued the "W" to the smaller plaque with Beacon's 3-in-1 then attached that plaque to the bottom of the larger plaque. Then I attached Witchy's silhouette.
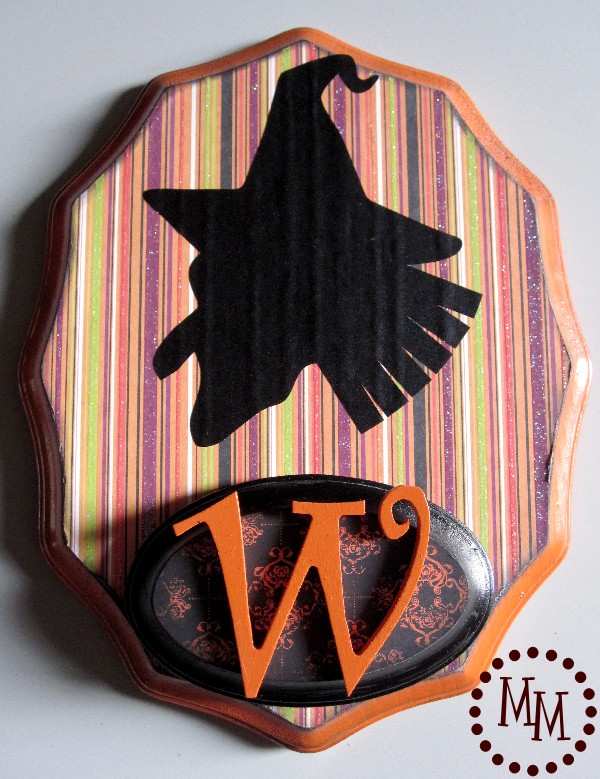
I think she turned out pretty well!
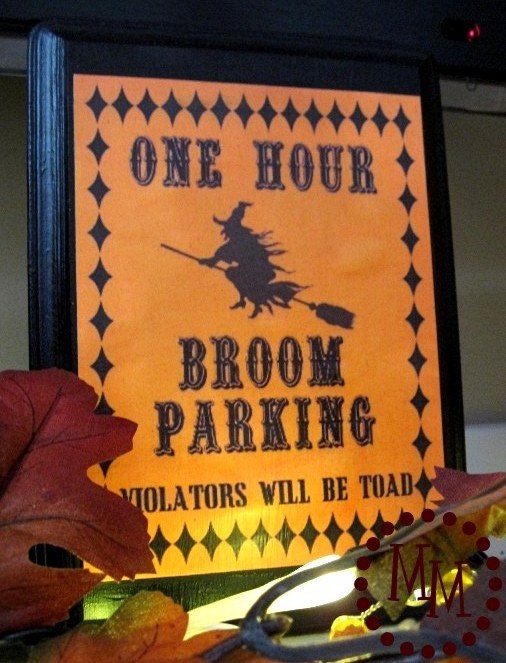
Broom Parking Plaque
My Broom Parking plaque started out on my mantle, but I ultimately had other plans for it.
In fact, I said as much when I pinned the image here on Pinterest!
(The printable can now be found here.)
I printed the Broom Parking printable after resizing it to fit my plaque. Then I simply Mod Podged it to the wood. Its going to be outside so I Mod Podged a couple of layers on top, too.
To adhere it to my pole (originally a long rectangular piece of unfinished wood from Hobby Lobby that I painted black) I used Gorilla Glue.
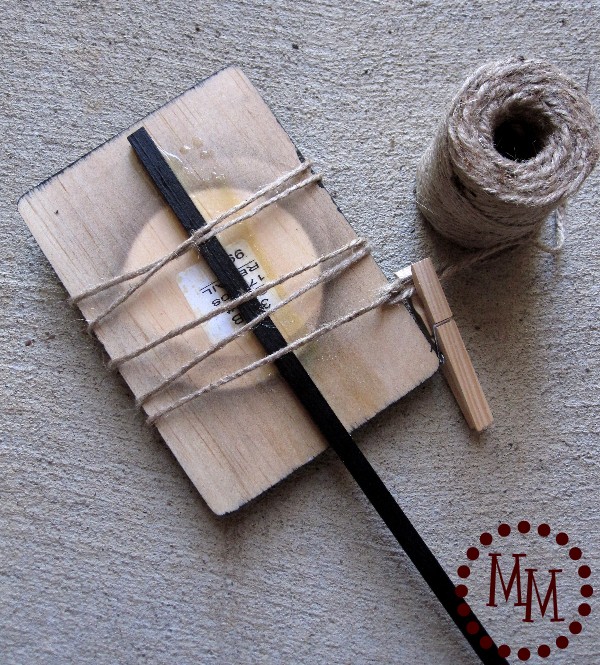
I glued the pole to the back of the plaque and wrapped it tightly with heavy twine.
I gave it a good two hours to dry.

I decided to dress the plaque up a little more with some purple ric rac and also used purple and orange ric rac to tie a knot around the pole under the plaque.
I stuck the pole in a cute black bucket I already had and filled it with some glass marbles I had used in my home decor previously. I topped the marbles with strips of black ric rac (don't they look a little wormy??) and then placed a few extra marbles on top so they wouldn't blow away.
The addition of the little Wicked sign was at the last minute.
Its something I had in my scrapbook stash.
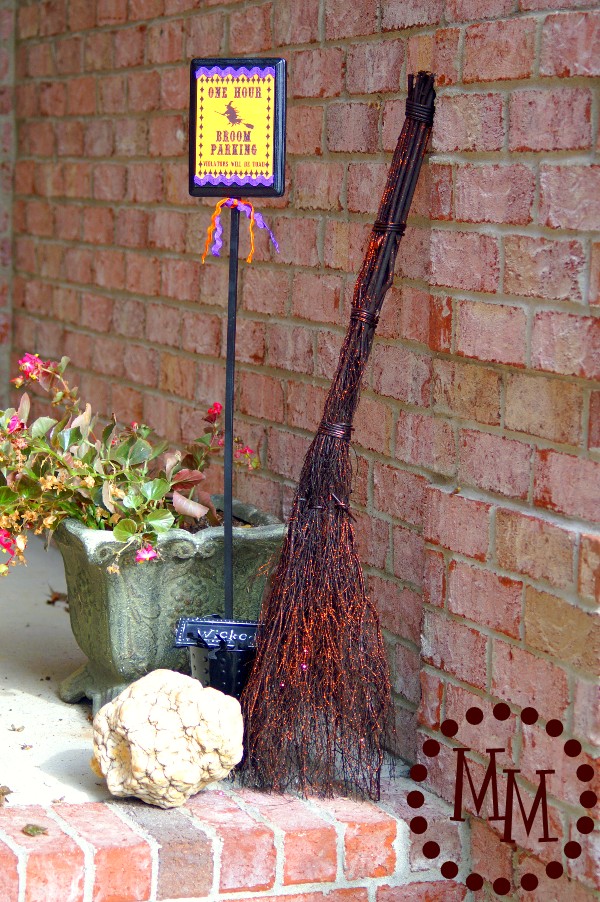
Add the broom I splurged for at Home Goods and the giant "brain" rock we've had for ages, and I've got the start of a fun little Halloween set up on my front porch!

The begonias aren't so spooky, but you can catch a glimpse of my spooky chic Halloween wreath on the door that I made last year.
We'll gather a few pumpkins from the patch in a week or so and the porch will be all decked out!
I link up to these fun parties.


I tried your etsy link but it is no longer there. Are you still selling your parking sign printable? Very interested. Thanks!
Unfortunately it was not my Etsy shop. 🙁 But you're in luck! The site that originally offered it is offering it as a free download! 🙂
http://www.thediaryofdaveswife.com/2012/09/12/its-back-broom-parking-free-printable/
Very fun project! Super tute on the silhouette stuff. I've not done that (cutting) yet!
gail
Love it! Please post this, and anything else you may have, in my link party at
http://diycraftstomake.blogspot.com/
Thanks,
Peggy
awesome project... are all your neighbors jealous of your crafty and creative entry? ( -:
Love, love, love the witches parking sign! That is great and so creative. I may have to snag the concept for something in my upcoming Christmas crafts. GREAT idea!
Oh, TOO CUTE! And it looks so professional!
I would love to have you drop by Happy Hour Projects and link up at Freestyle Friday - the linky is open all weekend!
Adrianne
http://www.happyhourprojects.com
Hi Michelle, this turned out absolutely DARLING!!! I LOVE the way you used the Broom Parking Printable. If you wouldn't mind, updating your link, I actually designed that printable last year, and at this time it is no longer offered for free. I have asked C.R.A.F.T. to remove the image everyone is using, as it is now available in my ETSY shop found here: http://www.etsy.com/listing/83257098/8x10-one-hour-broom-parking-printable
Thanks so much! ♥ DavesWife {Kristy}
This is so cute! I love the broom sign! Thanks for linking up this week!
These are just great! I want to try to put together both of these things. I just love homemade Halloween decorations:)
I need to get myself a silhouette! Thanks for the tutorial. I'm bookmarking it for a future project 🙂
LOVE! I want to make both of these!!! Great job Michele!
These are super cute Michele!! But the best part is you showing how to alter the images!! There aren't many tutorials out for that! Thanks!!
OK I really need to save up for a Silhoeutte. The design capabilities are just too much to resist.