
Hey there! I am Holly and I typically can be found hanging out on Main Street – 504 Main that is…and I also hang out at The DIY Club. BUT, today, I am beyond excited to be visiting The Scrap Shoppe and helping Michele take a baby break! I do all kinds of crafting and DIYing over there (I also cook, bake, and chat about other fun stuff).
I have been fascinated with discovering new techniques and mediums sine I attended The Craft and Hobby Association Trade Show in January. So, I thought I would show you a little set of canvases I made using some of these cool products.
SUPPLIES
(I have named the particular brands/products I used, but you can use this process on many different designs – be creative!)
-
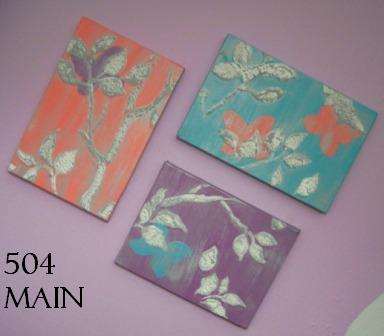
3 Canvases, different sizes. The sizes I used are: 2-9″x6″ and 1-8″x6″
-
3 colors DecoArt Americana Acrylic Paint: Bahama Blue; Melon; Wild Orchid (any colors will do…just select 3 colors that compliment each other)
-
Snow-Tex (by DecoArt)
-
Cutting Edge Stencil, Style: Spring Songbird (any branch like stencil will do, this one I had on hand and love and it is big, so I only needed to lay it down once and was done)
-
Elegant Finishes; Shimmering Silver DecoArt
-
Glazing Medium, DecoArt
-
Butterfly stencil or shape (you can find or create a shape, I traced a butterfly from a shape I had)
-
Paper plate
-
Paint brushes
-
Old credit or store card (or palette knife)
DIY IT!
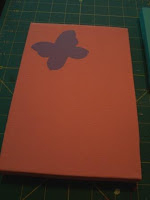
1. Layout canvases in the look you want and determine which color will go where; then PAINT each canvas the correct color (fronts and sides).
2. Once dry, trace butterfly (a bird would be super cute too) in desired position.
- I used an asymmetrical style, so none of my butterflies are centered, etc.
- When the canvases are all laying their in their desired layout it makes it easy to determine placement.
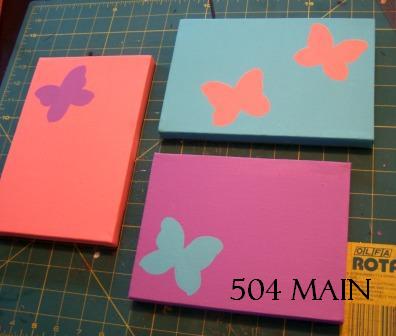
3. Match up butterfly colors to canvas colors – one color canvas and a different color butterfly (of butterflies).
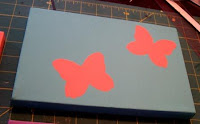
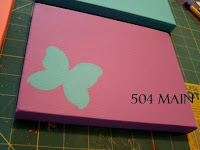
4. Paint butterflies and let dry.
NOTE: I almost glazed the canvas here with white acrylic paint/glazing medium mixture. Which would look awesome too!
For a different look you could do this and skip Step 10.
5. KEEP the canvases in their preferred layout/hanging sequence. Place stencil on the canvases and tape or secure. I used painters tape and loosely taped the stencil down to the table.
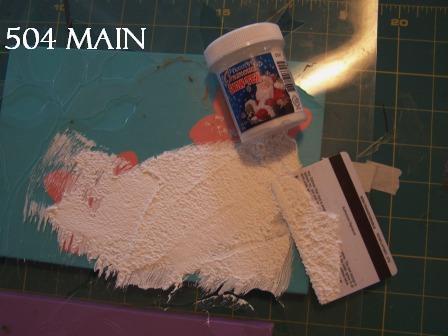
6. Stir up the SnowTex and grab the old credit/store card. I use a palette knife to scoop out the SnowTex onto my card.
7. Holding the stencil in place (but don’t push down too hard – the canvas will depress and paint will get under the stencil…I may have done that on occasion – just sayin’).
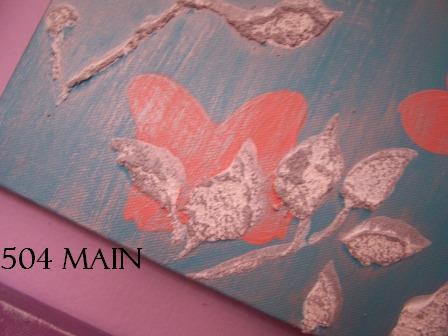
- Use a swiping motion to drag the Snow-Tex across the stencil filling in the open areas on the canvas. You may need to reload the Snow-Tex to complete the job.
- Just go lightly and smoothly across the stencil.
- This can be a little messy, but let me tell you I am a messy crafter and I am unscathed.
- The snow-Tex gives the coolest texture – LOVE!
8. When finished remove stencil and clean immediately with warm water and soap.
Let the SnowTex dry…depending on how thick you got it (and where you live), it may take a while, a few hours to overnight.
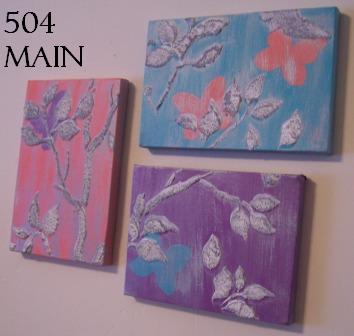
9. Once dry, I actually liked the clean look of the trio at this point. It was pretty and simple and such happy colors…but I can never leave anything alone….
10. Using Elegant Finish in Shimmering Silver, mixed with Glazing Medium (1:1), I brushed on the glaze all over the canvases and branches. Then wiped off using baby wipes (a damp rag or towel will do). I went back and re-applied the glaze in a few other areas as well – wipe off and let dry.
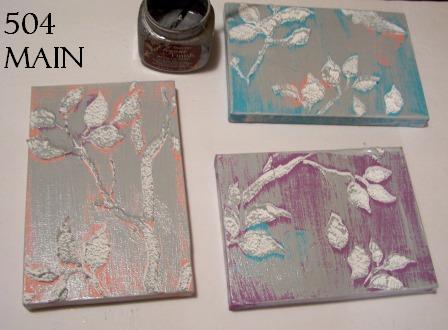
So I love the glaze on this project, but you can totally achieve a different look without it at all. This is simple DIY art that has great impact because of the layers and textures. My daughter love sit and well, that is good, because that is where it’s going…her room!


Tammy
Tuesday 26th of April 2011
Just gorgeous. I love sitting down and working with different mediums. It can be so relaxing.
gail
Monday 25th of April 2011
Holly!!! so awesome. WHERE do you find the time?really pretty!gail
Kelley
Monday 25th of April 2011
AWESOME! I really love what you have done!
Beverly @ FlamingoToes.com
Monday 25th of April 2011
Wow Holly!! These are amazing!! The canvases are just beautiful and I love all the techniques you used. Great job!!
Amy @ Positively Splendid
Monday 25th of April 2011
What a fab project idea! Love that texture!