Hello Scrap Shoppe Readers!
My name is Beverly and I blog at Flamingo Toes.
I'm so excited to be visiting today and helping Michele out during her Baby Vacation!
I love doing knockoffs - and I figured since we're celebrating Michele's new little guy, it would be fun to do a knockoff for a baby!
I went searching at that great source of inspiration - Pottery Barn Kids.
I found the cutest little Critter Nursery Blankets and that was it.
I just had to make one!
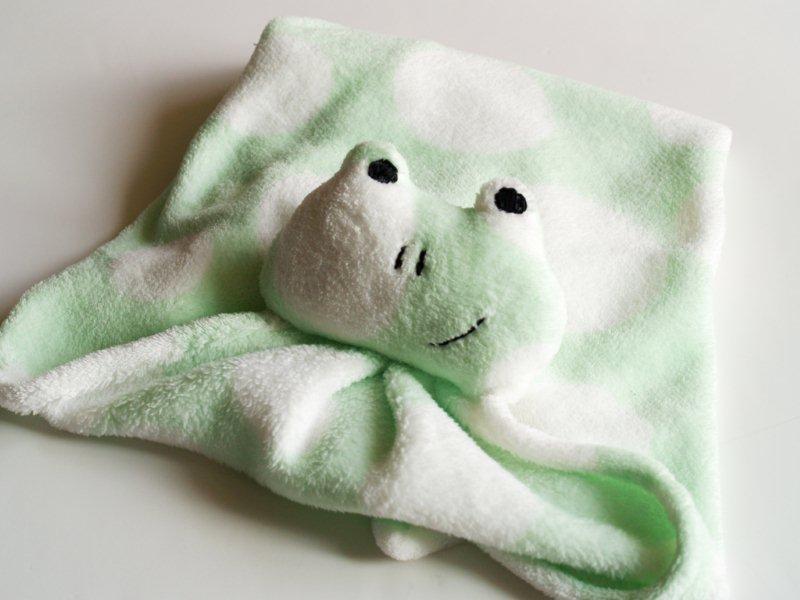
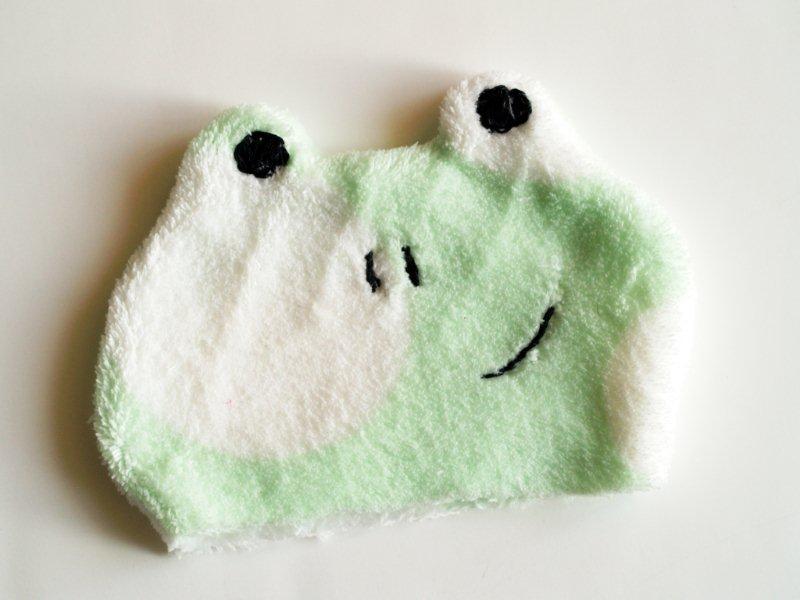
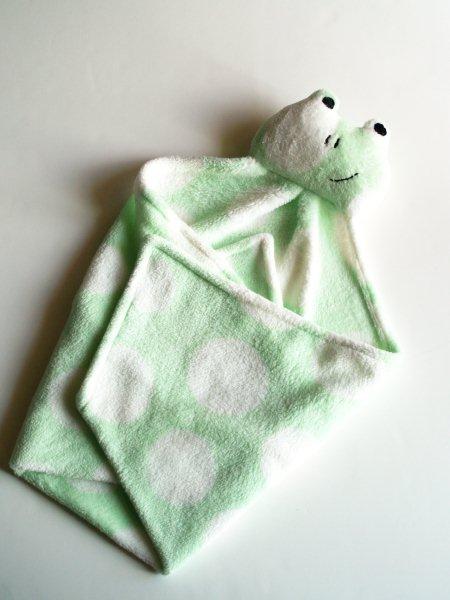
Here's my version of their little frog blanket:
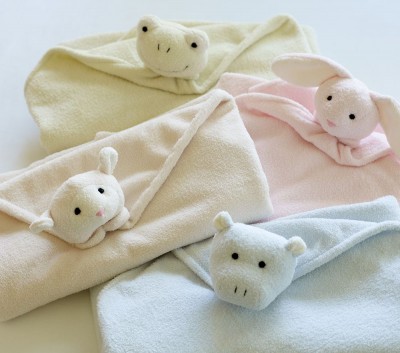
And here's the PBK version:
See the little frog in the back? 🙂
I made mine a little larger - and a little brighter in color. I wanted a fun green color and I spotted this fuzzy fleece at Joann's. Perfect!!
Here's what you'll need to make your own.
• ⅔ yard of 60" fleece
• embroidery floss
• fiberfill
• Frog Pattern (Click to download)
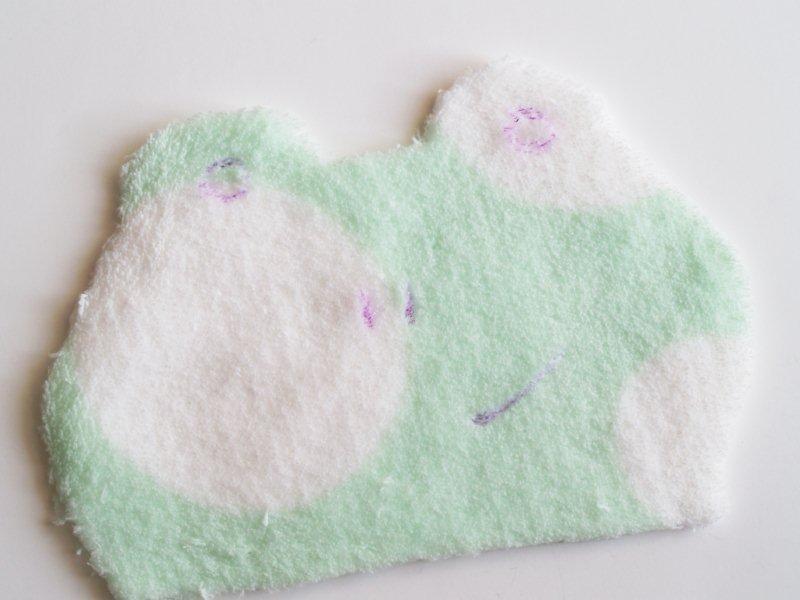
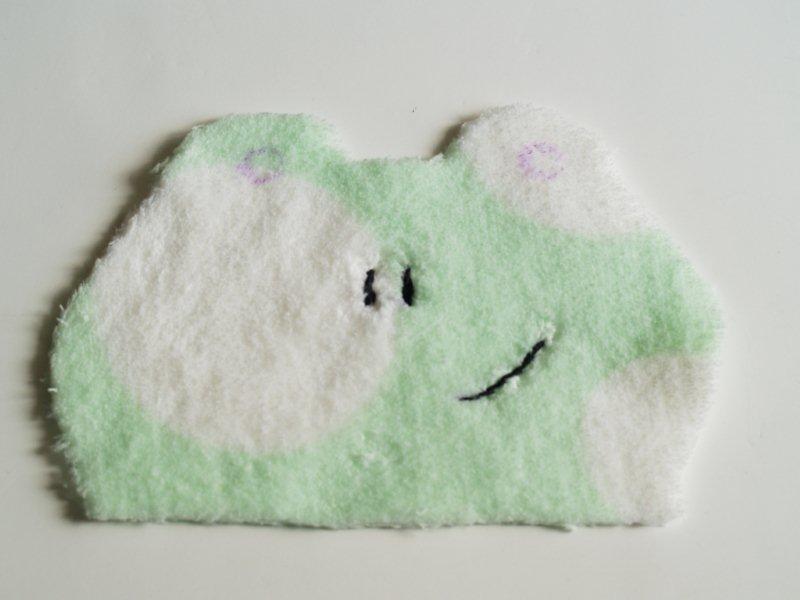
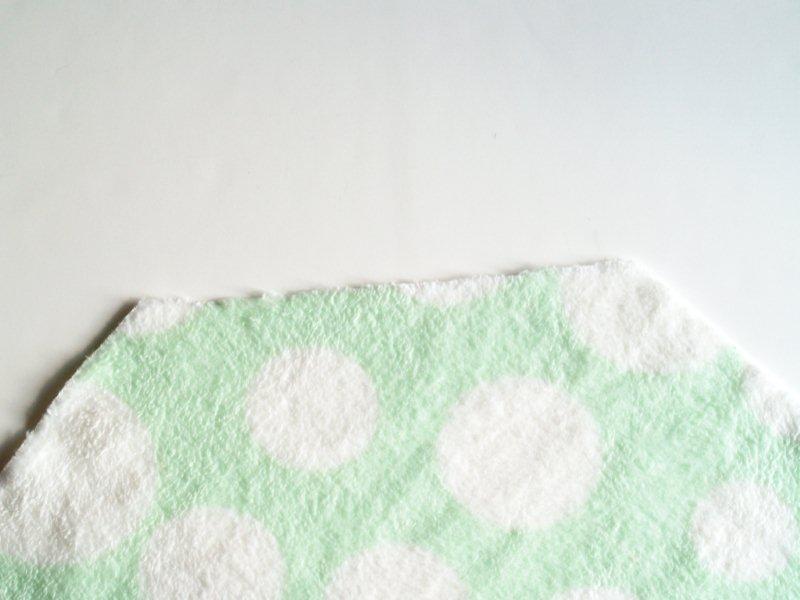
Cut your fleece into a 24" square. Cut out your frog pattern. You'll need to cut two - a front and back.
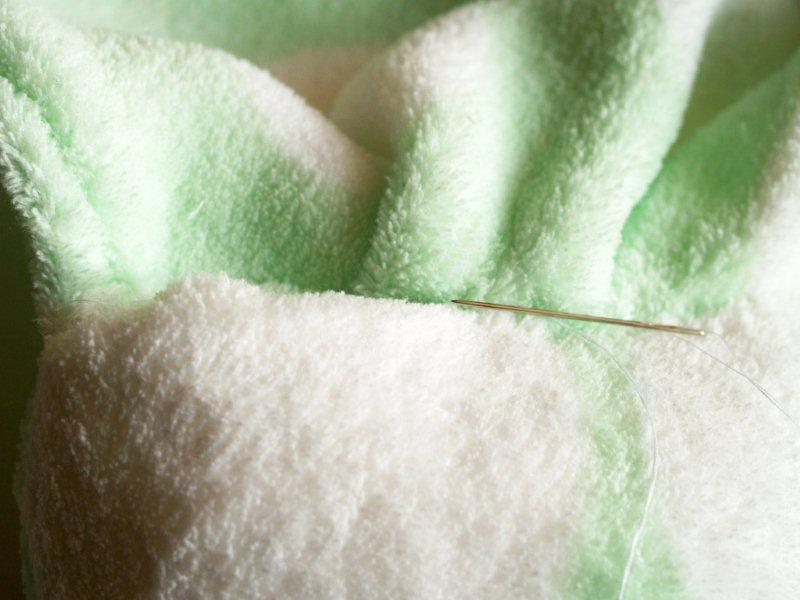
Trace the face markings onto the fleece with a disappearing ink pen.
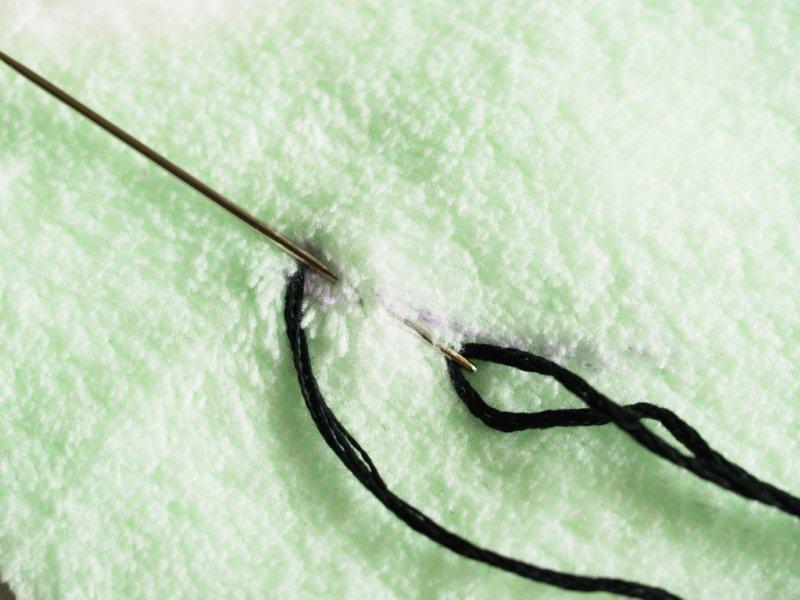
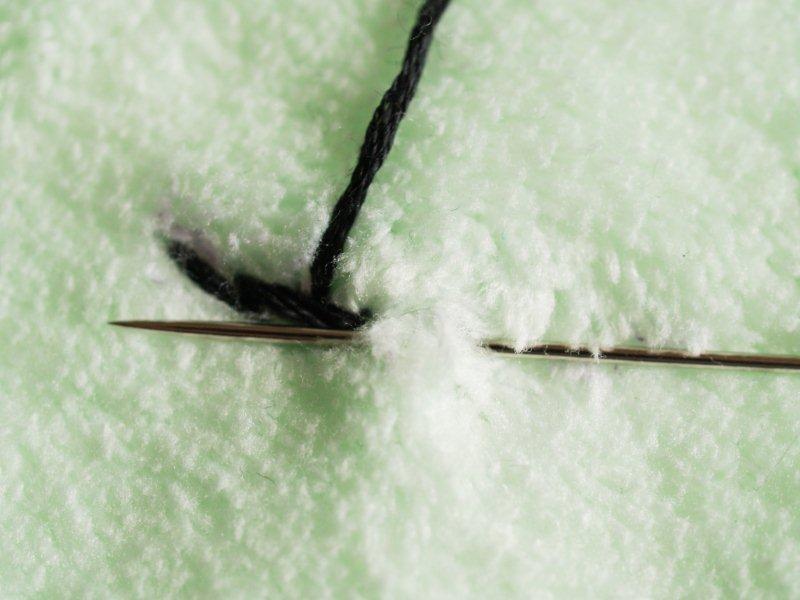
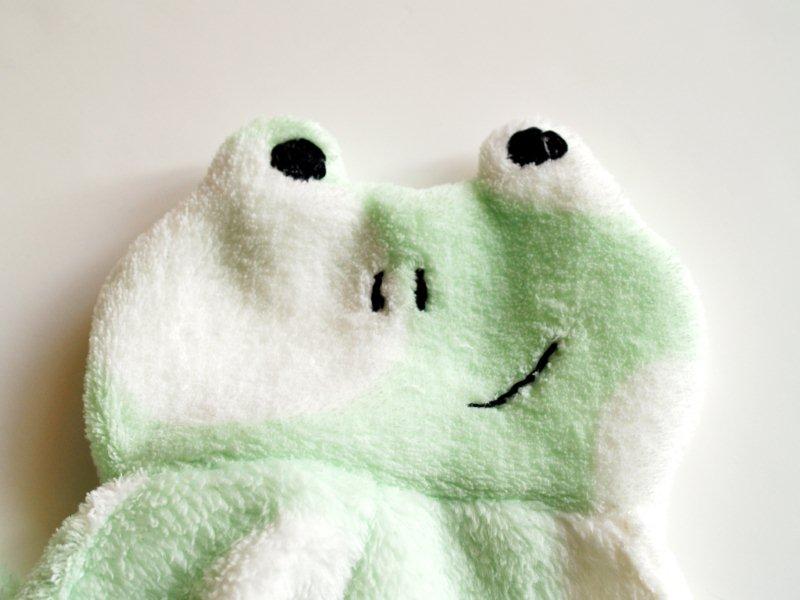
Begin embroidering your froggy's mouth.
Bring the floss up at the left side of the mouth.
Put the needle back through the fabric about ¼" along the line. Bring the needle back up between these two points.
Continue this same stitch, putting the needle through about ¼" down the line, the back up at the point the previous stitch ends.
Repeat all the way down the line until the mouth is finished.
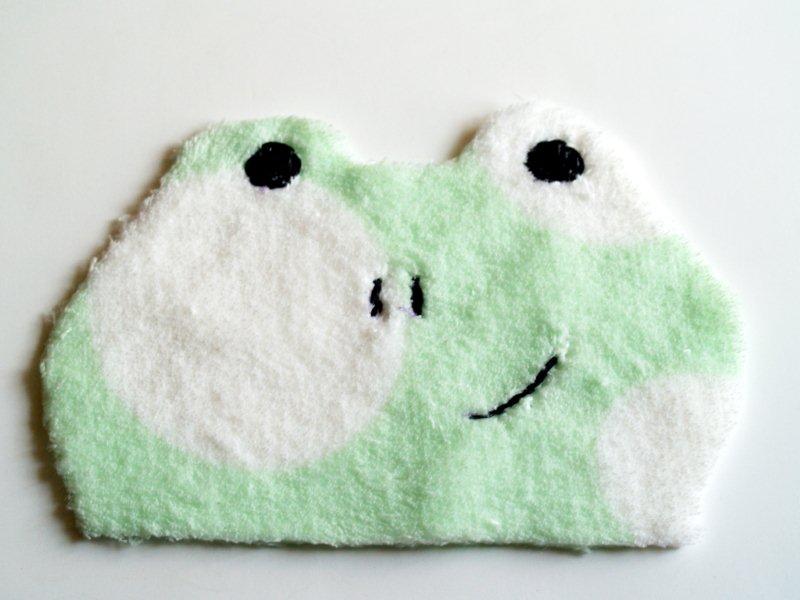
Sew on the nose next, using small stitches to make it as thick or thin as you want.
For the eyes, do the previous stitch in a circle, outlining where the eye will be. Then fill in the center with straight stitches starting at one side and crossing to the other until the whole eye is filled.
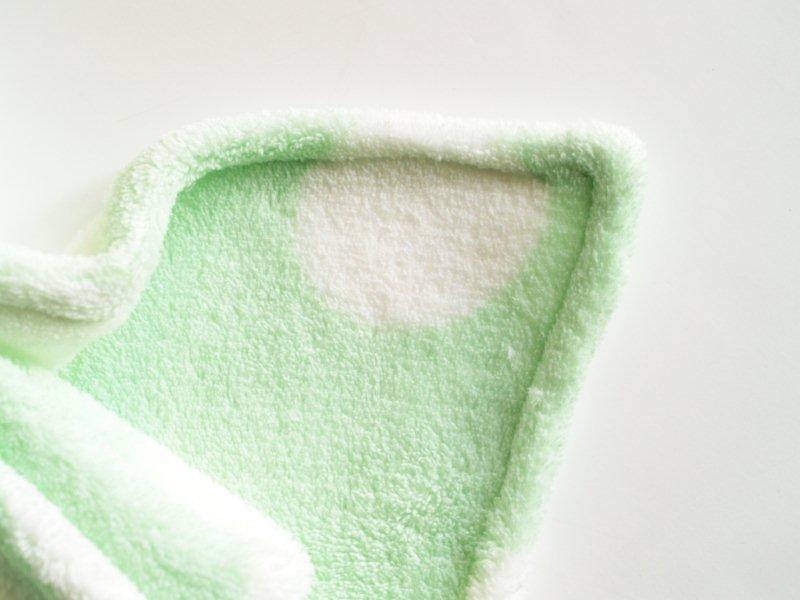
Place the other head piece over this one, right sides together, and sew around the edges with a ¼" seam, leaving the bottom open.
Turn right side out.
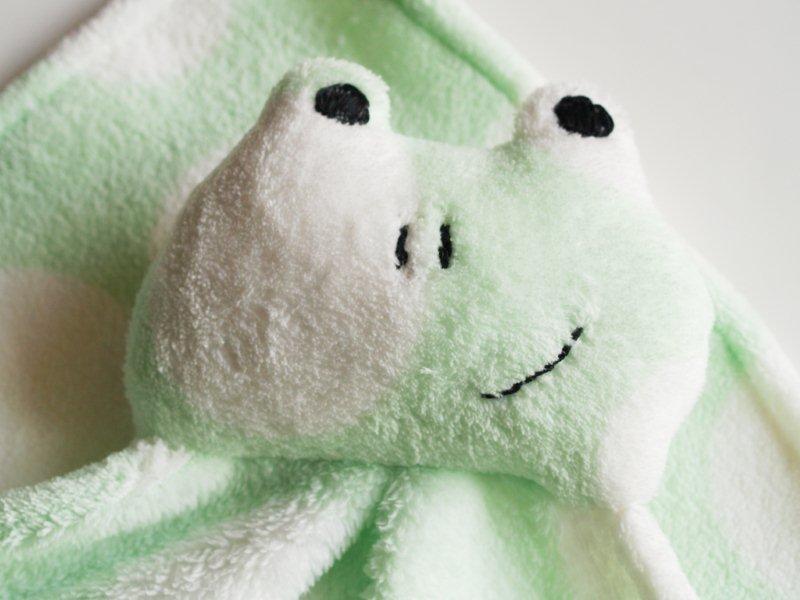
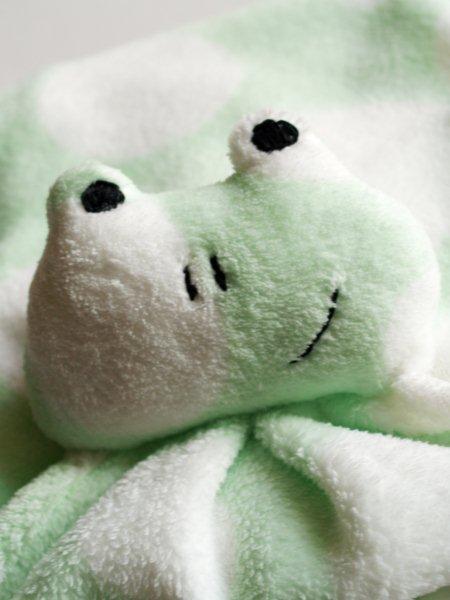
I love our smirky little frog so far. 😉
Measure down about 8" from one corner of the fleece square.
Cut the corner off.
Hem the remaining sides of the square by turning the edges over ½", then ½" again and stitching close to the edge.
Make sure you leave the cut corner unsewn.
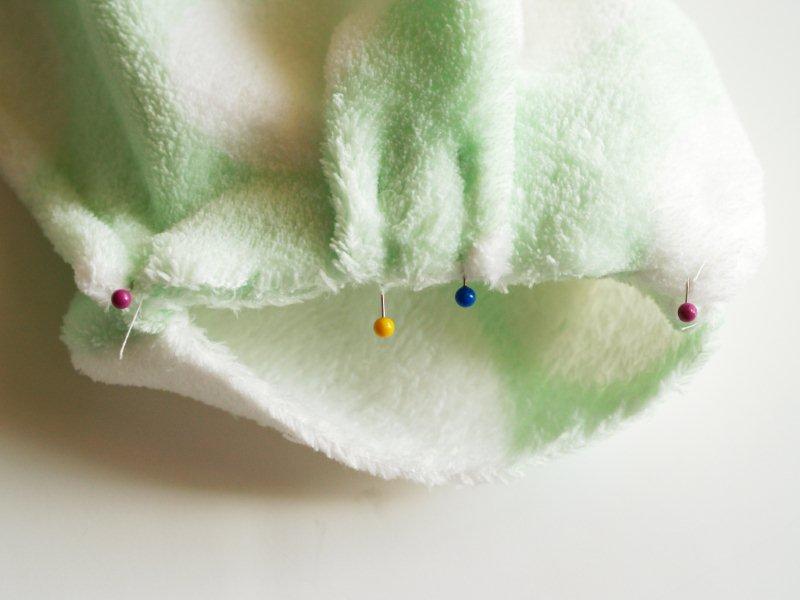
Now we're going to pin the head to the cut corner of the square.
Match up the bottom edges of the head at the seams with each end of the cut corner.
There will be extra fabric in the middle.
Bring the cut corner piece together in the center so that it is the length of the head piece.
Fold flat the extra fabric to make a pleat. Pin this to the face side of the head.
Sew this seam, making sure not to catch the back of the head while you're sewing.
Now the front of the head will be sewn to the blanket but the back will be open still.
Stuff the head (lightly - don't go crazy here).
Turn the back of the head under about ¼" and hand sew it down to the back side of the blanket square.
That's all there is to it!!
Such an easy way to make a cute Critter Blanket - perfect for new little ones, baby showers, and gifts!
Not bad when you consider Pottery Barn's version is $29!
I'd love for you to stop by Flamingo Toes and say "Hi!"
You can check out my other projects here- You'll find a few other knockoff's there. 🙂
Thanks so much for having me over, Michele!
Enjoy your time with your sweet little guy!
- - - - - - - - - - - - - - - - - - - - - - - - - - - - - - - - -
Bev is such a sweetheart, as many of you already know.
She was so generous as to send this adorable blanket to my little guy!
And, as you can see, he LOVES it!
Its so soft and cuddly. Just like my little guy!
Thank you so much, Bev!!!


Adorable, Bev! Ill be making this for the next baby shower for sure!
Absolutely darling, Bev!! I want to make one now. What a perfect baby gift!
Is there anything she doesn't do....exceptionally! I feel a trip the fabric store coming on. I'm feeling very inspired, and my sister-in-law just had a baby girl on Mother's Day!
These are just adorable!
Michele thank you so much for letting me guest post!! It is always such fun to come hang out. I can't wait for when we can do it in real life. 😉
Caleb looks so darling on the blanket - I'm so glad he likes it!!! 🙂
Such a cute knock off and a great baby shower gift! Nice job bev! I'm pinning this tutorial for sure 🙂
Michelle, your sweet boy is ADORABLE!! Congratulations again 🙂
Kara @ http://www.mineforthemaking.com
This little guy is too cute for words! I love his half smirk...so sweet. ...and Caleb looks all snuggly and cozy. Great work, Bev!
This looks like so much fun! This is going to be the perfect gift for some baby showers I have coming up. Have to try this one today. Thanks for sharing 🙂
How absolutely adorable are these! I love the little crooked smile. And clearly it is well loved by our little model!