
Canvas-Wrapped Christmas Gift Decor
Create simple but elegant Christmas decorations using unlikely elements like these canvas-wrapped Christmas gift decor.

If you're looking for some cute, simple, last minute decor for that certain shelf or mantel, I can help you out!
Today I want to share a super simple Christmas decor idea using mounted canvas to make faux Christmas gifts.
This canvas-wrapped Christmas gift decor is a beautiful addition to your Christmas decorations.

Supplies:
Assorted canvases
12x12 Scrapbook paper (the thicker the better)
Staple gun (affiliate link)
Hot glue gun
Ribbon
Holiday picks and/or ornaments
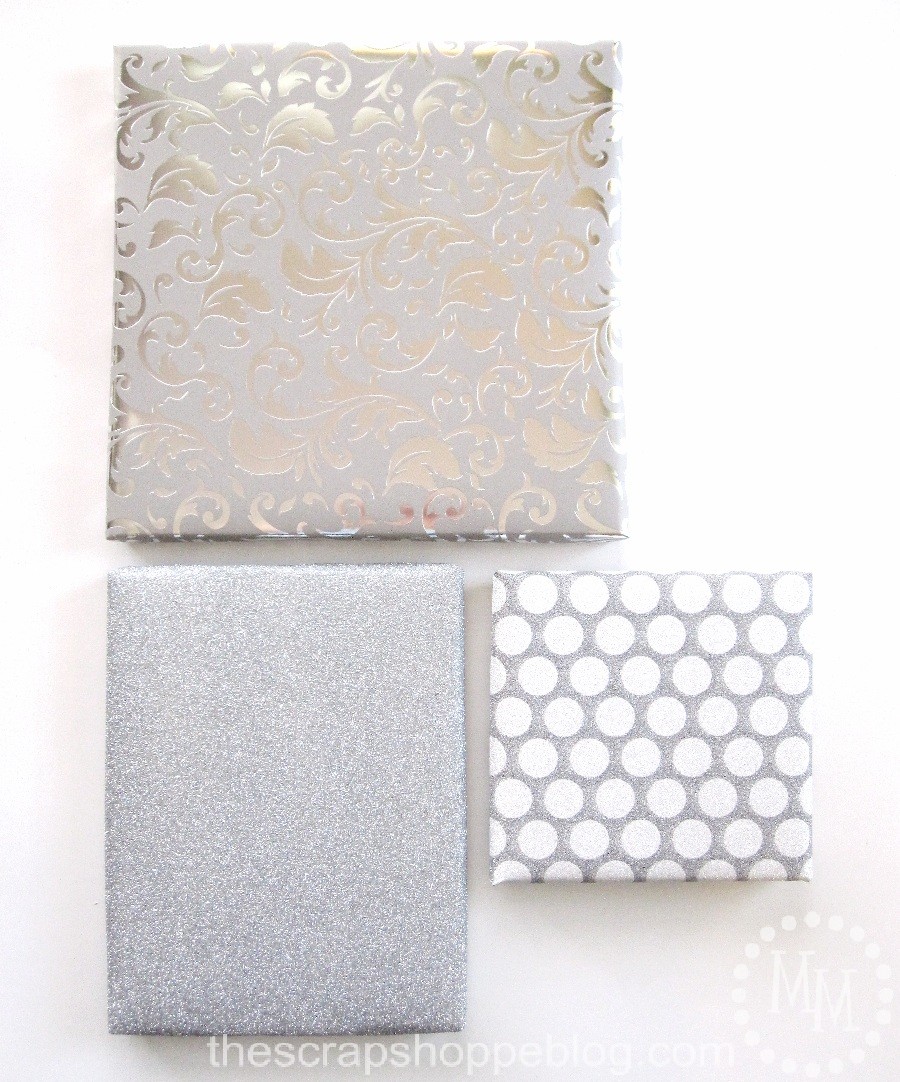
Select the mounted canvas sizes you want to use for the project.
Staggering their sizes will make them more visually appealing.
I used 10x10, 7x9, and 6x6 inch canvases.
Also select your media for "wrapping" the canvas.
You can use actual gift wrap, scrapbook paper, or fabric.
I went with scrapbook paper because it was easy to find three pieces of 12x12 paper that would look good together.

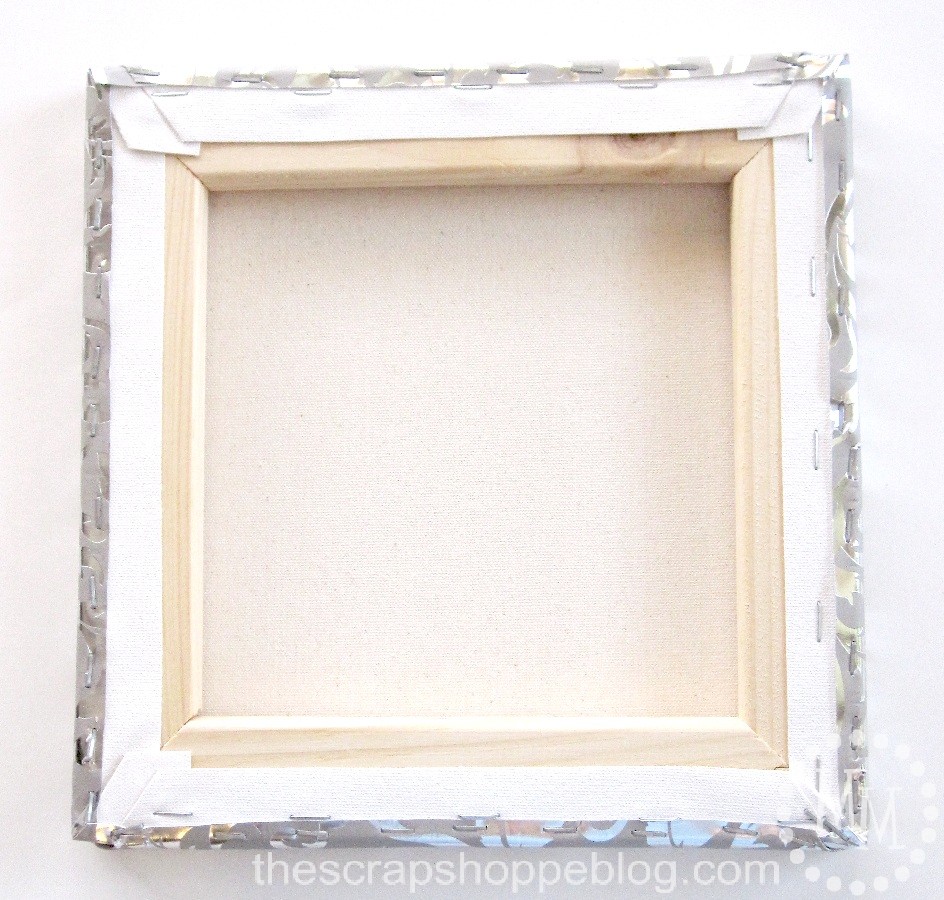
Fold the paper over the back of the canvas and attach is using a staple gun.
Do this for two sides of the canvas.
(The staple gun will work fine with most heavier scrapbook papers and fabric. For gift wrap you may want to actually wrap the entire canvas like an actual gift since the paper is so thin.)
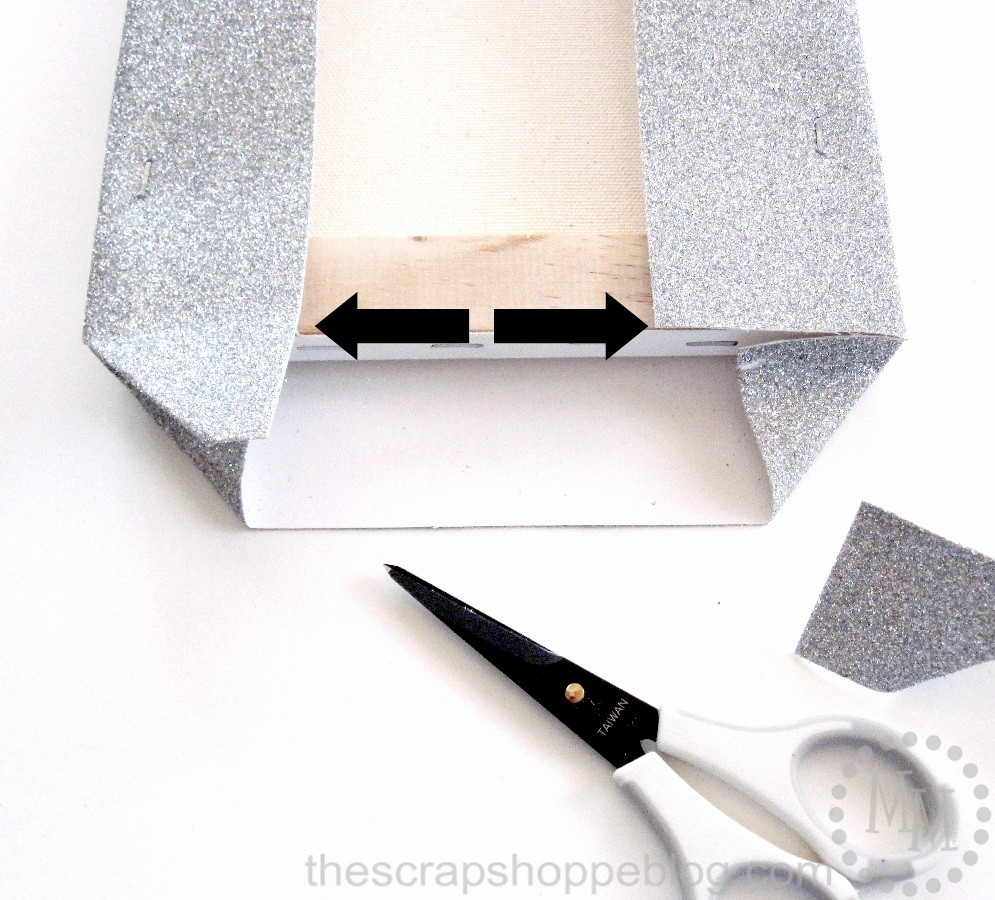
For the other two ends of the canvas, fold the paper so it looks like you are wrapping the ends of a present.
Trim off the top flaps (see the arrows) so they won't add bulk to the wrapping.
Fold the flap over and staple it down.
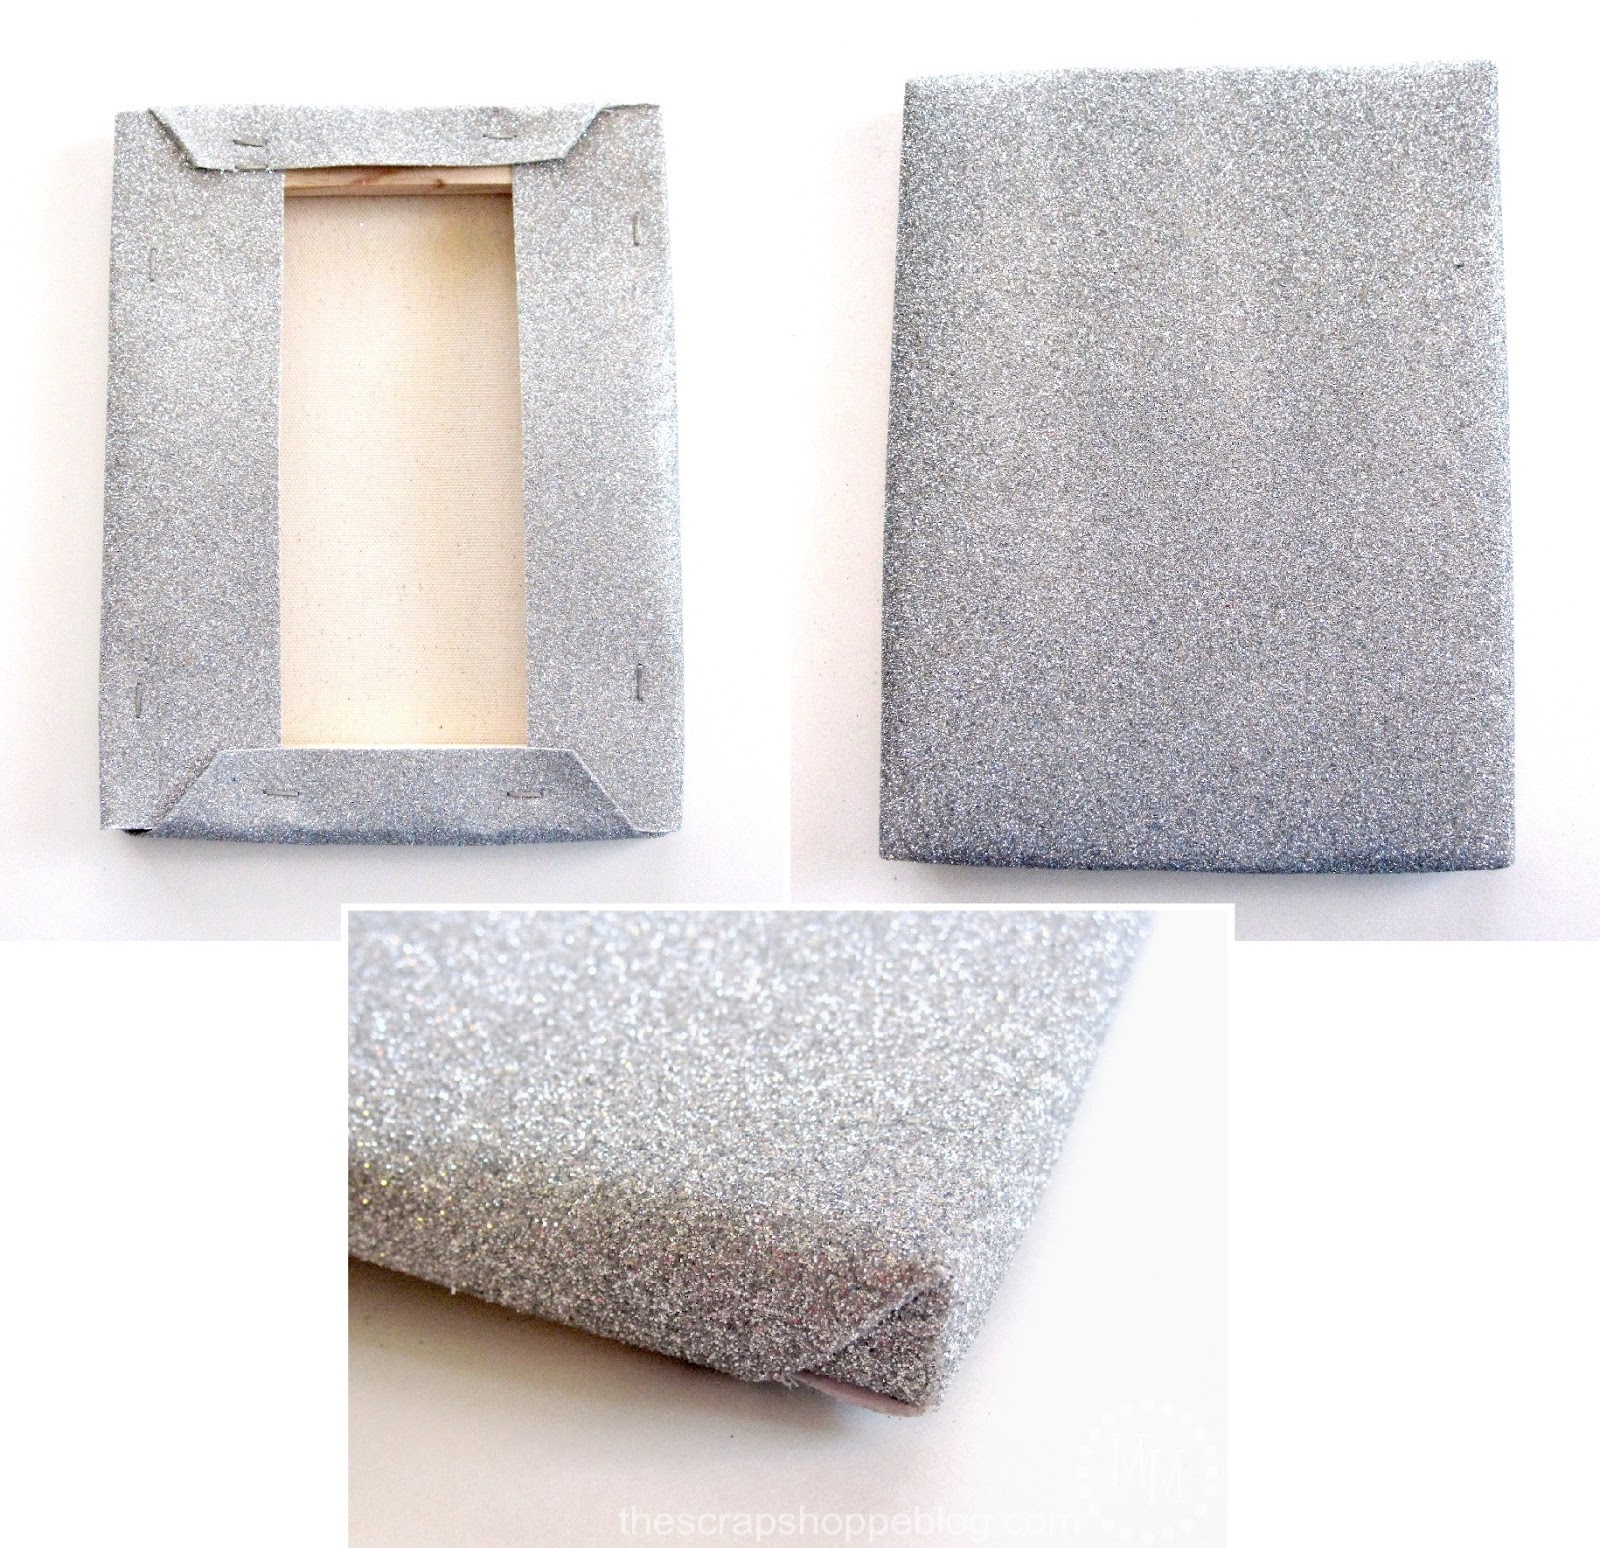
Now the entire front and sides of the canvas are covered.
If you are wrapping with scrapbook paper like I am, you do not want to use a piece of mounted canvas larger than 10x10.
The 12x12 scrapbook paper just folds over to the back of the canvas.
Be sure before you start stapling that you have perfectly centered the canvas on the paper.
You can certainly use larger canvas if you are using gift wrap or fabric.
Continue on wrapping all of the canvases.

Once wrapped, its time to decorated!
Wrap the gifts with decorative Christmas ribbon.

Add bows or decorative Christmas picks to the packages.
I attached the picks with a hot glue gun.
Find a shelf, cabinet top, or a place on your mantel to stagger your gifts together.
And, viola, you have instant Christmas decor!

>> See where I party! <<
The colors are so pretty! I think that little woven one is my favorite. I’m going to wrap some of my presents that way this year. I love the silver and red colors you used. Thanks for sharing, It’s been pinned. I love the idea and will pin it for future ref. I have “used” canvases that I can definitely recycle for this project. Have a very Merry Christmas.
The colors are so pretty. I think that a little woven one is my favorite. I really like this idea so cute. Pinned it so I could use it next year. Thanks for the inspiration, I really love this. Your look gorgeous thinking I should do them next year. What a wonderful idea, I love the silver and red colors you used. Thanks for sharing, It’s been pinned. Have a very Merry Christmas.
The colors are so pretty! I think that a little woven one is my favorite. Every year I wrap some empty boxes to display under the tree, and every year one of the little elves can”t stop themselves from opening the packages. turned out beautifully, so I’m pinning it for next year.
very clever, and oh so beautiful Michele! You did such a pretty job decorating your faux gifts!
gail
These are very cute! I love the idea and will pin it for future ref. I have "used" canvases that I can definitely recycle for this project. 🙂
I love this idea. Turned out beautifully, so I'm pinning it for next year! 🙂
such a cute idea Michele!
Thanks for linking up! I featured your post in my wrap up. http://tidymom.net/2012/handmade-christmas-ideas/
Have a very Merry Christmas!
Very cute. My aunts used to do this for all the photos and artwork on their walls for Christmas. Your are much more stylish!
This is so adorably cute and of course I love all of the bling!
Every year I wrap some empty boxes to display under the tree, and every year one of the little elves can"t stop themselves from opening the packages.Even though they have been told they are empty boxes.They can't believe that anyone would wrap empty boxes!( My husband can"t believe it either. This is a much better idea. Thanks for sharing it!
Super cute! I'll be featuring you tomorrow on my blog. Thank you so much for visiting my party and Merry Christmas!
Gorgeous! I would love you to come join my Pin Me Linky Party that starts Friday morning at 8am CST.
What a wonderful, creative, and glittery idea for holiday decor. Love it, Michele!
Michele these are such a great idea! Would look great above my kitchen cabinets among the greens! Thanks for the inspiration!
Holiday Hugs,
Pendra
These are stunning! What a wonderful idea! I love the silver and red colors you used. Thanks for sharing! It's been pinned. Have a very Merry Christmas!
I love these Michele!! The colors are so pretty! I think that little woven one is my favorite - I'm going to wrap some of my presents that way this year.
These are beautiful!
I really love this! Your look gorgeous - thinking I should do them next year.
I really like this idea - so cute. Pinned it so I could use next year...Thanks for the inspiration....
Cute idea...especially for a skinny spot where a box won't fit!