
DIY Scalloped Mirror
This DIY Scalloped Mirror is an easy way to create custom home decor in minutes!
 I am always on the hunt for new home decor ideas, especially ones I can create myself for a much lower cost. Plus there's the whole needing to match my current decor color scheme thing. Sometimes making something yourself is just the best option!
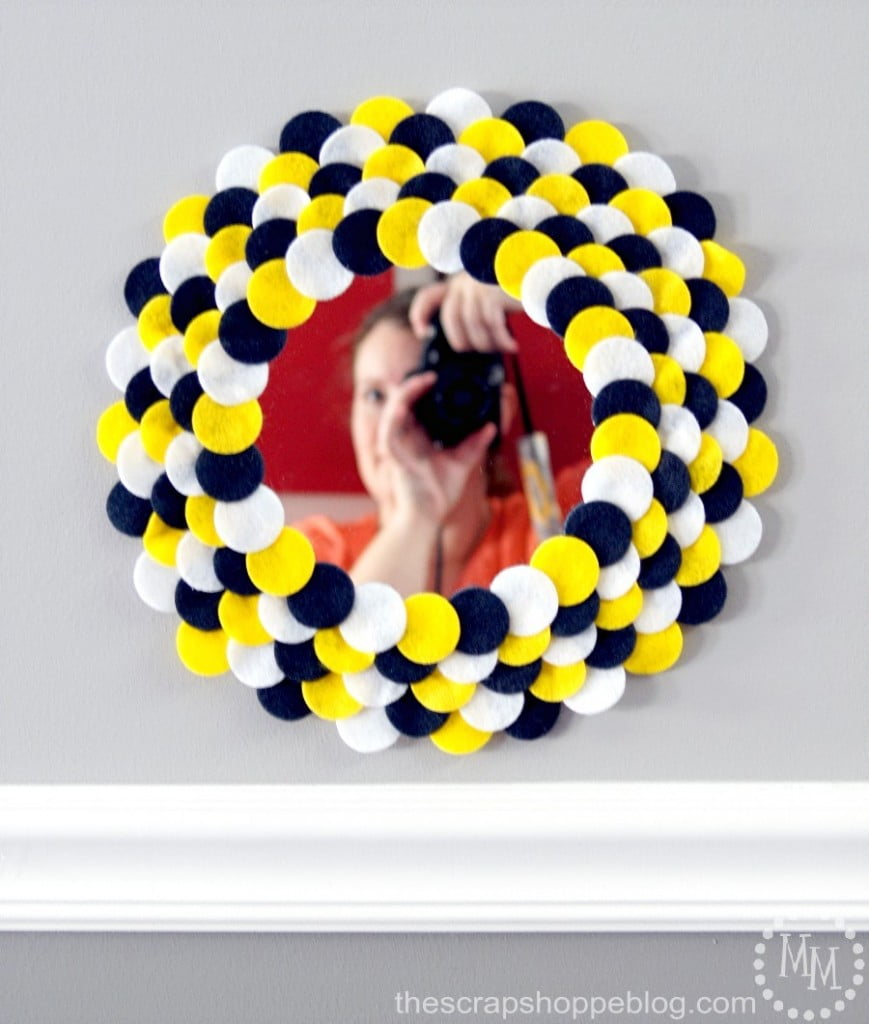
I've seen a lot of decorative mirrors with scalloped frames at the home decor stores. The scallops are usually made with various textures, but I have never found one in the perfect size or color to suit me. So I made one!
 Making this decorative mirror couldn't be easier and you only need a handful of items to pull it off.
Felt circles are from The Ribbon Retreat.
Supplies:
Felt circles (1 ¼")
Mirror (7")
E-6000
Fabri-Fix
12x12 sheet of cardboard
I used dark navy, yellow, and white circles. It took approximately 50 of each color to complete the frame for a 7" mirror. You can find a variety of mirrors at your local craft store.
 1. Use the E-6000 to glue the mirror to the center of the cardboard. Use Fabri-Fix to glue the felt circles to the edge of the mirror. Overlap the circles on the mirror and on each other. Only apply glue to the part of the felt going on the mirror.
2. Create another layer of felt behind the first. Only apply glue to the part of felt being tucked under the first layer of felt. This way the rest of the felt will stay loose so you can keep tucking in new layers as you build the frame. Try to keep colors from matching up from row to row.
3. Continue adding layers to the frame until you either run out of felt or are satisfied with the width.
4. Using "not your best" scissors (don't dull those fabric or paper scissors!), trim the excess cardboard from the back of the mirror.
 Flip the frame back to the front and make sure none of the cardboard is peeking through from the back. If so, trim it off.
Allow plenty of dry time before hanging - at least 24 hours.
 I used a couple of 3M Velcro Strips to hang my new decorative mirror in just the right place in my entryway! It's so lightweight that I have zero concern of it falling down.
For ~$20 and 30 minutes time, I have a brand spanking new custom mirror for my living room!


Love this simple yet beautiful DIY 🙂
Praveena
https://craftornothing.wordpress.com
That is so cool! I love it!
I love this and the colors you used!
Such a cute idea! & love the color combo.Thanks for sharing at the Inspiration Spotlight party. Pinned & shared. Hope to see you again soon.
I love this!! Amazing color combo! Would love to see you at my craft party which is new Thursdays at 7pm EST. Have a great rest of the week!
Lovely craft, Michele and so simple to make as well. I love that this is customizable--from shapes to colors. Thanks so much for sharing this on #shinebloghop this week 🙂
How cool! We have a plain Ikea mirror and I'm sure my girls would love to help me to do something similar.
I would love to invite you to share this at our new Sweet Inspiration party, which is live every Friday http://sweethings.net/sweet-inspiration-link-party1/.
Have a wonderful week!
Love this, thanks for sharing on craft schooling Sunday, and would appreciate your adding my party to your list at the bottom of the post, and helping promote my blog, just a little friendly exchange if you would, thanks!