
Fun & Funky Stenciled Pillow
This project is part of a sponsored campaign with I Love to Create and Tulip. All opinions in this post are my own.

Do you ever feel the need to change up your decor or add something that will just make piece of furniture really pop? Then you need to check out the new Tulip For Your Home product line! Tulip has created products perfectly paired for one another for you to give your decor a fresh update including pillow forms in many sizes, various stencils, and fabric paint in contemporary colors.
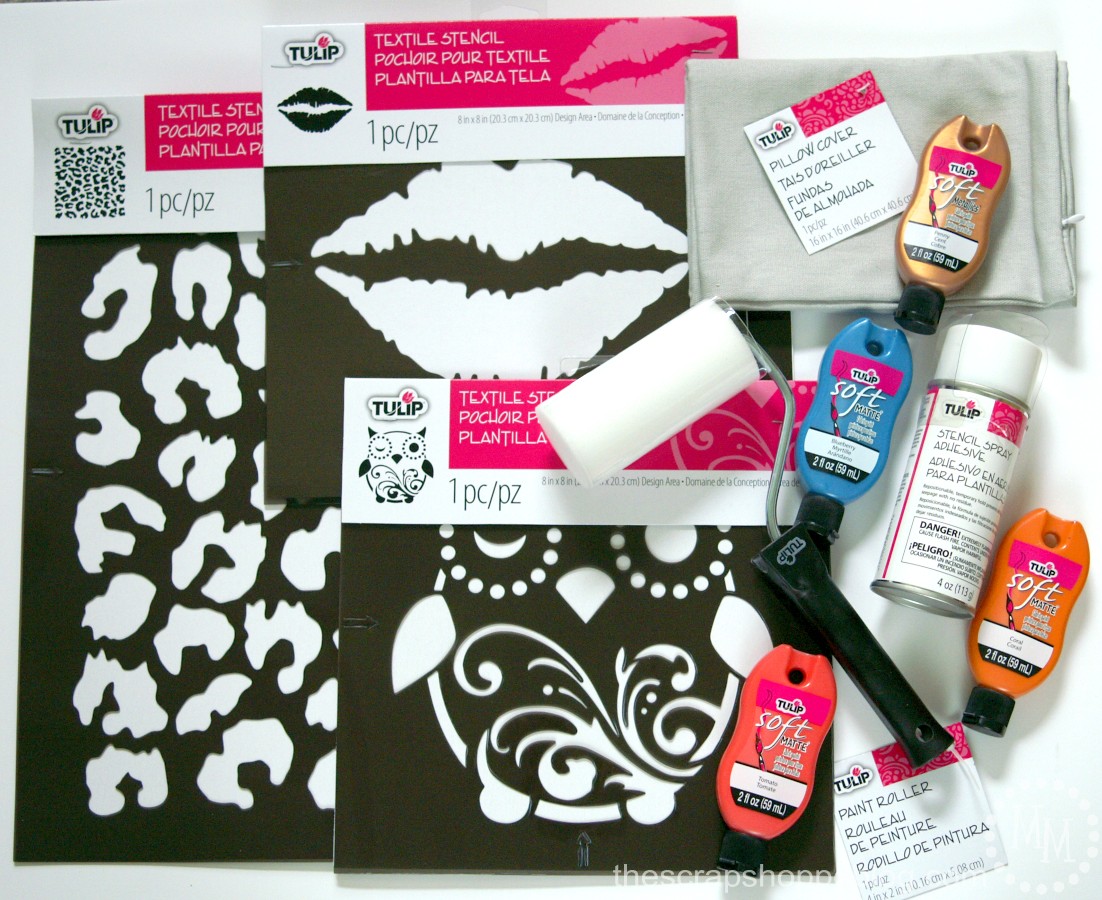
The products I was sent to work with included a 14"x14" leopard print stencil along with a blank pillow form of the same size, 8" lips stencil, 8" owl stencil, paint colors including Penny Metallic, Blueberry, Coral, and Tomato, stencil adhesive spray, and a paint roller.
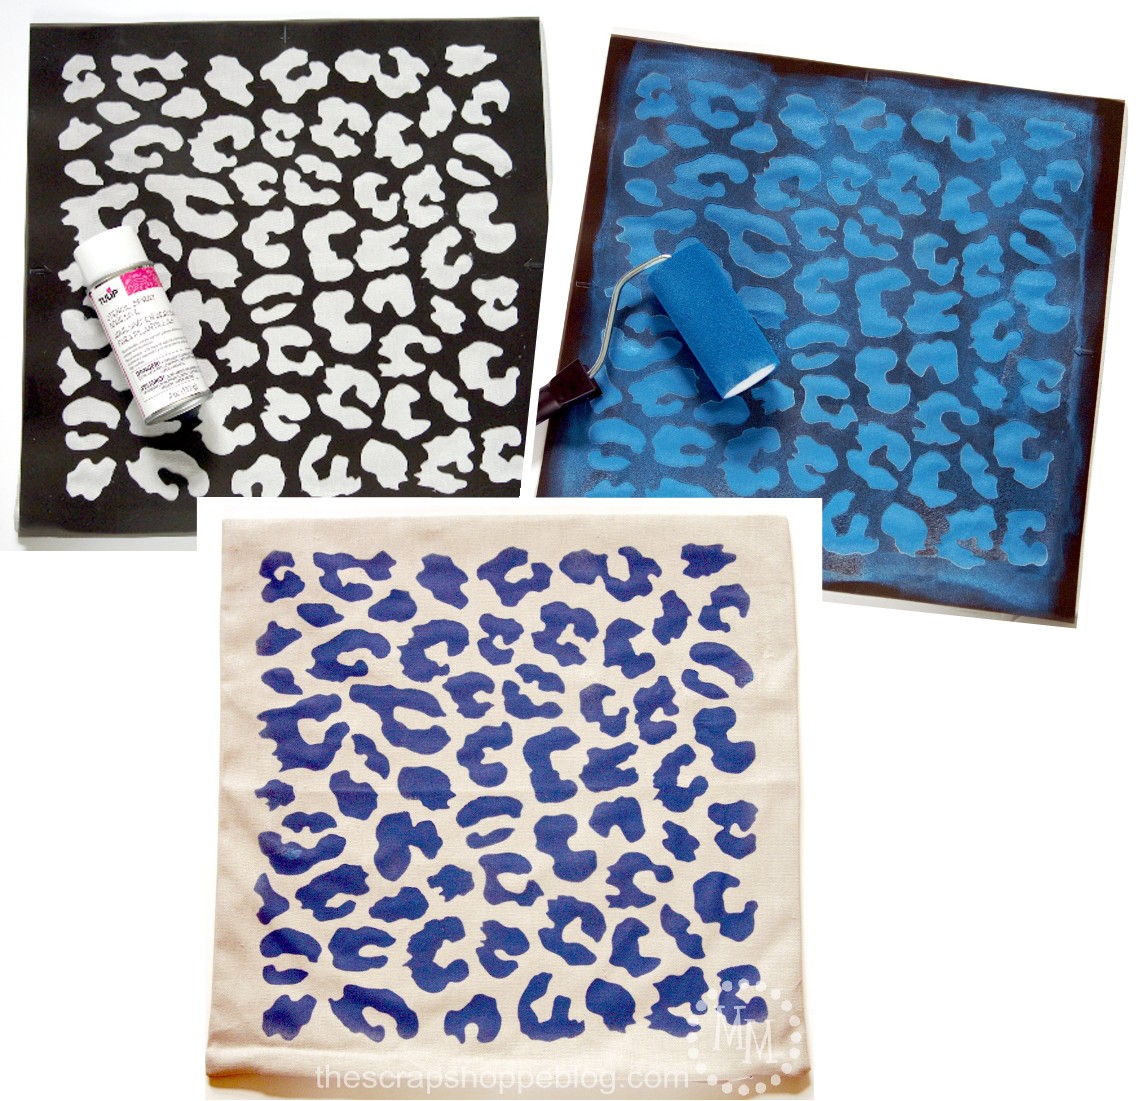
The first thing I did was iron the pillow form. Once I had a smooth working surface it was time to start stenciling! I began with the 14" leopard stencil. Apply the stencil adhesive by spraying a light coat on the matte side of the stencil. Allow a minute or two for the adhesive to become tacky. Lay the stencil on the pillow form and press down firmly.
When stenciling, often times less is more. Do not over saturate the paint roller. You can always go back and add another coat! The paint does dry relatively quickly. Using too much paint the first time risks the paint seeping under the stencil. For the leopard stencil I used the Blueberry fabric paint.
Allow the paint a few minutes to dry then slowly lift the stencil off of pillow form.
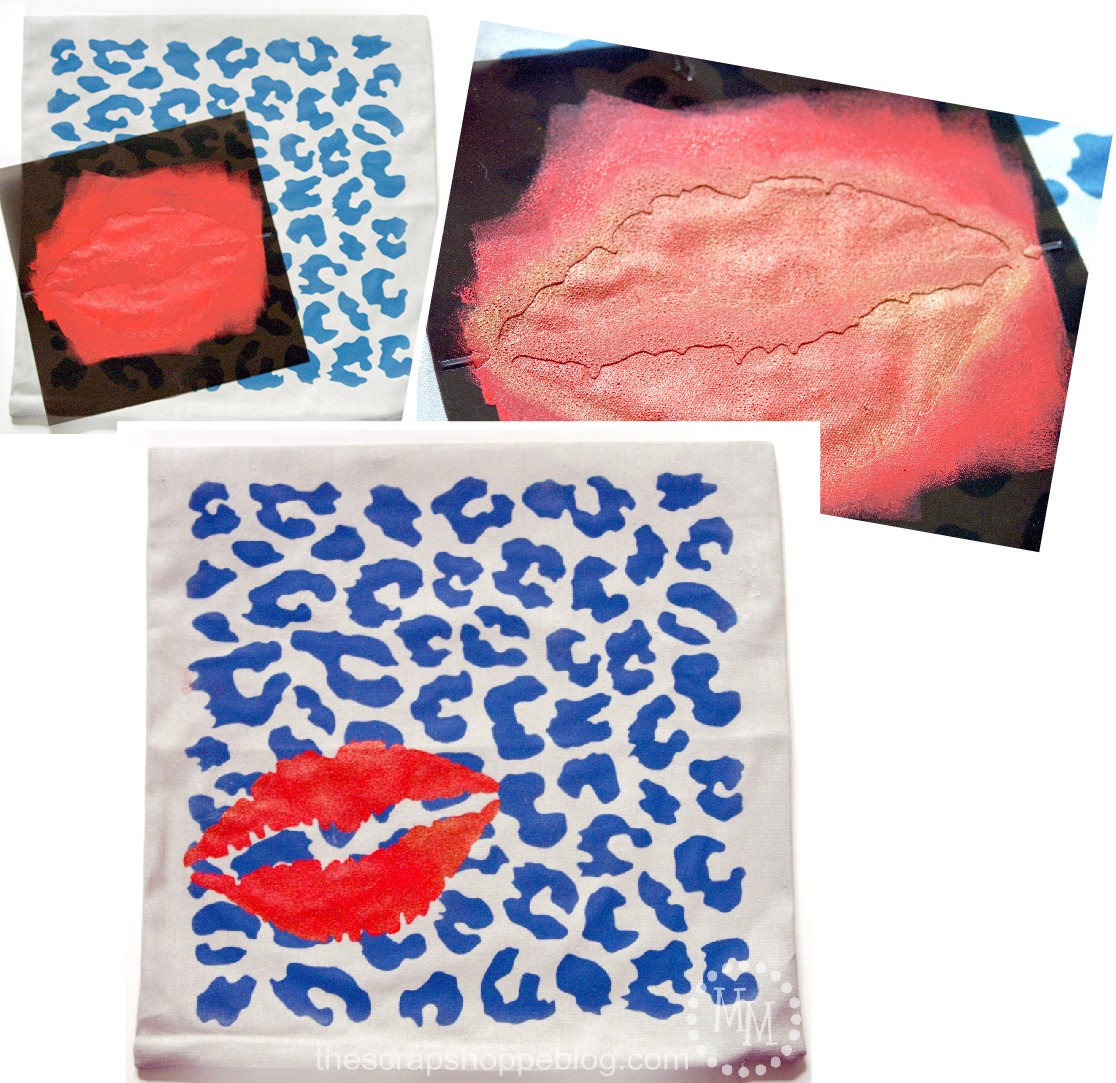
Once the paint for the leopard spots was dry, I applied the spray adhesive to the matte side of the lips stencil and placed it directly on top of the leopard print. I rolled on a coat of the Tomato paint color. Once the Tomato paint was dry I went back and dabbed the lips with the Penny Metallic paint color using the end (flat side) of the foam roller. This gave the lips a fun metallic sheen.

I wanted to be sure to show a close up of the stencil so you could see how crisp the edges are!
The stencil adhesive did a great job of not allowing the paint to seep under the stencil.
Wouldn't this pillow look adorable in a girl's dorm room? It is so fun and funky! And it definitely adds a pop of color to any space.
You can keep up with I Love to Create on
Be sure to check out these other fun projects from the Tulip For Your Home campaign!

I have started truncating my posts to avoid having my content stolen. I hope you'll click over to finish reading the post. Thank you for understanding!


Cute pillow! I love the blue leopard print and the lips!
Navy Wifey Peters @ Submarine Sunday Link Party
Love these pillows!
Adorbs!! What fun stencils!
So cute!! The lips with the print is super fun!! Thanks for sharing!!
love how sassy these are!
How cool is that! I love some of those stencils--I might have to run to the store for a few of them!! Thanks for sharing!
I love how you combined these stencils and the colors are fabulous!
The pillow is adorable!! Those stencils look so easy to work with- love!
You did a great job Michelle!!! Love your color combo! Thanks for doing this post for us! Oh and nice seeing you at Snap!!! -Alexa
Thanks, Alexa! It was great to see you, too! 🙂
How fun! Making if for a dorm room is a great idea! I love the look of that roller too - it would definitely make doing a large stencil easier!