
Monogram Zipper Pouch

I've been sewing!! And I've decided that when I create new projects that I'm going to challenge myself with new techniques. For this Monogram Zipper Pouch I tackled zippers (hello, scary!), applique, and piping! Not too shabby for only a few projects under my belt.
I'm going to not only share how I made this, but the various resources I used to master make these techniques work. Because if I can do, I know you can, too!

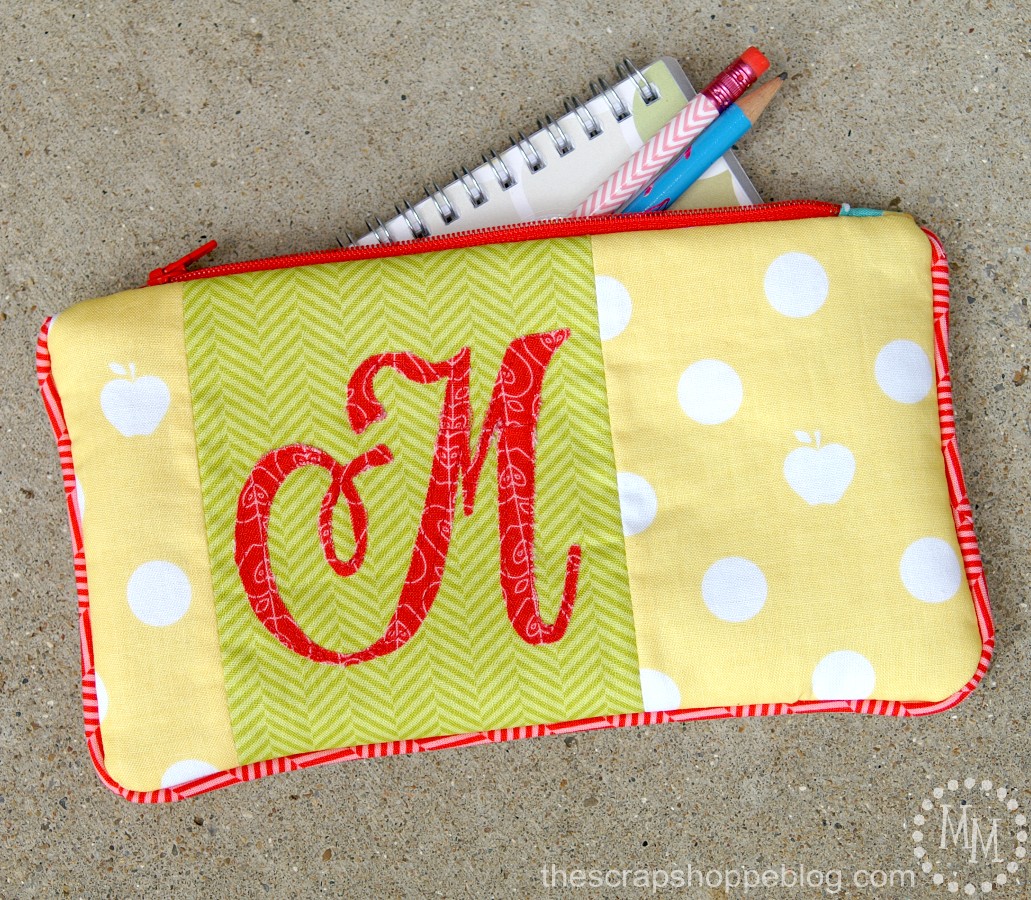
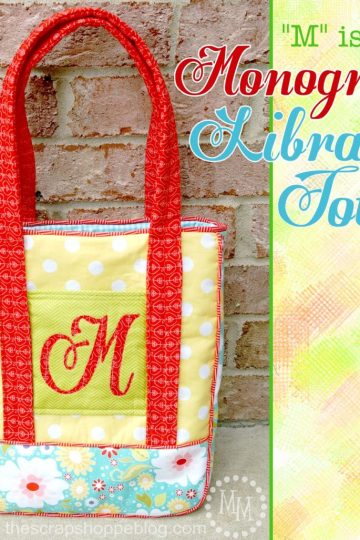
I made this Monogram Zipper Pouch large enough to easily carry around a few pencils, ID, a cell phone.
It pairs lovely with another project I just finished, and you can see it here!

I used these gorgeous Riley Blake fabrics from The Ribbon Retreat. They are from the Apple of My Eye collection. Aren't they lovely together?
I created my "other" project first and used the leftover scraps to make this zipper pouch.

Let's start with the monogram. The front and back sides of the zipper pouch are 9"x5" (allow for a ¼" seam from here on out). To make the monogram pop I wanted to use two contrasting fabrics.
The center panel that will hold the monogram is 4"x5". The panels surrounding it are 1 ½"x5" and 3 ½"x5"
I sized and printed an "M" out from my computer on cardstock that I cut out to use as a template. I used Steam-a-Seam on the back of the red apple fabric (follow directions on packaging) then placed the fabric face down and traced the reverse image of the cardstock M on the Steam-a-Seam backing. Cut out the M and follow directions to iron it to the green fabric. I then stitched along the M with the sewing machine to dress it up further.
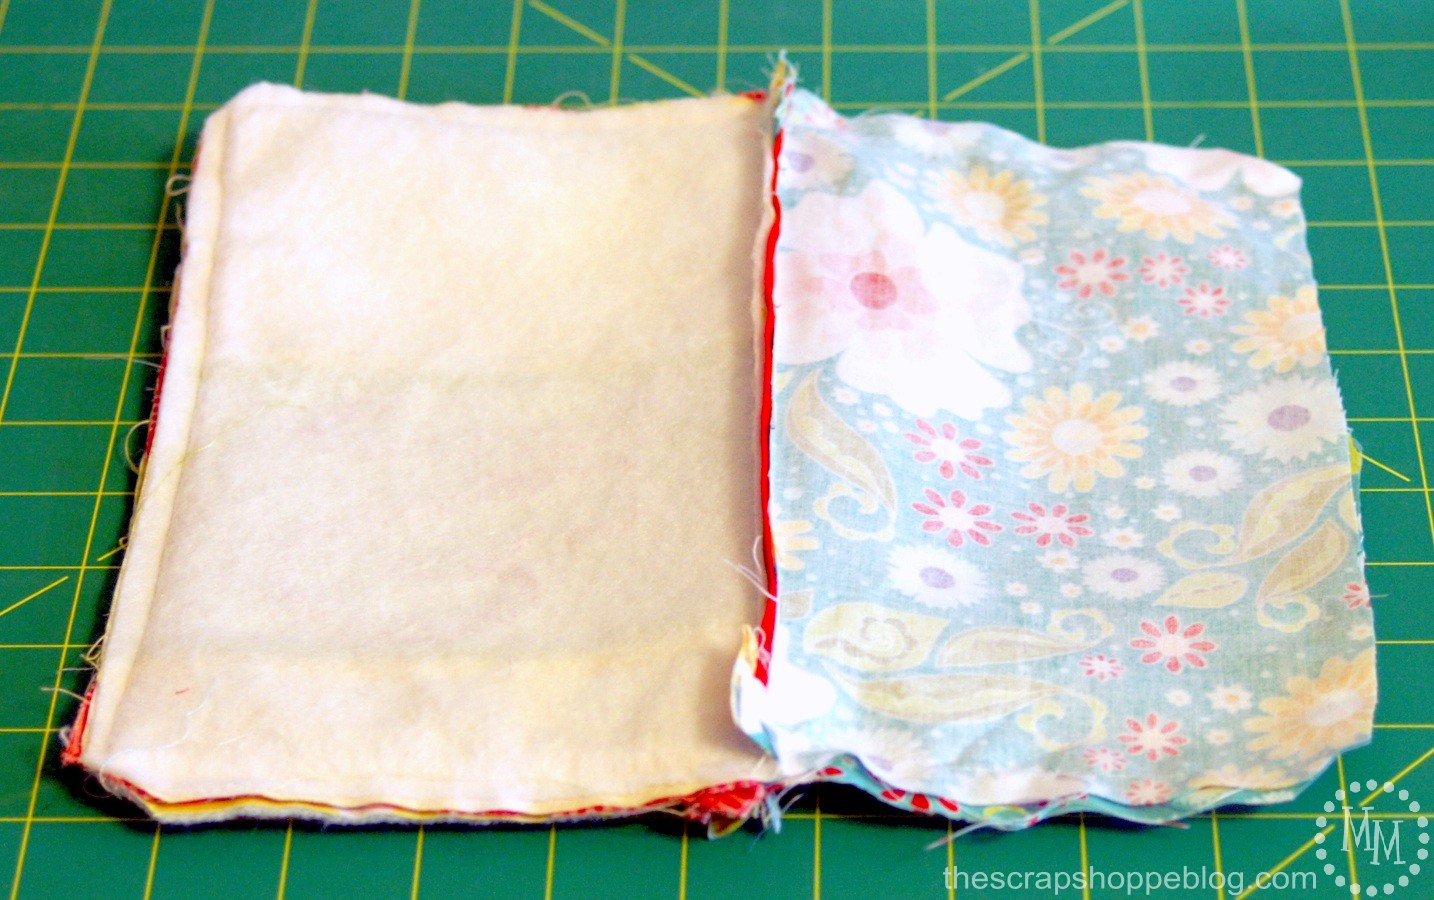
Stitch the 3 panels together to form the front and back sides of the pouch respectively. Be sure to stitch the back side in the reverse order of the front. Add fusible fleece interfacing to the back of both the front and back pieces of the pouch
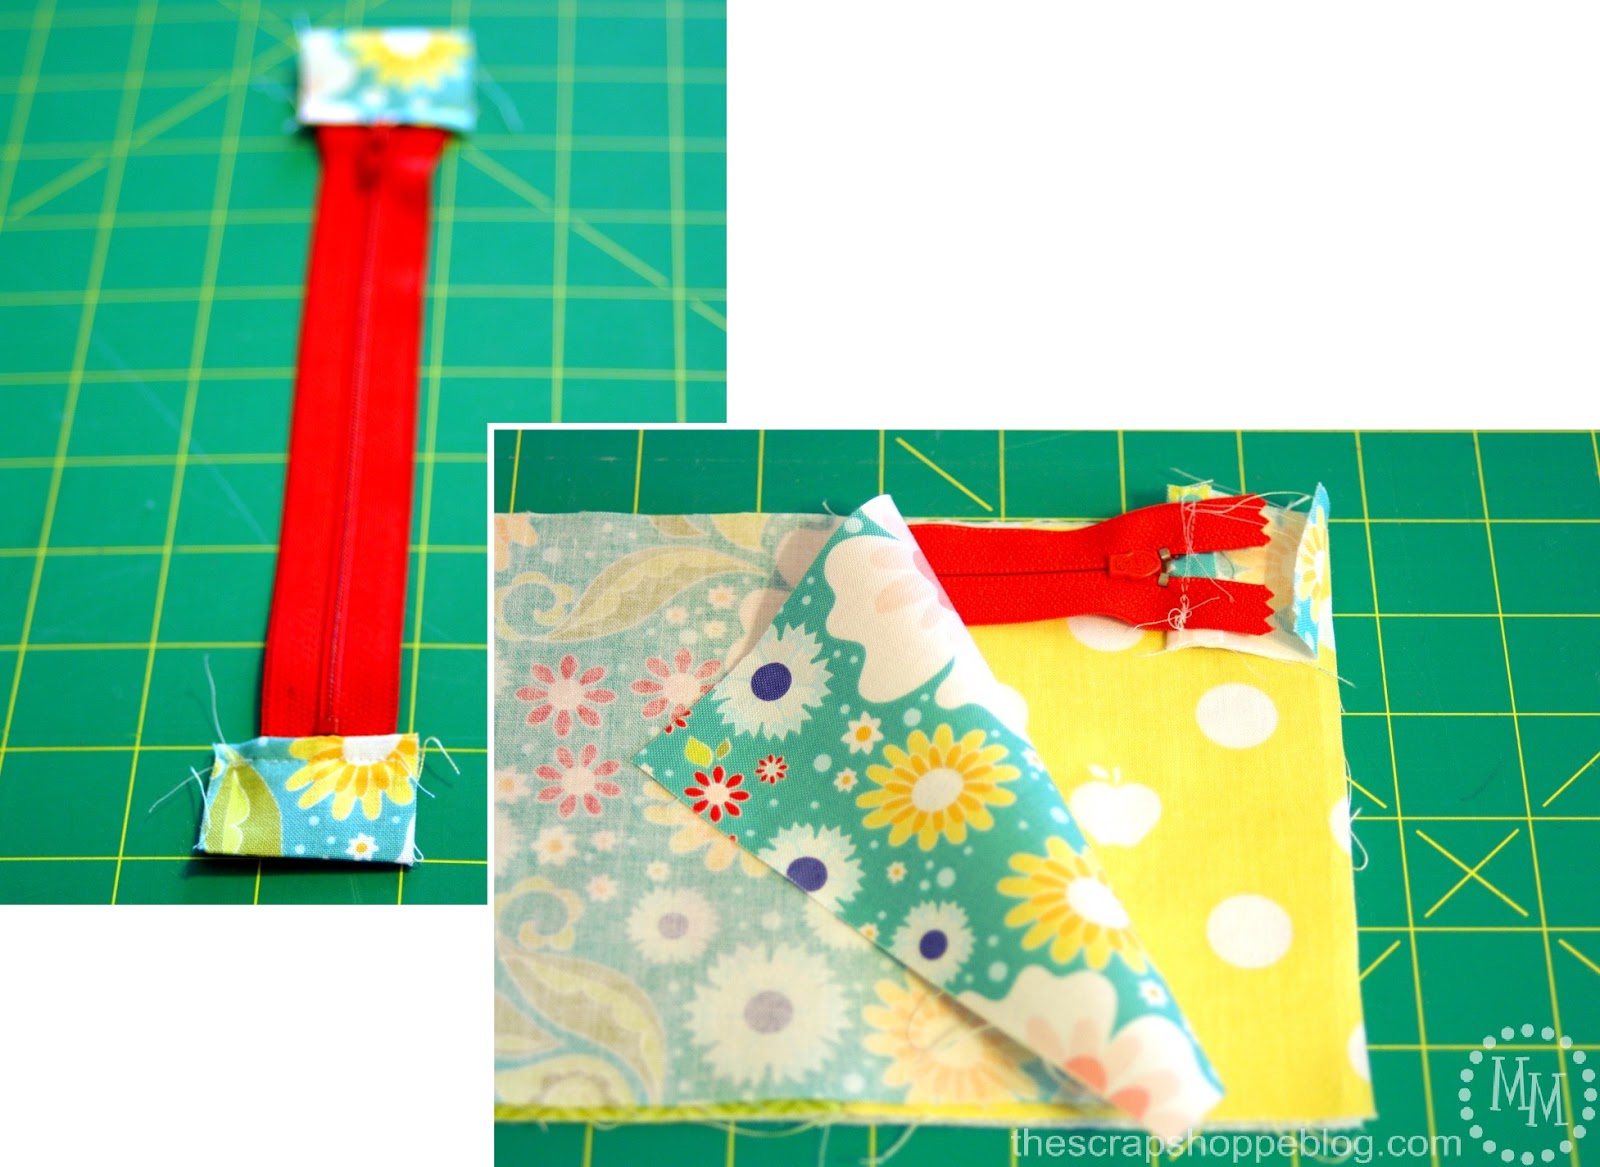
Time to attach the zipper! This is my first time working with a zipper so I wasn't 100% sure what I was doing. I realized that the zipper was a couple of inches shorter than what I needed (it's 7" and we need a 9") so I made up little fabric extensions using the fabric I was going to use for the lining. After attaching the extensions to each end of the zipper, I now had a full 9" (plus extra seam allowance) to work with.
I followed my friend Bev's directions for adding a zipper. It is very straightforward and worked like a charm!
Place the outer fabric right side up. Place the zipper face down on top of the fabric. Place the lining (9"x5") face down, lined up with the outer fabric. Use a zipper foot to sew a ¼" seam along the edge.

Repeat with the back panel and other piece of lining.
Here is how the zipper will look from the outside and inside of the pouch.

Now we need some piping! I really wanted to make my own piping so I could use matching fabric from the Apple of My Eye collection. I researched and researched until I found tutorials that really spelled out for me how to do this.
That pile of fabric on the left? That is over 9 yards of 1" trim cut from 1 fat quarter. Yup, you read that right!
Check out this tutorial from Jona Giammalva for a detailed tutorial with step-by-step photos. How wide you need the trim to be will determine how much you ultimately end up with.
I had picked up some 3.2 mm cording from Hobby Lobby to use to make the piping. I used these tutorials from Crazy Little Projects and Melly Sews to make the piping and figure out how to use it. It was super simple to make. Simply place the cording in the center of the trim, fold over, and sew closed (with a zipper foot) as close to the cording as you can.
Follow the tutorials referred to above to insert the piping between the front and back panels of the pouch. Stitch closed (with the zipper foot) and then stitch closed the lining, leaving a 3" hole in the bottom to pull the fabric right side out through. Be sure the zipper is open before stitching closed the lining.
Pull fabric right side out through the hole in the bottom of the lining. Hand stitch the lining closed.

I am beyond excited to have successfully tackled zippers, applique, and piping for this project!
I would love for you to check out the bigger fabulous project that goes with this zipper pouch!
Serenity Now, and other great parties found on my party page.


Lovely pouch! I love the combination of fabrics you used! And that M looks wonderful!
Navy Wifey Peters @ The Submarine Sunday Link Party!
Michele!! I love this so much! The zipper pouch is super cute and I'm so impressed by all the sewing skills you used. You are totally a pro now! 🙂