
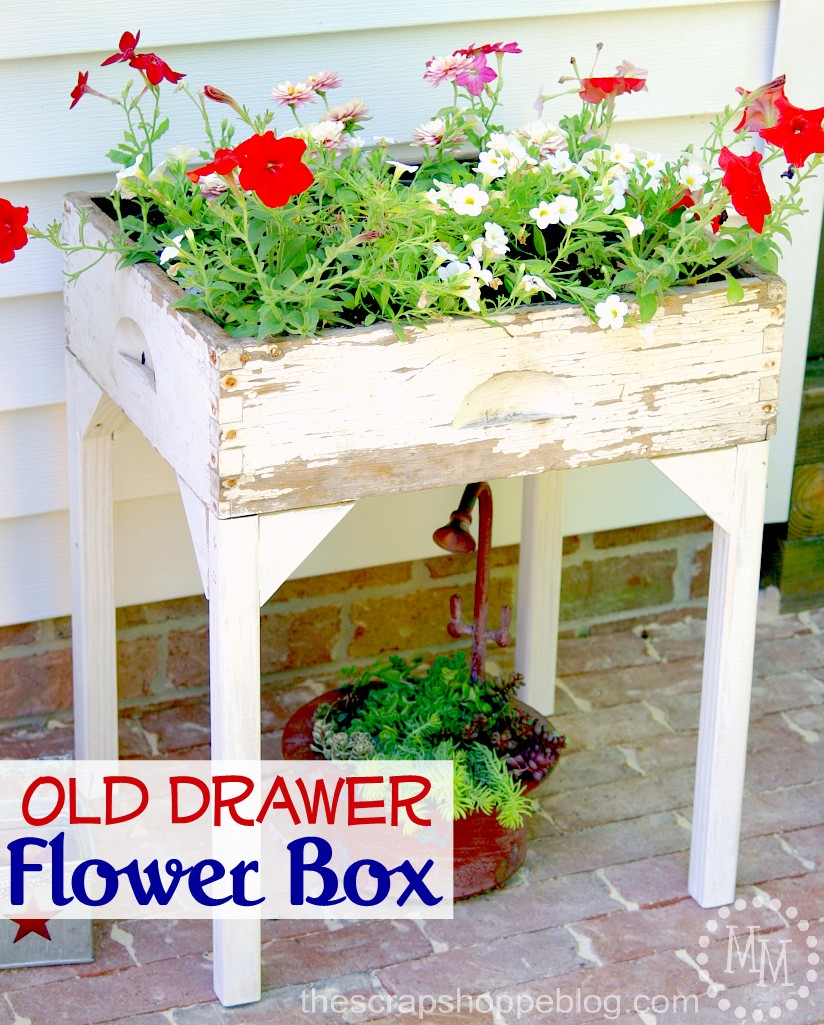
DIY Old Drawer Flower Box
This old drawer flower box is one of my favorite upcycles and still sits on my patio and is doing fabulously.
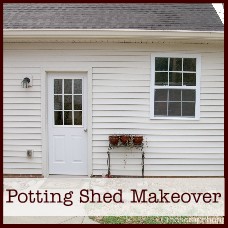
I'm still sharing projects from the potting shed makeover!
You can find links to all of the projects that went into the makeover at the end of the post.
It was a pretty huge feat, and we made a LOT of fun things to go on it.
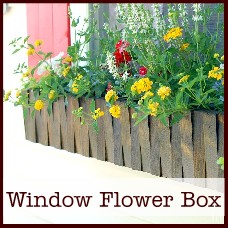
Including this old drawer flower box {edit: I've now learned this is a beehive lid!).
It is one of my favorite upcycles EVER and was pretty simple to update into a working flower box.
Old Drawer Flower Box Video
I have a quick video that shows all the steps for making the flower box.
You can also follow the step-out photos below.
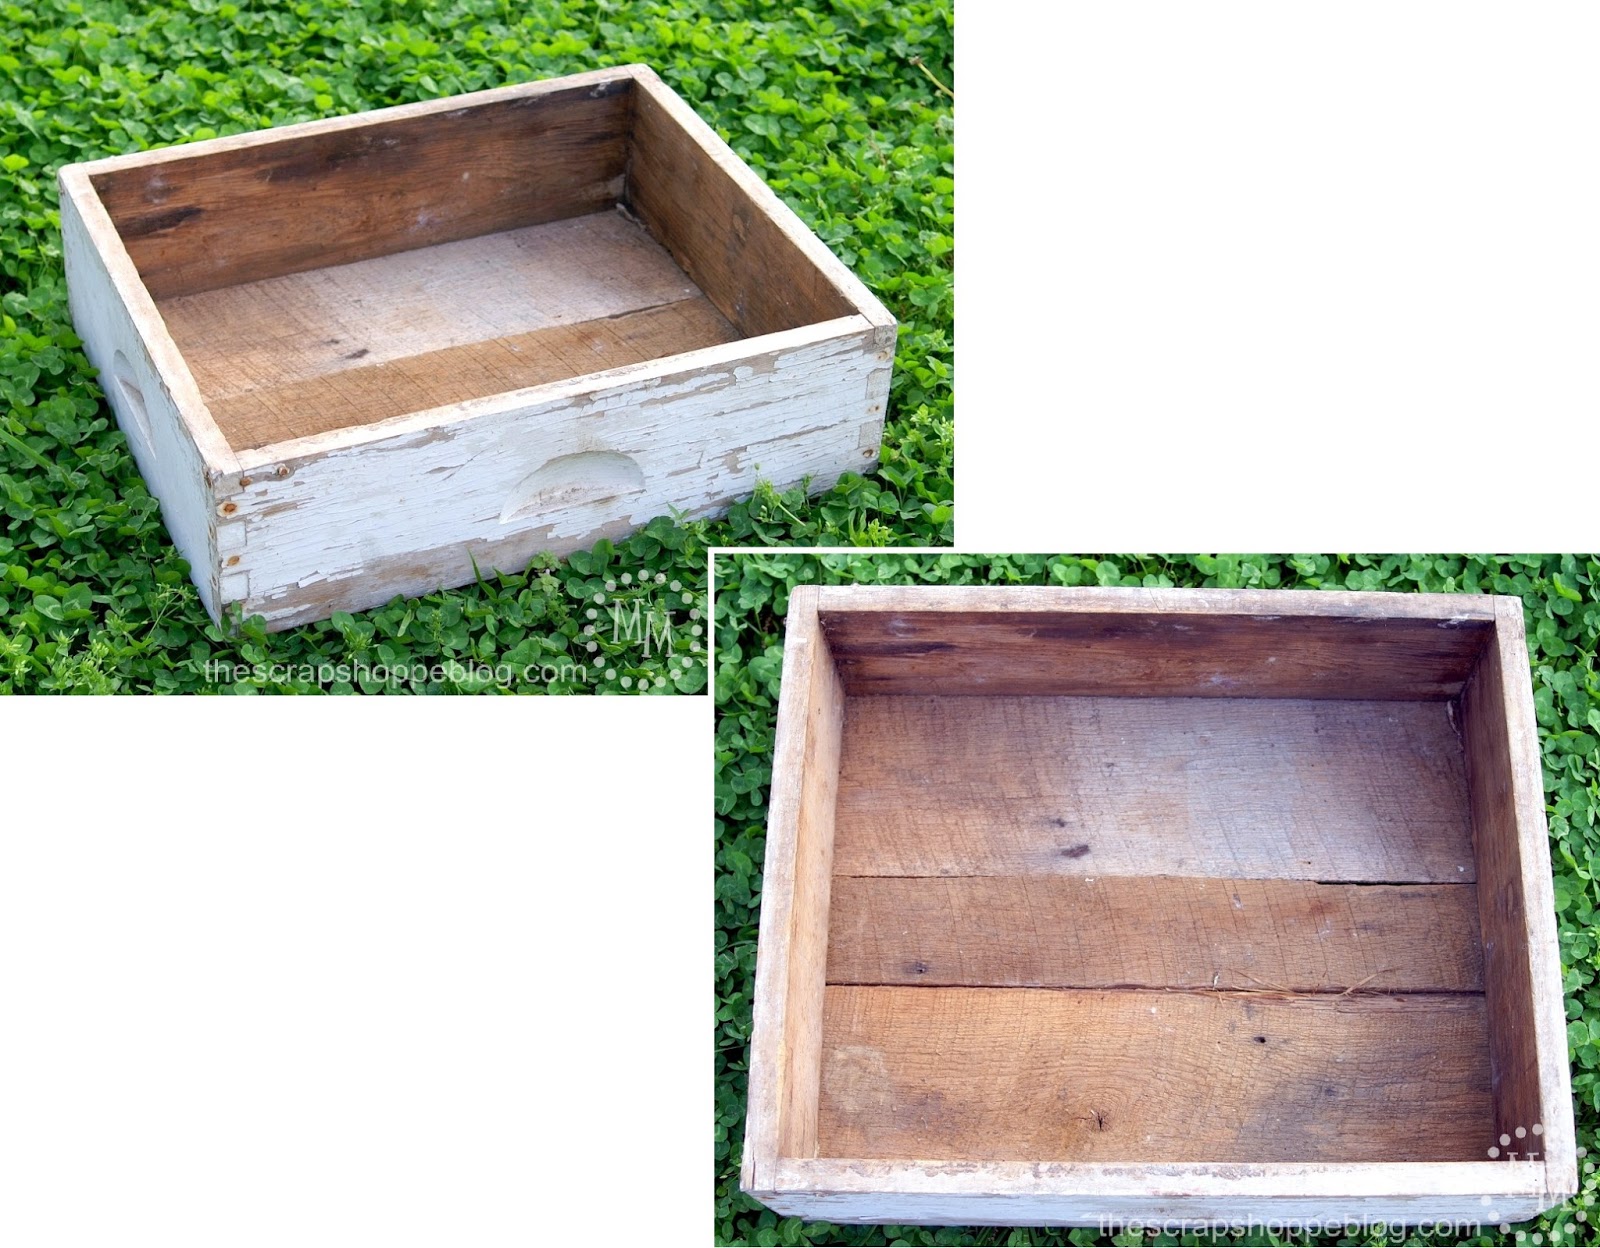
I have had this vintage drawer beehive lid in my possession for a couple of years now.
I found it at a barn sale and fell in love!
It's so chippy on the outside and has that wonderful old wood look on the inside.
It has been sitting in my potting shed holding unused flower pots.
But it was screaming to be something more.

To me, this gorgeous old drawer beehive lid was just begging to hold beautiful, bright flowers.
I knew I didn't want it to set on the ground, so I went about designing some legs to raise it up.
The drawer is heavy, so the legs needed to be sturdy and solid.
A couple of 2x2 posts and scrap 1x4's would work perfectly for very little cost!

I found 2x2 posts at Home Depot that were 36" long, and I spent less than $5 on the 2 I purchased.
We cut them in half to make four 18" table legs.
There wasn't a good way to attach the legs directly to the drawer.
We cut scrap 1x4's into 8 right triangles, 2 for each table leg.
The triangles could be attached to the drawer then, in turn, to the legs.

Here you can see how everything was attached.
The table legs were held in place to figure out where the triangles should go.
The triangles were then screwed to the drawer from the inside of the drawer into the triangles. T
he triangles were then screwed to the legs.
We did this for all 4 table legs.
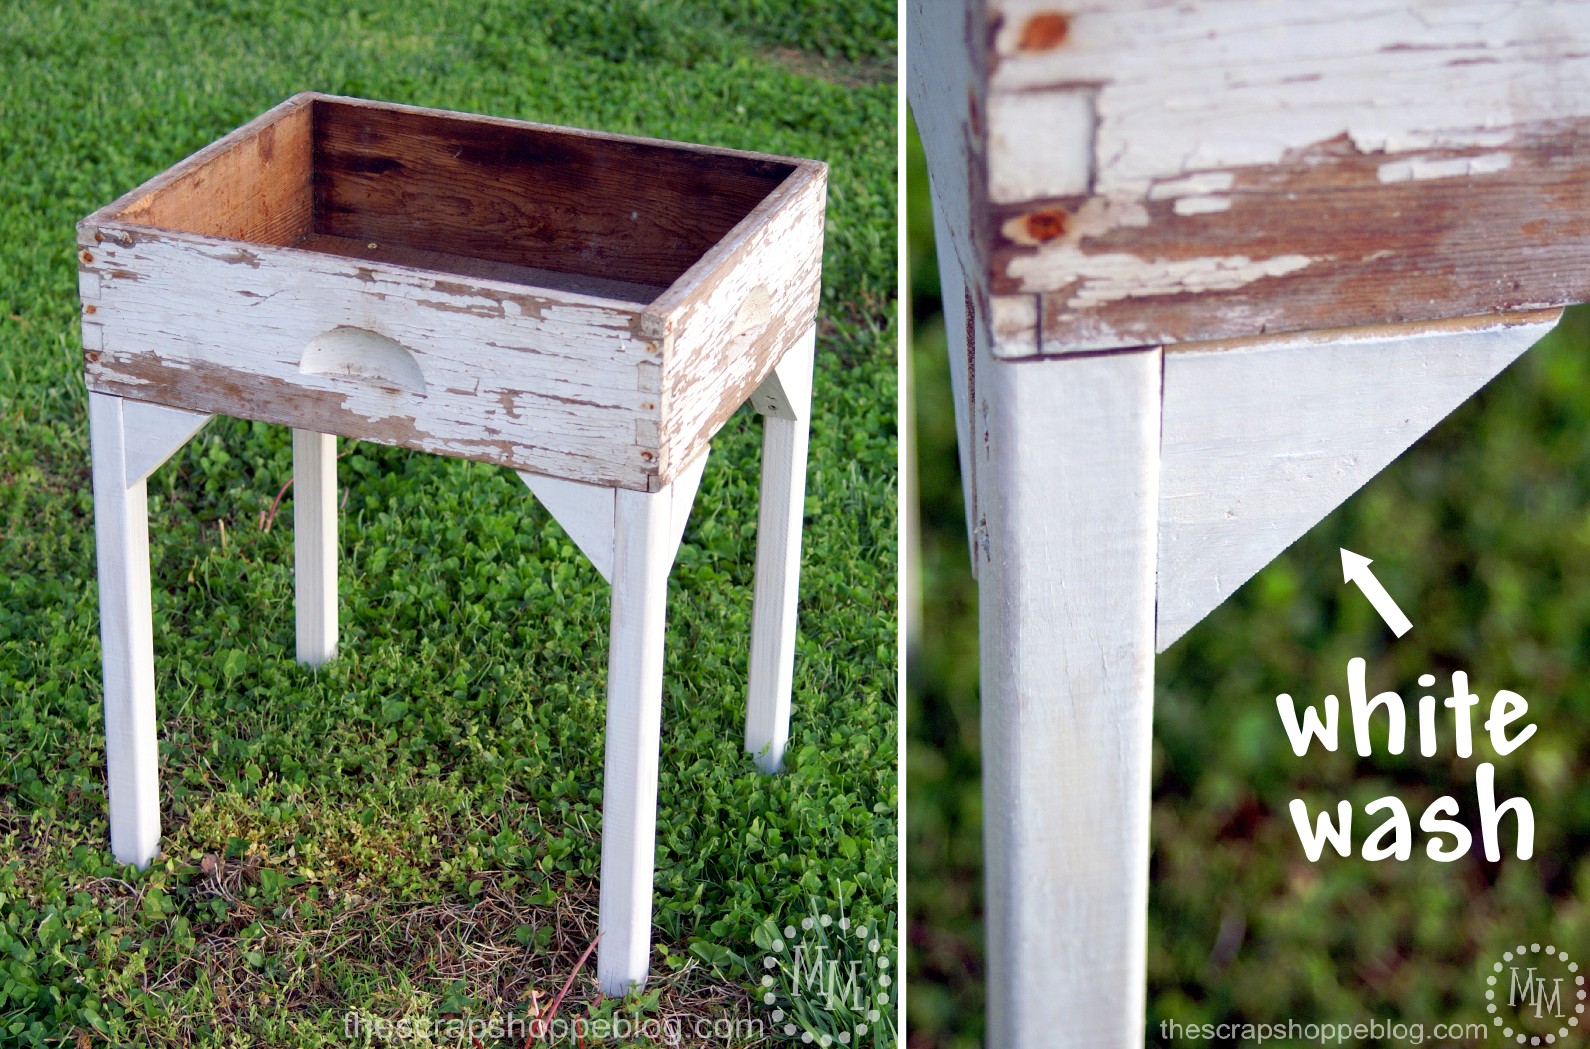
The bare wood legs did not look great with the white chippy drawer.
They needed to be painted, but I didn't want to take away from the drawer.
I wanted to use white paint, but was afraid it would be so bright that the new legs would not look right with the old drawer.
The solution?
White wash!
I made a white wash solution from some white paint I had on hand mixed with water.
I didn't do any exact calculations, just thinned the water to the consistency I wanted it to be at.
If I had to guess, I would say it was 1 part paint to 8 parts water.
I worked on one leg at a time.
I applied a coat of the white wash then immediately wiped it off lightly with a shop towel then repeated until I reached the opaque coat that I wanted.
It took about 3-4 coats until I was satisfied.
The white wash isn't too bright and doesn't take away from the chippy awesomeness that is the drawer!
Before adding the flowers, I sprayed a coat of paint sealer around the outside of the drawer to preserve the chippy paint now that the box would be outdoors.
I sprayed 2 coats of Thompson's Water Seal on the bare wood inside the drawer.
I didn't place dirt directly into the drawer - I was afraid of it rotting over time.
Instead I arranged 5 pots, one in each corner plus one in the middle, in the drawer and filled them with flowers.
The inside of the drawer still gets wet when it rains or when I water the pots, but the water beads up beautifully and does not soak into the wood.
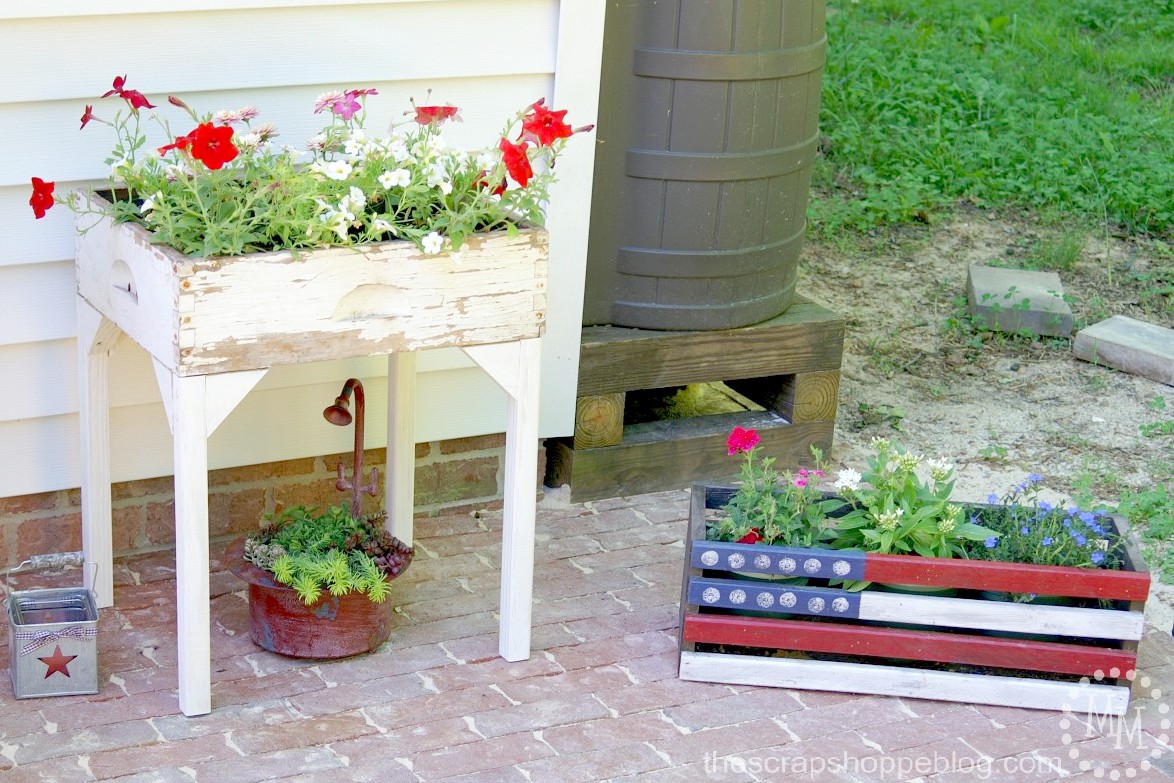
I love this addition to the patio! Just seeing it sitting there makes me happy.
UPDATE: The Old Drawer Flower Box is holding up great!
The Thompson's Water Seal has done a great job protecting it from the elements.
I still do not add dirt directly to the box, but rather typically use one large, somewhat shallow pot.
Once all of the flowers in the pot bloom, you don't even notice the pot in the box.
I will add another coat of the Thompson's next spring prior to the gardening season.
It will be the first time needing to add it in 5 years!
Not too bad!

>> See where I party! <<
You may also be interested in these other projects from the patio makeover:


This post was originally shared August, 2018.


Nice
What a fun and innovative project Michele.
Thank you for sharing your old drawer flower box at Create, Bake, Grow & Gather this week. I'm delighted to be sharing it at tonight's party and pinning too.
Hugs,
Kerryanne
Such a great project, I am so happy to feature you today at TFT! Please join us again and have a great weekend ahead!
https://followtheyellowbrickhome.com/late-summer-inspiration-at-thursday-favorite-things/
I have a stack of bee boxes in my garden that I planted. I love them! This is such a cute idea. I may need to buy another one and do this! Thanks for sharing it with SYC. I would have liked to feature you on Thursday, but I don't see a link back to the party. Sorry, but that is a requirement.
hugs,
Jann
Cool! Thanks for sharing at To Grandma's House We Go DIY, Crafts, Recipes and More Wednesday Link Party! Pinned it to Pinterest! Hope to have you join the party next week!
Such a fun project and use of an old bee hive box cover. I have some projects using wood for outdoors and I'll have to remember to seal them with a water seal. Thanks for sharing your project on MM.
I just adore this. I tried making one a couple of years ago, but it didn't last long. I'd luv to invite you to share this with us at Wall to Wall DIY Wednesday, which runs thru Mondays!
Me encanta el fin de la caja. Un precioso reciclaje. Saludos y feliz fin de semana!!!
I love this! I'm pinning it for later since I have a desire to do more in our yard, but a long to do list before the yard becomes a priority! Thanks for sharing at #HomeMattersParty
Have 2 drawers left from turning 6 drawer dresser into tv stand. Have been waiting to find just right project to use them for, at least one drawer anyway. Now to get hubs in mood to make base. Clever how you made legs for drawer, love how it looks. Pretty sure we have wood to make legs and braces for base.
Spring must spur my creativity cause have been making one thing after another. Thanks to wonderful generous bloggers have plenty of printables to choose from for new wall art in rooms.
This drawer flower stand will be pretty on our front porch. Can use on back deck until gets too hot. Our deck faces due west and it's very hot out there in Summer with sun blazing all afternoon. Very dry here in western CO also, need plants than can handle the heat and being so dry. Our front porch faces East so have shade in mid-afternoon.
So love idea of this for enjoying plants. Enjoy rest of week
Hi Michele! Just wanted to let you know that we loved your Old Drawer Flower Box so much when you shared it at #HomeMattersParty last week, we've FEATURED it THIS WEEK! Hope you can check it out when you get a chance. http://ourcraftymom.com/home-matters-linky-party-133/
I love this idea. I have a vintage box that I bought at an estate sale and i've been trying to find something unique to do with. Thanks for the inspiration.
Such a great post! Thank you for sharing with #OMHGWW linky so happy to feature you this week! http://fromevijawithlove.com/2017/04/26/distressed-letter-wonderful-wednesday/
I LOVE this project! Just picked up an old wooden fruit box. I've been trying to decide what I'll do with it. Now I know! Got a table saw for my birthday, so I'm ready to start creating. Thanks for the great project. Visiting from SITS.
I love it, you did a beautiful job!
Your flower box is so cute, and I love the flag box as well!!!
Thank you for sharing on Oh My Heartsie Girls Friday Features this week!!
Have a great weekend!
Thanks for sharing your awesome drawer planter table on our Share Your Style Party. It is so a clever and it looks fantastic with all the flowers in it. Your technique for attaching the legs could be applied to any box or crate to make many different tables--great idea!
Love this flower box and how you made it so special.
Hugs,
Bev
hi michele found you via funky polka dot giraffe. I love the drawer flower box. love it! laura
WOW! I totally love this! Awesome job!
Just saw this blog... very cute. However, I am 99% sure that your 'drawer' is actually a bee box cover. Hubby (son of a bee keeper) said that is what goes on the very top of the hive, like a lid.
I think you're right, Teri! And I think that makes me love this project even more! 🙂
Love this! Thanks for sharing at the #HomeMattersParty - We hope to see you again soon! The door is OPEN!
~Lorelai
Life With Lorelai
This is such a great project! Just wanted to let you know that I'm featuring it at this week's link party! http://www.thelifeofjenniferdawn.com/2015/05/a-little-bird-told-me-link-party-141.html
Michele - I loved your flower box. So cute! Thanks for sharing at the Thursday Favorite Things Blog Hop. I will be featuring you on my Tuesday Treasures tonight! I invite you to stop by and take a look!
Love this idea. Makes me wish we weren't on water restrictions. Miss my little garden projects.
Your drawer upcycle is fabulous!!! I'd love to have this sitting in my garden. I'll be on the lookout for old drawers, now. Pinning. Found you via Treasure Box Tuesday.
This is absolutly adorable....Love it!!! Thank you for sharing at Share it One More Time... Tammy
Hello gorgeous! I'm just stopping by to let you know that your cute drawer flower box was the most viewed at our last party! Happy dance time! We will be featuring it our at our party tonight at 7. I hope to see you there! Lou Lou Girls
This is COOL! Great idea using a drawer-----what a timesaver!
Michele, you have hit this one out of the park- people are going nuts over it! It's such a great project! Pinned! I am featuring it at Treasure Box Tuesday when we get started tonight (8 pm EST)! Thank you for linking up with us!
Excellent tutorial - great photos, instructions that anyone could use to replicate this project. So often details are so limited I feel I need to have taken a woodworking course. Now where did I stash that drawer>
I love this! I think there are a couple of old drawers in our garage - may have to put them to use. Thank you so much for sharing at Share It One More Time. Cathy
So cute! I want to make one!
Thanks for linking up with Share the Wealth Sunday.
Oh my goodness!! I LOVE your flower box!! Thank you so much for the inspiration-and for sharing at The Wonderful Wednesday Blog Hop! PINNING!!!
Upcycled drawer planters are one of my favorite projects out here in blogland. Yours is so pretty! Great tutorial, too, on adding the legs.
Great idea for a planter box. A great size that could be moved around to different locations throughout the spring/summer. I'll be keeping my eyes open for a drawer at upcoming garage sales.
what a great idea! love how you preserved the fab chippiness! the legs look awesome too with the extra detailing. Something like this would love LOVELY on my front porch! Thanks for linking to Snickerdoodle, if you get a chance stop by our Creative Challenge upcycle party on Fridays. This month it's all about the silverware but all upcycle crafts welcome!
What a great idea!!! I'm pretty sure I'm going to need to make one of these myself! Love that you shared this at Snickerdoodle Sunday and I hope to see you again this weekend!
Sarah (Sadie Seasongoods)
This is awesome!! Thanks for the idea!
Your flower box is really pretty. This was a great idea. Love it. .
I love this upcycle. I'm picturing Wave Petunias in this drawer and on the other hand a drawer full of lettuce for fresh salads this summer. Thanks for sharing on Sunday's Best. I can't wait to see more you crafts.
This is so darling Michele!! I love the idea of using a drawer as a planter - and thanks for sharing how you sealed it to make it able to stand up to water too! Sooo cute!
Great idea, it is so pretty.
Love this flower drawer!! It's super cute!! Love it!!
I love your chippy little flower box drawer!
gail
Cute as a button! Great job!