
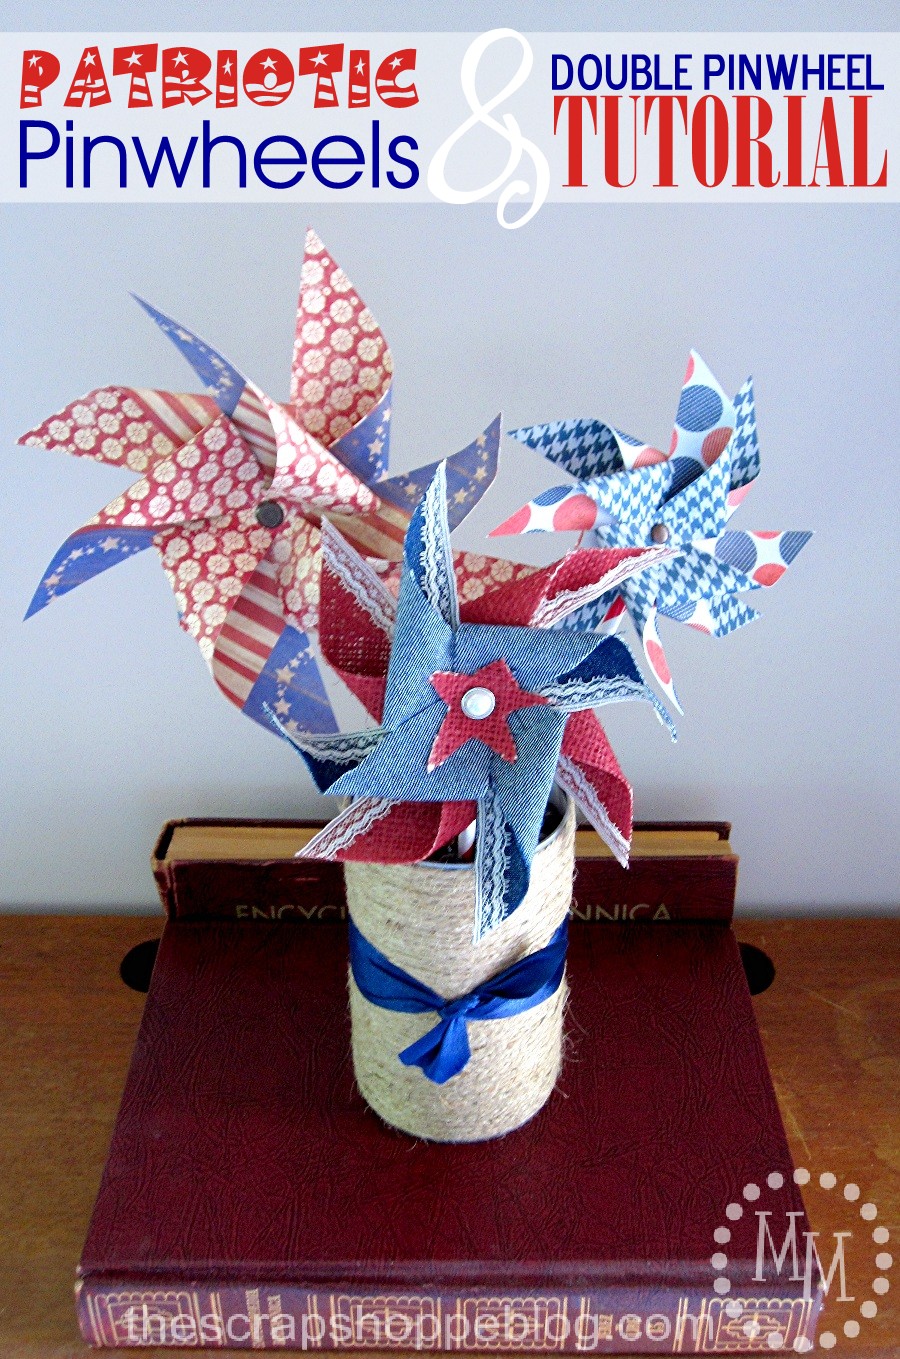
Patriotic Pinwheels {& Double Pinwheel Tutorial}
Pinwheels scream summertime fun and these patriotic pinwheels are perfect for all of the summer patriotic holidays.
I have an insanely fun and simple project to share with you today!
Can you believe I've never made a pinwheel before? Nope, never.
I thought it high time to remedy that, and just in time for some 4th of July decor!
So follow along with me as I show you how I made some
Patriotic Pinwheels and share a simple Double Pinwheel Tutorial!
I really wanted to make some pinwheels from fabric, but I thought I would practice with paper first.
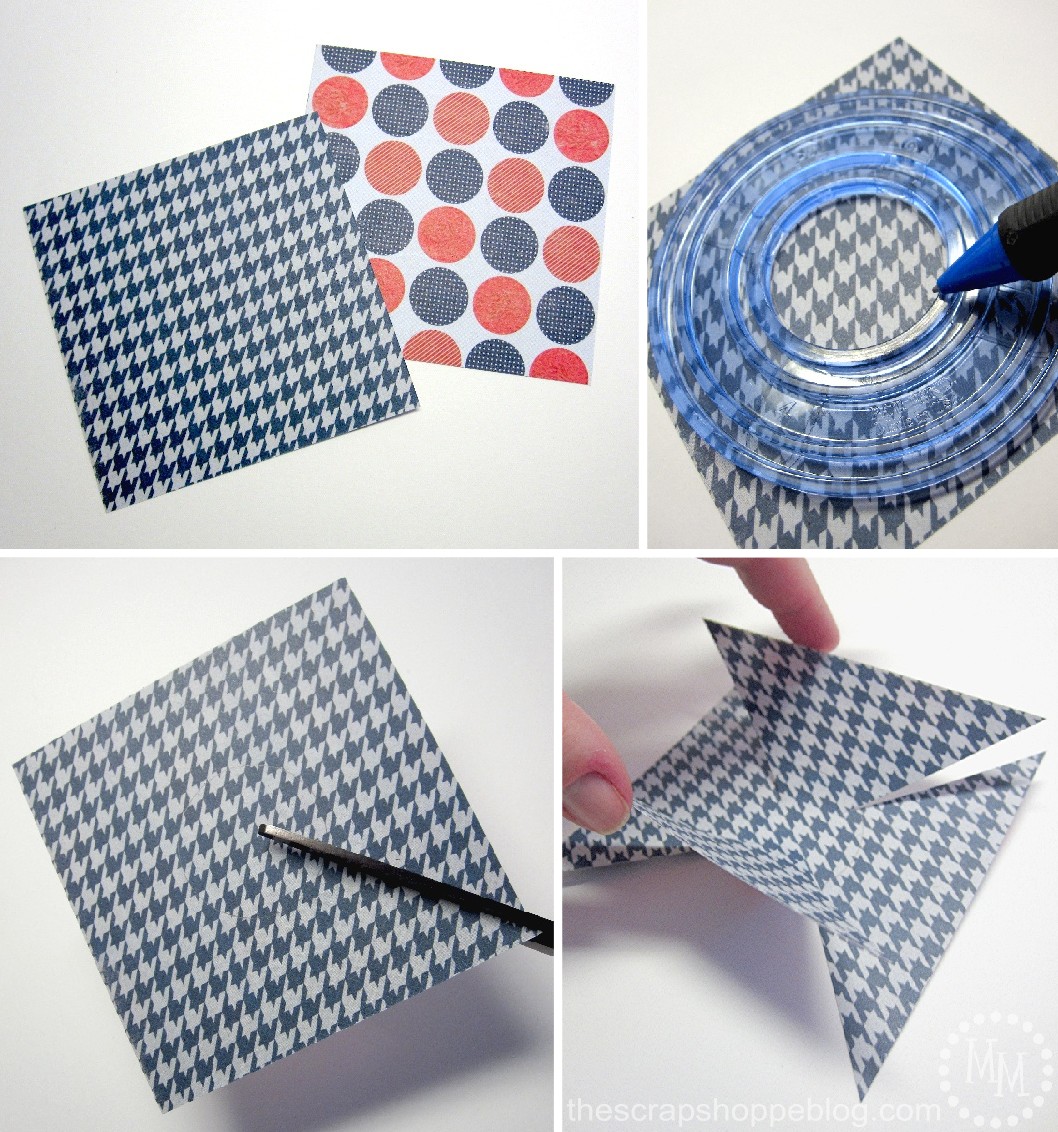
Grab some fun double-sided scrapbook paper and cut it down to squares.
I cut mine into 6 and 4 inch squares.
Draw a circle in the center of your square to help you find the center.
Cut from the corner towards the center, but stop at the edge of the circle you drew.
Do this with each of the 4 corners.
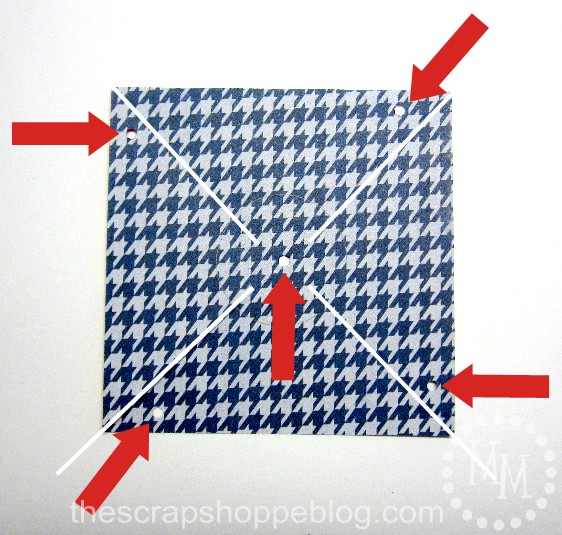
Punch a hole (red arrows) on one side of each section you just cut.
The white lines represent the lines you cut in the previous step.
Also punch a hole in the center of the square.
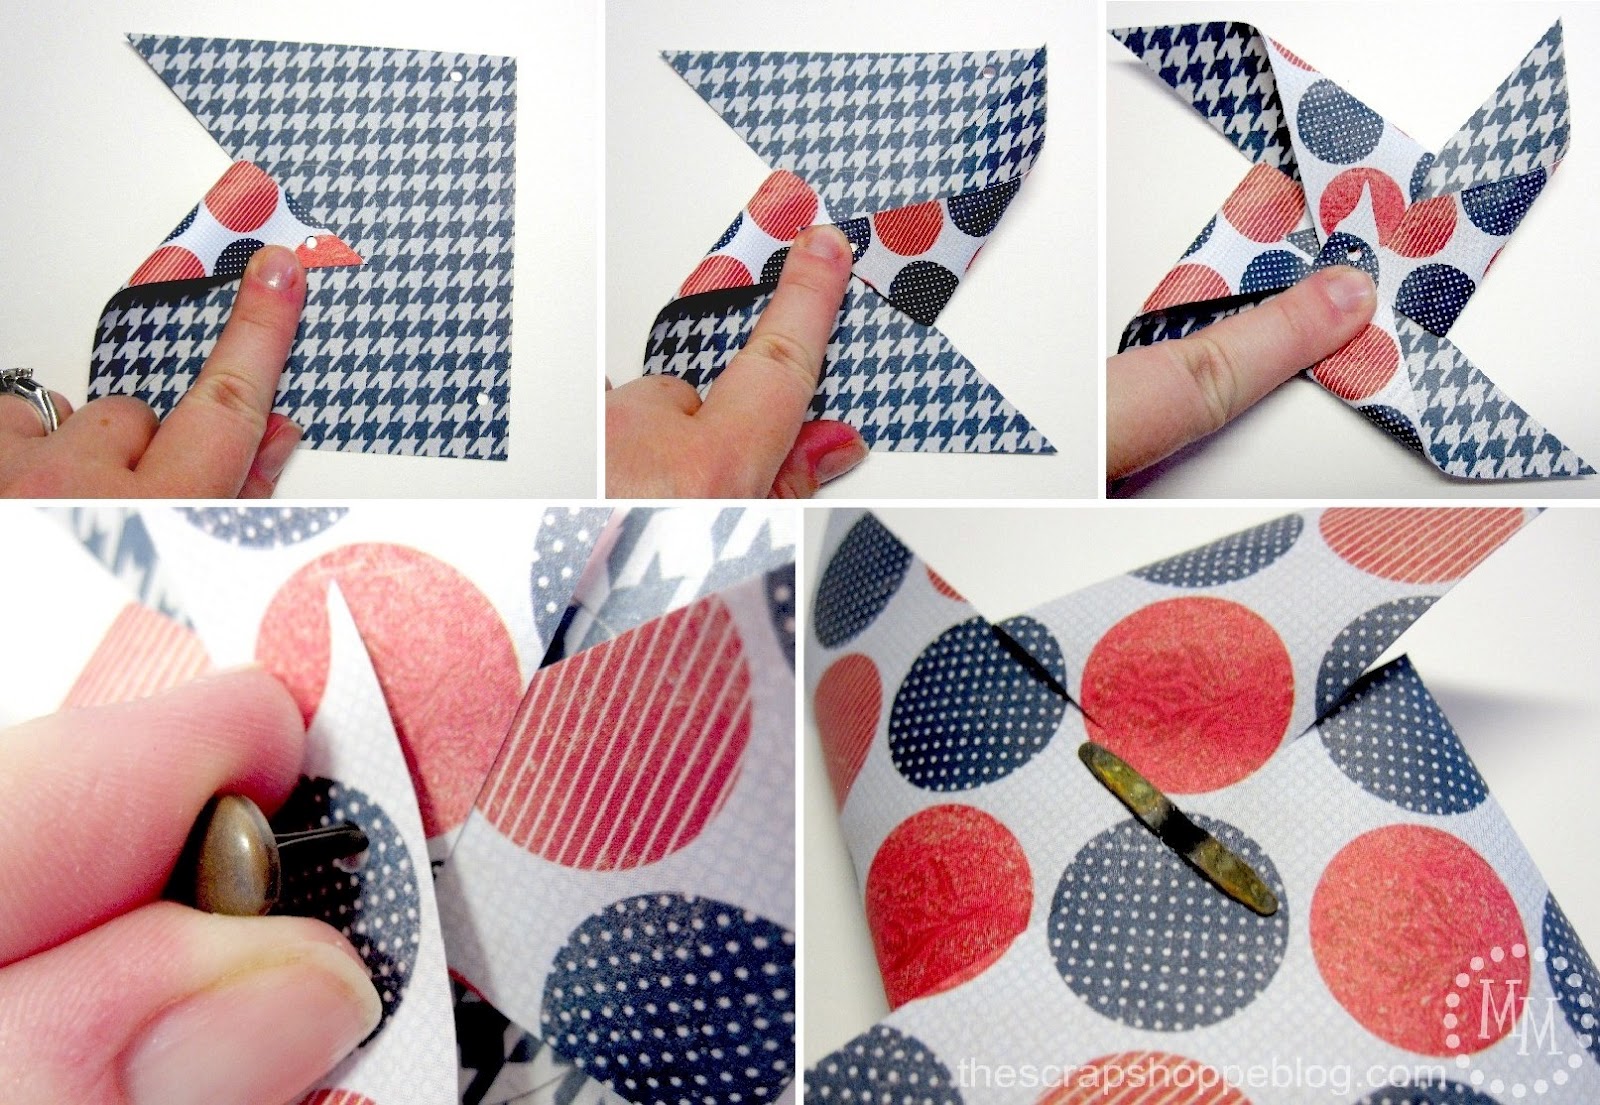
Begin folding the sections with the holes over the hole in the center of the paper.
>Hold the pinwheel together with a brad.
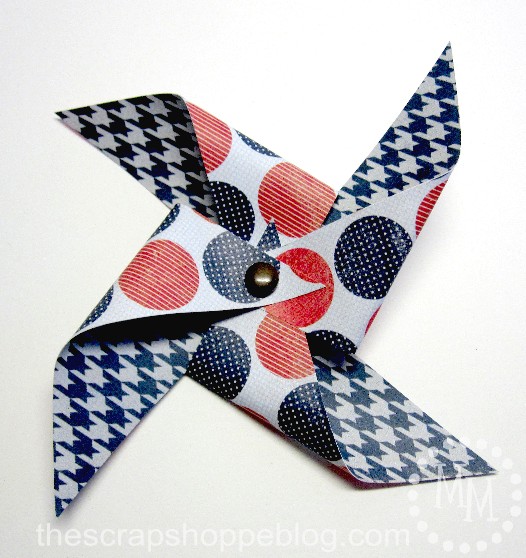
Cute, right? And so simple!
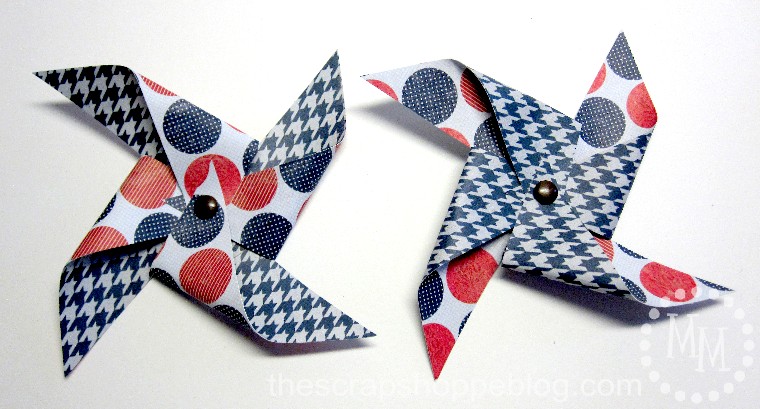
I made another pinwheel of the same size, but reversing the paper.
They are pretty adorable, BUT... could be a little more exciting.

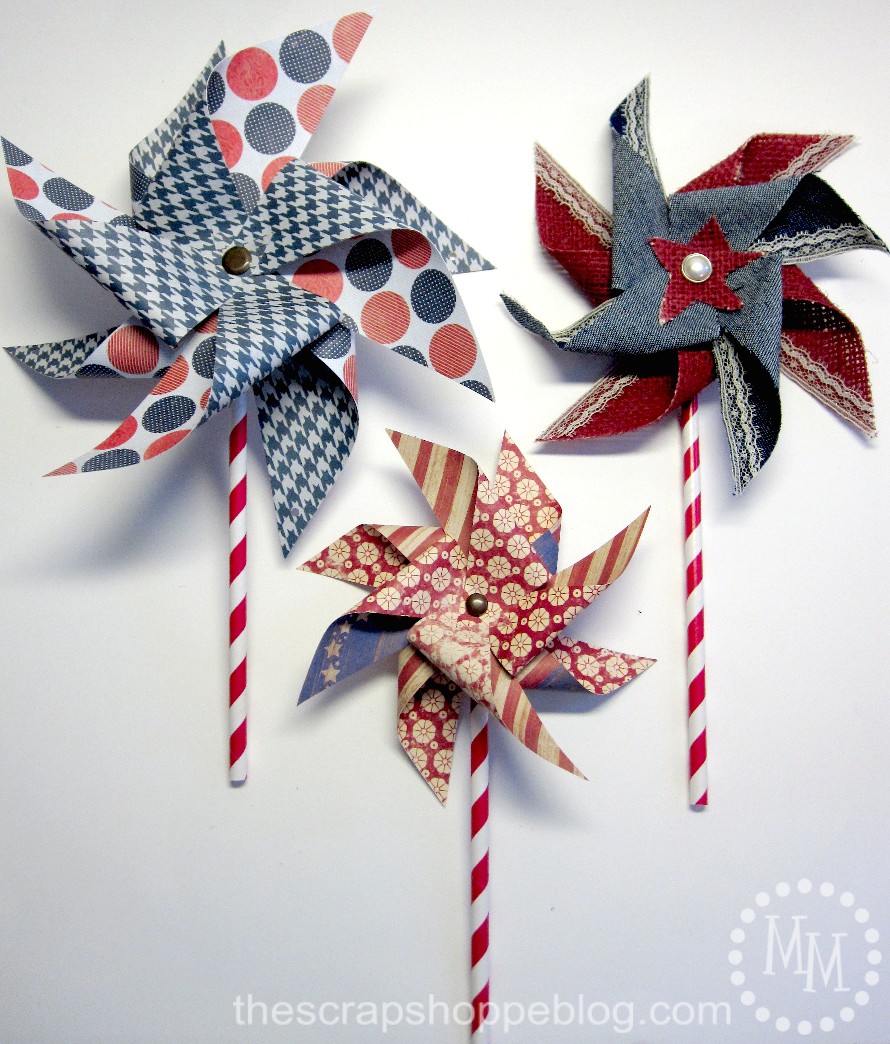
But look what happens when you stack them on top of each other!!
I really love this!
To make this double pinwheel, you simply stack both pinwheels on top of each other, thread the brad through them both, and twist them so the ends don't overlap one another.

This is another double pinwheel I made out of some other patriotic paper.

For the back, I used a paper straw that I smooshed (technical, right?), and punched a whole through.
Then simply thread it through the brad in the back of the pinwheel.

So fun!
Now to try it on fabric...

I knew I wanted to use denim and burlap to make my fabric pinwheels.
My burlap is spray painted red and is pretty stiff so I would be able to easily manipulate it into shape and have it stay that way.
The denim is another story, so I attacked it with a coat of fabric stiffener.
Once the denim was ready, I cut both fabrics into squares, cut the corners, and punched the holes just as I did for the paper pinwheels.
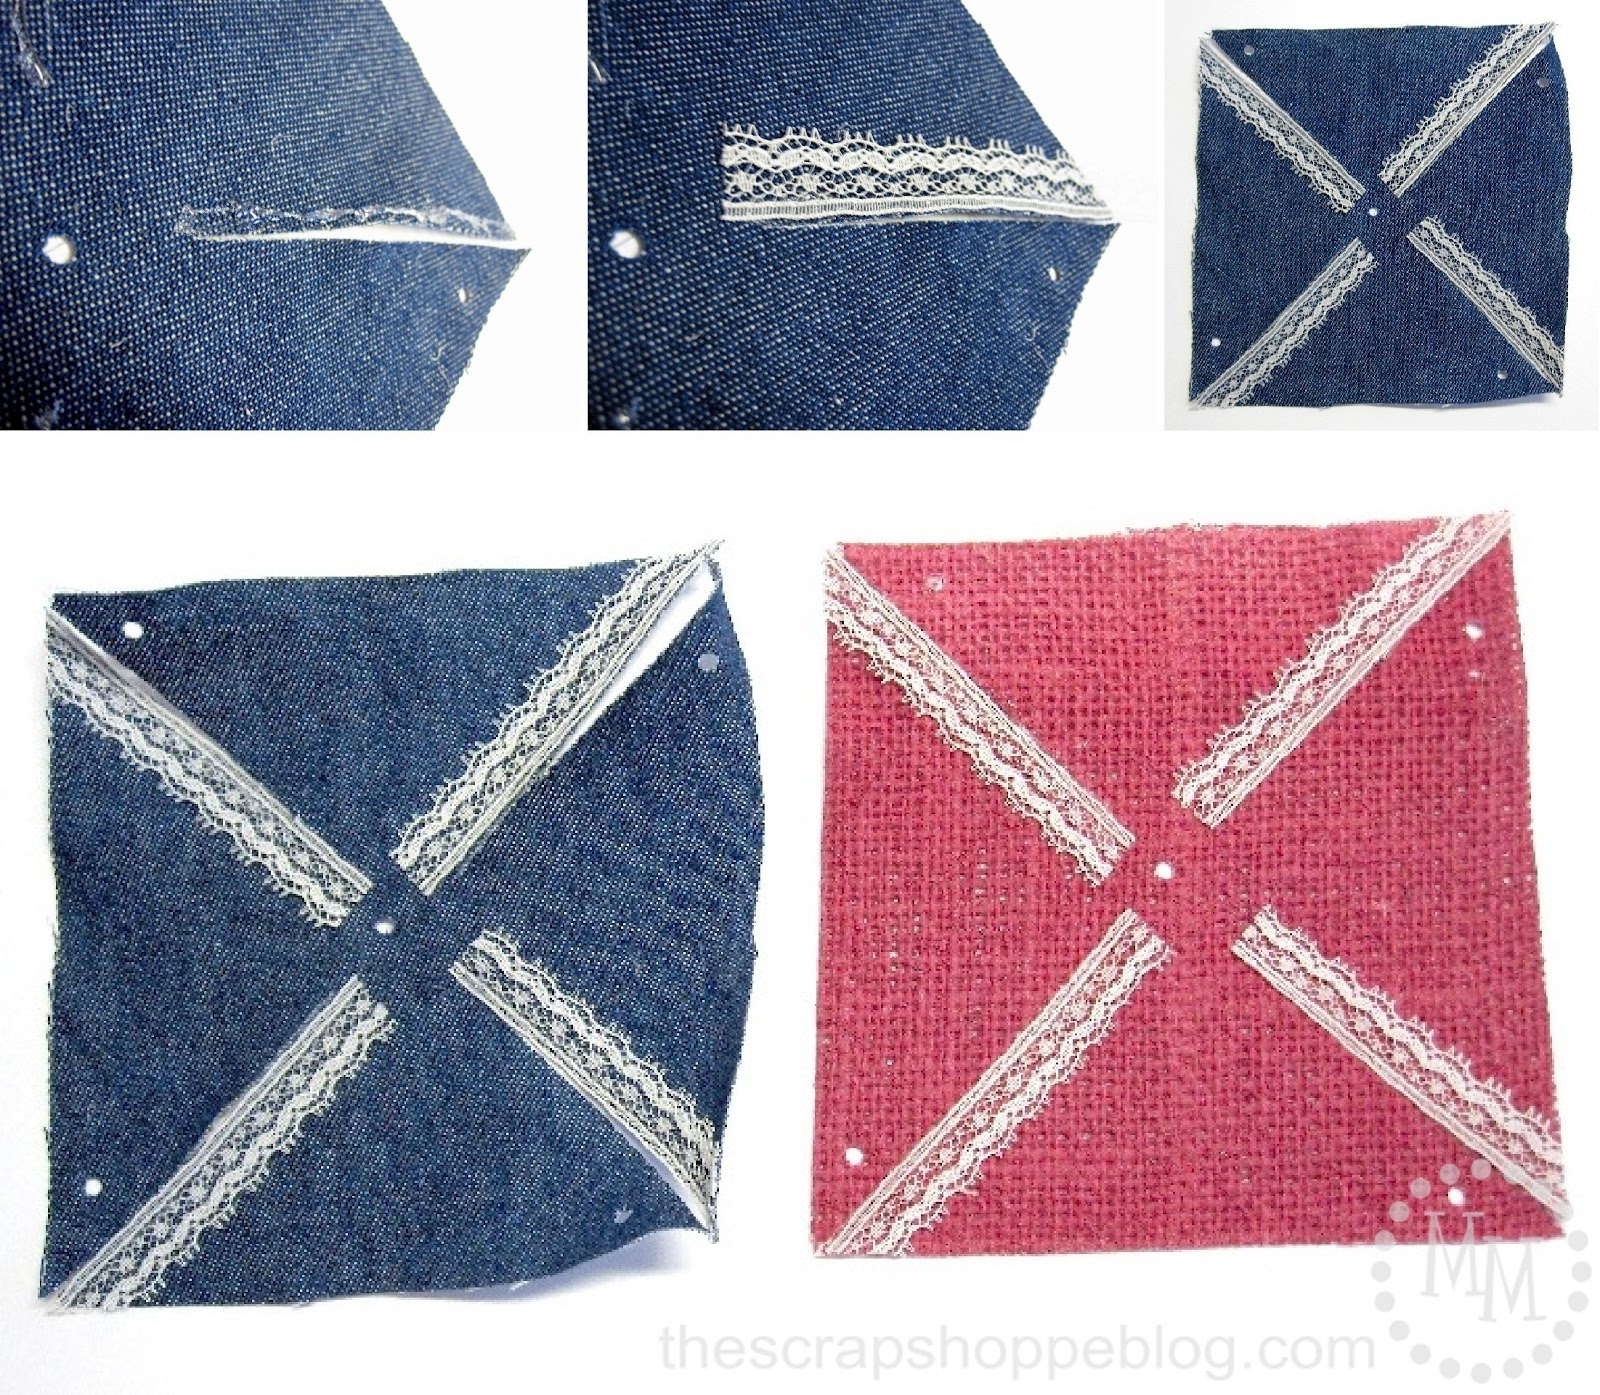
To get the "white" into my red, white, and blue fabric pinwheel I decided to add some lace to the fabrics.
Along the edges with no holes I laid down a strip of fabric glue (Beacon's Fabric-Tac) then added the lace.
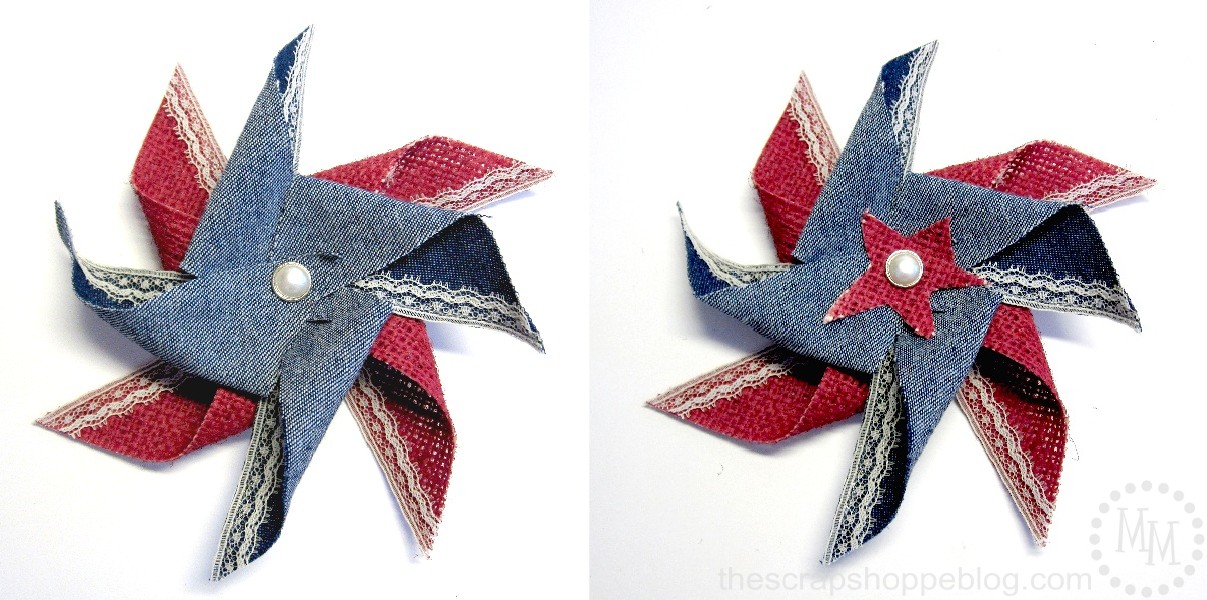
Follow the same procedure of folding the corners with the holes punched over the hole in the center of the square and insert your brad.
I decided all that inside out denim was kind of dull as the center of my pinwheel so I cut a star out of my red burlap, punched a hole in the center, and added it to the front of the pinwheel.
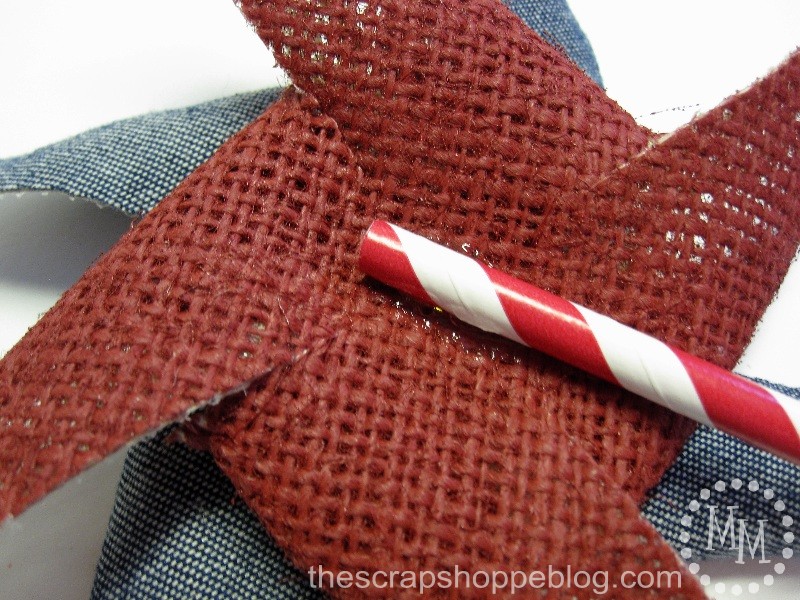
Unless you happen to have an extra long brad, you may not be able to thread it through the straw for the back because of the thickness of the fabric.
I opted to glue my straw to the burlap.
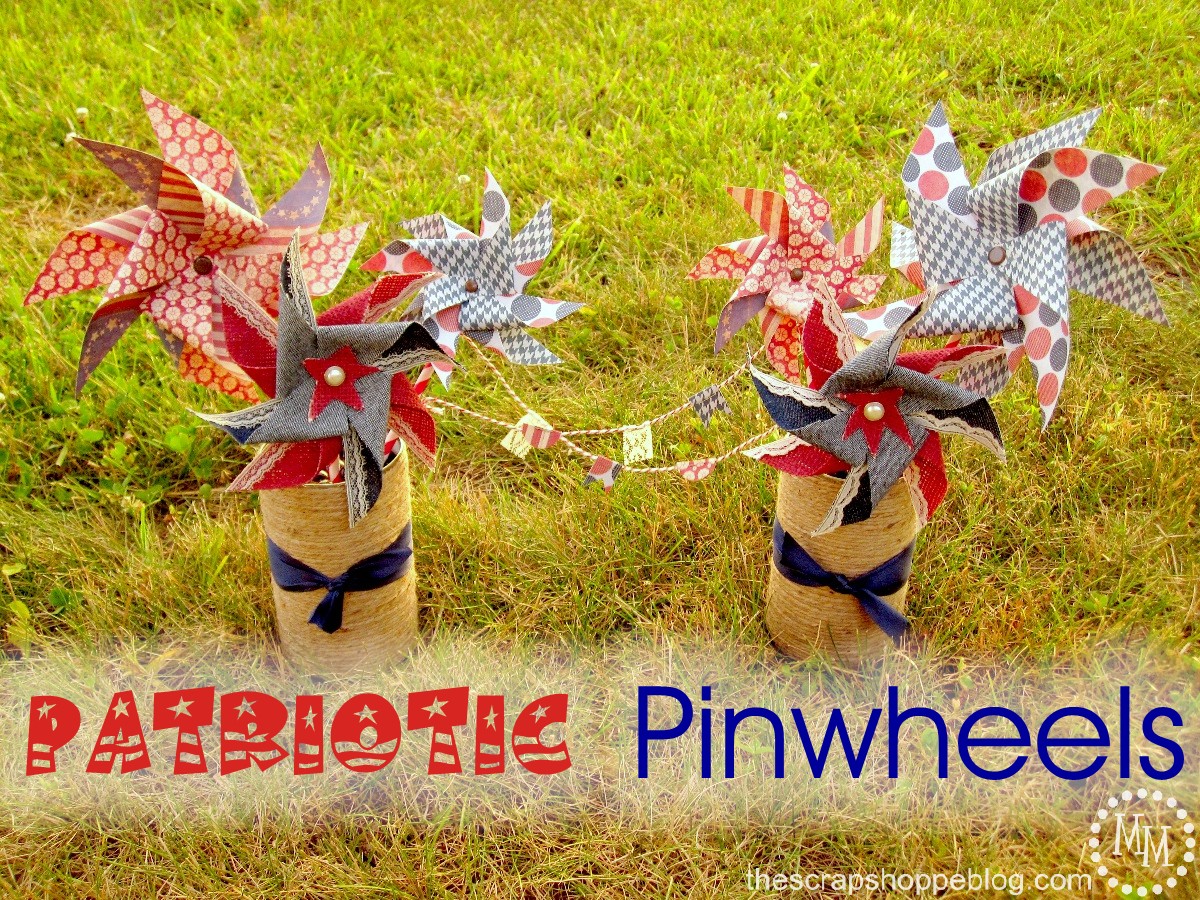
I ended up with 6 pinwheels total and set them up inside of twine-wrapped bean cans.
A little ribbon, a little bunting... and done!

I used some of my scrap paper to make the bunting as well as some scrap lace.
I'm loving how it turned out AND the fact I can leave it out until Labor Day!
I'm thinking a pinwheel garland may be in order now...

>> See where I party! <<


I discovered your blog today and must tell you that I have LOVED everything I read!! You are incredibly creative and talented!!!
Love your gorgeous pinwheels!!! I can't wait to try your tutorial.
~Donna
LOVE,love,love the pin wheels...great tutorial! Oh if I only had those papers right now !!!
Gorgeous!
super cuteness! love the lace, and those straws! ♥
Loooooove this Michele!!! Soooo cute- would love to make some mini ones 🙂 Featuring ya this weekend!! xoxo
These will be perfect for my son's Army birthday party - I'll do them in red, white and blue to add a little US of A to the party! Thanks for this. 🙂
I love your pinwheels! I will definitely be making these. I found this post on Pinterest! Repinned it!!!
Wow! Great project! Link it up with me on my Wow Us Wednesday, ok? Over at http://www.familyhomeandlife.com
These are very cute - I really like the one with the burlap and race! I am a fan of anything burlap!!! These would be a great addition to our Patriotic Link-Up Party running till July 4th if you'd like to link up, we'd love to have you: http://www.ourhousestory.net/2012/05/patriotic-link-up-party.html
Thanks so much for this tutorial! I'm a little in love with pinwheels right now but I haven't tried making them yet 🙂
I made patriotic pinwheels 2 years ago!! My kids *loved* them. The fabric ones are Beautiful!
These are beautiful! I'm a new follower, and I’d love for you to share this project on Tuesday’s Tidbits @ Naptime Delights: http://naptimedelights.blogspot.ca/2012/06/tuesdays-tidbits-3.html
Thanks so much!
Sarah
{http://naptimedelights.blogspot.com}
So pretty! I love the denim and burlap one...I might have to give it a whirl!
great tutorial! I may have to do some paper ones with my kids and spray them with some type of water protector for them to put outside and we can replace often!!!
I love pinwheels, they are such a summer icon! The lace is a delicate and lovely touch and gives a new spin on them...which I might just have to try!
Hi there - thanks for the tutorial. Love these ideas! I never thought of doubling them up - great job.
I also love the idea of making the holes and then lining them up and putting the brad through it.
Thanks
Linda
PS - I have a project on Sumo Sweet Stuff - it's my Summer Mantle. Hopefully you will check it out.
http://www.studioofdecorativearts.blogspot.com
Oh I love this!!!! I hav never made pinwheels but now I am tempted to 🙂
Michele,
your pinwheels are too cute! I use to make these with the kiddos when I taught pre-k. lots of fun!
but not as cute as yours!
gail
I love the idea of stacking them.. Plus the doubled sided prints makes them so much more interesting.
Great ideas!
These are just WONDERFUL!!! So much fun!
<3 Christina
http://igottacreate.blogspot.com
Wildly Original Round Up party is open.
So cute! I'm going to make these with my grandkids. Thanks for the tutorial.
So cute!! I pinned it, thanks for the great tutorial!
This is a great tutorial! I can't wait to make them. I love how you put together your finished product as well.
I have never made pinwheels either so thank you for such an easy to follow tutorial. Thanks for sharing at this week's BFF Open House. Pinning to my July 4th board!
Looks great! Liz
BTW, 4th of July is my favorite holiday, so I'm kinda obsessing over these!
I've made pinwheels before, but never thought of doubling them! I love the look of the fabric ones too. So cute!
I'd love if you'd come link up at my Tutorial Tuesday Linky Party http://www.ourthriftyideas.com/2012/05/tutorial-tuesday-8.html
Your pinwheels are awesome! Thanks for the tutorial - I will have to try to make some!
I would love if you came by my linky party happening now to link this up!
I would love to have you there!
Stacey of Embracing Change
http://staceyembracingchange.blogspot.com
Oh yeahhhhh! These are so super cute! I love them all - the paper ones are so fun and the denim and burlap - with the lace??? Adorable! I've never made pinwheels either - I can't wait to try!
Can these spin or is it for decoration?
Hi Daiana! These are purely for decoration, but you could easily make a couple of changes so that they would spin. I would suggest making the hole in the straw a little larger so the the brad could rotate freely. Also, don't pinch the straw as I did to put the brad through. You will want room for it to move and not be tight.
Ok thank you 🙂
I'm planning to put an eyelet in the center and using a thumbtack to put them on either a skewer or chopstick so they will spin. 🙂 I have other plans for the straws...
oh my heart!!!
i love pinwheels. my grandma used to have homemade pinwheels waiting on us when we would come & visit her for the Summer. you just brought back a flood of memories.
great tutorial too!
xo
kellie
EEK. Are you planning my wedding deco or just reading my mind?!?! I love the fabric and lace pinwheels - totally cute.
Thanks for such a great tutorial! I've been thinking of making some pinwheels...and yours are easy and gorgeous. And just the nudge I needed.
Thanks!
p.s. I went to 'pin' it for reference and no can do. 🙁
Thanks, Diane! 🙂
Hrmmm, I just tried to pin it to Pinterest and didn't have a problem. Maybe their site was having a hiccup?
Came back again and was able to 'pin.' Now on to create!!