
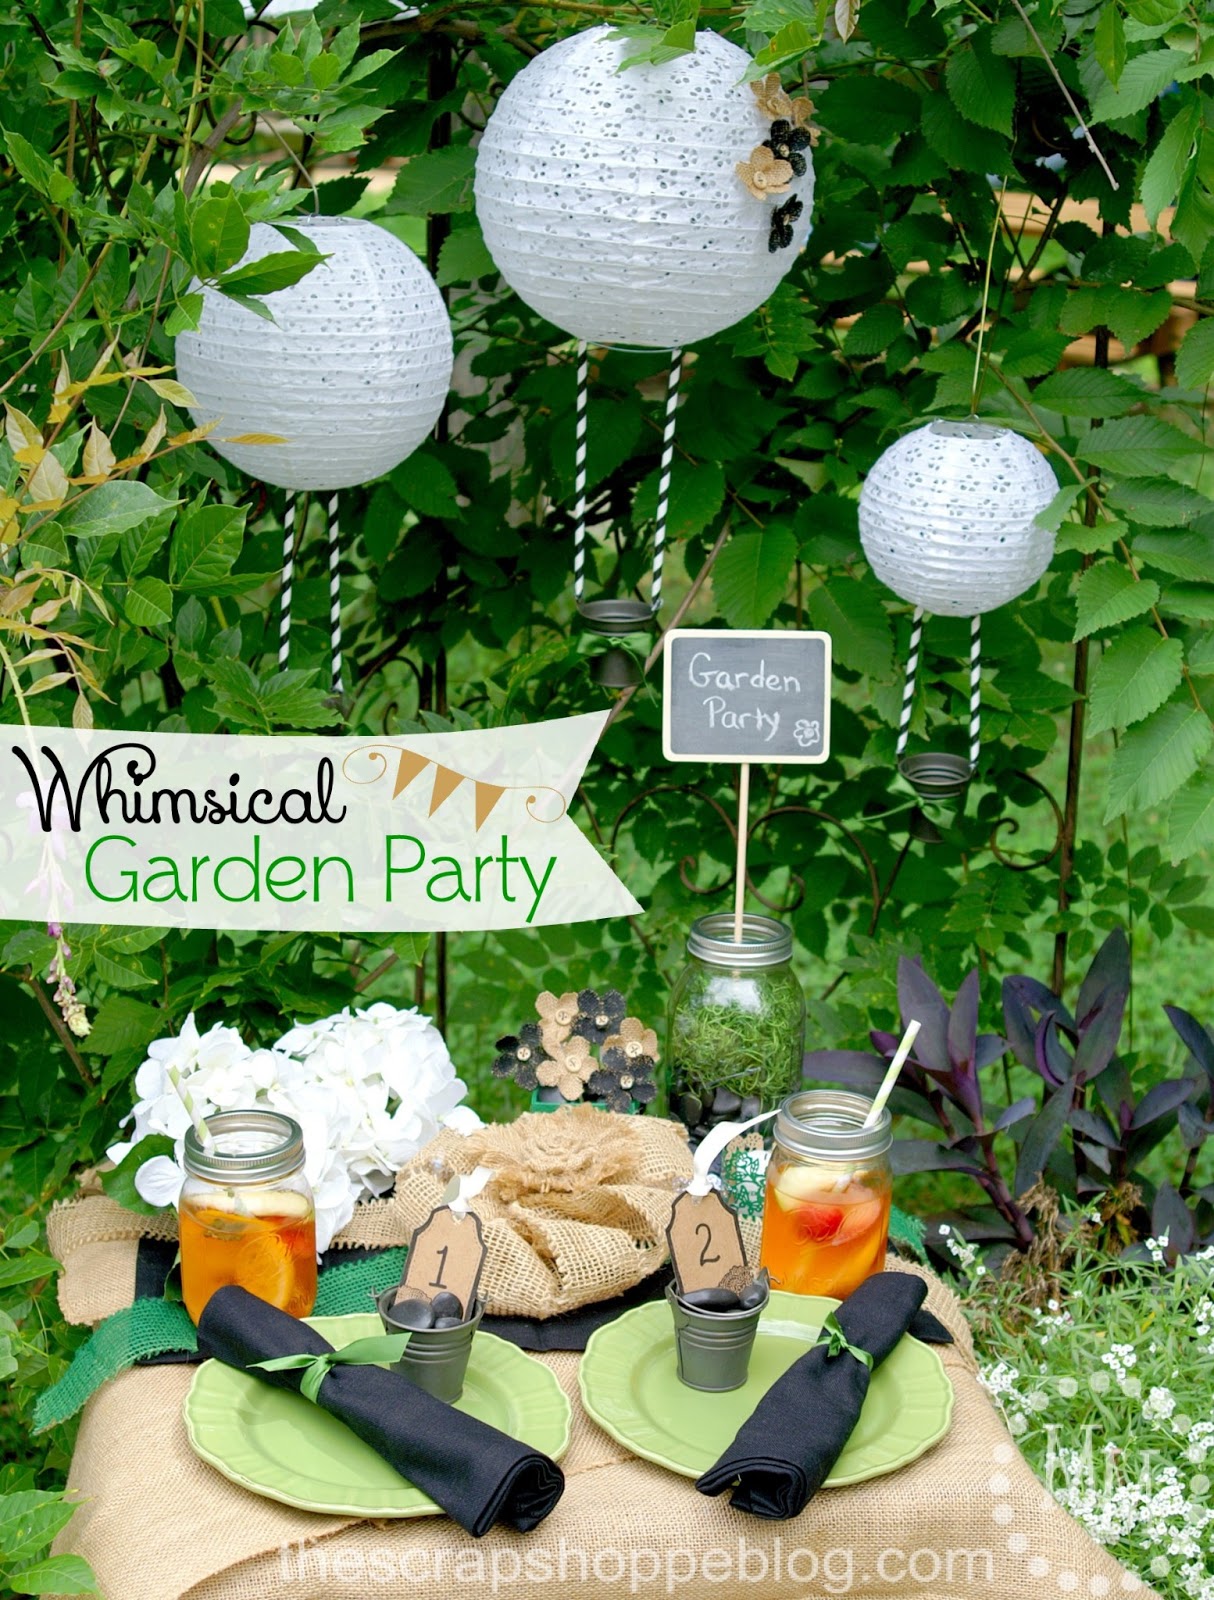
Whimsical Garden Party
I recently received some beautiful products from the new David Tutera Casual Elegance line to review. I cannot gush on these products enough! The line is rustic yet elegant all at the same time. Think of vintage chic wedding... held in an old barn! Gorgeous! I ooh'ed and ahh'ed my way through the box of goodies that arrived at my door. The line screams wedding, but you can really do so much more with it!
I decided I wanted to use as many of the products as I could for my review, so I decided to create a tablescape using the items. But I didn't even come close. There is just so much! And my table is only so big.
I put together a whimsical garden party using the David Tutera supplies. And for the backdrop I made some hot air balloons from the paper lanterns from the line. Let me show you how to put together the balloons.
Then we'll get to the rest of the table set up.
Supplies needed:
David Tutera Paper Lanterns - set of 3
David Tutera Black Striped Paper Straws
David Tutera Grey Tin Buckets
wire
scissors
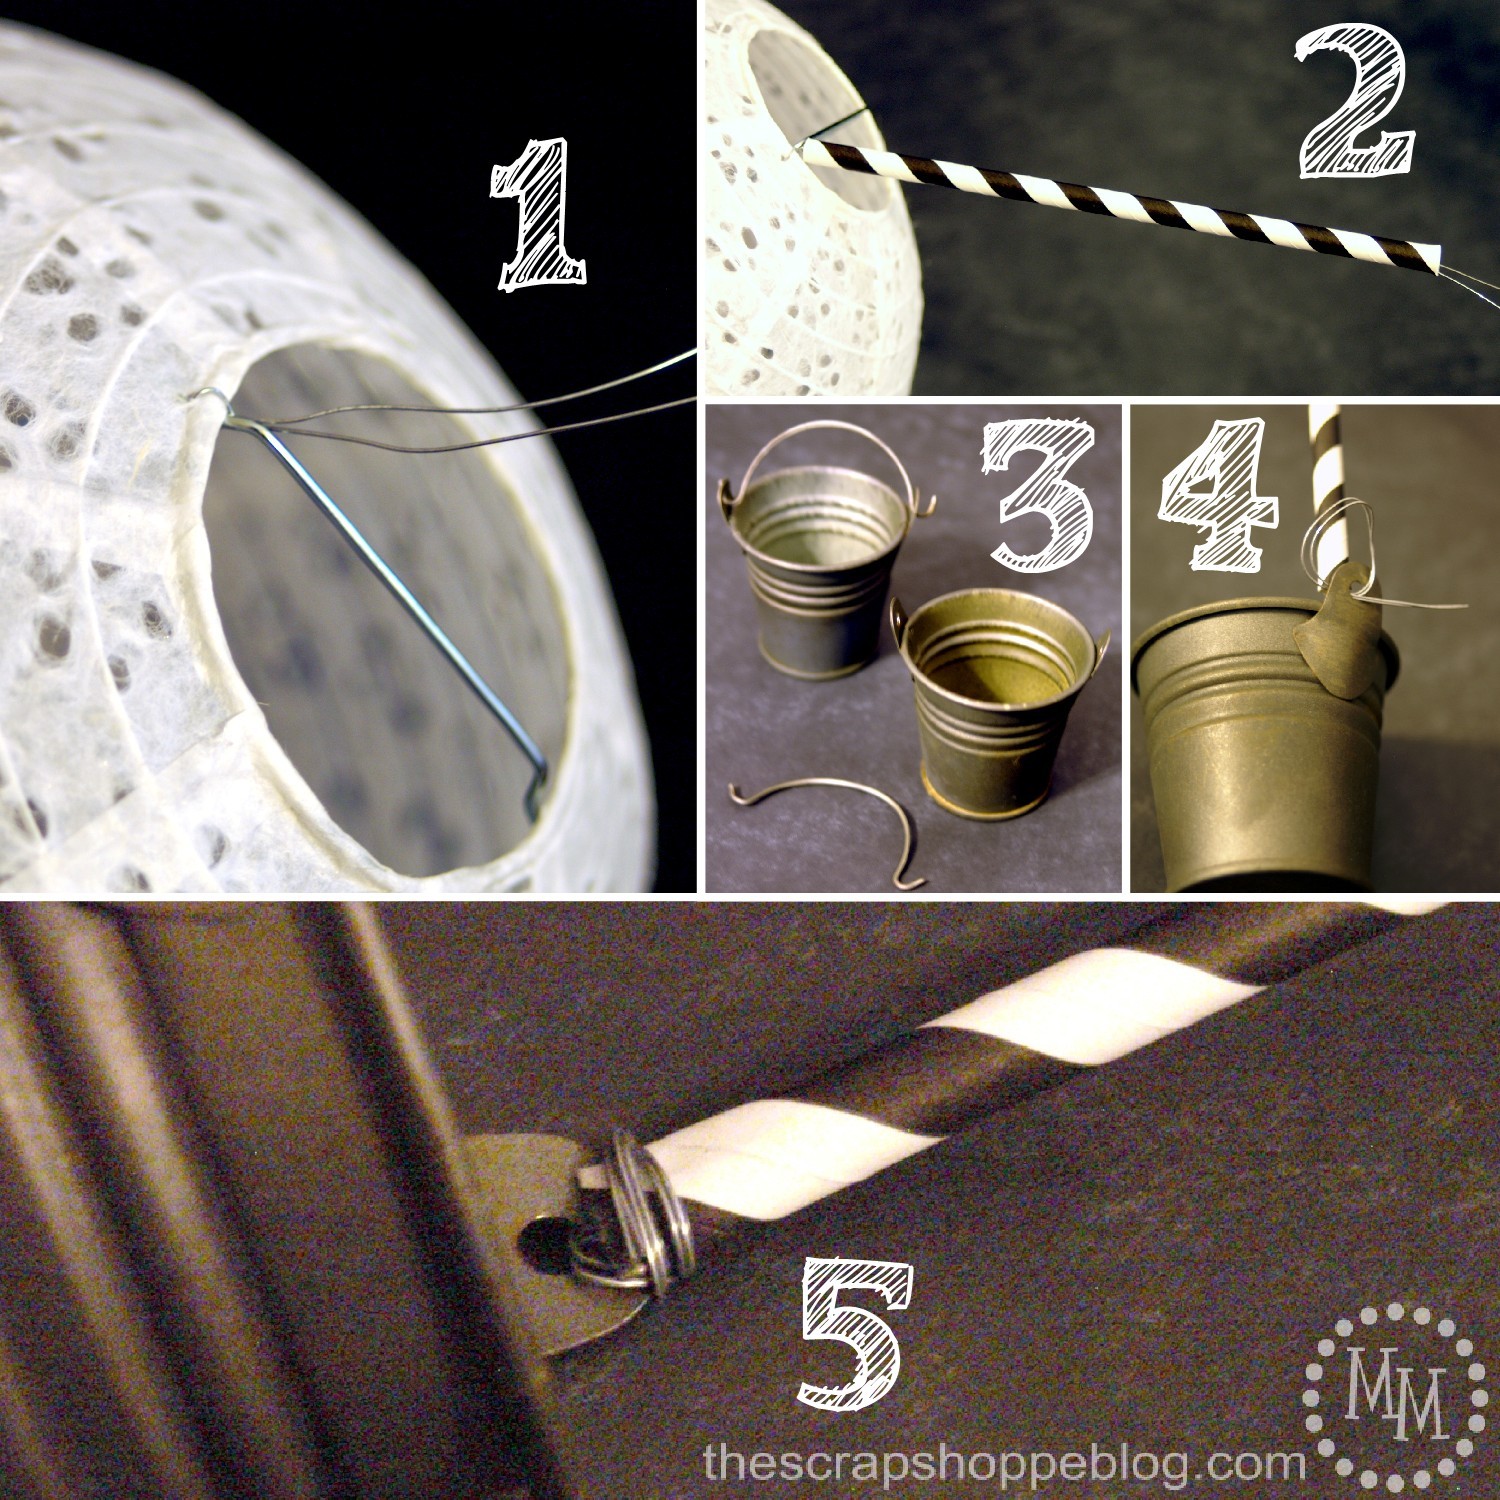
1. Cut a long length of the wire and run it through the bottom edge of the lantern and twist it around the wire that is on the lantern.
2. Slip the wire through a black and white striped straw (since the lanterns are of decreasing sizes, I also made the lengths of my straws of decreasing sizes). Make sure there is at least 2 inches of wire sticking through the end of the straw.
3. Remove the handle from the tin bucket.
4. Thread the wire through the hole in the handle of the bucket from the inside out then thread it through once again. Pull it tight.
5. Wrap the rest of the wire around the handle and the straw.
Repeat with the other two lanterns.

Isn't this hot air balloon whimsical and fun?
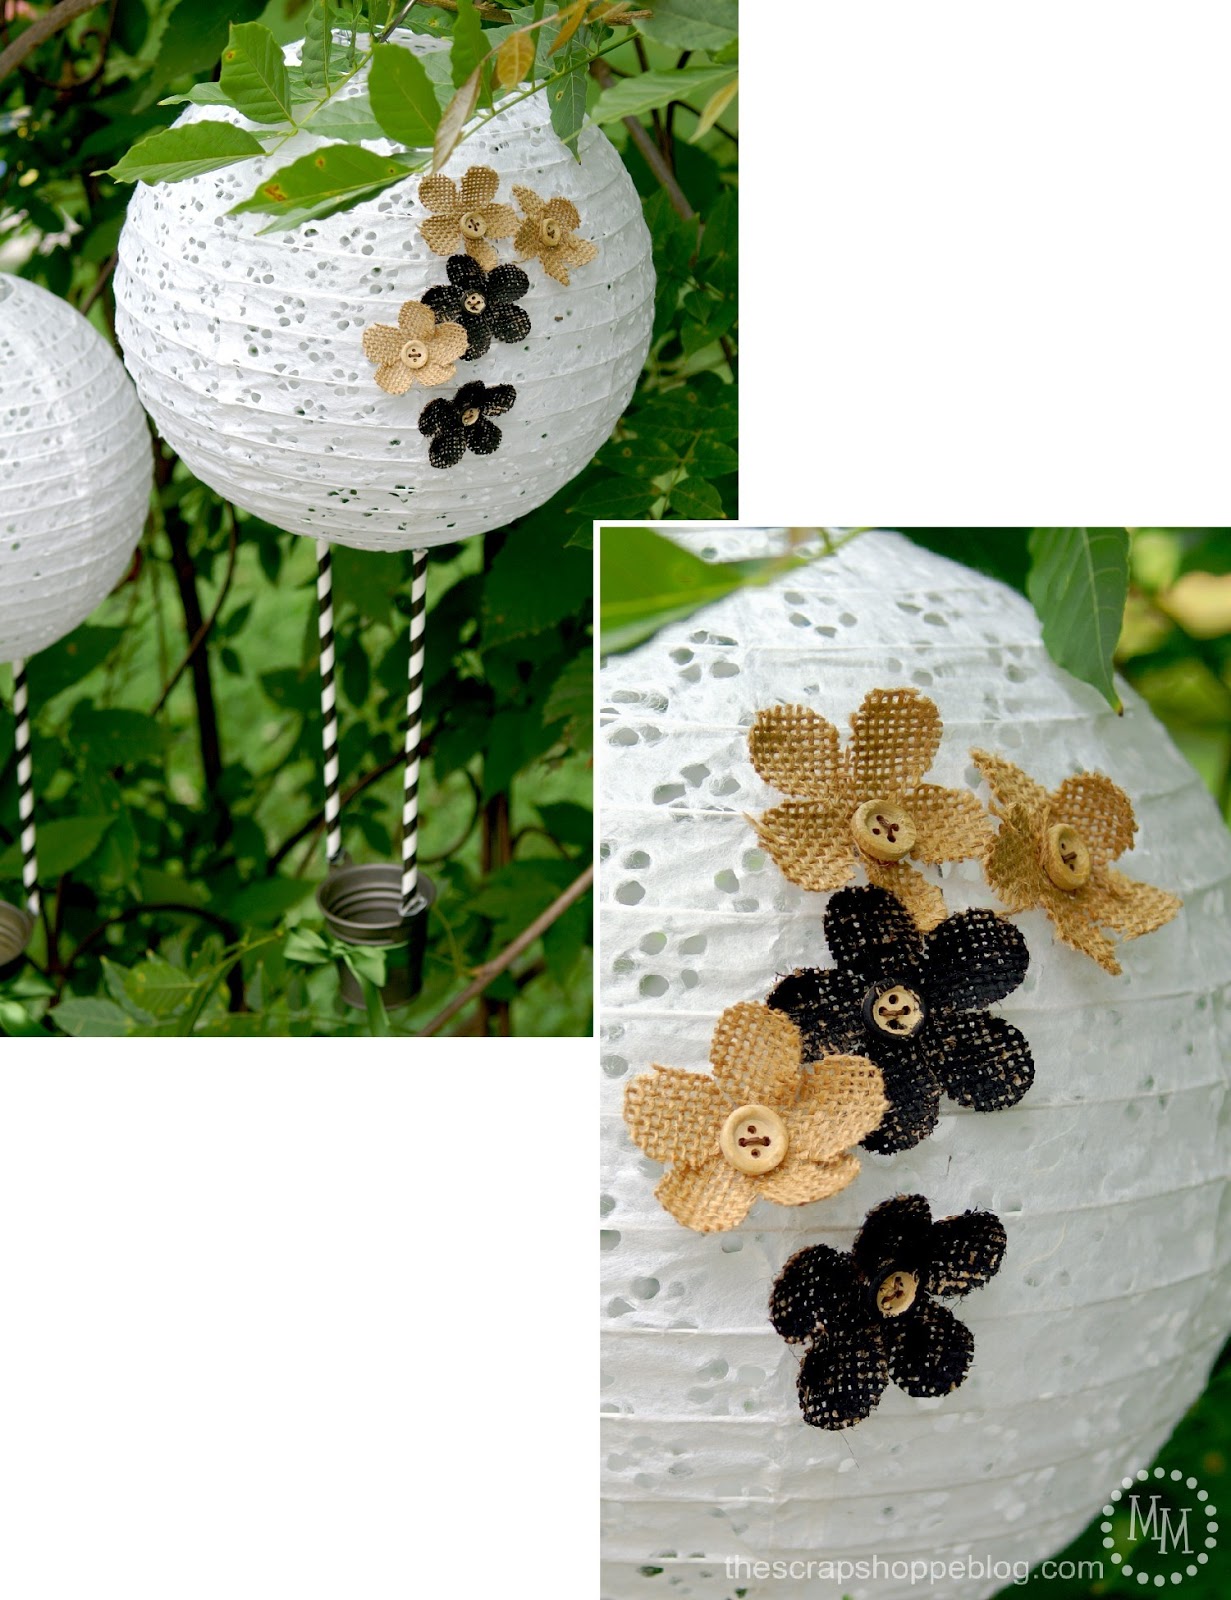
Decorate the hot air balloons as you see fit. I took the David Tutera Small Burlap Flower Picks and painted a few of them black using acrylic paint. Then I threaded them through the holes in the largest lantern and twisted the wire they are mounted on so they would stay in place.

For the garden party, I used wire hangers to hang the balloons on a corner trellis so that the hangers would get lost in the foliage and not so noticeable.
I only used the burlap flowers on the largest balloon and left the others plain. I tied green satin ribbon on all 3 buckets to dress them up and tie in with my color scheme.
The chalkboard stake peeking up from the bottom of the photo is also from the David Tutera Casual Elegance line.
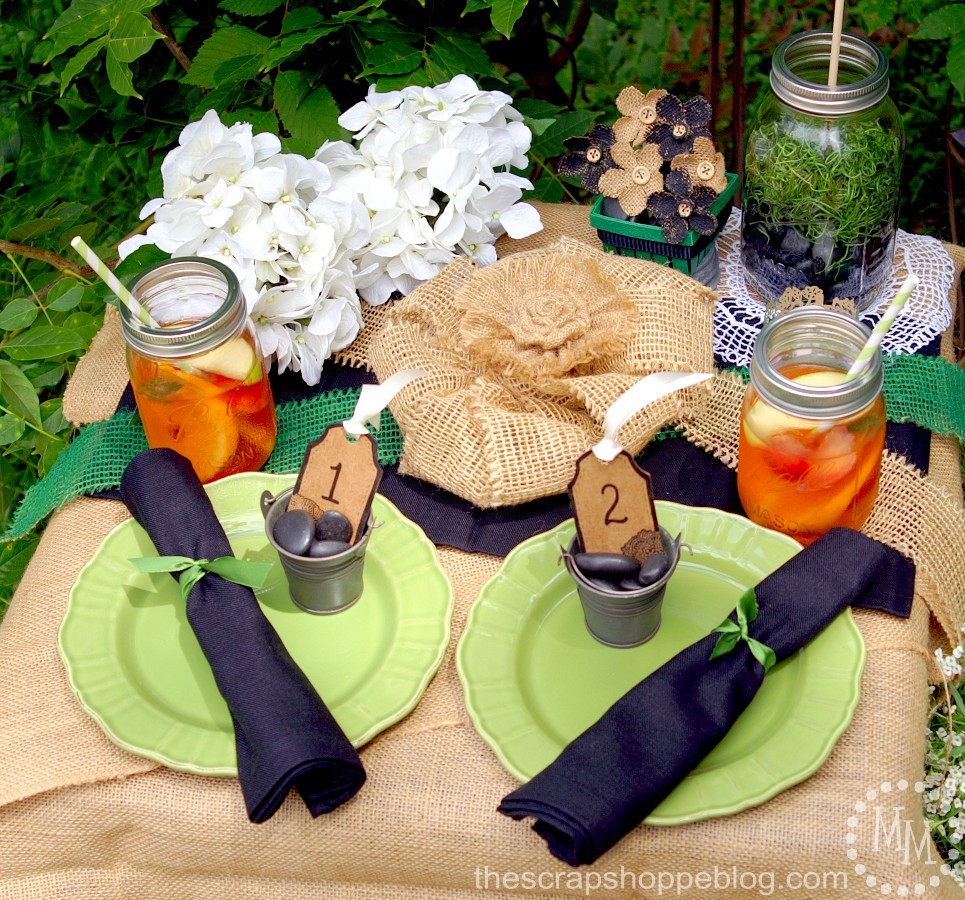
For the table I went with a Kraft, green, and black theme. I spray painted a few of the David Tutera items so they would work with my color scheme.
I covered this small square table with a burlap table runner I had on hand.
Let's break down the rest of the elements I used from the David Tutera line!

1. I used more of the small burlap flower picks for a mini bouquet. They are in David Tutera Mini Basket that I sprayed painted green. The large Ball jar is also from the line. I used it to hold the chalkboard stake.
2. There are a couple of cute Kraft paper napkin ring set in this line, and I used these floral napkin rings as candle wraps (and spray painted them green).
3. I love the burlap ribbon that I was sent. Its wired and the perfect length to make a large burlap bow. I added one of the David Tutera Burlap Flower Picks to the center to make it more interesting.
4. I used more of the tin buckets to hold the seat numbers which I made with the David Tutera Kraft Tags.
The Ball jars used for the drinks and the green striped straws are also from the line.

Isn't it fun! It is just perfect for a fun little party with friends.
I think the hot air balloons would be adorable in a baby room or a small child's room.
Not to mention super cute outside lit up at night!
Items from this line can be found exclusively at Jo-Ann Craft and Fabric Stores.
Looking for even more ideas? Check out these projects using the new David Tutera line.


What a cute way to decorate for a garden party!
so creative!
simply adorable! The lantern balloons would be adorable in a nursery!
Can I say I love the lantern = balloon concept. Wonderful!
When I see sweet things like these, I wish I had a girl to have fun decorating with these hot air balloons! I didn't know about the David Tutera's supplies, thanks for the tip!
That is the cutest thing ever - would be gorgeous in a nursery too!!!
Visiting from Under the Table and Dreaming...........
Hugs,
Suzan
Adorable!! My girls would love this! I would never have thought to make lanterns into balloons
Suzanne of Simply Suzannes at Home
Oh my gosh! Could your paper lanterns be any cuter!
How creative! Love the burlap flowers on them too!
Thanks so much for sharing!
Have a great weekend,
Suzanne
Super cute!! Love the hot air balloons!! Super, super cute. Love it!!
CUTE! Love those hot air balloons! I popped over from The Shabby Creek Cottage--thanks for sharing!
~Abby =)
How creative Michele... what a great rustic look. LOVE IT!
Oh my gosh. How cute is all of this?! I had no idea he had come out with this line!! And ok, those Hot Air Balloons??! Genius!! I think they would be perfect for any party - or a child's room too! So stinking cute!
Wow! This looks great! How cute are all those great supplies? You did a great job with the balloons. So cute! I am pinning!