
Backlit Canvas Art
Can you believe this backlit canvas art is made with just plain cardstock and an X-acto knife?

Do you have a project that you've been longing to do, but just haven't found the time yet?
I really seem to rack those up!
This project is one for me.
I call it my Backlit Canvas Art and the inspiration piece has been pinned in my "Crafts to try" Pinterest board for ages.
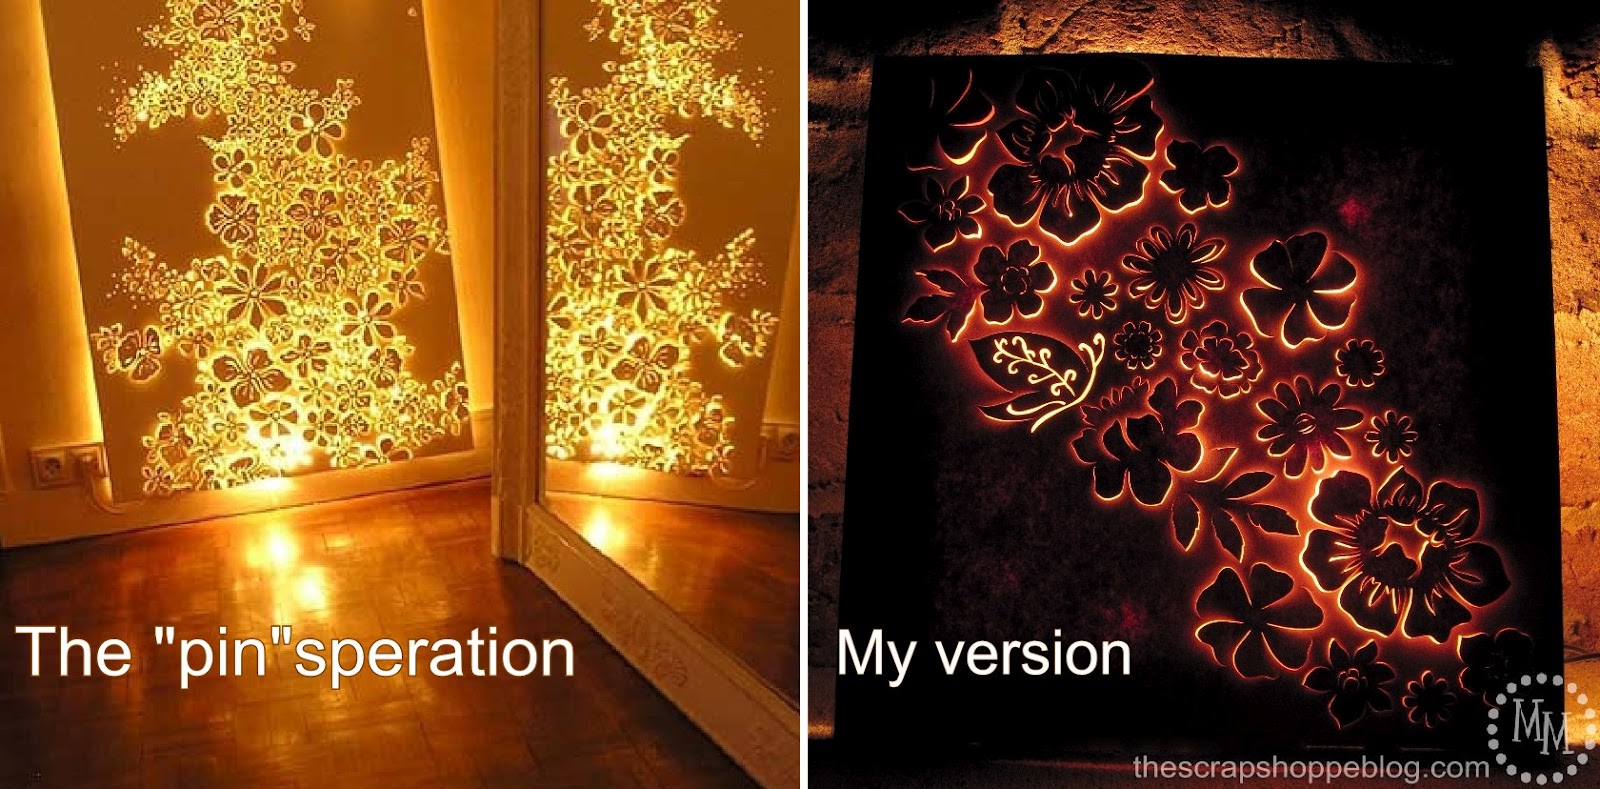
My "pin"speration is an artist's piece made from metal that has hand cut flowers all over it.
It's backlit by Christmas lights, and I pretty much love it!
So I decided to give it a go and create my version.
There are two main differences between the two:
1. The scale. Mine is way smaller!
2. The media. The artist used metal while I used cardstock!
I've put together a video tutorial that quickly shows all the steps to make this piece of artwork.
But you can follow the step-by-step photos below as well.
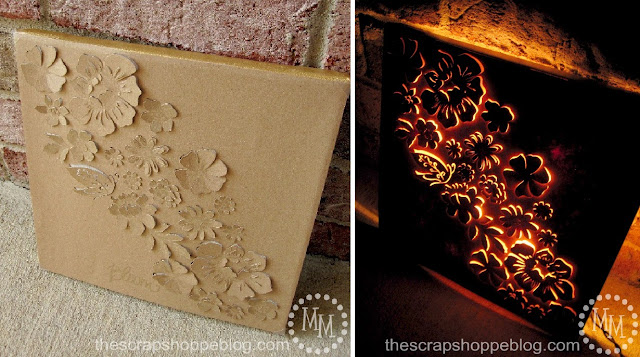
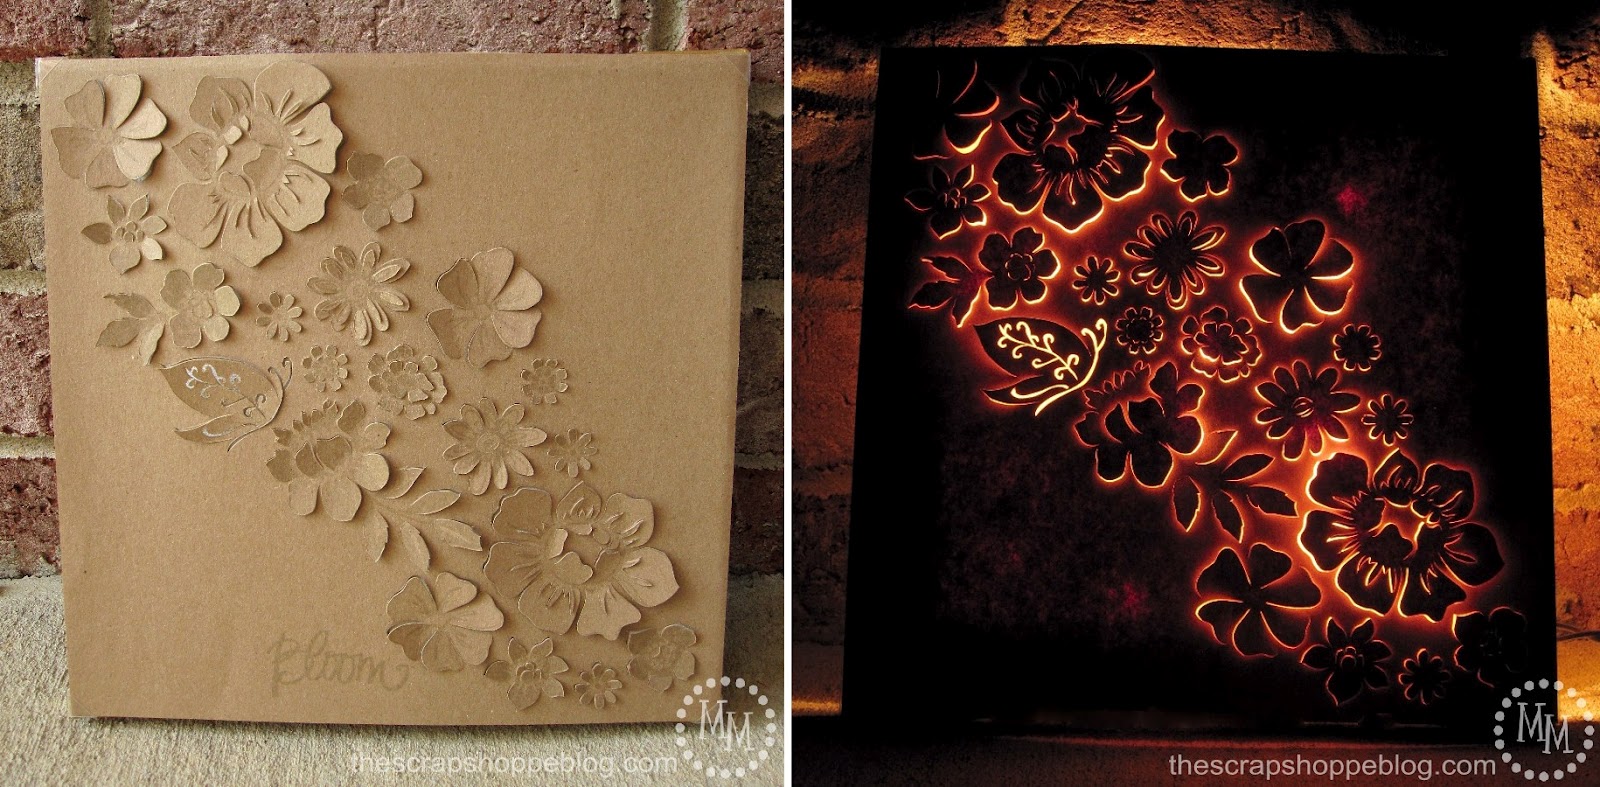
Backlit Canvas Art: Day & Night

The idea of the canvas is that during the day (ie. with the Christmas light off) you have a beautiful sculpture while at night (you guessed it, with the Christmas lights on!) you have a fun and unique piece of art.
How about a tutorial?

Backlit Canvas Art Supplies:

Mounted canvas (mine is 10"x10"
cardstock to fit on your canvas (mine is 12"x12")
stamps
ink pad
X-acto knife
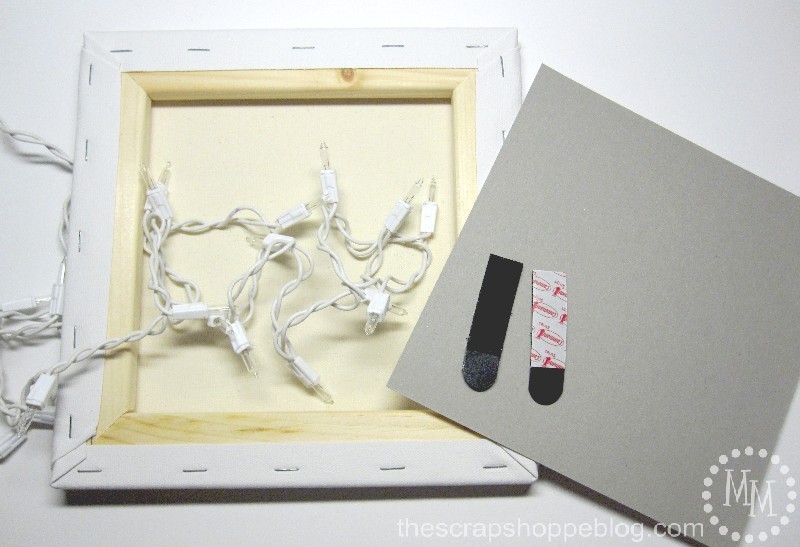
light source*
*I wasn't sure if I wanted to use a single bulb or Christmas lights so that is why both are in the above picture.
Ultimately I was worried that the single bulb could get too hot if left on too long so I went with the Christmas lights.
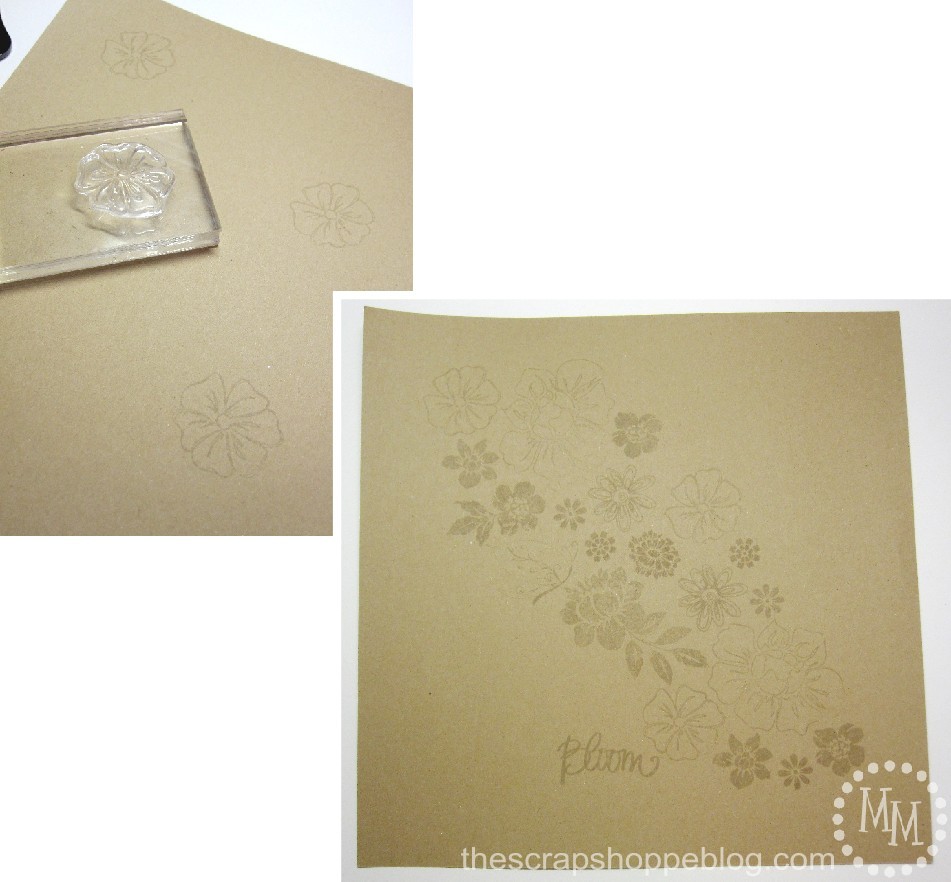
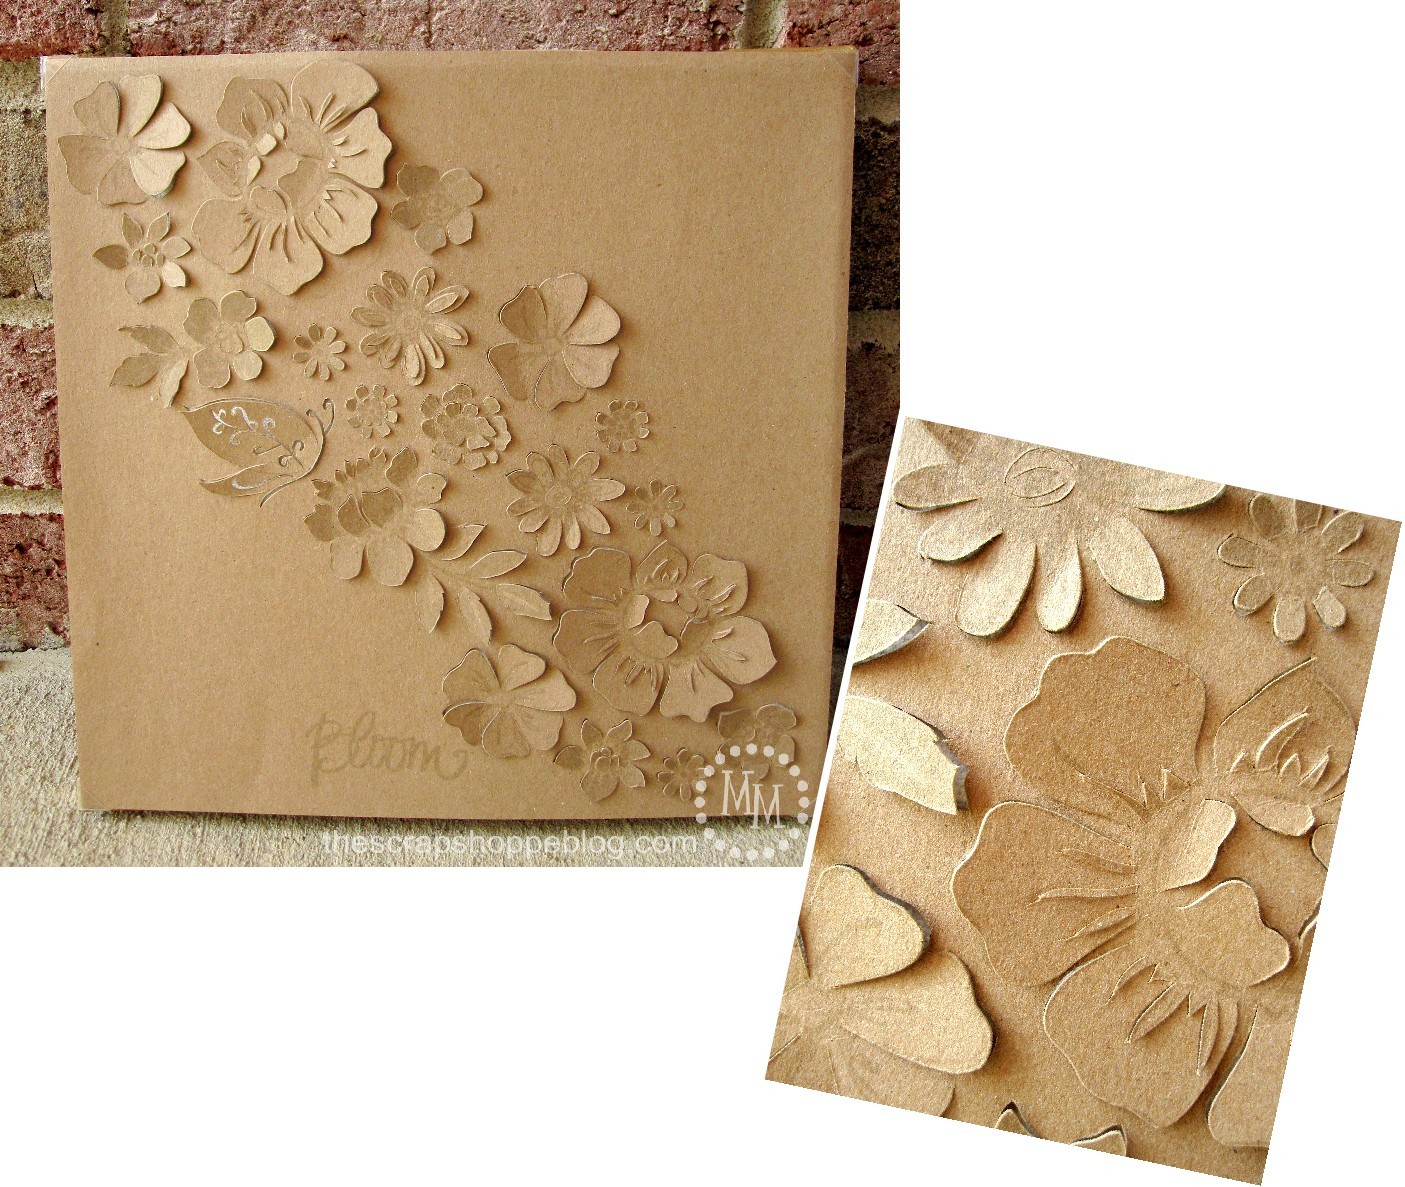
I decided to go with the same flower theme as my inspiration piece.
I randomly stamped various flowers across my cardstock.
I went with gray ink on the brown Kraft paper because I wanted it to be subtle during the daylight hours.
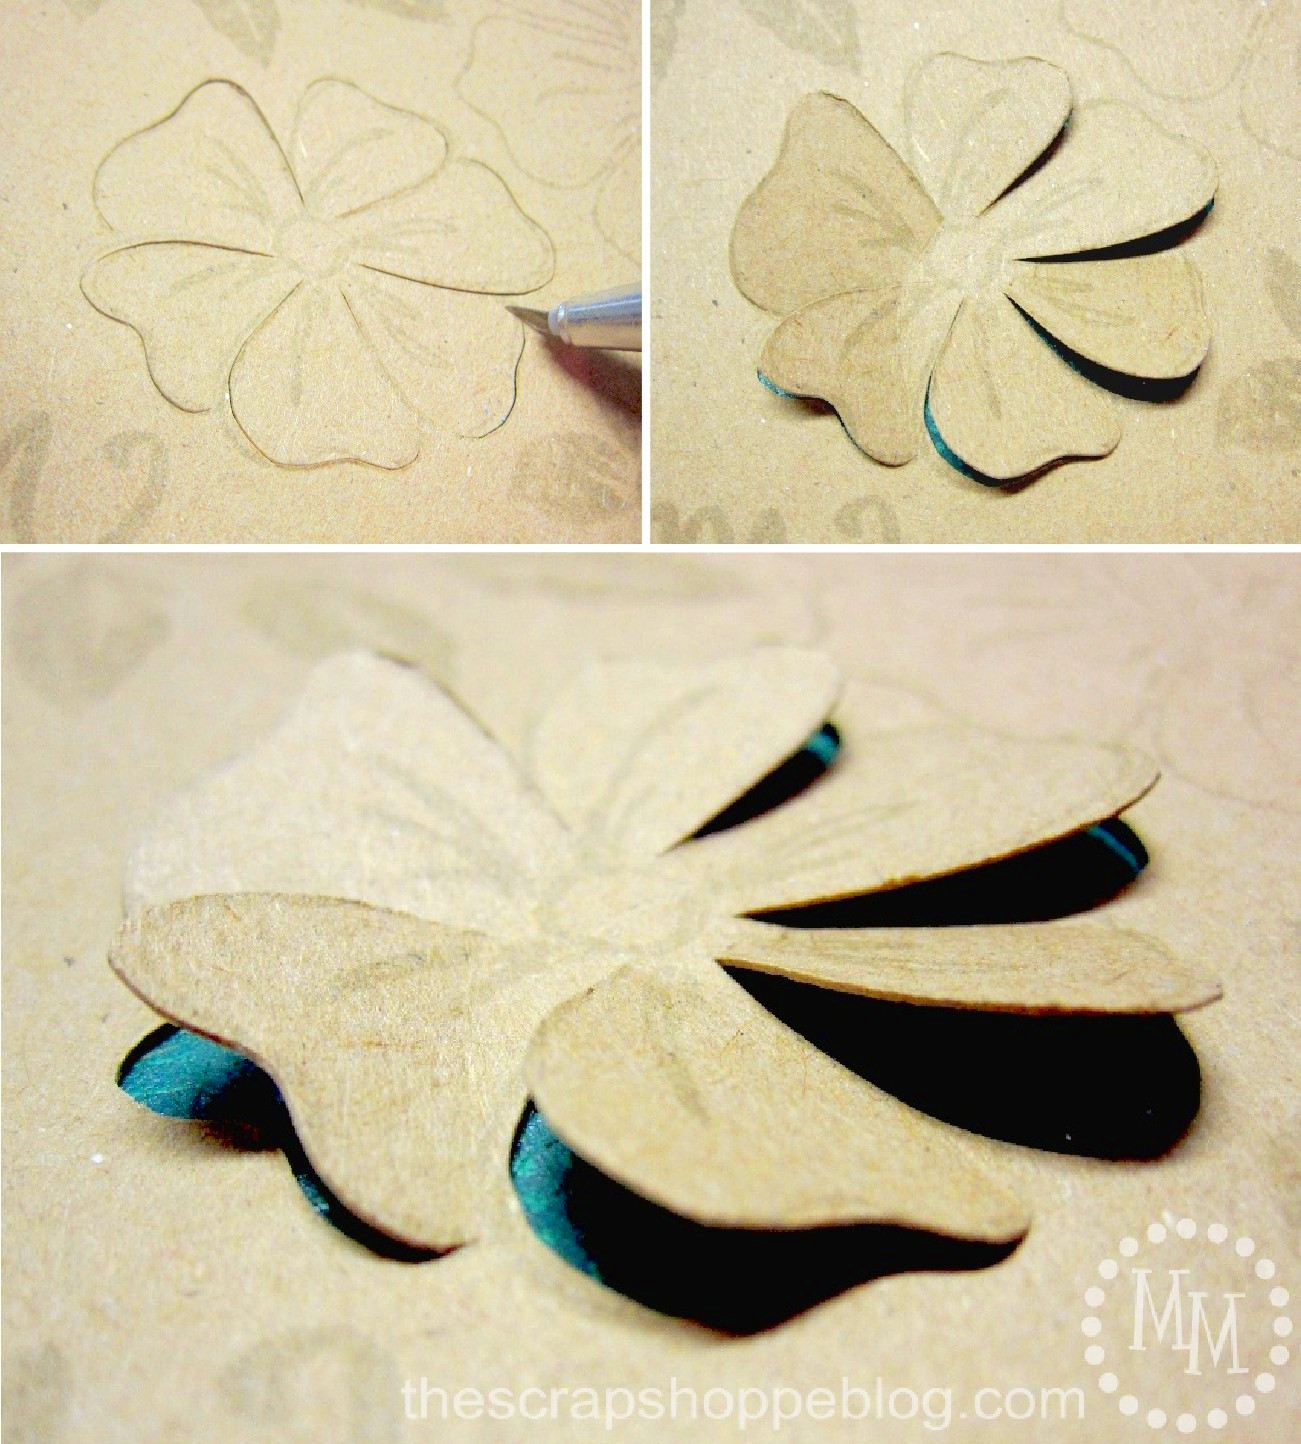
The main thing you want to take care of is not completely cut the flower off of the paper.
Take your time. Look at each flower individually and see what flows.

I cut some of my flowers very literally as they looked stamped.
For others I made different patterns with the petals.
For the butterfly I decided to completely cut out the thin swirls on his wings to let the light shine through.
After you're done cutting (or while you're cutting if you're impatient like me!), from the back of your paper, gently push the paper out so that it "pops" from the front. Be gentle.
Time for the lights!
I took a scrap piece of cardboard and trimmed it down to fit the back of my canvas.
I also snagged a couple of spare Command strips I keep around for just such an occasion.

I cut the Command strips in half lengthwise to
1) make them go further, and
2) slim them down to fit on the exposed wood frame.
After trimming, I arranged the Command strips where I wanted them to go and adhered them to the canvas
Next I set my cardboard on top of the strips so that everything would be lined up appropriately.

Tuck the Christmas lights between the canvas and the cardboard.
Be sure to spread the lights out so all of your light is not concentrated in one area.
The cord from the lights should easily fit between the canvas and cardboard backing.
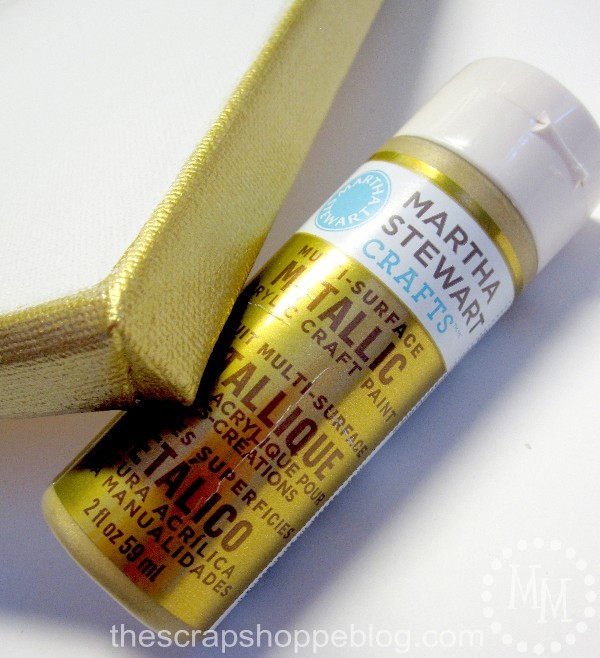
Since my canvas is white and my cardstock is brown, I decided I wanted to paint the sides of the canvas.
I went with a metallic gold from Martha Stewart Crafts.
I feel like it makes the canvas look "framed!"

Its time to trim the cardstock down to size and attach it to the canvas.
If you know me, I like multipurpose projects.
It makes for less storage and seriously just makes me happy!
This flower art was so fun to make that I decided I would definitely be doing it again.
Maybe even holiday pieces!
So I want to be able to use the canvas again and change out the cardstock.
I think this turned out SO fun!
You can literally use any color of paper and any pattern to make a unique piece of art for your home.
I definitely love the way the piece looks during the day.
The subtle shadows created by the cut flowers really draws the eye!
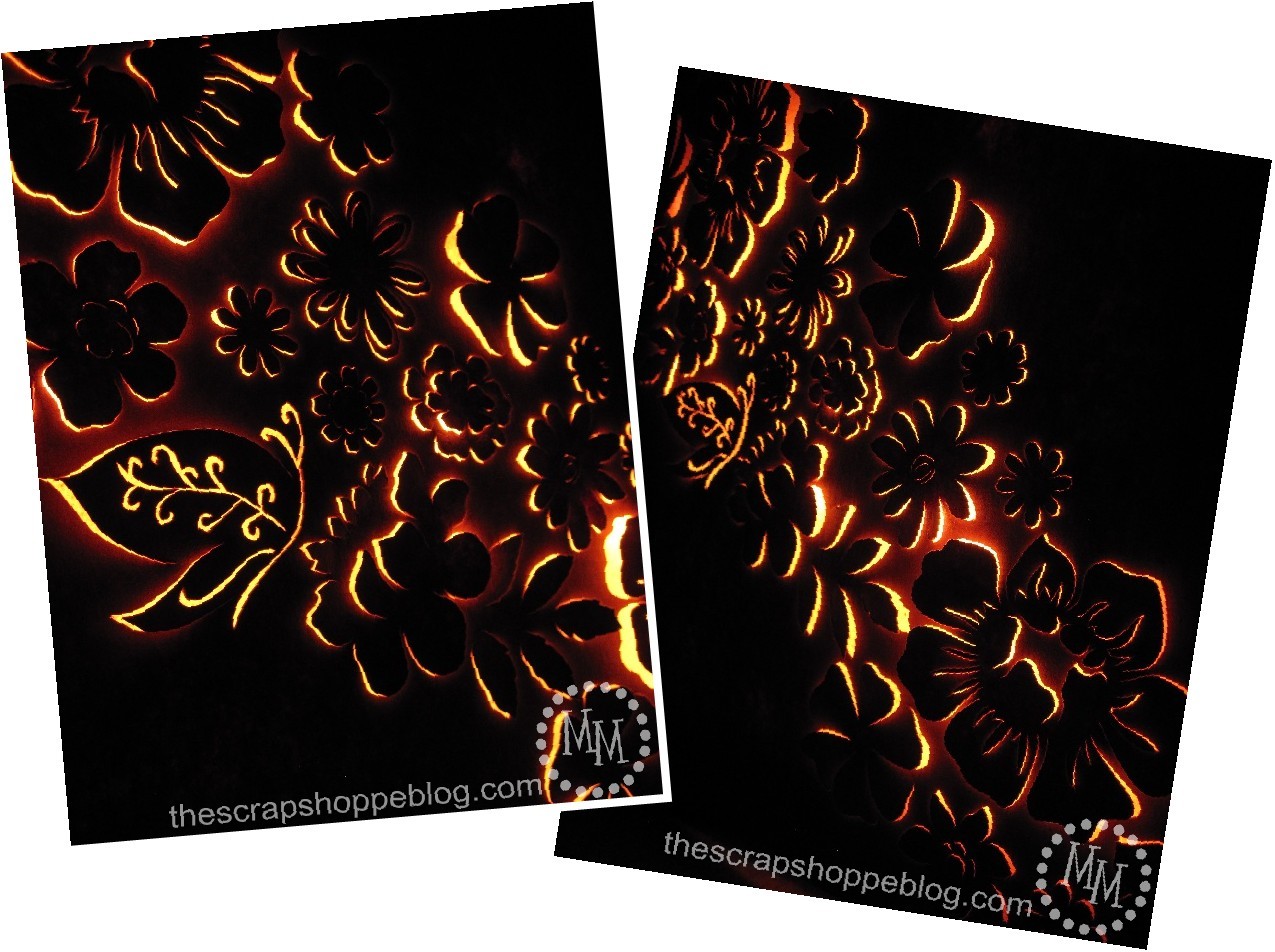
And backlit?
Well its just fun!
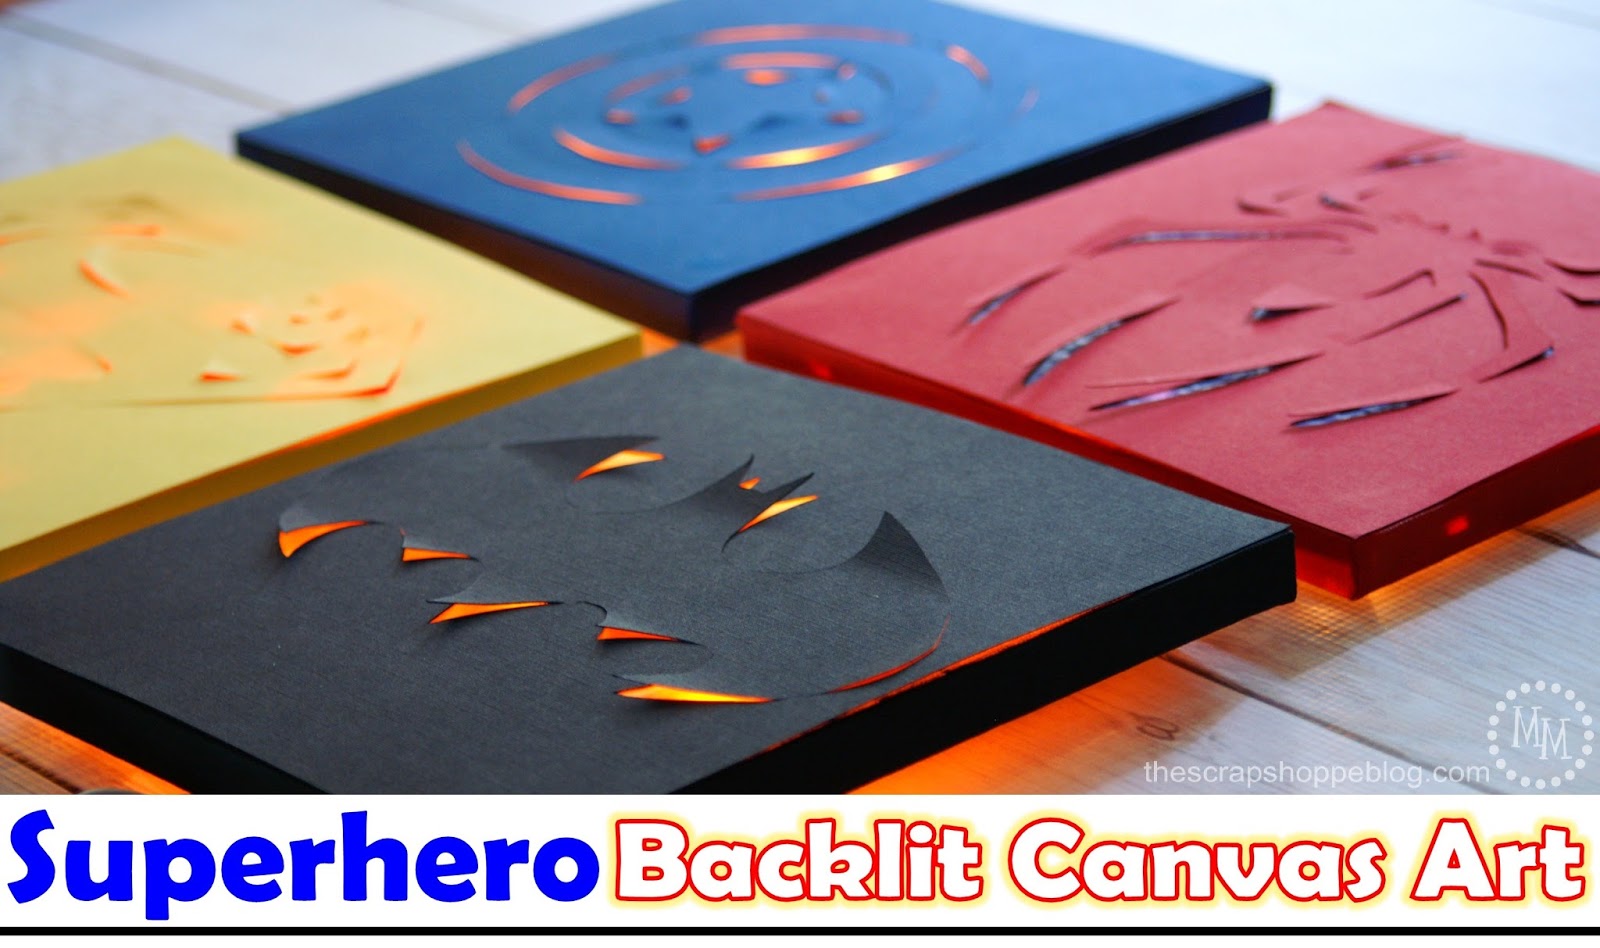
Be sure to check out my superhero backlit canvas art, too!

>> See where I party! <<


So cool! I was wondering though--is it possible to paint the cardstock and then stamp & cut out? I think it would make it look more complete. But would the ink stay? Thanks. 😀
-Lily
What an awesome idea. I think I will give it a try.
Thank you so much for sharing!
Wow this is amazing...so going to try this!!!! truly gorgeous work....
Hi, I clicked through from Curbly. Beautiful project; such a clever idea. Can't wait to try this.
Ooooh, I love this so much I had to put it in a Link Love post! Gorgeous job!
Thnk you so much for this.. I saw one in a store but was made with metal, and I didn't know that I could use it like this.. it was like 800 dollars, and now I can make it myself for SOOOOOOOO much cheap.. you just saved me so much money.. lol
thanks again..
This is awesome 🙂
I have you on "My Yahoo" and I like most everything you do..but somehow I missed this. And I just saw it, WOW, beautiful, amazing! I love yours so much more than the inspirational piece. I am such a perfectionist and fail miserable for the sheer fact that I never try. But I want so much to try. Even if I never do thanks so much for sharing, you did a wonderful job, it really is an amazing work of art. Melinda mxmomma05@yahoo.com
I've been looking to try this out and I was a bit worried about techniques and such because the last tutorial I saw had you using stickers and then spray painting over before peeling the stickers off to let the light shine through. I like your option better because it allows me to give the piece more flare during the day so it pops. Thanks for posting this. It's incredible. Seriously, you've done an amazing job.
How fabulous, Michele! This is beautiful and great inspiration! Love it.
Michele, wow! you did such a fabulous job with your artwork. 🙂 I love it both ways, lit and unlit.
gail
This is really beautiful!I've been wanting to do something similar for a Christmas decoration, but still haven't done it! This looks great.
This is very very unbelievable amazing... Thanx for inspiration...just stopped over from The Sunday Showcase Party at Underthetableanddreaming... Greetings from Germany from Jutty&Poppy from popeyetalk, The Blog with the Dog!
Very cleaver and truly gorgeous! I must try this too!
Absolutely gorgeous! I'm visiting from Under the Table and Dreaming. I hope you'll come share this at the Knick of Time Vintage Party! It starts on Tuesday morning.
Blessings,
Angie @ Knick of Time
This is awesome! I love how your's turned out! It looks great with the lights on!
Really gorgeous! Thanks for the tuto!
This is gorgeous!!
I LOVE this!!! Thanks for the tute!
Fondly, Tami
http://www.thisandthatfromtami.blogspot.com
I had seen that floating around Pinterest, as well, but had written it off as not-doable. You *totally* did it right! LOVELY!
I love both looks, the simply cut flower look for day is beautiful, then, turn the lights out and SUPRISE! Beautiful.
I would so love to have you link this up at my linky on Tuesday this week at tiarasandbowties.blogspot.com if you'd like!
Kim
What a cool project. I like yours better than the inspiration one.
This is so cool! Very pretty!
Thanks for linking up to this week's Catch a Glimpse Party! I'll be featuring this tomorrow. 🙂
This is beautiful!!! I love how it's beautiful both when it's lit and when it's not. Such a wonderful idea! Thanks for sharing!
This is awesome Michele! I love it!
This is so cool! Thanks for sharing, I love your spin on this pinterest idea. Very pretty! (found you through the linky party on Shabby Creek Cottage)
This is a fantastic idea. My mind is spinning with ideas for Halloween!
Hello my Dear and THANK YOU very much for sharing your this fabulous creative work...It really something so great and fun to make...I must give it a try for my newly build home ...it will be a great decor idea for a wall... Thank you so much and I am your newer follower with linky follower too ...
There is interesting tutorial I posted of a double sided pillow…If you are interested please check it @
http://craftaworld.blogspot.com/2012/05/double-sided-pillow-case.html
With love
Farah
This is soo cool! I love it, and I'm so trying it myself. Consider it pinned!
Oh wow! I might have to try this for my mom as a gift. I was trying to figure out what to get or make for her. Thanks!
beautiful! 🙂 visiting via a link on someday crafts
Wow, that is awesome! It looks great in the light and even better in the dark! I would love for you to share this (and any other creations) at Pin It and Win It Wednesday at http://www.cheapcraftymama.com-- where you can win free ad-space on my blog!
Whoa, gorgeous!!! I'd love for you to add it on my link party at: http://printabelle.com/?p=3188 Thanks!
You did a GREAT job on this. I'e seen the inspiration piece around but never thought I'd be able to pull it off- but YOU sure did! Also, the idea of doing holiday ones is brilliant! I'd love for you to link to to Sweet sharing Monday! http://saynotsweetanne.com/2012/sweet-sharing-monday-4/
Oh wow this is incredible! What an amazing project, the result is STUNNING!
Very neat! Found this on Sugar Bee Crafts!
amber
recipeswelove.net
WOW! I love this!!!
Now I am going to be the one with this project sitting on my pin board 🙂
But seriously I am going to try this one!
Found you via Sugar bee Crafts and am your newest linky follower!
That is insanely beautiful!!! You did an awesome job on it and I love that you can change it out if you want to!!!
OK Wow. Just WOW! This is so many kinds of amazing Michele.
I think my comment disappeared....
This is just gorgeous...really, really pretty. I wonder if I have the patience to try this...becasue I really want to. You did an amazing job!
I've never seen anything like this. It is absolutely beautiful. Great work. Jodi @ http://www.meaningfulmama.com
Ok, that's seriously COOL! I love it!
WOW!!!! Very innovative and so creative!!!
Michele you have done it again - this is beautiful and so creative! I love it!
wow, this is incredible Michele
This is so pretty! Very PINspiring!
It's beautiful, Michele, you did an amazing job!
WOW!!!!!! i am so loving this!
Michele!!! Seriously - that is one of the coolest things I've ever seen! The way you cut out the flowers is just gorgeous and I LOVE that you can change it out!! GENIUS!