
Glitter & Glam Decorations {Homemade Christmas Decor}
I love the two ladies visiting today. Not only are they super sweet, but they always have something super crafty up their sleeves! Today is no exception...
***
Hi Scrap Shoppe Readers! We're so excited to be here on Michele's blog, we just adore her. 🙂
First off, we'd like to introduce ourselves. We are twin sisters Kelli & Kristi from Lolly Jane and our little corner of blogland is filled with home improvement tips, craft tutorials, holiday decor, recipes and a good furniture revamp or two. We love how small touches of decor can customize a space and instantly make it yours.

Today we'll be sharing an easy way to spruce up your {holiday} decor.
Want to add some glitter&glam to your plain jane Christmas decorations?

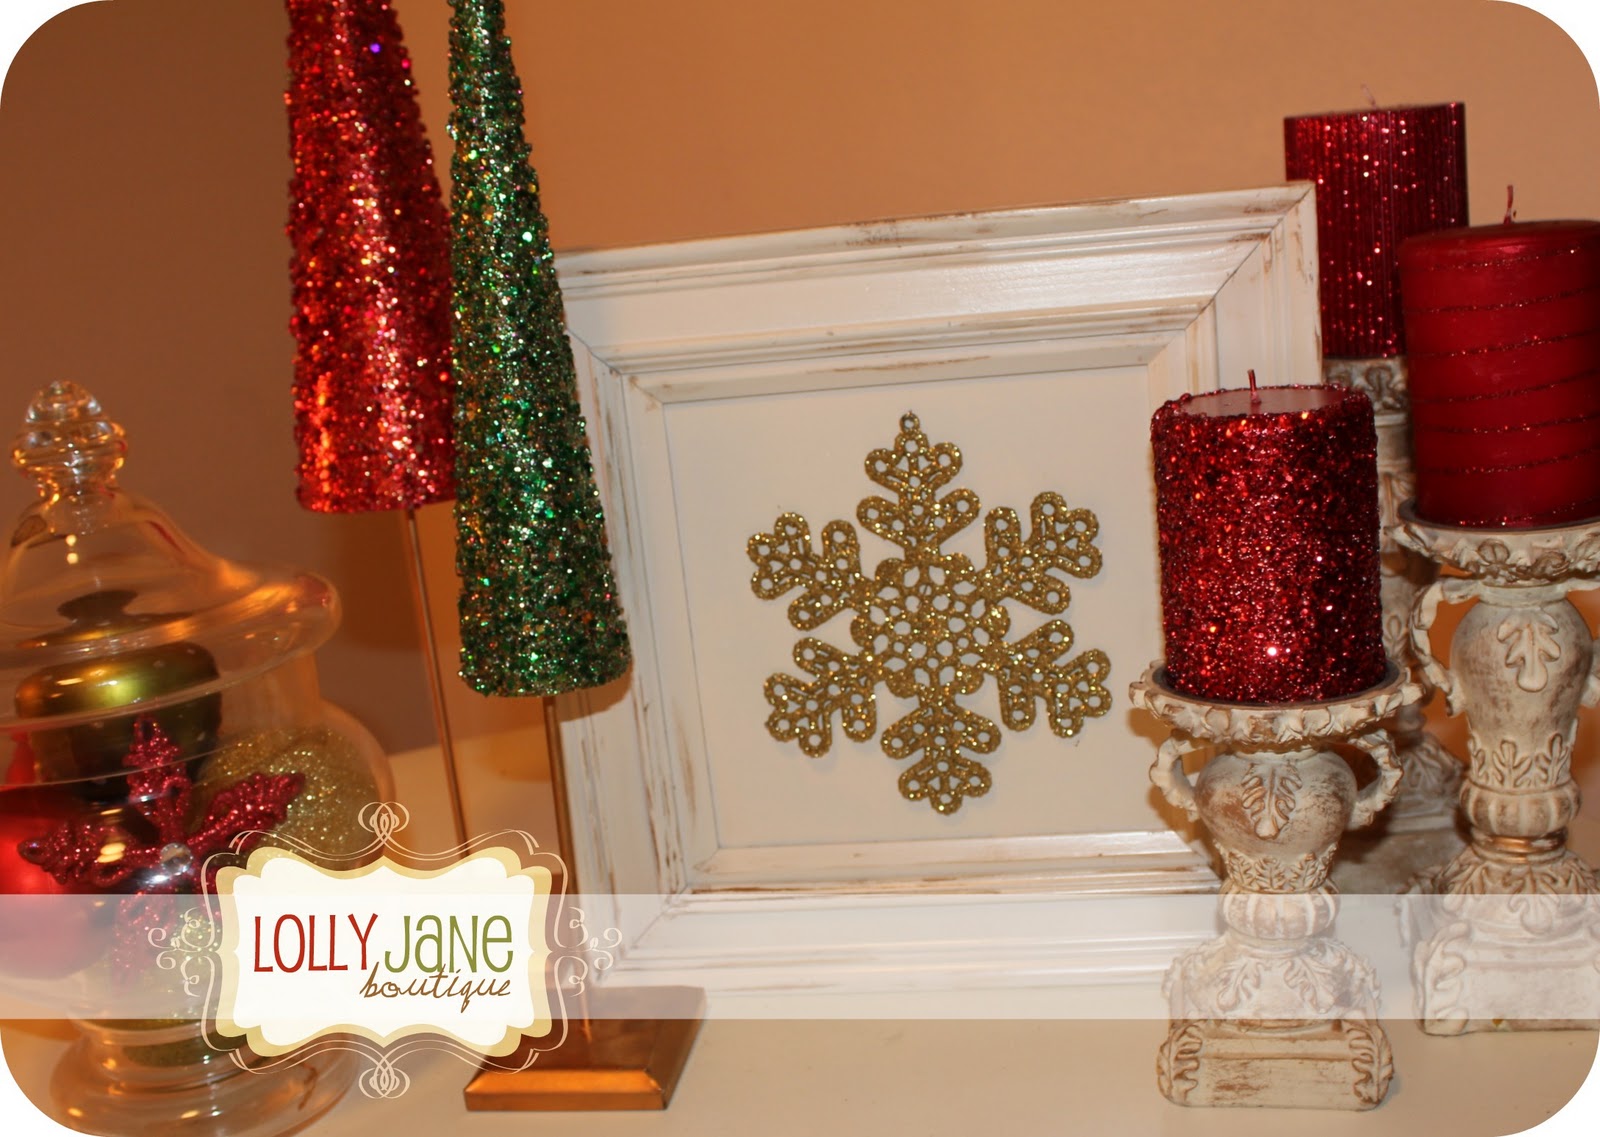
We've had these fun Christmas-y trees on display at my house for a few years now and just ♥ them because they add height to any cluster of decorations I play around with.
Wanna know how we made 'em?
Supplies needed:
Cone styrofoam . Mod Podge . 2- ⅛" Wooden dowels . 2"x2"x½" Wood base . Gold spray paint . Glitter
Directions:
1. Spray paint (1) wooden dowel & the wood base gold. Let dry completely.
2. Attach gold dowel to wood base with a screw from the bottom, (my hubby helped me here & even routered the edges to look more glitzy. Awww!)
3. Stick (1) unpainted dowel through the top and the gold dowel/base through the bottom of styrofoam until they are nice and snug.
4. Shave off styrofoam surrounding the top dowel until the cone styrofoam is shaped into a nice pointy Christmas-y tree, (cones come slightly flat on top. Don't worry if it's not perfectly smooth; the glitter will hide any imperfections.)
5. Paint a thin layer of Modpodge onto cone styrofoam & top wooden dowel.
6. Generously sprinkle glitter until all surfaces are completely sPaRkLy.
(Note: Be sure to glitter the underneath of the tree, too!)
7. Wait until surface is completely dry. Display for your viewing pleasure!

Supplies needed:
(3) Red candles . Red glitter . Elmer's Glue . Mod Podge
Directions:
Candle #1: Paint a thin layer of modpodge. Roll in red glitter. Dust glitter in cracks.
Candle #2: Squeeze Elmer's glue in thin layer, wrapping around candle. Dust red glitter on.
Candle #3: Repeat directions for candle numero uno 😉
If you're wondering about the gold snowflake in the middle of the frame, I'll let you in on a secret: it's an ornament from the $1 store! I simply copied the method for my glitter candles: modpodge, dust on gold glitter, tack to frame, display. That's it!
We hope you've enjoyed our tips today! We'd ♥ to catch up with you on FB (:
Thanks again for having us, Michele!
XOXO
***
I love it! Its my personal opinion that there is no such thing as too much glitter (says the girl who lives in a house full of boys) especially around the holidays! Thanks, girls!
These are perfect! I love a little bling come Christmas!!
These are so cute! I love how quick it is to dress up simple candles - they look great!!
Thanks for having us guest, Michele! XOXO