
Homemade Christmas Gifts - Flamingo Toes
Hello! I'm so excited to be here at The Scrap Shoppe for the Homemade Christmas Event!
My name is Bev and I blog over at Flamingo Toes.
At Flamingo Toes, I like to do sewing, crafting and especially knockoffs!!
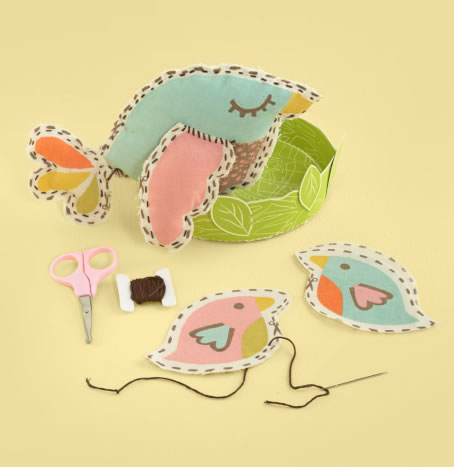
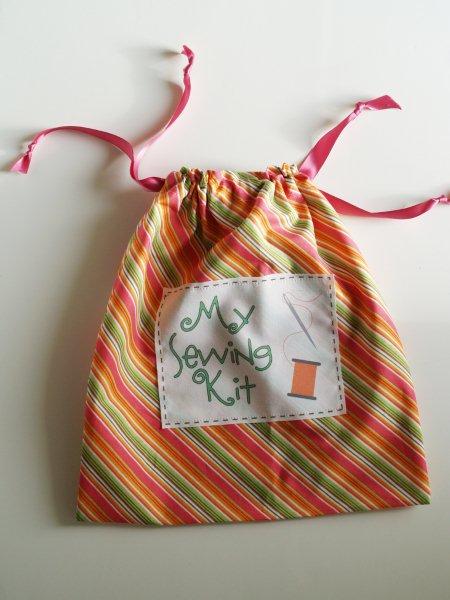
In fact, that is what I'm sharing with you today - my tutorial for this darling Child's Sewing Kit.
Perfect for a stocking stuffer and verrrry easy on the pocketbook.

My inspiration is this little sewing kit from the Land of Nod.
This one is so fun and easy and has so many options!
I've been doing some projects printing on fabric - and this is perfect for that.
Here's what you'll need to make your own kit.
• Fabric for printing - white or light color
• Freezer Paper
• Fabric for Sewing bag
• Ribbon
• Scissors, Needles and Thread for kit
• Box for sewing kit
• Stuffing
• Downloads for printing
Begin by cutting out your fabric and freezer paper - you want them to be 8 ½" x 11".
Iron the shiny side of the freezer paper to the fabric.
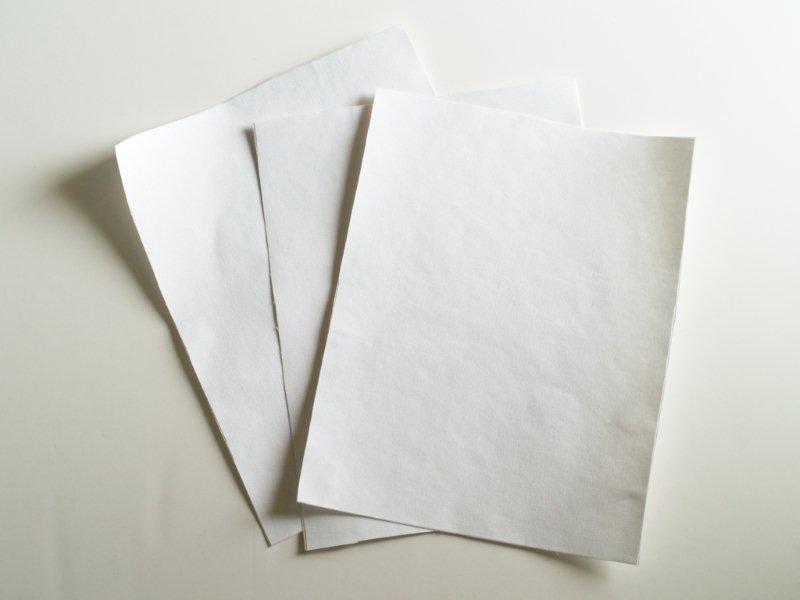
Print one page at a time. Place your fabric in the printer so that when it feeds through, the printer will print directly onto the fabric. The freezer paper is just there to keep it stabilized.
Sometimes you will get little ink marks along the top or sides of the fabric. It's a good idea to have a little extra fabric in case you need to reprint something.
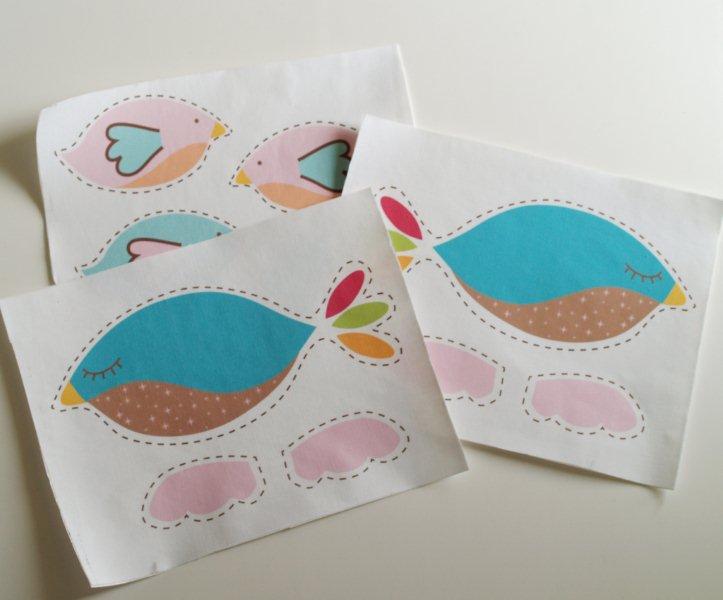
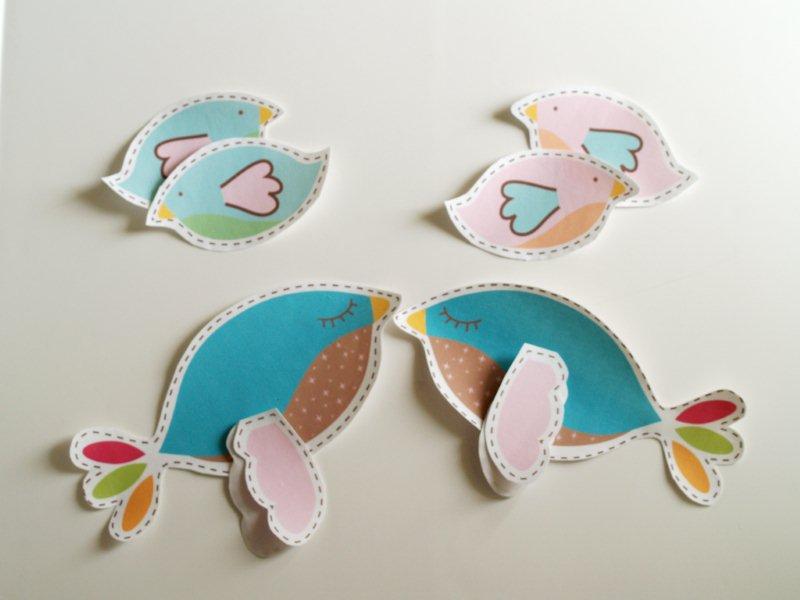
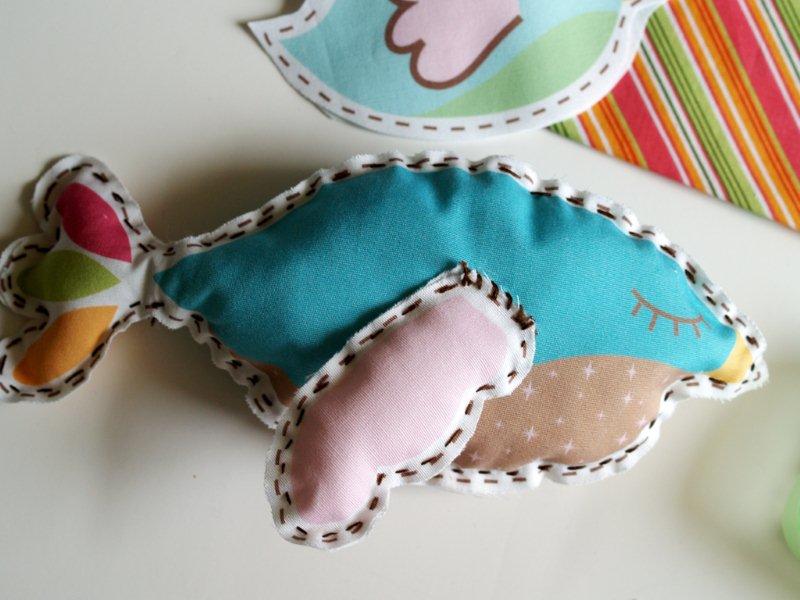
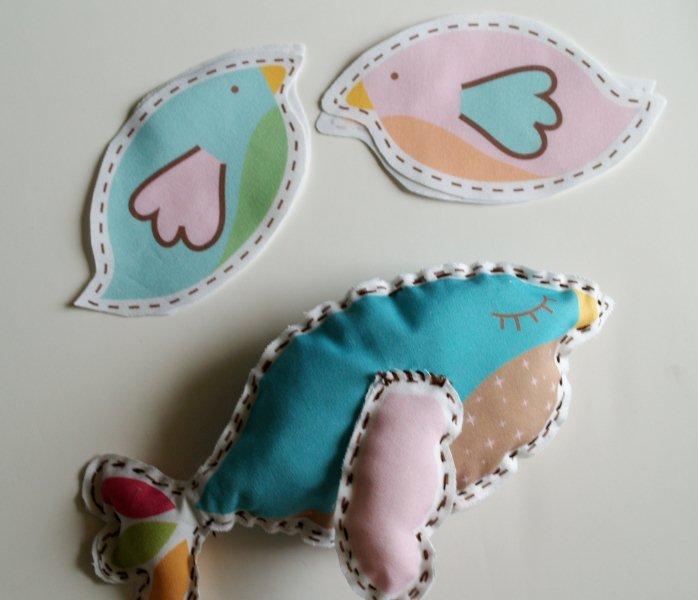
Cut out all your bird and wing pieces. Leave a little white around the dashed lines.
Peel off the freezer paper.
Now your fabric pieces are all ready for your little ones to sew together!
To make the bag to hold all their supplies in, cut a rectangle of fabric 13" x 28".
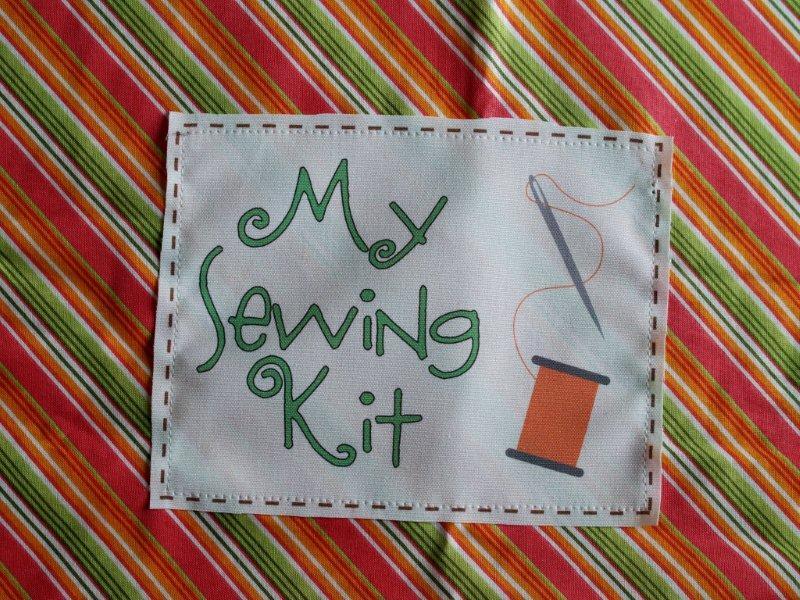
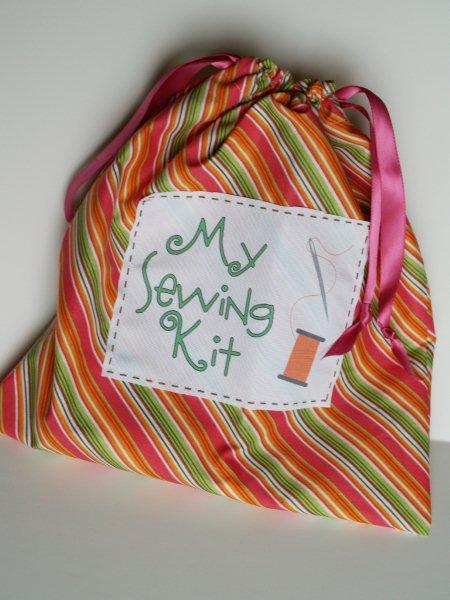
Cut another set of fabric and freezer paper and print out the sewing kit image.
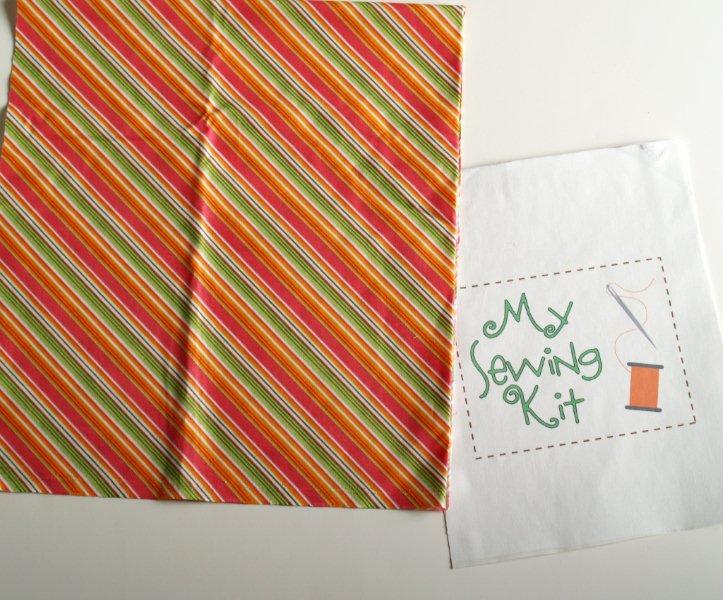
Trim around the image. Fold your rectangle in half with the cut ends together. Position your image in place on the bag and machine sew on.
Hem the sides at each end for about 3". Sew a casing into both top edges, wide enough for your ribbon. Sew a seam at the bottom and top of the casing.
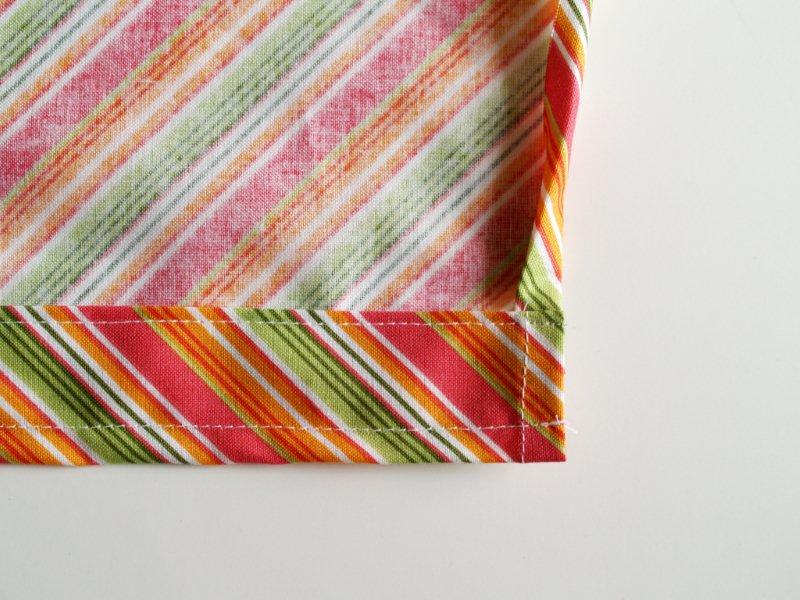
Fold the bag in half again, right sides together, and sew the two side seams. Sew the small part above the casing together as well.
Turn your bag right side out and feed a ribbon through each casing. Knot the ends of the ribbon.
Gather all your supplies for the kit. I've showed you here how the Momma bird is sewn together. You'll need to coach your little ones together on how to sew along the edges, stuff the birdie, and sew the opening closed.
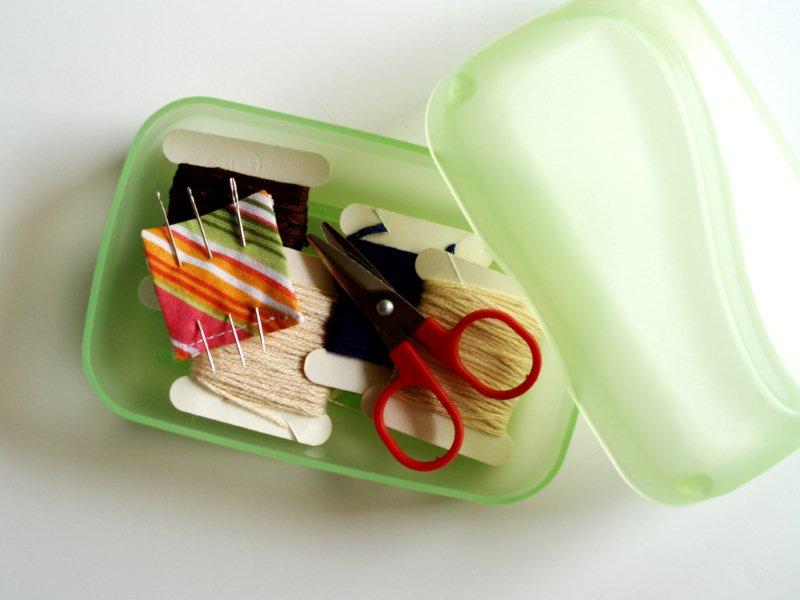
Get a small box to hold embroidery floss, needles and tiny scissors. This box is a soap box and the scissors came from a drugstore sewing kit. Both were only $1.
I also sewed a small rectangle of fabric for a needle holder.
Depending on the age of the child - you'll want to decide how sharp of a needle you want to give, and of course provide supervision.
You can give them some stuffing in a Ziploc bag, for their birdies, and everything fits nicely in the bag! So cute - plus it is easy to take along and it keeps everything nice and tidy.
For these birdies, I remade the images based on the Land of Nod set, but you could find any simple clip art image and print it onto fabric for them to make into a stuffed toy.
You could also do the same thing with coloring page images, and add fabric markers to the set - so they can color the fabric and then sew it up!
I hope you enjoyed the tutorial - I'd love for you to stop by Flamingo Toes sometime!!
Michele thanks so much for including me in the fun!!
I have started truncating my posts to avoid having my content stolen. I hope you'll click over to finish reading the post. Thank you for understanding!
I Love this sewing bag so much! My little Princess who is 9yrs finish her sewing class on Friday July 26,2013. She made a pink and white flower dress She model on the Red Carpet for the Fashion Show. They had to show their parents and friends. I love how her dress turn out, 1 week of sewing class to make her first dress. This is the next project She will be making:) First time visiting your blog. I am going to see past post:)
Deemarie
My 7 year old daughter has been asking to learn to sew. I was planning on making her a sewing kit for Christmas. I came across your project quite by accident and I am so thrilled. It is adorable and it is exactly what I was looking for. Thank you so much for sharing.
You are brilliant and I love your blog.
One question. The freezer paper is that some kind of code word or is it really freezer paper for food? I am going to save so much money on my son's quiet book if it really is freezer paper because iron on transfers are expensive but not necessary if I use the freezer paper.
Adorable! Too cute for words!
I am in LOVE with this project! So, so sweet, simple, yet brilliant! I had forgotten that you can use freezer paper to make printable fabric. I'm definitely going to have to give this a go and share it with my friends on Facebook too!
This is so adorable!
WOW! Bev, this is darling!!
What a super cute idea!
That is sew cute! Great job Bev!!!
That is such an adorable idea!
What a great idea!! I've only seen fabric printing where you stick it to label sheets, not freezer paper!! now that I don't have to buy anything new I might just have to try this!!
Way too cute!
what a great idea! I love it
Totally cute! This would be nice for my niece, but I want it for myself!!
This is precious! Very nicely done and too fun for little girlies! 🙂
What a cute idea! The would be a great activity for young girls over the hoilday break- glad you were here Bev.
Too cute Bev!